Ford Orion. Manual - part 11
5 Clean all traces of the old gasket from the
mating surfaces of the pump and engine.
Refitting
6 If the original oil pump has been dismantled
and reassembled and is to be re-used, or if a
new pump is to be fitted, it must first be
primed with engine oil prior to fitting. To do
this, turn its driveshaft and simultaneously
inject clean engine oil into it.
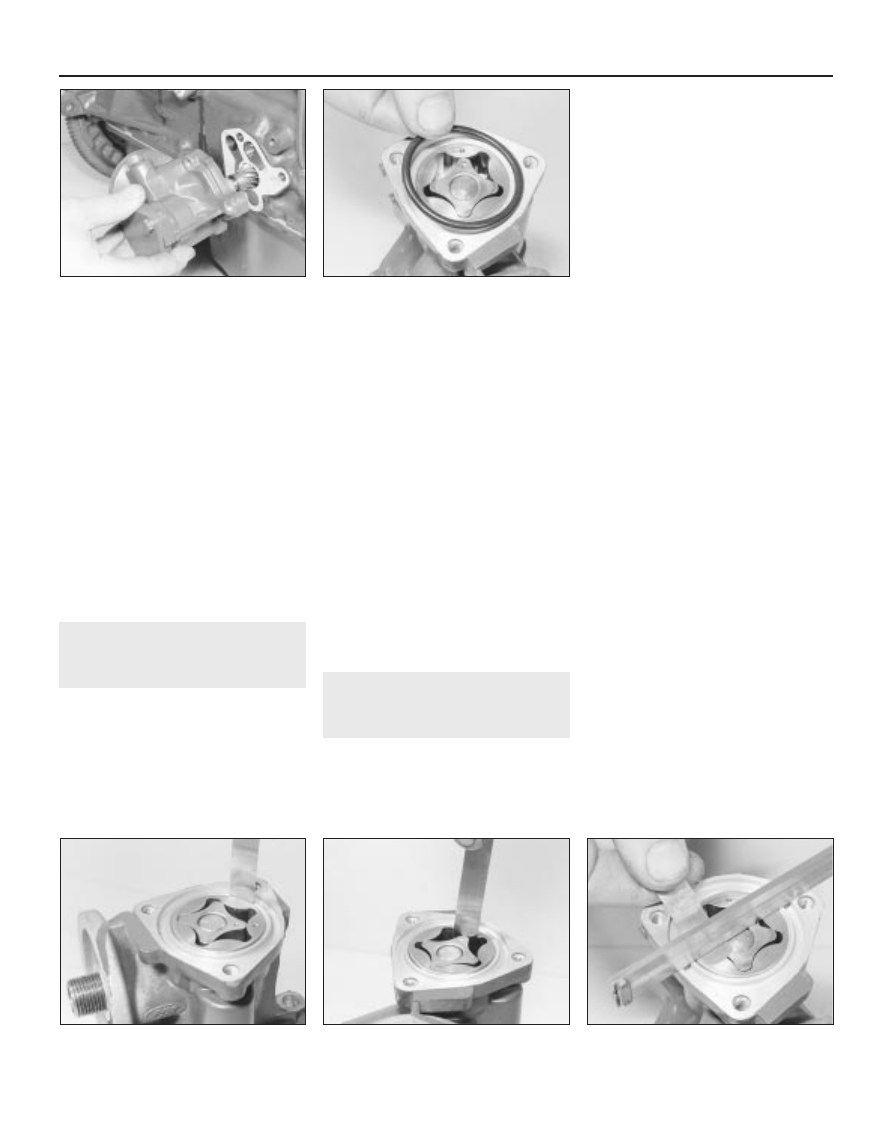
7 Locate a new gasket into position on the
pump mounting flange, then insert the pump,
engaging the drivegear as it is fitted (see
illustration). Fit the retaining bolts, and
tighten to the specified torque wrench setting.
8 Fit a new oil filter into position on the oil
pump body, as described in Chapter 1.
9 Lower the vehicle to the ground, and top-
up the engine oil level to replenish that lost
during the previous operations.
16 Oil pump - dismantling,
inspection and reassembly
3
Dismantling
1 To inspect the oil pump components for
excessive wear, undo the retaining bolts and
remove the cover plate from the pump body.
Remove the O-ring seal from the cover face
(see illustration).
2 Wipe the exterior of the pump housing
clean housing.
Inspection
3 Noting their orientation, extract and clean
the rotors and the inner body of the pump
housing. Inspect them for signs of severe
scoring or excessive wear, which if evident
will necessitate renewal of the complete
pump.
4 Using feeler gauges, check the clearances
between the pump body and the outer rotor,
the inner-to-outer rotor clearance, and the
amount of rotor endfloat (see illustrations).
5 Check the drivegear for signs of excessive
wear or damage.
6 If the clearances measured are outside the
specified maximum clearances and/or the
drivegear is in poor condition, the complete
pump unit must be renewed.
Reassembly
7 Refit the rotors into the pump (in their
original orientation), lubricate the rotors and
the new O-ring seal with clean engine oil, and
refit the cover. Tighten the retaining bolts to
the specified torque wrench setting.
17 Crankshaft oil seals -
renewal
3
Front oil seal
1 Disconnect the battery negative (earth) lead
(refer to Chapter 5, Section 1).
2 Apply the handbrake, then raise the vehicle
at the front end and support it on axle stands.
3 Refer to Section 11 for details and remove
the crankshaft pulley.
4 Using a suitable claw tool, extract the oil
seal from the timing chain cover, but take care
not to damage the seal housing. As it is
removed, note the fitted orientation of the seal
in the cover.
5 Clean the oil seal housing in the timing
chain cover. Lubricate the sealing lips of the
new seal and the crankshaft stub with clean
engine oil.
6 Locate the new seal into position so that it
is squarely located on the crankshaft stub and
in the housing, and is correctly orientated.
Drift it initially into position by fitting a
temporary distance piece against the seal,
then draw it fully home by refitting the
crankshaft pulley and retaining bolt.
7 When the seal is fully fitted, remove the
crankshaft pulley bolt, pulley and distance
piece.
8 Lightly lubricate the rubbing surface of the
pulley, then refit the pulley as described in
Section 11.
Rear oil seal
9 Remove the flywheel as described in
Section 19.
10 Using a suitable claw tool, lever the seal
from the rear seal housing (taking care not to
damage the housing). As it is removed, note
the fitted orientation of the seal.
11 Clean the seal housing, the crankshaft
rear flange face and the flywheel mating
surface.
12 One of two possible methods may be
used to insert the new oil seal, depending on
the tools available.
13 If Ford service tool No 21-011 is available,
lubricate the crankshaft flange and the oil seal
inner lip with clean engine oil. Position the
seal onto the service tool (ensuring correct
orientation), then press the seal into its
housing.
14 If the service tool is not available, remove
the engine sump (Section 14), then unscrew
the Torx-head bolts retaining the rear seal
housing in position, and remove the seal
housing from the rear face of the cylinder
block. New gaskets will be required for both
the seal housing and the sump when refitting.
2A•10 HCS engine – in-car engine repair procedures
16.4C Checking the rotor endfloat
16.4B Checking the inner rotor-to-outer
rotor clearance
16.4A Checking the outer body-to-rotor
clearance
16.1 Extract the O-ring from the groove in
the oil pump
15.7 Refitting the oil pump. Note the new
gasket