Citroen C6 Dag (2008 year). Manual - part 5
 

  Index      Citroen     Citroen C6 Dag - service manual 2008 year in english


Search            


Content   ..  3  4  5  6   ..


Citroen C6 Dag (2008 year). Manual - part 5


68

II

C R U I S E   C O N T R O L

These actions bring up the information 

"OFF"

 in the instrument panel.

Adjustment of the memorised speed while 
cruise control is in operation

To  adjust  the  memorised  speed,  displayed  in  zone A

press:

Button 3

 to increase the speed or

Button 4

 to decrease the speed.

Remark:

  Successive  presses  will  allow  to  modify  the 

speed  in  steps  of 1 km / h  (1  mph)  and  a  continuous 

press in steps of 5 km / h (3 mph).

Deactivation of cruise control with 
memorised speed

You can deactivate cruise control:

Either by pressing the brake pedal or the clutch 

pedal.
Or by the ESP or ASR

 systems being active.

Or by pressing button 2.

Note: Cruise control is deactivated if the gear lever is in 
neutral (position N).


These actions do not cancel your cruise speed which 

remains displayed in the instrument panel.

Cruise control must only be used where the traffi c conditions permit driving at a constant speed.
Do not use it on congested roads or when the weather or the road conditions are poor.
The driver still has to remain attentive and in complete control of his vehicle.
You are recommended to keep your feet within range of the pedals.

Reactivation of cruise control

By recalling the memorised speed:
For that, press on button 2.

Your vehicle will automatically resume the 

memorised cruise speed which is displayed in the 

instrument panel.

Remark:

 If the cruise speed already memorised is far 

higher than the current speed, the vehicle accelerates 

hard until it reaches the memorised speed.

By selecting the current speed:
Give a short press on button 3 or 4 as soon as 

you have reached the desired speed.

The information "OFF" then disappears from the 

screen.

To cancel cruise control

Give a long press on button 1.

Or stop the engine.

The speed that was chosen is no longer 

memorised.

If there is a malfunction, either the memorised speed or 

the dashes "- - -" will fl ash and the warning lamp "OFF" 

will come on permanently in the display.
Contact a CITROËN dealer.


69

II

1

3

2

4

A

B

S P E E D   L I M I T E R

SELECTION OF THE SPEED LIMITER

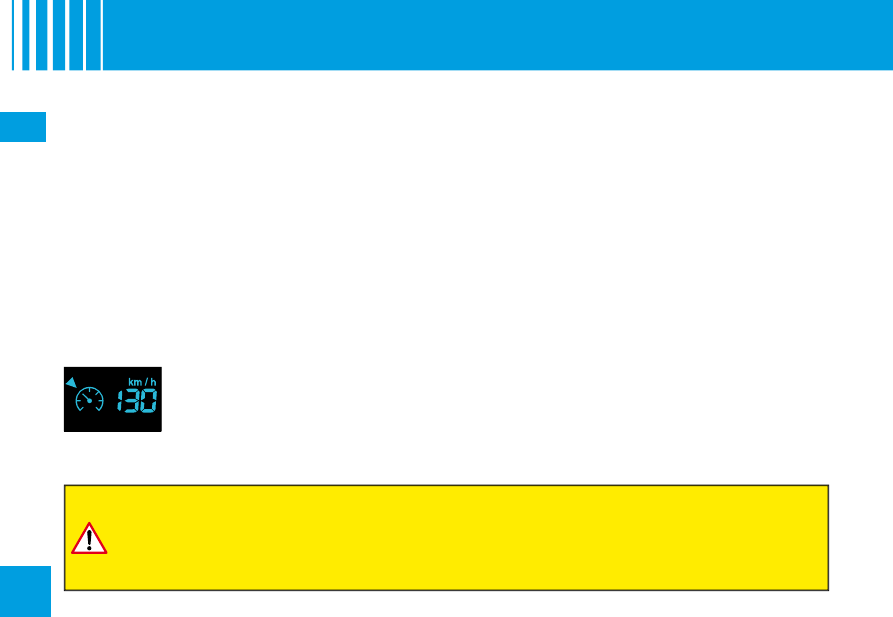
To select the speed limiter, press on button 1 to display in 

zone A of your instrument panel the symbol B for the speed 

limiter.

The last speed memorised is also displayed.

TO ADJUST THE MAXIMUM SPEED

Provided the engine is running, you can select your maximum speed, with 

short or long presses on:

Button 3

 to increase the speed or

Button 4

 to decrease the speed.

Remark:
Successive presses will allow to modify the speed in steps of 1 km / h (1 mph) 

and a continuous press in steps of 5 km / h (3 mph).

ACTIVATION OF THE MAXIMUM SPEED

When the desired maximum speed is displayed, press button 2 to activate 

the speed limiter.


The information "OFF" then disappears from the screen.

As long as the function is active, action on the accelerator pedal will not per-

mit the programmed speed to be exceeded, unless you press the pedal hard 

down to activate the switch at the end of its travel. See "Temporary override 

of the maximum speed".
Note:  The  vehicle  speed  may  slightly  exceed  the  memorised  maximum 
speed.

This  driving  assistance  function 

enables you to select a maximum 

speed that you wish not to exceed. 

This must be greater than 30 km/h 
(18 mph).
Note:  
The  information  relating  to 
the limiter is displayed in zone A of 
the instrument panel.

70

II

S P E E D   L I M I T E R

DEACTIVATION

To deactivate the maximum speed, press button 2.

The information "OFF" will appear in the instrument panel.
This  action  does  not  cancel  the  memorised  speed,  which  remains  displayed  in  the  instrument 

panel.

TEMPORARY OVERRIDE OF THE MAXIMUM SPEED

The accelerator pedal has a switch at the end of its travel. By pressing the pedal hard down to activate this switch at 

any time you can go faster than the memorised maximum speed.
During the time the limit speed is being exceeded, the displayed speed fl ashes.
You have only to release the accelerator pedal to return below the maximum speed, to restore the function.
Note: If during speed limitation the system cannot keep to the maximum speed (especially on a steep descent or if 

you accelerate too hard), the speed fl ashes. Adapt your speed as necessary.
The function will re-engage when your speed has returned below the desired maximum.

TO CANCEL THE FUNCTION

Give a long press on button 1.

Or stop the engine.

The speed that you chose is memorised. The information disappears from the instrument panel.
If there is a malfunction, the memorised speed will fl ash and the warning lamp "OFF" will come on permanently in 

the display.
Contact a CITROËN dealer.


A fl oor mat that is not recommended by CITROËN could slide underneath the accelerator pedal, 

thus preventing you from temporarily overriding the maximum speed. Then it would be impossible 
to exceed your desired speed, unless by actioning the button.
The driver still has to remain attentive and in complete control of his vehicle.

71

II

E L E C T R O N I C   S TA B I L I T Y   P R O G R A M M E

The  ESP

  system  offers  increased 

driving safety but is not in place to 

encourage the driver to take addi-

tional risks or to drive at excessive 

speeds.
The  functioning  of  this  system  is 

subject  to  compliance  with  the 

manufacturer’s  recommendations 

on wheels (tyres and rims), brake 

parts  and  electronic  components, 

as  well  as  with  the  assembly  and 

repair  procedures  approved  by 

CITROËN.

repair  procedures  approved  by 

repair  procedures  approved  by 

After any collision, have this system 

checked by a CITROËN dealer.

After any collision, have this system 

After any collision, have this system 

ELECTRONIC STABILITY PROGRAMME (ESP) AND 
TRACTION CONTROL (ASR)

These systems are closely associated with ABS and additional to it. In the 

event of a loss of control of the vehicle by the driver, the ESP system acts 

automatically on one or more wheels and also on the engine to bring the 

vehicle back on trajectory. The ASR system optimises traction and prevents 

wheel spin by acting on the brakes of the driving wheels as well as on the 

engine. It also improves steering stability during acceleration.

OPERATION

When either the ESP or the ASR

 system is brought into operation 

the warning lamp "ESP/ASR" fl ashes.

DEACTIVATION

In exceptional conditions (vehicle stuck in snow, soft ground, etc.) it may 

prove  useful  to  deactivate  the  ESP/ASR  systems  to  allow  the  wheels  to 

spin and thus regain traction.
Press on button A, the "ESP/ASR" warning lamp, as well as the lamp on 

the button A

, light up. The ESP/ASR systems are no longer active.

The ESP/ASR systems will activate again:

Automatically

 after the ignition has been switched off.

Automatically

 when you drive at above approx. 50 km/h (approx. 

30 mph).
Manually

 with another press on button A.

OPERATIONAL ANOMALY

Should there be a system malfunction, the "ESP/ASR" warning lamp will 

light up.
Contact a CITROËN dealer to have the system checked.


72

II

B R A K E S

ABS system

The ABS system enhances your safety by preventing the wheels from locking in the event of sudden braking 

or in conditions of poor road adherence. It enables you to retain control of the steering.
The functioning capability of all the electrical components essential to the ABS is monitored electronically 

before and during your journey. The ABS warning lamp lights up when you switch on the ignition: it should go out 

after a few seconds.
If the monitoring warning lamp does not go out, that means that the ABS has disconnected because there is a fault. 

Also, the fact that the monitoring warning lamp comes on during the journey shows that the ABS system is inactive. 

In both cases, the normal braking system remains effi cient, exactly as on a vehicle without ABS. However, in order 

for the security associated with the correct functioning of the ABS to be restored, the vehicle should be examined as 

soon as possible by a CITROËN dealer.

for the security associated with the correct functioning of the ABS to be restored, the vehicle should be examined as 

for the security associated with the correct functioning of the ABS to be restored, the vehicle should be examined as 

On roads with poor adherence (chippings, snow, ice etc.), it is always imperative to drive with prudence.

SYSTEM OF EMERGENCY BRAKING ASSISTANCE

The emergency braking assistance system helps you to attain the required braking pressure more rapidly, thus to 

reduce the stopping distance. It operates as a function of the speed of action on the brake pedal, decreasing the 

resistance to this action. To prolong this action of the emergency braking assistance system, simply keep your foot 

on the brake pedal.

If  the  Electronic  Parking  Brake  is  off,  the  lighting  of  this  warning  lamp  in  conjunction  with  the 

STOP

 warning lamp indicates that the brake fl uid level is low or that the braking distributor is mal-

functioning. It is essential to stop the vehicle. Contact a CITROËN dealer as soon as possible.

 warning lamp indicates that the brake fl uid level is low or that the braking distributor is mal-

 warning lamp indicates that the brake fl uid level is low or that the braking distributor is mal-

73

II

A

E L E C T R I C   PA R K I N G   B R A K E

OPERATION

To park
With the vehicle stationary, operate 

the parking brake by pulling then 

releasing the control A.
Note:

In all circumstances with an 
automatic gearbox, select the 
Park position P.
On steep gradients, turn 
the steering towards the 
pavement.
It is not possible to release the 
electric parking brake if the key 
is removed or in position S.

To quit a parking space
With  the  engine  running,  release 

the  electric  parking  brake,  by 

pressing  the  brake  pedal  or  the 

accelerator pedal and pulling then 

releasing the control A.

You  are  advised  not  to  clean  underneath  the  vehicle  using  a 

high pressure system, as this could damage the electric parking 

brake.
Do not use the accelerator to hold your vehicle while on an incline. 

Use either the brake pedal or the electric parking brake.

The  warning  lamp  comes 

on if the parking brake is on 

or  not  properly  released

or if you try to release the 

brake  without  pressing

on the brake pedal.

If  these  two  warn-

ing lamps come on 

together,  this  indi-

cates that the elec-

tric  parking  brake 

is malfunctioning.
The brake is on.

If this warning lamp comes 

on,  this  indicates  that  the 

electric  parking  brake  is 

malfunctioning.

The brake is not on.

With an automatic gearbox, 
place the gearbox on position P.
With a manual gearbox, 

engage fi rst gear.

74

II

B

D

E

C

A

UNLOCKING IN 
EMERGENCY

In the event of a malfunctioning of 

the electric parking brake or a bat-

tery  failure

,  provided  your  gear-

box is not on Park position (P) with 

an automatic gearbox, or a gear is 

engaged with a manual gearbox:

1. 

Open the lower compartment 

in the central armrest by 

actioning the control B.

E L E C T R I C   PA R K I N G   B R A K E

5. Make sure that you position 

the strap back in its location D

Otherwise, applyng the brake 

will not be possible after fi ve 

attempts.

Contact a CITROËN dealer.

This strap cannot apply the parking brake. To re-apply the electric parking 

brake (after fi rst resolving the malfunction or the battery failure), pull then 

release the control A

. The time for applying the brake subsequent to the 

emergency unlocking will be longer.

Note:  During  the  emer-
gency unlocking, the warn-
ing  lamp  for  the  electric 
parking  brake  will  light  up 
in the instrument panel.

2. 

Detach the CD storage section 

by pulling on the tabs C.

3. 

Disengage the strap from its 

location D.

4. 

Pull the strap to unlock the 

brake. A loud click confi rms 

that the brake is unlocked.

Note: It is essential to make 
sure that the parking brake 
warning  lamp  does  indeed 
light  up  in  the  instrument 
panel.

Remark: Presence of the diagnostic socket
Take care not to place dusty or damp items close to the socket E, which is 

vital to the maintenance operations on your vehicle.

75

II

S P E E D - S E N S I T I V E   R E A R   S P O I L E R 

( D E F L E C T O R )

The  Piloted  Defl ector  enhances 

the aerodynamics and the braking 

of your vehicle.

AUTOMATIC DEPLOYMENT

Two  deployment  stages  are  pos-

sible:

The fi rst deployment stage 

is from around 65 km / h 

(40 mph)

. This prevails as long 

as the speed remains above 

approx. 25 km / h (16 mph)

below this speed, the Piloted 

Defl ector retracts completely.

The second deployment stage 

is from around 125 km / h 

(78 mph)

. This prevails as long 

as the speed remains above 

approx. 105 km / h (65 mph)

below this speed, the Piloted 

Defl ector 

returns to the fi rst) 

deployment stage.

MAINTENANCE

For any maintenance that may be 

necessary on your Piloted Defl ec-

tor  (leaves  or  other  components 

jammed,  deploy  it  in  the  mainte-

nance position: Switch off the igni-

tion then within one minute action 

the wiper stalk. Your Piloted Defl ec-

tor deploys.
Next, to retract it, start then drive at 

over 10 km/h (6 mph).
Note:  The  maintenance  position 
makes  the  wipers  stand  up  verti-
cally. See "Wash/wipe".

ACCESSORIES

It is recommended to place 

the Piloted Defl ector in the 

maintenance position before 

installing an accessory on the 

boot (for example a bicycle-

carrier).

Installation of accessories on 

the vehicle (roof bars, roof box, 

bicycle-carrier, etc.) limits the 

effectiveness of the Piloted 

Defl ector.

Remark:

  Depending  on  engine-

type, certain versions are equipped 

with a fi xed defl ector.

If you wash the vehicle with a high pressure system, make sure that the 

Piloted Defl ector is closed.

76

II

As  the  vehicle  approaches  the 

obstacle, the sound signal becomes 

more  and  more  urgent  and  the 

shaded areas are displayed closer 

and closer to the vehicle.

Proximity sensors are located in the front and rear bumpers of your vehi-

cle.
When manœuvring in either forward or reverse gear, at a low speed less 

than  approx. 10 km / h  (6  mph)

,  they  inform  you  of  the  presence  of  any 

obstacle that is within their zone of detection by: 

A sound signal emitted by the front or rear loudspeakers.

Display of the outline of your vehicle with shading corresponding to the 

area where an obstacle is detected.

As the vehicle approaches the obstacle, the sound signal tells you the posi-

tion of the obstacle according to whether the sound is coming from the front 

LH or RH or the rear LH or RH loudspeakers.
Note:  The  sound  volume  of  your  audio  equipment  reduces  automatically 
when a signal is being emitted.


PA R K I N G  A S S I S TA N C E

Front

Rear

When  the  obstacle  is  less 

than  around 25  centime-

tres  from  the  vehicle,  the 

sound  signal  becomes 

continuous  with  display 

of  a  "WARNING"  panel  on  the 

screen.

77

II

ACTIVATION/DEACTIVATION

You  can  activate/deactivate  the 

parking  assistance  by  pressing 

button 1

. When the parking assist-

ance is inactive, the warning lamp 

on button 1 is lit up.
Activation/deactivation of the park-

ing assistance is memorised when 

you stop the vehicle.
Remark:

  If  you  wish  to  tow  a 

trailer, it is necessary to deactivate 

the parking assistance by pressing 

button 1

. The warning lamp on the 

button lights up.

OPERATION

When you engage reverse gear

a  sound  signal  confi rms  to  you 

that the system is active. The out-

line of your vehicle appears on the 

screen.  Any  obstacles  located  to 

the rear or to the front of the vehi-

cle can be detected.
When  moving  forward  at  a 
speed less than approx. 10 km/h 
(6 mph)

,  whether  in  neutral  or  in 

gear,  the  vehicle  outline  appears 

on the screen as soon as an obsta-

cle is detected in front of the vehi-

cle.  Any  obstacles  located  to  the 

rear  or  to  the  front  of  the  vehicle 

can be detected.

Remarks:

The proximity sensors cannot 

detect objects that are 

immediately under or over the 

bumpers.

A thin object such as a spike, 

a bollard or similar, can only 

be detected at the start of the 

manœuvre but not when the 

vehicle arrives close up to it.
In poor weather or in winter, 

you need to ensure that the 

sensors are not covered with 

mud or with ice or snow.

PA R K I N G  A S S I S TA N C E

78

II

L A N E   D E PA R T U R E   W A R N I N G   S Y S T E M

This  driving  assistance  device  warns  you  when  you  unwittingly  cross  a 

lane marking (either a continuous or a dotted line on the road surface). It 

is  designed  for  use  on  motorways  and  dual  carriageways,  operating  only 

above speeds of approx. 80 km / h (50 mph).

ACTIVATION/DEACTIVATION

A press on button 1

 activates the function, the warning lamp on the button 

lights up.
A second press on button 1 deactivates the function, the warning lamp on 

the button goes out.
When you start the engine, the mode (activated/deactivated) selected when 

you stopped the engine is retained.

OPERATION

Above a speed of around 80 km/h (50 mph), if you cross a lane marking, you are alerted to this by a vibration within 

the cushion of your seat:

On the right hand side if you cross a lane marking to the right.

On the left hand side if you cross a lane marking to the left.

The system does not alert you if one of your direction indicators is operating and for approx. 20 seconds after the 

direction indicator has stopped.

Remarks

This system is designed to identify traffi c lane markings.
In certain cases it may trigger an alert that is unnecessary, for example if the vehicle passes over a directional arrow 

or some unusual road marking.
The system may be affected temporarily by conditions external to the vehicle:

Detection of lane markings made diffi cult by:

Markings being worn.

Insuffi cient contrast with the general road surface.

Sensors being negated by:

Driving in snow or heavy rain.

Driving on roads that are covered with mud or water 

puddles.

If  there  is  prolonged  interference,  contact  a  CITROËN 

dealer.


-

-

-

-

The driver still has to remain attentive and in 

complete control of his vehicle.

79

II

D I E S E L   PA R T I C U L AT E   F I LT E R   S Y S T E M

In addition to the catalytic converter, this fi lter contributes actively to the preserving of air quality, by collecting the 

polluting particles that have not been burnt off. Black exhaust fumes are thus eliminated.

Simultaneous  lighting  of  the  SERVICE  and  depollution  system  warning  lamps  indicates  an 

increased risk of clogging.
Contact a CITROËN dealer as soon as possible.

DIESEL ADDITIVE LEVEL

If the additive level is low, it is necessary to top up the additive level.
Contact a CITROËN dealer as soon as possible.

CLOGGING OF THE PARTICLE FILTER

Clogging is caused by the particle fi lter starting to be saturated (owing to exceptionally long periods 

spent driving in urban conditions: low speeds, traffi c jams, etc.).
In order to regenerate the fi lter you are advised to drive as soon as possible, when traffi c conditions 

allow, at a speed of 60 km/h (37 mph) or more for at least 5 minutes. If the problem persists, contact a CITROËN 

In order to regenerate the fi lter you are advised to drive as soon as possible, when traffi c conditions 

In order to regenerate the fi lter you are advised to drive as soon as possible, when traffi c conditions 

dealer.
Note: If the vehicle has been running for long periods at very low speeds or at idle, vapour emissions may be seen 
coming from the exhaust under acceleration. These have no consequences for the running of the vehicle or for the 
environment.

80

III

LOCKING/UNLOCKING 
FROM THE INSIDE

A  press  on  the  control A  operates 
the  electric  central  locking  and 
unlocking,  provided  all  the  doors 
are closed.
It is still possible to open the doors 
from the inside.
Remark:  Control A  is  inactive  if 
the vehicle has been locked using 
the remote control or the key.
The  three  statuses  for  locking/
unlocking the vehicle are signalled 
by  the  warning  lamp  on  the  con-
trol A:

It fl ashes when the vehicle is 

locked, engine stopped.
It lights up when the ignition is 
switched on, vehicle locked.
It goes out when the vehicle is 
unlocked.

A C C E S S

ANTI-THEFT PROTECTION

When  you  start  the  vehicle,  doors 
and  boot  closed,  the  system 
automatically  locks  the  doors 
as  soon  as  you  reach  a  speed  of 
around 10 km / h (6 mph).
Note:  If  a  door  has  been  opened, 
this  will  lock  again  automatically 
when  the  vehicle  reaches  approx. 
10 km/h (6 mph).

Activation/Deactivation of 
the anti-intrusion protection

Give a long press on control A for 
central locking until you see a mes-
sage displayed.

ANTI-THEFT

The  boot  locks  automatically  as 
soon  as  the  vehicle  reaches  a 
speed of around 10 km / h (6 mph).
Note: The opening of a door or use 
of the control A unlocks the vehicle.

Your vehicle is fi tted with doors that have frameless windows. When you open the doors, immediately you 

action the exterior handle, a micro-descent device on the SIDE WINDOWS lowers the glass slightly.
If this device were not working properly, it could result in the windows breaking:

If there should be a battery failure:

Open the doors gently.
Do not close the door abruptly as this risks breaking the window, if possible wait until the battery is 
powering the vehicle again.

If you are intending to work on the battery, open the windows fi rst.

In freezing conditions, ice may form to hinder the operation of the micro-descent device. If the action 

on the door handle does not move the window down, it is essential fi rst to free the ice.

-
-

-

81

III

A

A C C E S S

To make it easier to open the doors, 
the windows automatically open by 
a few millimetres.
Note: 

This 

movement 

occurs 

immediately  you  touch  an  interior 
door handle.
The  window  recloses,  automati-
cally adjusting for a perfect seal.

IMPORTANT

This function has no anti-pinch. Do 
not leave your hand on the window 
when you close the door
Any  interruption  of  your  vehicle's 
electrical  supply  will  prevent  the 
windows from opening and closing 
correctly.
Remark: Travelling at high speed, 
closing  of  windows  may  be  hin-
dered  by  the  aerodynamic  pres-
sure.  Acoustic  comfort  may  then 
be adversely affected.

ELECTRICALLY-CONTROLLED CHILD SAFETY

This deactivates the controls in the rear of the vehicle, both for the rear win-
dows and for opening the rear doors from the inside.
For Pack Lounge seats, the seat slide adjustments, and those for the front 
seats from the rear of the vehicle, are also deactivated.

Activation

The electric safety device is activated by pressing the control A located on 

the  windows  control  panel. A  message  appears  to  confi rm  that  the  child 

safety is activated.
It is still possible to open the doors from the outside and to operate the elec-
tric windows from the front of the vehicle.

Before  changing  or  repairing  the  battery,  open  all  four 
windows.
If you unlock your vehicle using the key because of a problem 
with  the  battery,  be  aware  that  opening/closing  a  door  with 
the window closed can seriously damage the glass, even to 
the point of breaking it.

82

III

A

B

A C C E S S

BOOT

This  can  be  unlocked,  vehicle 
stopped:

With either the remote control 
or the key.
Using the interior central 
unlocking button, or simply by 
opening a door.

Opening from the outside

Press upwards on the lever A.
Note:

In any event, as soon as the 
vehicle is moving at more than 
around 10 km / h (6 mph), the 
boot is locked.
When the vehicle is stationary, 
the boot unlocks when a door 
is opened or if the interior 
central locking/unlocking 
button is pressed.

Closing the boot

Use  the  moulded  handle  on  the 
inside of the boot trim to lower the 
boot.
Press fi rmly shut.

UNLOCKING IN EMERGENCY

In  the  event  of  a  problem  with 
unlocking the boot, the lock can be 
released if you fold the rear bench-
seat:

1. Insert a screwdriver into the 

aperture B in the lock.

2. Turn it until the boot is 

unlocked.

In the case of Pack Lounge seats, 
contact a CITROËN dealer.

In the case of Pack Lounge seats, 

of Pack 

83

III

A U T O M A T I C   A I R   C O N D I T I O N I N G

A.  Sunlight sensor

B.  Soft diffusion 

system

C.  Ventilated 

storage under 
the central 
armrest


Content   ..  3  4  5  6   ..