Chery Tiggo 5 (T21). Service manual - part 349
 

  Index      Chery     Chery Tiggo 5 (T21) - service and repair manual 2014 year


Search            copyright infringement  


Content   ..  347  348  349  350   ..


Chery Tiggo 5 (T21). Service manual - part 349


31–

100

31

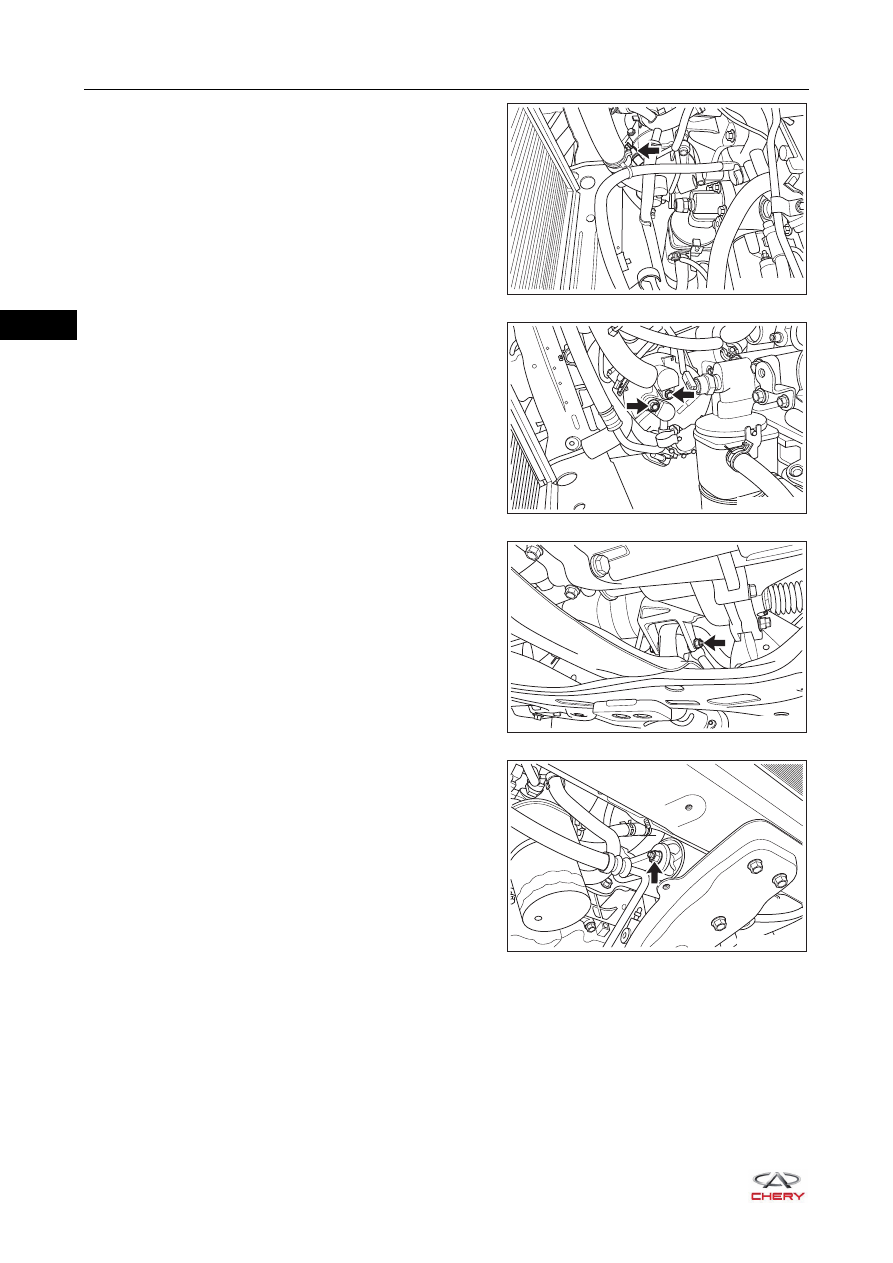
c. Disconnect the compressor assembly wire harness 

connector (arrow).

d. Remove 2 fixing bolts (arrow) between A/C high/low 

pressure line and compressor assembly, and 
disengage the A/C high/low pressure line from the 
compressor assembly.

(Tightening torque: 25 ± 2.5 N·m)

e. Remove the coupling bolt and nut (arrow) between 

rear mounting cushion assembly and rear mounting 
bracket.

(Tightening torque: 70 ± 5 N·m)

f. Remove the coupling bolt and nut (arrow) between 

front mounting cushion assembly and front mounting 
bracket.

(Tightening torque: 70 ± 5 N·m)

RT21310850

RT21310860

RT21220180

RT21220190

31–

101

31

g. Remove the coupling bolt (1) and coupling nuts (2) 

between right mounting cushion assembly and right 
mounting bracket.

(Tightening torque: 80 ± 6 N·m)

h. Remove 3 coupling bolts (arrow) between right 

mounting cushion assembly and body.

(Tightening torque: 70 ± 5 N·m)

i. Lower the engine assembly and remove 2 fixing bolts 

(arrow) between compressor assembly and mounting 
bracket.

(Tightening torque: 40 ± 5 N·m)

j. Carefully remove the compressor assembly from below.

Installation

Installation is in the reverse order of removal.

1

2

RT21070690

1

RT21310870

CAUTION

 Tighten the fixing bolts to specified torque.
 It is necessary to replace the refrigerant line O-ring when installing the refrigerant line. Failure to do so 

may result in refrigerant leaks.

 Lubricate the new rubber O-ring with clean refrigerant oil and install it to the refrigerant line joint.
 Only use the specified O-ring, as it is made of special materials for R134a system.
 Only use recommended refrigerant oil which is applicable to the A/C compressor assembly on vehicle.
 When installing a new compressor assembly, always remove a certain amount of refrigerant oil from the 

new A/C compressor assembly as specified. 

 Perform recharging for the A/C system and check refrigerant for leakage.

31–

102

31

Condenser Assembly (w/Receiver Drier)

Removal

1. Recover the refrigerant from the A/C system (

See page 31-66

).

2. Turn off all the electrical equipment and ignition switch.
3. Disconnect the negative battery cable.
4. Remove the front bumper assembly (

See page 48-11

).

5. Remove the condenser assembly (w/ receiver drier).

a. Remove the fixing nut (arrow) between A/C high 

pressure line I and condenser assembly, and 
disengage the A/C high pressure line I from the 
condenser assembly.

(Tightening torque: 7 ± 1 N·m)

b. Remove the fixing nut (arrow) between A/C high 

pressure line II and condenser assembly, and 
disengage the A/C high pressure line II from the 
condenser assembly.

(Tightening torque: 7 ± 1 N·m)

c. Remove 4 fixing bolts (arrow) from the tank upper 

crossmember fixing bracket and disengage the upper 
part of condenser assembly. 

(Tightening torque: 7 ± 1 N·m)

CAUTION

 Special service equipment for R134a refrigerant must be used to recover/charge refrigerant.
 Always keep the work area in good ventilation.
 The disconnected A/C line and connecting part should be sealed to prevent foreign matter from entering.

RT21310800

RT21310810

RT21310880

31–

103

31

d. Remove the condenser deflector fixing clips (arrow) 

and remove the deflectors on both sides.

e. Disengage the lower part of condenser assembly from 

the positioning holes (arrow) of tank lower 
crossmember assembly.

f. Carefully remove the condenser assembly (w/receiver drier) from above.

Inspection

1. Check the condenser fins.

a. If the condenser fins are dirty, wash them with water. And then dry the fins with compressed air.

b. If the condenser fins are bent, straighten them with a 

screwdriver or pliers.

RT21310890

RT21310900

CAUTION

 DO NOT damage the condenser fins.

RT21310910


Content   ..  347  348  349  350   ..