Snowmobile Ski-Doo DEEP SNOW E-TEC SERIES. OPERATOR’S GUIDE (2024) - page 1
OPERATOR’S GUIDE
Model
Package
Engine
850 E-TEC
Freeride
-
850 E-TEC Turbo R
600R E-TEC
Adrenaline
850 E-TEC
600R E-TEC
Edge
850 E-TEC
Summit
850 E-TEC
X
850 E-TEC Turbo R
850 E-TEC
Expert
850 E-TEC Turbo R
2
TABLE OF CONTENTS
GENERAL INFORMATION
GENERAL INFORMATION
10
Know Before you Go
10
Safety Messages
10
About this Operator’s Guide
11
Respect of the Environment
12
SAFETY INFORMATION
BEFORE YOU GO
16
Operating Age and Ability
16
Drugs and Alcohol
16
Avalanche Safety Training Courses
16
Protective Gear
17
Required Equipment
17
GET FAMILIAR WITH THE SNOWMOBILE
19
Track Propulsion System
19
Steering
19
Tether Cord
20
Braking
20
Parking Brake
20
Carrying Loads
20
Towing Loads
21
Towing Another Snowmobile
22
Accessories and Modifications
22
Traction Enhancing Products
23
RIDE SAFELY
25
Rider Position (Forward Operation)
25
Rider Position (Reverse Operation)
27
Riding with Passenger(s)
27
Riding Alone
28
Riding in a Group
28
Avoiding Collisions
31
Riding Behaviors
31
Speeding
32
Moving Parts
32
Know Terrain and Riding Variations
32
Respect of the Wildlife
36
Carbon Monoxide (CO) Poisoning
36
Gasoline Fires and Other Hazards
37
Burns from Hot Parts
37
PRACTICE EXERCISES
38
Where to Practice Exercises
38
Exercises to Practice
38
FUELING
41
Fueling Procedure
41
3
TABLE OF CONTENTS
INJECTION OIL
42
TRANSPORTING THE VEHICLE
43
IMPORTANT ON-PRODUCT LABELS (CANADA/UNITED
STATES)
44
Vehicle Safety Labels
44
Technical Information Labels
60
Hang Tag(s)
68
IMPORTANT ON-PRODUCT LABELS (ALL COUNTRIES EX-
CEPT CANADA/UNITED STATES)
72
Vehicle Safety Labels
72
Technical Information Labels
89
PRE-RIDE INSPECTION
97
Before Starting the Engine
97
After Engine is Started
97
Pre-Ride Check List
98
REPORTING SAFETY DEFECTS
100
VEHICLE INFORMATION
PRIMARY CONTROLS
102
Handlebar
102
Throttle Lever
102
Emergency Engine Stop Switch
103
Brake Lever
105
Parking Brake Lever
111
Engine Cut-off Switch
112
SECONDARY CONTROLS
114
Console Switches
114
SHOT/ Electric Start/ Electronic Reverse (RER) Button
118
Rewind Starter Handle
119
BODY AND SEAT
120
Front and Rear Bumpers
120
Front Storage Compartment
121
Side Panels
122
Upper Body Module
128
Seat
132
EQUIPMENT
134
Operator's Guide
134
Heated Cell Case (if equipped)
134
Power Outlet - USB (if equipped)
134
Tools
135
Drive Belt Guard
138
Mountain Strap
138
Adjustable Stopper Strap (If Equipped)
139
Ice Scratchers
139
Spare Drive Belt Holder
139
GAUGE – 4.5” DIGITAL DISPLAY
143
Multifunction Display
143
4
TABLE OF CONTENTS
Warning Lamps and Indicators
145
Settings
147
GAUGE – 10.25” COLOR TOUCHSCREEN DISPLAY
149
Default Display
149
Navigating the Digital Display
149
Center Display
150
Narrow View Display
151
App Menu
152
Warning Lamps and Indicators
156
Pairing your Smartphone Via Bluetooth
158
BRP GO! App
159
Quick Tour of the BRP GO! App
161
Messages in Multifunction Gauge
162
FUEL
164
Fuel Requirements
164
Fueling Procedure
165
INJECTION OIL
167
Recommended Injection Oil
167
Injection Oil Level Verification
167
BREAK-IN PERIOD
169
Operation During Break-In
169
BASIC PROCEDURES
170
Engine Starting Procedure
170
Emergency Starting
170
Vehicle Warm-Up
173
Reverse (RER)
174
Shutting Off the Engine
175
RIDING CONDITIONS AND YOUR SNOWMOBILE
176
Altitude
176
Temperature
176
Hard Packed Snow
176
TUNE YOUR RIDE
178
Front Suspension Adjustments
178
Rear Suspension Adjustments
183
Adjustment Tips According to Vehicle Behavior
196
MAINTENANCE
MAINTENANCE SCHEDULE
200
EPA Regulation - Canadian and USA Vehicles
200
Deep Snow Usage
201
Maintenance Schedule
202
MAINTENANCE PROCEDURES
208
Engine Coolant
208
Exhaust System
211
Spark Plugs
211
Brake Fluid
212
Chaincase Oil
217
5
TABLE OF CONTENTS
Drive Chain
220
Drive Belt
221
Drive Pulley
227
Track
231
Suspension
239
Skis
241
Fuses
241
Headlights
242
Battery
244
VEHICLE CARE
248
Post-Operation Care
248
Vehicle Cleaning and Protection
248
STORAGE
249
Engine Storage Procedure
250
PRESEASON PREPARATION
253
MAINTENANCE RECORDS
254
TECHNICAL INFORMATION
VEHICLE IDENTIFICATION
264
Vehicle Description Decal
264
Identification Numbers
265
COMPLIANCE LABELS
267
EPA Compliance Label
267
SSCC Label
268
Regulation (EU) 2016/1628 applicable for Non-Road Mobile
Machineries
268
NOISE EMISSION AND VIBRATION VALUES
271
EU DECLARATION OF CONFORMITY
272
UK DECLARATION OF CONFORMITY
273
EPA CERTIFIED ENGINES
274
Engine Emissions Information
274
RADIO FREQUENCY DIGITALLY ENCODED SECURITY SYS-
TEM (RF D.E.S.S. KEY)
276
MULTIFUNCTION GAUGE REGULATORY INFORMATION ...277
TECHNICAL SPECIFICATIONS
ENGINE
280
600R E-TEC
280
850 E-TEC
281
850 E-TEC Turbo R
283
VEHICLE
285
Freeride
285
Summit
290
6
TABLE OF CONTENTS
TROUBLESHOOTING
TROUBLESHOOTING GUIDELINES – E-TEC ENGINES
300
MONITORING SYSTEM
303
Pilot Lamps, Messages and Beeper Codes
303
Fault Codes
308
WARRANTY
BRP LIMITED WARRANTY USA AND CANADA: 2024 SKI-DOO®
SNOWMOBILES
310
SCOPE OF THE LIMITED WARRANTY
310
LIMITATIONS OF LIABILITY
310
EXCLUSIONS - ARE NOT WARRANTED
310
WARRANTY COVERAGE PERIOD
311
CONDITIONS REQUIRED FOR WARRANTY COVERAGE . . 311
WHAT TO DO TO OBTAIN WARRANTY COVERAGE
312
WHAT BRP WILL DO
312
TRANSFER
313
CONSUMER ASSISTANCE
313
US EPA EMISSION-RELATED WARRANTY
314
Emission-Related Warranty Period
314
Components Covered
315
Limited Applicability
316
BRP INTERNATIONAL LIMITED WARRANTY: 2024 SKI-DOO®
SNOWMOBILES
317
SCOPE OF THE LIMITED WARRANTY
317
LIMITATIONS OF LIABILITY
317
EXCLUSIONS - ARE NOT WARRANTED
318
WARRANTY COVERAGE PERIOD
318
CONDITIONS TO HAVE WARRANTY COVERAGE
319
WHAT TO DO TO OBTAIN WARRANTY COVERAGE
320
WHAT BRP WILL DO
320
TRANSFER
320
CONSUMER ASSISTANCE
321
BRP LIMITED WARRANTY FOR THE EUROPEAN ECONOMIC
AND THE COMMONWEALTH OF THE INDEPENDENT STATES
(CIS) AREAS AND TURKEY: 2024 SKI-DOO®
SNOWMOBILES
322
SCOPE OF THE LIMITED WARRANTY
322
LIMITATIONS OF LIABILITY
322
EXCLUSIONS - ARE NOT WARRANTED
323
WARRANTY COVERAGE PERIOD
323
CONDITIONS TO HAVE WARRANTY COVERAGE
324
WHAT TO DO TO OBTAIN WARRANTY COVERAGE
324
WHAT BRP WILL DO
325
TRANSFER
325
CONSUMER ASSISTANCE
325
7
TABLE OF CONTENTS
CUSTOMER INFORMATION
DATA PRIVACY INFORMATION
328
CONTACT US
330
Asia Pacific
330
Europe, Middle East and Africa
330
Latin America
331
North America
331
CHANGE OF ADDRESS/OWNERSHIP
332
8
GENERAL
INFORMATION
9
GENERAL INFORMATION
Congratulations on your purchase of a new BRP snowmobile. What-
ever model you have chosen, it is backed by the Bombardier Recrea-
tional Products Inc. (BRP) warranty and a network of authorized BRP
snowmobile dealers ready to provide the parts, service or accessories
you may require.
Your dealer is committed to your satisfaction. He has taken training to
perform the initial set-up and inspection of your snowmobile as well as
completed the final adjustment required to suit your specific weight
and riding environment before you took possession.
At delivery, you were informed of the warranty coverage and signed
the Pre-delivery Check List to ensure your new vehicle was prepared
to your entire satisfaction.
Know Before you Go
To learn how to reduce the risk for you, your passenger or bystanders
being injured or killed, read the following sections before you operate
the vehicle:
- Safety Information
- Vehicle Information.
Also read all safety labels on your snowmobile and watch attentively
the safety video located at:
Or, use the following QR code.
Safety Messages
This operator’s guide utilizes the following symbols and words to em-
phasize particular information:
The safety alert symbol
indicates a potential injury hazard.
WARNING
Indicates a potential hazard which, if not avoided, could result
in serious injury or death.
10
GENERAL INFORMATION
CAUTION
Indicates a hazard situation which, if not avoided, could result
in minor or moderate injury.
NOTICE
Indicates an instruction which, if not followed, could severely
damage vehicle components or other property.
About this Operator’s Guide
This operator's guide has been prepared to acquaint the owner, oper-
ator and passenger with this snowmobile and its various controls,
maintenance and safe riding instructions.
The following terminology in regards to operator, passenger and ve-
hicle configuration is used as follows throughout this guide:
- Operator: refers to the person being behind the controls and driv-
ing the snowmobile.
- Passenger: refers to a person sitting behind the operator.
-
1-UP: refers to a model designed for an operator only.
–
2-UP: refers to a model designed to accommodate one
passenger.
Keep this operator's guide in the vehicle as you can refer to it for the
operation, instructing others, maintenance and troubleshooting.
Note that this guide is available in several languages. In the event of
any discrepancy, the English version shall prevail.
If you want to view and/or print an extra copy of your operator's guide,
simply visit the following website:
The information contained in this document is correct at the time of
publication. BRP, however, maintains a policy of continuous improve-
ment of its products without imposing upon itself any obligation to in-
stall them on products previously manufactured. Due to late changes,
some differences between the manufactured product and the descrip-
tions and/or specifications in this guide may occur. BRP reserves the
right at any time to discontinue or change specifications, designs, fea-
tures, models or equipment without incurring any obligation upon
itself.
This operator's guide should remain with the vehicle when it's sold.
11
GENERAL INFORMATION
Respect of the Enviironment
The guidelines that we support are not designed to limit your snow-
mobiling fun, but to preserve the beautiful freedom that you can expe-
rience only on a snowmobile! These guidelines will keep
snowmobilers healthy, happy and able to introduce others to what they
know and enjoy about their favorite winter pastime. So, the next time
you hit the trails on a cool, crisp and clear winter day, we ask you to re-
member that you are paving the way for the future of our sport. Help
us lead it down the right path! From all of us at BRP, thank you for
doing your share.
There is nothing more exhilarating than snowmobiling. Venturing onto
snowmobile trails that cross wild areas is an exciting and healthy win-
ter sport. However, as the number of people using these recreational
parks increases, so does the potential for damage to the environment.
Abuse of land, facilities and resources inevitably leads to restrictions
and closures of both private and public land.
In essence, the greatest threat to our sport, is all around us. Which
leaves us with one logical choice. When we snowmobile, we must al-
ways ride responsibly.
The vast majority respect the law and the environment. Each of us
must set an example for those who are new to the sport, young and
old alike.
It is in every one's best interest to tread lightly into our recreational
areas. Because, in the long run, to protect the sport we must preserve
the environment.
Recognizing the importance of this issue and the need for snow-
mobilers to do their share in preserving areas that make it possible to
enjoy our sport, BRP has developed the “Light Treading Is Smart Sled-
ding” campaign for snowmobilers.
Light Treading refers to more than the thread of our tracks. It's a state-
ment of concern, respect and willingness to take the lead and take ac-
tion. It applies to the environment in general, its proper care and
maintenance, its natural inhabitants and all enthusiasts and the public
at large who enjoy the great outdoors. With this theme, we invite all
snowmobilers to remember that respecting the environment is not only
critical to the future of our industry but to future generations.
Light Treading in no way suggests you should curb your appetite for
snowmobiling fun! It simply means tread with respect!
The fundamental objective of Light Treading is one of respect for
where and how you ride a snowmobile. You're a light treader when
you follow the principles below.
12
GENERAL INFORMATION
Become informed. Obtain maps, regulations and other information
from the Forest Service or from other public land agencies. Learn the
rules and follow them and that goes for speed limits, too!
Avoid running over young trees, shrubs, and grasses and don't cut
wood. On flatlands or areas where trail riding is popular, it's important
to ride only where authorized. Remember, there is a link between pro-
tecting your environment and your own safety.
Respect wildlife and be particularly sensitive of animals that are rear-
ing young or suffering from food shortage. Stress can sap scarce en-
ergy reserves. Refrain from riding in areas where only animals are
intended to tread!
Obey gate closures and regulatory signs and remember, light treaders
don't litter!
Stay out of wilderness areas. They're closed to all vehicles. Know
where the boundaries are.
Obtain permission to travel across private land. Respect the rights of
landowners and other people's privacy. Remember, snowmobile tech-
nology has lowered the noise factor considerably, but you still
shouldn't rev your engines where quiet “is the order of the day”.
Snowmobilers know all too well the efforts that have been made
throughout the sport's history to enjoy access to areas where people
can snowmobile safely and responsibly. This effort continues today,
as strong as ever.
Respecting the areas where we ride... wherever they may be... is the
only way to ensure their future enjoyment. That's one major reason
why we know you'll agree that Light Treading is smart sledding! And
there are more.
Enjoying the opportunity to see winter and all its natural majestic won-
ders, is an experience cherished by snowmobilers. Light Treading will
preserve this opportunity and will make it possible for us to expose
others to the beauty of winter and the unique thrill of our sport! Light
Treading will help our sport to grow!
Finally, Light Treading is the sign of a smart snowmobiler. You don't
have to leave big tracks or careen through a virgin forest to show you
can ride. So whether you're driving a high performance BRP snowmo-
bile or any other make or model, show you know what you're doing.
Show you know how to send snow flying and make tracks with a light
touch!
13
GENERAL INFORMATION
This page is intention-
ally blank
14
SAFETY
INFORMATION
SAFETY INFORMATION
15
BEFORE YOU GO
WARNING
Disregarding any of the safety precautions and instructions
contained in this section could cause injury including the possi-
bility of death.
Operatiing Age and Abillity
Operators must be qualified. Make sure the operator is 16 or older.
Your state (or province) may have additional requirements. Laws re-
garding the minimum age and licensing requirements vary from one
jurisdiction to another. Be sure to contact the local authorities for infor-
mation regarding the legal operation of a snowmobile in the intended
jurisdiction of use. BRP highly recommends that you take a safety rid-
ing course. Basic training is required for the safe operation of any
snowmobile.
Operation of this snowmobile with a disability that impairs vision, reac-
tion time, judgment, or operation of the controls is not recommended.
The safe use of your snowmobile depends on many conditions such
as visibility, speed, weather, environment, traffic, vehicle condition
and the condition of the operator. The performance of some snowmo-
biles may significantly exceed that of other snowmobiles you have op-
erated. Therefore, use by novice or inexperienced operators is not
recommended.
Each passenger must be able to simultaneously place both feet firmly
flat against each footboard when properly seated.
Drugs and Alcohol
Never ride after consuming alcohol or drugs. Riding on a snowmobile
requires the operator and passenger (s) to be sober, attentive and
alert. The use of drugs and alcohol, singly or in combination, de-
creases reaction time, impedes judgment, impairs vision, and inhibits
your ability to safely ride on a snowmobile.
Avalanche Safety Training Courses
We recommend that all mountain riders take a local avalanche safety
training course to become more familiar with snow conditions and
learn how to properly use their equipment. Here are some web sites
that can help you finding important information:
-
- US: www.avalanche.org
–
- Europe: www.avalanches.org
–
- Canada: www.avalanche.ca
16
SAFETY INFORMATION
BEFORE YOU GO
Protective Gear
Proper snowmobile clothing should be worn by all riders. It should be
comfortable and not too tight. Always check the weather forecast be-
fore going on a ride. Dress for the coldest weather expected. Thermal
underwear next to the skin also provides a good insulation.
Always wear an approved helmet at all times for safety and comfort.
They provide both warmth and reduce injury. A stocking type cap, ba-
laclava and face mask should always be carried or worn. Goggles or a
face shield that attach to the helmet are indispensable.
Hands should be protected by a pair of snowmobile gloves or mitts
which have sufficient insulation and allow use of thumbs and fingers
for operation of controls.
Rubber bottom boots with either a nylon or a leather top, with remov-
able felt liners are best suited for snowmobiling.
You should keep yourself as dry as possible when snowmobiling.
When you come indoors, take your snowmobile suit and boots off and
make certain they dry properly.
Do not wear a long scarf or loose apparels that could get caught in
moving parts.
Carry colored lens goggles.
Required Equipment
As the owner of the snowmobile, you are responsible for ensuring that
all required safety equipment is aboard. Check your local regulations
about requirements.
First aid kit
Provided tool kit
Mobile phone
Knife
Spare spark plugs
Flashlight
Adhesive tape (duct tape)
Trail map
Spare drive belt
Snack
Probe*
Shovel*
SAFETY INFORMATION
17
BEFORE YOU GO
Avalanche beacon*
-
*When riding in an area with avalanche risk
18
SAFETY INFORMATION
GET FAMILIAR WITH THE SNOWMOBILE
This vehicle may exceed the performance of other vehicles you may
have ridden. Take time to familiarize yourself with your new vehicle.
Inexperienced riders may overlook risks and be surprised by vehicle’s
specific behavior and terrain conditions. Ride slowly. Excessive speed
and reckless driving can kill.
Make sure you read and understand the content of this operator’s
guide to become completely familiar with the controls and operation of
the snowmobile before embarking on your first trip or taking on a pas-
senger(s). If you have not had the opportunity to do so, practice driving
solo in a suitable traffic-free area to become accustomed to the feel
and response of each control.
It is very important to inform any operator, regardless of his experi-
ence, of the handling characteristics of this snowmobile. The snowmo-
bile configuration, such as ski stance, ski type, suspension type, track
length, width and type vary from a model to another. The snowmobile
handling is greatly influenced by these characteristics.
Track Propulsiion System
Your snowmobile features a track propulsion system. The track grips
on the snow-covered surface and pushes the snowmobile in the oppo-
site direction of the force applied on the surface. Stay away from the
track. Personal injury will result if contact is made with the revolving
track.
WARNING
Never stand behind or near a rotating track. Debris could be
projected causing severe injuries.
The grip of the track will vary depending on the surface conditions.
The grip may be reduced on hard-pack snow or ice. Reduce your
speed and allow more space to turn. Refer to the TRACTION EN-
HANCING PRODUCTS subsection of this guide to learn how to bal-
ance the grip of the ski vs the grip of the track. If the front and rear of
the snowmobile are out of balance due to an incorrect combination of
traction enhancing products, the snowmobile may tend to oversteer or
understeer, which could lead to a loss of control.
Steeriing
Skis are used to steer the snowmobile through the handlebar. The per-
formance to steer will vary depending of the grip of the skis on the sur-
face. Steering control ability may be reduced on hard-pack snow, ice
or roads. Reduce speed and allow more space to turn. Refer to the
TRACTION ENHANCING PRODUCTS subsection of this guide to
learn how to balance the grip of the ski versus the grip of the track. If
SAFETY INFORMATION
19
GET FAMILIAR WITH THE SNOWMOBILE
the front and rear of the snowmobile are out of balance due to an in-
correct combination of traction enhancing products, the snowmobile
may tend to oversteer or understeer, which could lead to a loss of
control.
Riding with a passenger or when carrying loads, the steering control
will also be reduced. Reduce speed and allow more space to turn.
Tether Cord
Always attach tether cord eyelet to clothing before starting the engine
to help ensure the engine stops should the operator fall off.
After riding, always remove the tether cord from the engine cut-off
switch to avoid unauthorized use by children or others and to prevent
starting in a closed environment (ex: garage).
Braking
Braking performances may vary suddenly under certain conditions. Al-
ways remember that the snowmobile braking distance may be af-
fected when riding with a passenger and when loaded with cargo at
the rear. Never jam the brake and lock the track. Be sure to use re-
straint in braking to keep from blocking the track in order to avoid sur-
prises that could lead to a loss of control.
Using studs on the track will give you better braking capacity on
packed snow or ice but will have no noticeable effect on soft snow. Re-
fer to Enhancing Traction Control Products subsection for track stud-
ding application.
Parking Brake
Always engage parking brake before starting the engine. Parking
brake should be used whenever snowmobile is parked.
Make sure parking brake is fully disengaged before operating the
snowmobile. When you ride the vehicle, brake pads that are caused to
drag by a continuous pressure on the lever may cause damage to the
brake system and cause loss of braking capacity or fire.
Carryiing Loads
Carrying loads affects the vehicle handling, stability and braking dis-
tance. Appropriate loading and weight distribution are therefore
important.
When carrying loads it is very important to follow the
recommendations:
20
SAFETY INFORMATION
GET FAMILIAR WITH THE SNOWMOBILE
- Never exceed the maximum cargo capacity. Refer to Safety Infor-
mation on the Vehicle or Technical Specifications subsections for
the applicable cargo load capacity of your snowmobile.
- Always adjust the suspensions according to the cargo load. Refer
to Tune Your Ride subsection for more details.
- Never carry a load unless it is properly secured using a BRP LinQ
certified accessory. Compatible accessories which are not BRP
certified may not be considered as fit for this purpose.
- Always reduce your speed, turn gradually and allow longer braking
distance when carrying loads.
WARNING
Failure to follow these recommendations when carrying or tow-
ing loads could lead to a loss of control and possibly in a tip
over.
Towiing Loads
Towing loads affects the vehicle handling, stability and braking dis-
tance. Appropriate loading and weight distribution are therefore
important.
When towing a load it is very important to follow the
recommendations:
-
Always use a rigid tow bar to tow a cargo carrier or an accessory.
–
Never tow a load using a rope. Using a rope would result in a colli-
sion between the load and the snowmobile and possibly in a tip
over in case of a rapid deceleration or on a downward slope.
-
Never tow a load by attaching it directly to the bumper. Use only
the hitch to tow a load. Make sure that the cargo carrier hitch is
compatible with the one on the vehicle. Use security chains or ca-
bles to secure the cargo carrier with the vehicle. Avoid excessive
slack in the chains or cables, it could break and snap back.
-
Never exceed the vehicle maximum tow capacity. Refer to Safety
Information on the Vehicle or Technical Specifications subsections
for the applicable towing capacity of your snowmobile.
-
Never exceed the tongue weight capacity, if applicable.
–
Always make sure load is evenly distributed and safely secured on
the cargo carrier. Make sure there is at least some weight on the
tongue, if applicable.
-
Always adjust the suspensions according to the weight on the
tongue, if applicable. Refer to Tune Your Ride subsection for more
details.
-
Reduce your speed and turn gradually. Avoid hills and rough ter-
rain. Riding this vehicle with a cargo carrier substantially increases
the risk of toppling, especially on inclined slopes. Never attempt
steep hills.
SAFETY INFORMATION
21
GET FAMILIAR WITH THE SNOWMOBILE
- Allow more distance for braking, especially on inclined surfaces
and when a passenger is on board. Be careful not to skid or slide.
- Use caution when disconnecting a loaded cargo carrier; its load
may topple on you or others.
WARNING
Failure to follow these recommendations when carrying or tow-
ing loads could lead to a loss of control and possibly in a tip
over.
On vehicle equipped with a gearbox, always put the shift lever to L
(low range) when towing a cargo carrier.
Any towed accessory should have reflectors on both sides and at the
rear.
Check country transport regulations for brake light(s) requirements.
Towing Another Snowmobille
If a snowmobile is disabled and must be towed, in an emergency sit-
uation only, a rope can be used
- Remove the drive belt. Refer to Maintenance Procedures for more
details.
- Attach the rope to the ski legs (spindles), not to the skis. If the ski
legs are not accessible, attach the rope to the bumper.
- Have someone sit on the towed snowmobile to steer and activate
the brake if needed.
- Tow at low speed with extra caution.
NOTICE
Always remove the drive belt of the snowmobile that is to be
towed to prevent damage to its belt and drive system.
In some areas, it may be illegal to do so. Check with state or local
authorities.
Accessories and Modiifiications
Any modifications or addition of accessories approved by BRP may af-
fect the handling of your vehicle. It is important to take the time to get
familiar with the vehicle once modifications are made to understand
how to adapt your driving behavior accordingly.
Avoid installing equipment not specifically approved by BRP for the
vehicle and avoid unauthorized modifications. These modifications
22
SAFETY INFORMATION
GET FAMILIAR WITH THE SNOWMOBILE
and equipment have not been tested by BRP and may create hazards.
For example, they could:
- Create a loss of control and increase risk of crash
- Cause overheating or short circuits increasing the risk of fire or
burn injuries
- Affect the protection features provided by the vehicle
- Affect the behavior of the trailer when the vehicle is transported
- Cause a risk of losing objects on the road when transported.
Your vehicle may also become illegal to ride.
Ask your authorized BRP dealer for suitable available accessories for
your vehicle.
Tractiion Enhancing Products
Important
-DEEP SNOW SERIES snowmobiles are not meant to be used with
any type of traction enhancing products such as, adjustable or
more aggressive ski carbide runners and/or track studs.
-BRP does not recommend the installation and use of such
products on your DEEP SNOW SERIES snowmobile.
WARNING
Never stud a track that has not been approved for studs. Instal-
ling studs on an unapproved track could increase the risk of the
track tearing or severing.
Although not recommended, the installation of more aggressive car-
bide ski runners still possible.
Using more aggressive than original carbide ski runners gives a better
grip on packed snow and ice, but has no noticeable effect on soft
snow. For this reason, driving a snowmobile equipped with aggressive
carbide runners requires a certain adaptation period. If your snowmo-
bile is equipped with aggressive carbide runners , be sure to take
plenty of time to get used to the way it handles when turning. Refer to
Maneuverability.
Maneuverability
Using traction enhancing products such as, more aggressive ski car-
bide runners and/or studs makes the snowmobile grip the ground bet-
ter at both the front and at the rear. The use of carbide runners is
therefore required to give the skis a better grip, so that the front and
rear of the snowmobile are in balance. While off-the-shelf carbide ski
SAFETY INFORMATION
23
GET FAMILIAR WITH THE SNOWMOBILE
runners are adequate, they don’t necessarily give you optimal control,
since that depends on your personal preferences, your riding style,
and how your suspension is adjusted.
WARNING
If the front and rear of the snowmobile are out of balance due to
an incorrect combination of traction enhancing products, the
snowmobile may tend to oversteer or understeer, which could
lead to a loss of control.
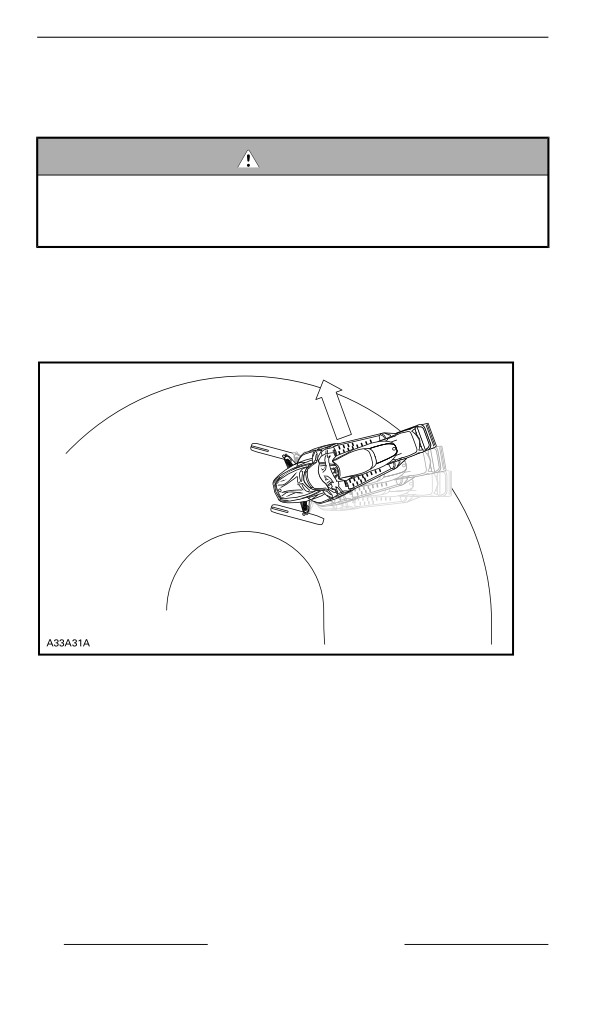
Oversteering
In certain conditions, using more aggressive ski carbide runners with-
out studs on the rear track could make the snowmobile prone to over-
steering, see illustration.
OVERSTEERING
24
SAFETY INFORMATION
RIDE SAFELY
Riider Posiition (Forward Operatiion)
Your riding position and balance are the two basic principles of making
your snowmobile go where you want it to. When turning on the side of
a hill, you and your passenger must be ready to shift body weight to
help it turn in the desired direction. Operator and passenger must
never attempt this maneuvering by placing feet outside of the vehicle.
Experience will teach you how much lean to put into turns at different
speeds and how much you will have to lean into a slope to maintain
proper balance.
Generally, the riding position for best balance and control is sitting.
However, the posting, kneeling or standing positions are also used
under certain conditions.
WARNING
Do not attempt any maneuvers if they are beyond your abilities.
Sitting
Feet on the running boards, body midway back on seat is an ideal po-
sition when operating the snowmobile over familiar, smooth terrain.
Knees and hips should remain flexible to absorb shocks.
Posting
A semi-sitting position with the body off the seat and the feet under the
body in a sort of squatting posture, thus allowing the legs to absorb
the shocks when traveling over uneven terrain. Avoid abrupt stops.
SAFETY INFORMATION
25
RIDE SAFELY
Kneeling
This position is achieved by placing one foot firmly on the running
board and the opposite knee on the seat. Avoid abrupt stops.
Standing
Place both feet on the running boards. Knees should be flexed to ab-
sorb the shock from surface bumps. This is an effective position to see
better and to shift weight as conditions dictate. Avoid abrupt stop.
26
SAFETY INFORMATION
RIDE SAFELY
Riider Posiition (Reverse Operatiion)
When operating in reverse:
- Ensure the path behind is clear of obstacles or bystanders before
proceeding in reverse.
- BRP recommends sitting on your snowmobile when operating in
reverse.
- Avoid standing up. Your weight could shift forward against throttle
lever while operating in reverse, causing an unexpected accelera-
tion. Unexpected acceleration when snowmobile operates in re-
verse can cause a loss of control.
Fast reverse while turning, could result in loss of stability and control.
Riiding with Passenger(s)
This vehicle is designed for one (1) operator and as many passengers
as there are seats with straps or handholds installed on the vehicle
conforming to SSCC standards. Passenger must only sit on desig-
nated passenger seat.
WARNING
– Never carry a passenger on a seat not approved by BRP.
– Never allow anyone to sit between the handlebar and the
operator.
SAFETY INFORMATION
27
RIDE SAFELY
Even when a passenger is allowed, this person must be physically fit
for snowmobiling.
Any passenger must always be able to firmly lay his feet on the footr-
ests and keep his hands on the handholds or seat strap when seated.
Respecting those physical criteria is important to ensure that the pas-
senger is stable and to reduce the risks of ejection. Falls can result in
severe injury or death.
The operator has a responsibility to ensure the safety of his passenger
and should inform the passenger about snowmobiling basics.
Before riding the vehicle, adjust suspension according to weight. Refer
to Tune Your Ride subsection for more details.
Ask your passenger to inform you to slowdown or stop immediately if
he feels uncomfortable or insecure during the ride.
When going over bumps, riders(s) may raise their body slightly off the
seat to absorb the shocks with their legs.
An unforeseen bump can leave you passenger-less. Remind your
passenger to lean into the turn with you, without causing the vehicle to
topple. Be extremely careful, go more slowly and check the passenger
frequently. Keep a watchful eye on your passenger while riding.
Braking ability and steering control are reduced when riding with a
passenger. Decrease speed and allow extra space to maneuver.
Ridiing Alone
Venturing out alone with your snowmobile could also be hazardous.
You could run out of fuel, have an accident, or damage your snowmo-
bile. Remember, your snowmobile is capable of traveling further in half
an hour than you may be able to walk in a day. Use the “buddy sys-
tem”. Always ride with a friend or member of your snowmobile club.
Even then, tell someone where you are going and the approximate
time you plan to return.
Ridiing iin a Group
Before starting out, designate a “trail boss” to lead the party and an-
other person to follow-up at the end of the party. Ensure that all mem-
bers of the party are aware of the proposed route and destination.
When riding with others, limit your abilities to the experience of others.
Never overtake the trail boss or, for that matter, any other snowmobile.
Use down-the-line hand signals to indicate hazards or intent of direc-
tion change. It’s important to keep a safe distance between each
snowmobile but each one behind the leader should know the position
of the machine ahead.
28
SAFETY INFORMATION
RIDE SAFELY
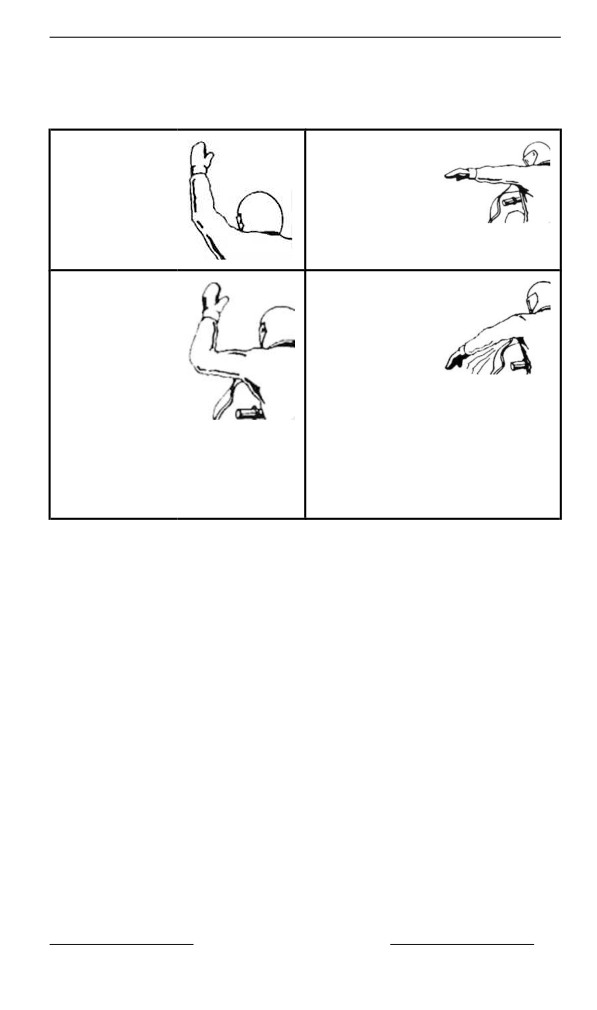
Hand Signals
Every snowmobiler should relay any signal to the ones behind.
STOP
LEFT TURN
Raise either
Extend your
hand straight
left hand
above your
straight out in
head.
the proper
direction.
RIGHT
SLOWING
TURN
DOWN
Extend the left
Left hand
arm and raise
extended out
the hand to a
and down
vertical
from the side
position so it
of the body
forms a right
with
angle at the
downward
elbow.
flapping
motion of
hand to signal
warning or
caution.
SAFETY INFORMATION
29
RIDE SAFELY
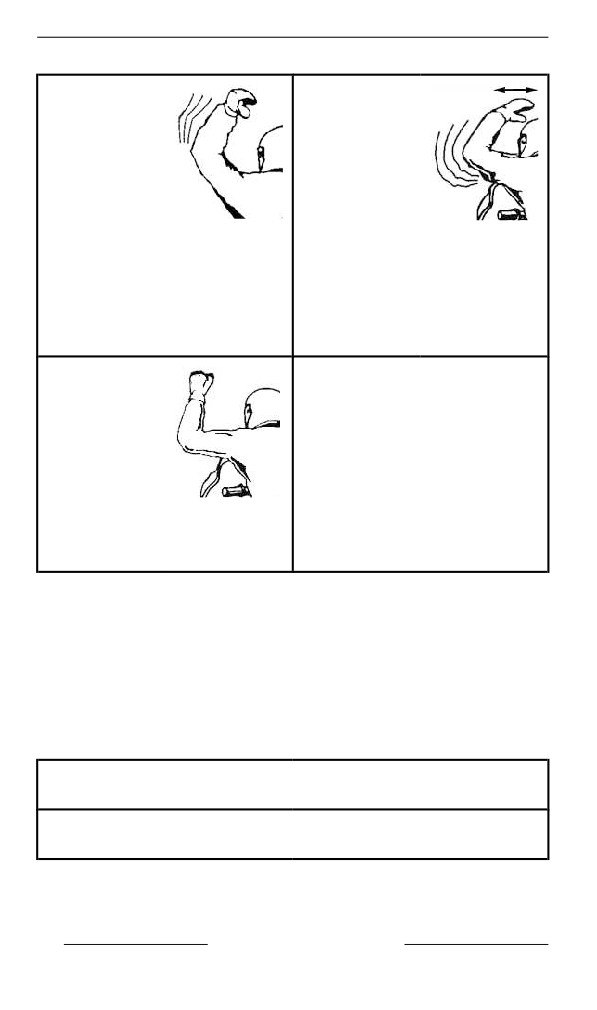
FOLLOWING
ONCOMING
SNOWMO
SNOWMO
BILES
BILES
Arm raised,
Left arm
elbow bent
raised at
with thumb
shoulder
pointing
height, elbow
backward, in
bent and
hitch-hicking
forearm
motion move
verticl, wrist
arm forward to
bent, move
backward
arm from left
over your
to right over
shoulder.
head pointing
to right side of
trail.
LAST
SNOWMO
BILE IN LINE
Left arm
raised at
should height,
elbow bent
and forearm
vertical with
hand
clenched in a
fist.
Light Signals
As an alternative to the hand signals, a light signal system can be in-
stalled on your snowmobile. Whether it is an OEM or after-sales sys-
tem, it consists basically in a 2 colors LED light that signals you are
followed by other riders, or you are the last rider. It allows the rider to
keep both hands on the handlebar for more safety while crossing other
riders.
Visit you BRP snowmobile dealer for more information.
FOLLOWING
YELLOW light
SNOWMOBILES
LAST SNOWMOBILE IN
GREEN light
YOUR GROUP LINE
30
SAFETY INFORMATION
RIDE SAFELY
Avoiding Collliisions
Wherever riding your vehicle always be on the look-out for the unex-
pected. Operate defensively. Scan constantly for people, objects, con-
ditions and upcoming vehicles. In the trail, always stay on the
appropriate side - as per country regulation - to avoid collision, espe-
cially when the field of vision is reduced. E. g.: Before a hilltop and a
curve. Use extra caution whenever off-trail.
Always keep a safe distance from other snowmobiles and bystanders.
Tailgating another snowmobile should be avoided. If the snowmobile
in front of you slows for any reason, its operator and passenger could
be harmed through your neglect. Maintain a safe stopping distance
between you and the snowmobile in front of you. Depending on the
terrain condition, stopping may require a little more space than you
think. Play it safe. Be prepared to use evasive driving.
On land or water, fog or visibility-limiting snow can form. If you must
proceed into the fog or heavy snow, do so slowly with your lights on
and watch intently for hazards. If you are not sure of your way, do not
proceed. Keep a safe distance behind other snowmobilers to improve
visibility and reaction time.
Riiding Behaviiors
Injury or death may result to the snowmobile operator, passenger or
bystander if the snowmobile is used in risky conditions which are be-
yond the operator's, passenger's or snowmobile's capabilities or in-
tended use.
Remember, promotional material may show risky maneuvers per-
formed by professional riders under ideal and controlled conditions.
You should never attempt any such risky maneuvers if they are be-
yond your level of riding ability.
Jumping can be a hazardous situation. It requires practice and should
be done in a known and controlled environment. Never attempt jump-
ing in a trail. A loss of control could lead to an impact with different ele-
ments like rock or tree, or with another snowmobile. When jumping be
prepared for landing to absorb the shock. Brace yourself for the impact
and your knees must be flexed to act as shock absorbers.
Also, an uneven or mined surface in the trail could be enough to kick
upward the snowmobile and generate an impact or a loss of control.
When “gunning” the throttle, the vehicle digs into and leaves an irregu-
lar snow surface for others. So protect the other users by not spinning
the track in the middle of the trail.
SAFETY INFORMATION
31
RIDE SAFELY
Speeding
Excessive speed and reckless driving can be fatal. Always adjust your
speed according to snow conditions and circumstances. In many
cases, you cannot react or respond quickly enough to the unexpected.
Always ride at a speed which is suitable to the trail, weather conditions
and your own ability. Know your local rules. Speed limit may be in ef-
fect and meant to be observed.
Moving Parts
Stay away from the track. Personal injury will result if contact is made
with the rotating track.
To prevent serious injury to individuals near the snowmobile:
- Never stand behind or near a moving track
- Always use a wide-base snowmobile stand with a rear deflector
panel if it is necessary to rotate track
- When the track is raised off the ground, only run it at the lowest
possible speed. Centrifugal force could cause debris, damaged or
loose studs, pieces of torn track, or an entire severed track to be
violently thrown backwards out of the tunnel with tremendous force
- Never operate the engine without the belt guard securely installed
- Never operate the vehicle without the brake disk guard securely
installed
- Never operate the vehicle with the side panels opened, or the hood
removed
Know Terrain and Riidiing Variations
Groomed Trail
On a maintained trail, sitting is the most preferred riding position. Do
not race and, above all, keep to the right hand side of the trail. Be pre-
pared for the unexpected. Observe all trail signs. Do not zigzag from
one side of the trail to the other.
Ungroomed Trail
Unless there has been a fresh snowfall you can expect “washboard”
and snowdrift conditions. Taken at excessive speeds, such conditions
can be physically harmful. Slow down. Hold on the handlebar and as-
sume a posting position. Feet should be under the body assuming a
crouched position to absorb any jarring effect. On longer stretches of
“washboard” trails, the kneeling position of one knee on the seat can
be adopted. This provides a certain amount of comfort, while at the
same time keeps the body loose and capable of vehicle control. Be-
ware of hidden rocks or tree stumps partially hidden by a recent
snowfall.
32
SAFETY INFORMATION
RIDE SAFELY
Deep Snow
In deep “powder” snow, your vehicle could begin to “bog” down. If this
occurs, turn in as wide an arc as possible and look for a firmer base. If
you do get “bogged”, and it happens to everyone, do not spin your
track as this makes the vehicle sink deeper. Instead, turn the engine
off, get off and move the back of the vehicle onto new snow. Then
tramp a clear path ahead of the vehicle. A few feet will generally suf-
fice. Restart the engine. Assume the standing position and rock the
vehicle gently as you steadily and slowly apply the throttle. Depending
on whether the front or rear end of the vehicle is sinking, your feet
should be placed on the opposing end of the running boards. Never
place foreign material beneath the track for support. Do not allow any-
one to stand in front of, or to the rear of, the snowmobile with the en-
gine running. Stay away from the track. Personal injury will result if
contact is made with the revolving track.
Frozen Water
Traveling frozen lakes and rivers can be fatal. Avoid waterways. If you
are in an unfamiliar area, ask the local authorities or residents about
the ice condition, inlets, outlets, springs, fast moving currents or other
hazards. Never attempt to operate your snowmobile on ice that may
be too weak to support you and the vehicle. Operating a snowmobile
on ice or icy surfaces can be very dangerous if you do not observe cer-
tain precautions. The very nature of ice is foreign to good control of a
snowmobile or any vehicle. Traction for starting, turning or stopping is
much less than that on snow. Thus, these distances can be multiplied
manyfold. Steering is minimal, and uncontrolled spins are an ever
present danger. When operating on ice, drive slowly with caution. Al-
low yourself plenty of room for stopping and turning.
Slush
Slush should be avoided at all times. Always check for slush before
starting across any lake or river. If dark spots appear in your tracks,
get off the ice immediately. Ice and water can be thrown rearward into
the path of a following snowmobile. Getting a vehicle out of a slush
area is strenuous and in some cases, impossible.
Uphill
There are two types of hills you can encounter — the open hill on
which there are few trees, cliffs or other obstacles, and a hill that can
only be climbed directly. On an open hill, the approach is to climb it by
side hilling or slaloming. Approach at an angle. Adopt a standing posi-
tion with both feet on the same running board. Keep your weight on
the uphill side at all times. Maintain a steady, safe speed. Continue as
far as you can in this direction, then switch to an opposite hill angle
and riding position.
SAFETY INFORMATION
33
RIDE SAFELY
A direct climb could present problems. Choose the standing position,
accelerate before you start the climb and then reduce throttle pressure
to prevent track slippage.
In either case, vehicle speed should be as fast as the incline demands.
Always slow down as you reach the crest. If you cannot proceed fur-
ther, don't spin your track. Apply the parking brake, turn the engine off,
free the skis by pulling them out and downhill, place the rear of the
snowmobile uphill, restart the engine, release the parking brake and
ease it out with slow even throttle pressure. Position yourself to avoid
tipping over, then descend.
Downhill
Downhill driving requires that you have full control of your vehicle at all
times. On steeper hills, keep your center of gravity low and both hands
on the handlebar. Maintain slight throttle pressure and allow the ma-
chine to run downhill with the engine operating. If a higher than safe
speed is reached, slow down by braking but apply the brake with fre-
quent light pressure. Never jam the brake and lock the track.
Side Hill
When crossing a side hill or traversing up or downhill, certain proce-
dures must be followed. All riders should lean towards the slope as re-
quired for stability. The preferred operating positions are the standing
position, with both feet on the running board that is facing uphill. Be
prepared to shift your weight quickly as needed. Side hills and steep
slopes are not recommended for a beginner or a novice snowmobiler.
Avalanche Hazard
When riding on mountainous terrain, you should be aware of the risk
of avalanches. Avalanches vary in size and shapes and generally oc-
cur in steep terrain and on unstable snow.
New snow, animals, people, wind and snowmobiles can all trigger an
avalanche. Avoid high marking or traversing steep terrain when ava-
lanche conditions are possible. When in unstable snow conditions,
travel should be restricted to lower angle slopes. Wind formed corni-
ces should be avoided. Staying off unstable conditions is the key to
safe mountain riding. Probably most important is to be aware of the
conditions and dangers on a daily basis when in the mountains. Check
local avalanche forecasts and threats each day before heading out to
ride and heed forecasters advice.
You should always carry a snow shovel, probe and avalanche beacon
while riding on mountains.
34
SAFETY INFORMATION
RIDE SAFELY
Bright Sunshine
Bright sunny days can considerably reduce your vision. The glare from
sun and snow may blind you to the extent that you cannot easily distin-
guish ravines, ditches or other obstacles. Goggles with colored lenses
should always be worn under these conditions.
Night Rides
The amount of natural and artificial light at a given time can affect your
ability to see or to be seen. Be extra cautious. Drive at speeds that will
allow you to stop in time when you see an unknown or dangerous ob-
ject ahead. Stay on established trails and never operate in unfamiliar
territory. Be sure both headlights and taillight are working and clean.
Unfamiliar Territory
Whenever you enter an area that is new to you, drive with extreme
caution. There may be obstructions hidden beneath the snow. Go slow
enough to recognize potential hazards such as fences or fence posts,
brooks crossing your path, rocks, sudden dips, guy wires and count-
less other obstacles which could result in a termination of your snow-
mobile ride.
Driving off established trails and in the woods requires reduced speed
and increased vigilance. Driving too fast in an area can make even mi-
nor obstacles very hazardous. Even hitting a small rock or stump could
throw your snowmobile out of control and cause injury to its riders.
Even when following existing tracks, be cautious. Travel at a speed so
you can see what is around the next bend or over the top of the hill.
Hidden Wires
Always be on the lookout for hidden wires, especially in areas that
may have been farmed at one time or another. Too many accidents
have been caused by running into wires in the fields, guy wires next to
poles and roads, and into chains and wires used as road closures.
Slow speeds are a must.
Riding Uneven Surfaces
Unplanned jumps of snowdrifts, snowplow ridges, culverts, indistin-
guishable objects or sudden drop in the trail can be dangerous. You
can avoid them by wearing the proper color lenses or face shields and
by operating at a lower speed.
A good way to help seeing these terrain variations is to wear the prop-
er color lenses or face shields and by operating at a lower speed.
Crouch (stand) towards the rear of the vehicle and keep the skis up
and straight ahead. Apply partial throttle and brace yourself for the im-
pact. Knees must be flexed to act as shock absorbers.
SAFETY INFORMATION
35
RIDE SAFELY
Road Crossing
Your snowmobile is not designed to operate or turn on pavement of
public streets, roads or highways. Avoid road traveling. If you must do
so, and it is permitted, reduce speed and stay on the edge of the way
where you can find snow to help providing capabilities to maintain di-
rectional control.
As snowmobile trails often cross roadways it is important for riders to
know the proper crossing procedures. When approaching a roadway,
signal to others that you are stopping at the intersection and slowly
come to a complete stop back from the road's edge. In some cases,
you will be approaching the road from a ditch or snowbank. Choose a
place where you know you can climb without difficulty. Stop com-
pletely at the top of the bank and wait for all traffic to clear. Then, look
carefully in both directions before crossing at a 90° angle. If needed,
assume a standing position to look both ways. Be wary of parked ve-
hicles. When you are certain that the road is clear proceed straight
across the intersection without hesitation. Each rider needs to come to
a complete stop, look both ways and then proceed when the roadways
is clear of oncoming traffic.
Railroad Crossing
Never ride on railroad tracks. It is illegal. Railroad tracks and railroad
rights-of-way are private property. A snowmobile is no match for a
train. Before crossing a railroad track, stop, look and listen.
Respect of the Willdliife
Wildlife compliments your snowmobiling day. Snowmobile tracks pro-
vide firm ground over which animals can travel from area to area. Do
not violate this privilege by chasing or harassing wildlife. Fatigue and
exhaustion can lead to animal's death. Avoid areas posted for the pro-
tection or feeding of wildlife. If you happen to be fortunate enough to
see an animal, stop your snowmobile and observe quietly.
Carbon Monoxiide (CO) Poiisoning
All engine exhaust contains carbon monoxide (CO), a deadly gas.
Breathing carbon monoxide can cause headaches, dizziness, drowsi-
ness, nausea, confusion and eventually death.
Carbon monoxide is a colorless, odorless, tasteless gas that may be
present even if you do not see or smell any engine exhaust. Deadly
levels of carbon monoxide can collect rapidly, and you can quickly be
overcome and unable to save yourself. Also, deadly levels of carbon
monoxide can linger for hours or days in enclosed or poorly ventilated
areas.
36
SAFETY INFORMATION
RIDE SAFELY
If you experience any symptoms of carbon monoxide poisoning, leave
the area immediately, get fresh air and seek medical treatment.
To prevent serious injury or death from carbon monoxide:
- Never run the vehicle in poorly ventilated or partially enclosed
areas such as garages, carports or barns. Even if you try to venti-
late engine exhaust with fans or open windows and doors, carbon
monoxide can rapidly reach dangerous levels.
- Never run the vehicle outdoors where engine exhaust can be
drawn into a building through openings such as windows and
doors.
- Never stand next to the vehicle while the engine is running. A per-
son standing next to the vehicle when the engine is running may in-
hale high concentrations of exhaust fumes.
After riding, always remove the tether cord from the engine cut-off
switch to avoid unauthorized use by children or others and to prevent
starting in a closed environment (ex: garage).
Gasoliine Fires and Other Hazards
Gasoline is extremely flammable and highly explosive. Fuel vapors
can spread and be ignited by a spark or flame many feet away from
the engine. To reduce the risk of fire or explosion, follow these
instructions:
- Use only an approved gasoline container to store fuel.
- Strictly adhere to instructions in Vehicle Fueling Procedure.
- Never start or operate the engine if the fuel cap is not properly
installed.
- Use only a BRP approved LinQ fuel caddy to carry extra fuel on
the vehicle. It should be properly installed and secured.
Gasoline is poisonous and can cause injury or death.
- Never siphon gasoline by mouth.
- If you swallow gasoline, get any in your eye or inhale gasoline va-
por, visit your doctor immediately.
- If gasoline spills on you, wash with soap and water and change
your clothes.
Burns from Hot Parts
Certain components may become hot during operation. Avoid contact
during and shortly after operation to avoid burns.
SAFETY INFORMATION
37
PRACTICE EXERCISES
Practice alone the following exercises after having done the entire
Pre-ride inspection. Always start and stop the engine according to the
instructions in ENGINE STARTING PROCEDURE and SHUTTING
OFF THE ENGINE in BASIC PROCEDURES. Don’t forget to attach
the tether cord to your jacket.
Where to Practiice Exercises
Find a suitable area to practice the exercises. Ensure the area meet
the following requirements:
- No traffic
- No obstacles
- Hard packed snow
- Ample space to maneuver.
Exercises to Practice
Practice alone the following exercises after having done the entire
Pre-ride inspection. Always start and stop the engine according to the
instructions in ENGINE STARTING PROCEDURE and SHUTTING
OFF THE ENGINE in BASIC PROCEDURES. Don’t forget to attach
the tether cord to your jacket.
Using the Emergency Engine Stop Switch
Purpose: Become familiar with the operation of throttle lever and to be-
come familiar with using the engine stop switch.
Directions:
- With the parking brake engaged, start the engine and let idle until it
reaches the operation temperature.
- Use the engine stop switch to shut the engine off. Press the switch
with your right thumb while keeping your hand on the handgrip.
- Restart the engine and repeat the exercise. No idle time is
required.
Tips for additional practice:
- Press the emergency engine stop switch without looking at it.
Starting, Stopping and Basic Handling
Purpose:
- Learn throttle control and how to get the vehicle moving.
- Become familiar with low speed deceleration and braking.
If you feel like you are losing control while doing this exercise, release
the throttle to stop accelerating and apply the brake as needed to slow
down. You can also use the engine stop switch to cut power entirely.
Directions: At first, you will only use the throttle for a moment at a time,
then release it and coast.
38
SAFETY INFORMATION
PRACTICE EXERCISES
- Start the engine and release the parking brake lever.
- Slowly apply throttle until the vehicle starts to creep forward. As
soon as you start moving release the throttle and coast, then press
the brake lever to stop.
- Continue with this part of the exercise until you are comfortable
with applying and releasing the throttle.
Engine Stop While in Motion
Purpose: Become familiar with using the emergency engine stop
switch when in motion so you know how the vehicle will react if you
need to use it later.
Directions:
- Partway down the straightaway, while operating at 8 km/h (5MPH),
toggle the engine stop switch to OFF position and coast to a stop.
- Restart the engine and repeat the exercise. Try increasing your
speed (to a maximum of 20 km/h (12MPH) before using the engine
stop switch.
In an emergency, the snowmobile engine can be stopped by pressing
down on the emergency engine stop switch or by pulling the tether
cord cap from the engine cut-off switch, while applying brake.
Basic Turns
Purpose: Get comfortable turning in a controlled manner on both
sides.
Directions:
- Roll in a straight line at low speed and make a wide arcing turn.
Make sure there is enough space to perform the entire turn.
- Repeat right and left turns and maintain a steady speed bellow
8km/h (5MPH). Hold the throttle to maintain your low speed.
- Leaning forward and into the curve may help you to turn the han-
dlebar more easily.
Quick Stops
Purpose:
- Become familiar with the vehicle braking ability.
- Learn to apply brakes with maximum efficiency.
This exercise is like what you did before, except you’ll be applying the
brake more firmly, working up to braking at the maximum without lock-
ing the track rotation. Always release the throttle completely for quick
stops. If you apply throttle and brake at the same time, your stopping
distance will be longer.
Directions:
SAFETY INFORMATION
39
PRACTICE EXERCISES
- Start at one end of the straightaway and accelerate to 8 km/h
(5MPH). Partway down the straightaway, release the throttle com-
pletely and brake quickly.
- Keep head and eyes up, keep handlebar straight, and do not re-
lease the brake until fully stopped.
- Repeat, increasing your speed and braking harder. When you feel
that the rotation of the track will be stopped you need to release
the pressure on the break lever. To maintain control, you need to
keep the track in rotation.
Operating in Reverse
Purpose: Become familiar with the vehicle handling and turning radius
in reverse.
Directions:
- Shift into reverse and remain seated. Refer to SHIFTING IN RE-
VERSE in BASIC PROCEDURES.
- Check that the area behind you is clear. While looking backwards,
slowly reverse and stop by releasing throttle and using the brake,
just like when operating normally.
- Keep your speed low and do not back up for long distances.
- Repeat the reverse and stop in straight line until you get
comfortable.
- Once you are comfortable with reversing in straight line, you can
slowly reverse while turning the handle bar.
40
SAFETY INFORMATION
FUELING
Fuel is flammable and explosive under certain conditions.
- Never use an open flame to check fuel level.
- Never smoke or allow flame or spark in vicinity.
- Always proceed in a well-ventilated area.
Fueliing Procedure
1. Stop engine and engage the parking brake.
2. Have operator and passenger get off the vehicle. Do not sit or lean
on seat when fuel tank cap is not properly installed.
3. Unscrew slowly the fuel reservoir cap counterclockwise to stabilize
pressure before removing it.
NOTE:
A short whistling sound is normal.
4. Insert the spout into the filler neck.
5. Pour fuel slowly so that air can escape from the tank and prevent
fuel flow back. Be careful not to spill fuel.
6. Stop filling after the release of the gas pump nozzle handle and
wait a moment before removing the spout. Do not retract the gas
pump nozzle to put more fuel into the fuel tank. Do not overfill.
7. Reinstall the fuel cap and fully tighten clockwise.
8. Always wipe off any small fuel spillage from the vehicle. If a major
spillage occurs, remove side panels to remove fuel vapors from en-
gine compartment before starting.
9. Before getting on the way don’t forget to disengage the parking
brake.
10. Never top up the fuel tank before placing the vehicle in a warm
area. As temperature increases, fuel expands and may overflow.
SAFETY INFORMATION
41
INJECTION OIL
Injection Oil is flammable when heated.
- Never use an open flame to check oil level.
- Never smoke or allow flame or spark in vicinity.
- Always proceed in a well-ventilated area.
Refer to Injection Oil in Vehicle Information to add oil.
42
SAFETY INFORMATION
TRANSPORTING THE VEHICLE
Make sure that oil reservoir and fuel tank caps are properly installed.
Many type of trailer can be used to transport a vehicle. Tilt-bed, flatbed
or enclosed trailers, no matter the trailer used, always proceed with
precaution when driving the vehicle on and off of it.
Always anchor the vehicle securely, front and rear, even on short
hauls. Use appropriate tie-down straps only. Make sure all equipment
is securely fastened. Cover the vehicle to prevent road grime from
causing damage.
Make sure the trailer meets state or provincial requirements. Ensure
the hitch and safety chains are secured, and the brake, turn indicators
and clearance lights are functional.
WARNING
Make sure all seats, accessories and cargo are properly se-
cured, or remove it to prevent from falling on the road and cre-
ating a hazard for following vehicles.
WARNING
Do not tow the vehicle facing backwards. If the vehicle is towed
facing backwards, the wind may cause damage to the wind-
shield or even loss of the windshield.
SAFETY INFORMATION
43
IMPORTANT ON-PRODUCT LABELS
(CANADA/UNITED STATES)
Vehiiclle Safety Labels
These labels are affixed to the vehicle for the safety of the operator,
passenger or bystanders.
The following labels are on your vehicle and they should be consid-
ered permanent parts of the vehicle. If missing or damaged, the decals
can be replaced free of charge. Visit an authorized BRP snowmobile
dealer.
NOTE:
In the event of any discrepancy between this guide and the vehicle,
the safety labels on the vehicle have precedence over the labels in this
guide.
Shock Absorber - Warning Label
SHOCK ABSORBERS - WARNING LABEL
44
SAFETY INFORMATION
IMPORTANT ON-PRODUCT LABELS (CANADA/UNITED STATES)
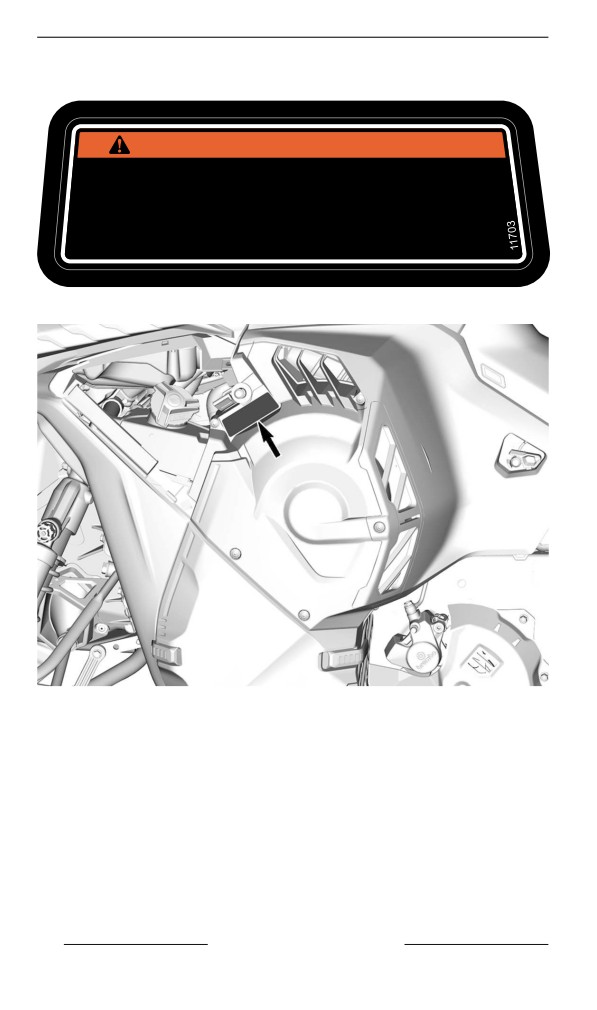
Disconnect Fuel Injectors - Warning Label
DISCONNECT FUEL INJECTORS - WARNING LABEL
LABEL LOCATION
SAFETY INFORMATION
45
IMPORTANT ON-PRODUCT LABELS (CANADA/UNITED STATES)
Pulley Guard - Warning Label
WARNING / AVERTISSEMENT
This guard must ALWAYS be in place when the engine is
running. Beware of rotating parts, they could cause injuries
or catch your clothing.
Ce protecteur doit TOUJOURS être en place lorsque le
moteur tourne, les pièces en rotation peuvent provoquer
des blessures ou prendre dans vos vêtements.
PULLEY GUARD – WARNING LABEL
LABEL LOCATION
46
SAFETY INFORMATION
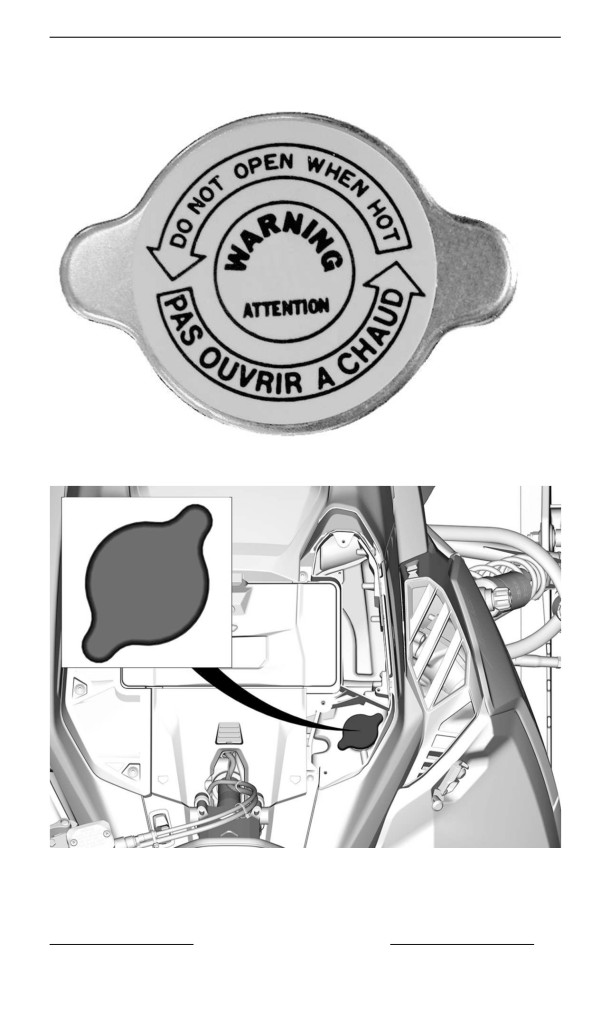
IMPORTANT ON-PRODUCT LABELS (CANADA/UNITED STATES)
Do Not Open When Hot - Warning Label
DO NOT OPEN WHEN HOT - WARNING LABEL
LABEL LOCATION – TURBO ENGINE
SAFETY INFORMATION
47
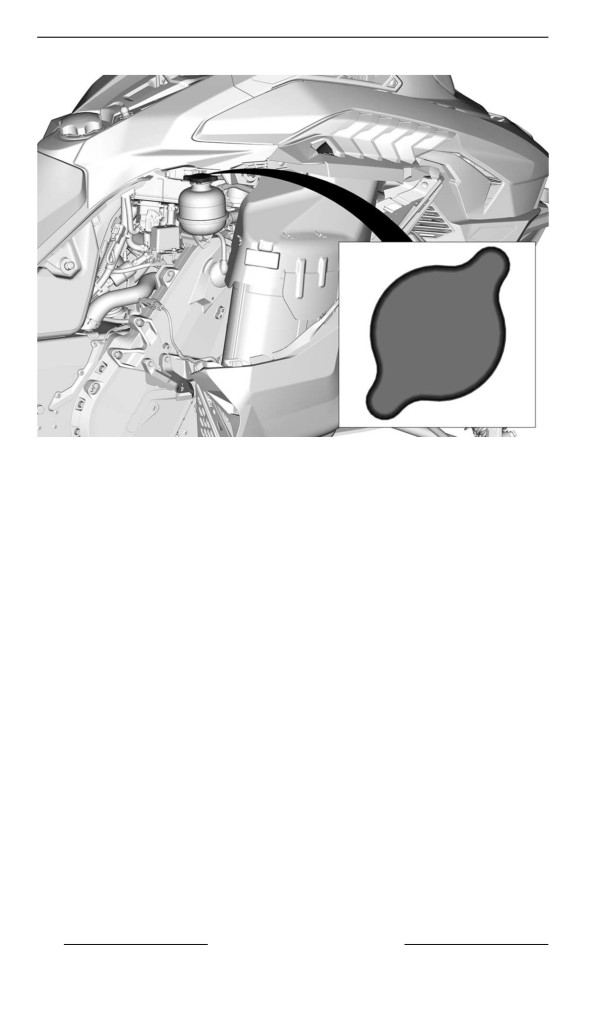
IMPORTANT ON-PRODUCT LABELS (CANADA/UNITED STATES)
TYPICAL – LABEL LOCATION – EXCEPT TURBO ENGINE
48
SAFETY INFORMATION
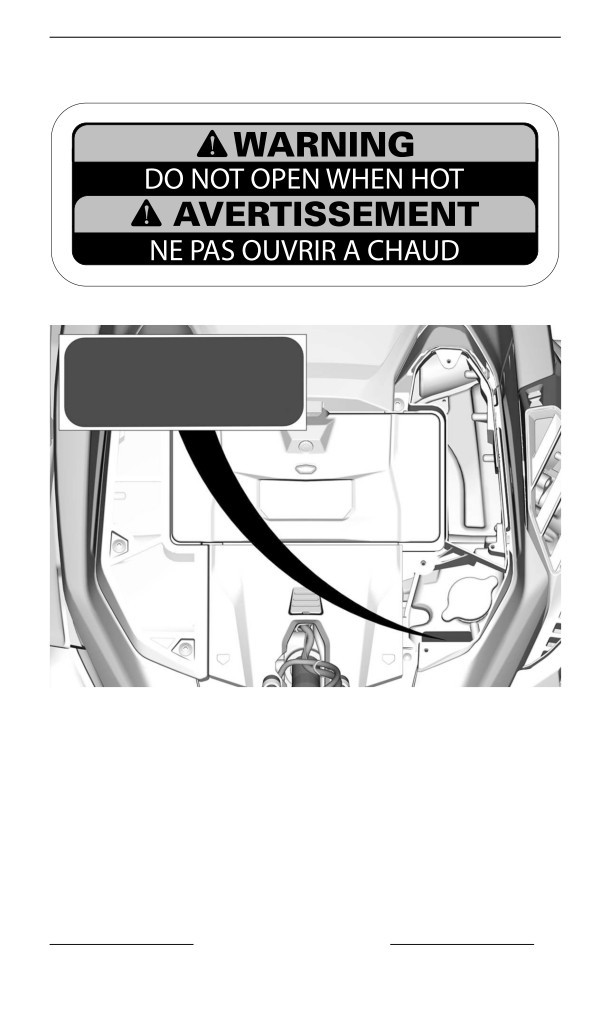
IMPORTANT ON-PRODUCT LABELS (CANADA/UNITED STATES)
Do Not Open When Hot - Warning Label
DO NOT OPEN WHEN HOT – WARNING LABEL
LABEL LOCATION – TURBO ENGINE
SAFETY INFORMATION
49
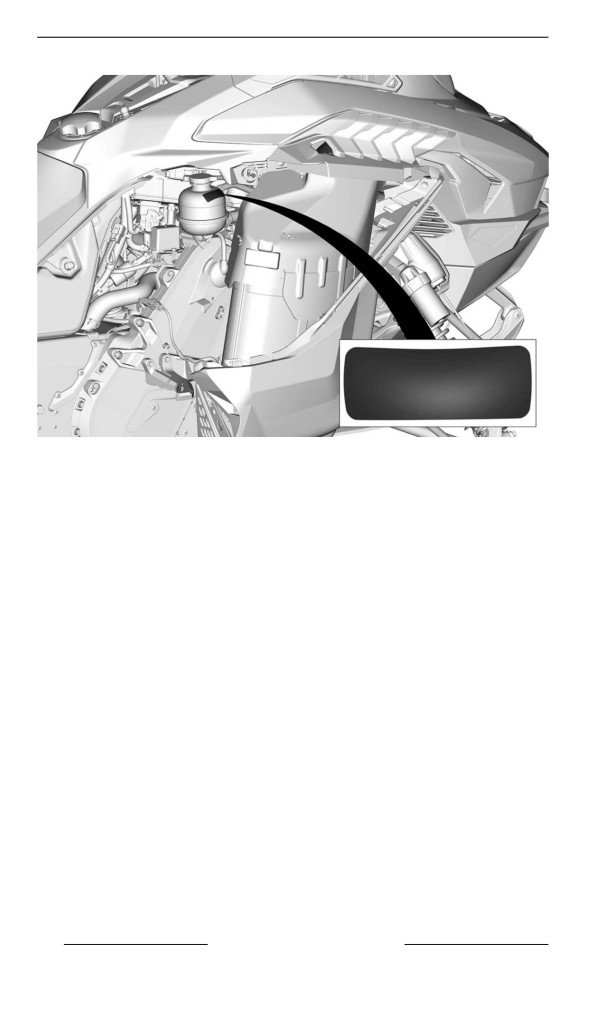
IMPORTANT ON-PRODUCT LABELS (CANADA/UNITED STATES)
TYPICAL – LABEL LOCATION – EXCEPT TURBO ENGINE
50
SAFETY INFORMATION
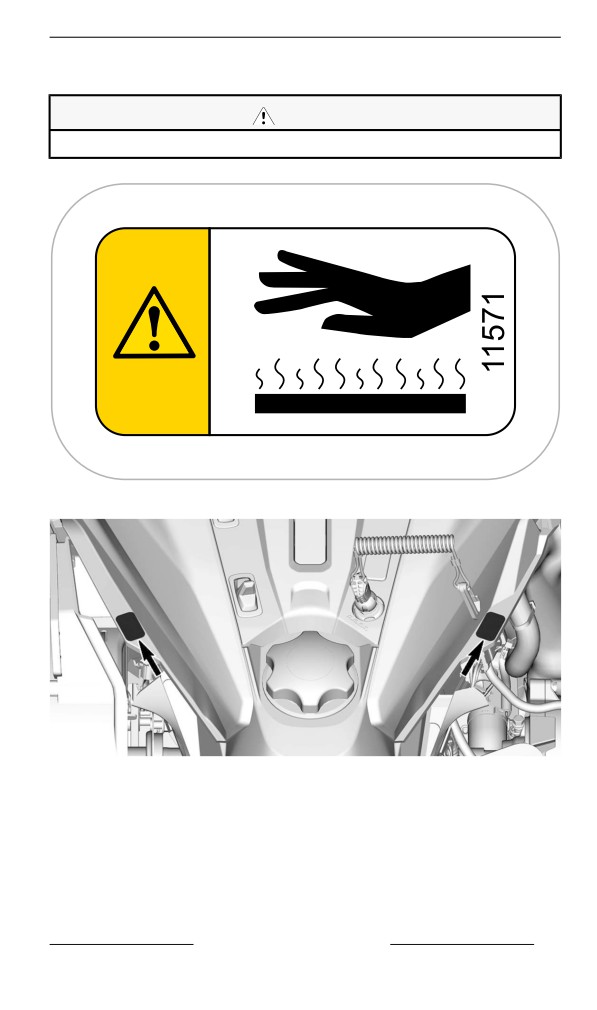
IMPORTANT ON-PRODUCT LABELS (CANADA/UNITED STATES)
Beware of Hot Parts - Caution Label
CAUTION
Beware of hot parts.
BEWARE OF HOT PARTS - CAUTION LABEL
TYPICAL – LABEL LOCATION
SAFETY INFORMATION
51
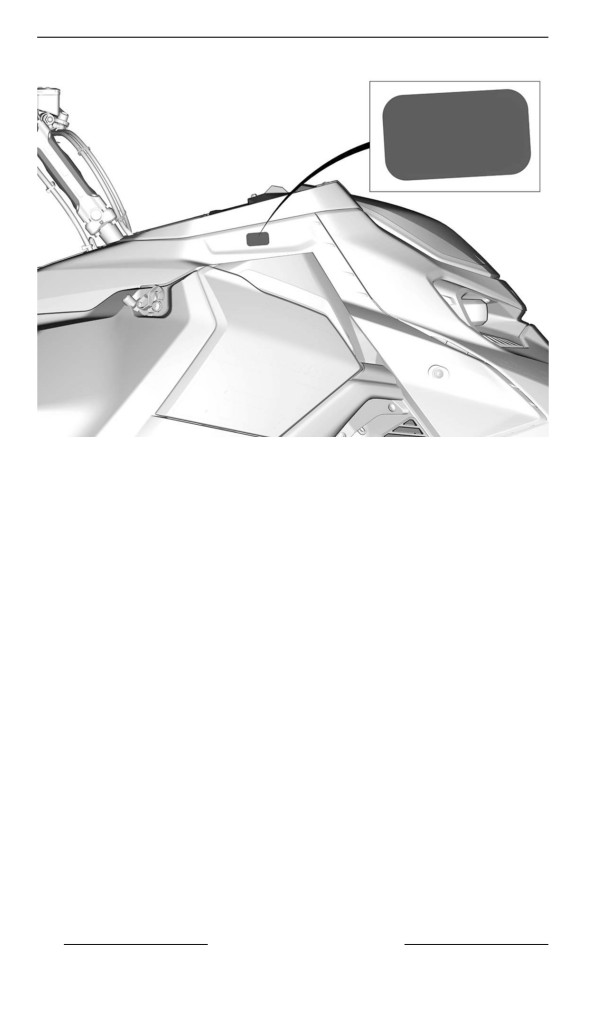
IMPORTANT ON-PRODUCT LABELS (CANADA/UNITED STATES)
52
SAFETY INFORMATION
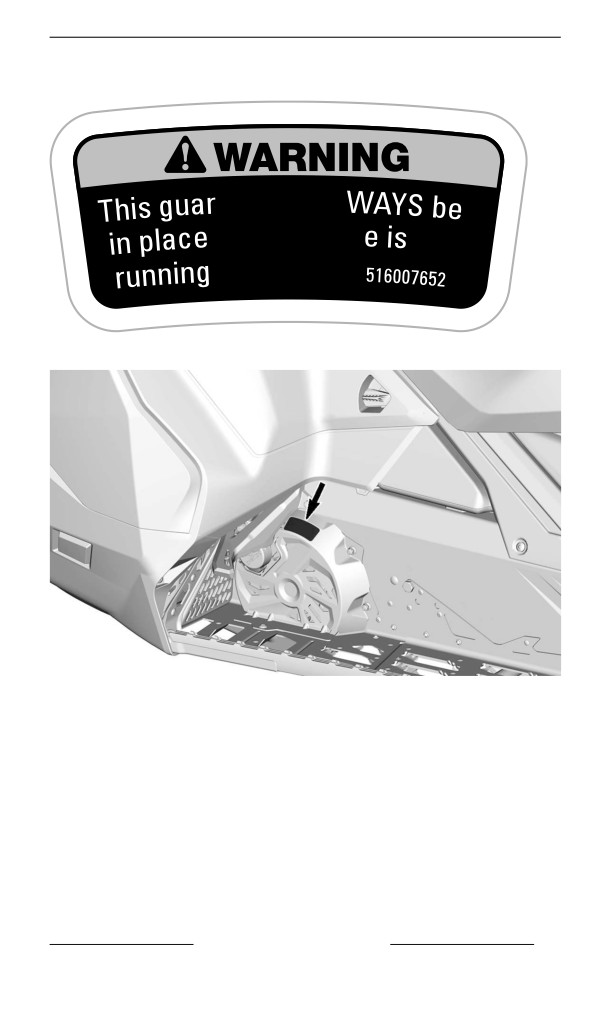
IMPORTANT ON-PRODUCT LABELS (CANADA/UNITED STATES)
Disk Guard - Warning Label
d must AL
when engin
DISK GUARD – WARNING LABEL
TYPICAL – LABEL LOCATION
SAFETY INFORMATION
53
IMPORTANT ON-PRODUCT LABELS (CANADA/UNITED STATES)
Starting Procedure - Warning Label
WARNING
• Read and understand all safety labels, locate and readoperator’s guide and watch the
safety video (using the QR code link or visit Ski-Doo web site) before operation.
• Get familiar with your vehicle. Inexperienced riders may
overlook risks and be surprised by vehicle’s specific
behavior and terrain conditions. Ride slowly.
• Excessive speed and reckless driving can kill.
• ALWAYS adjust your speed according to snow conditions and circumstances.
• Steering control and braking ability may be reduced on hard-pack snow,
ice or roads. Reduce speed & allow more space to stop or turn.
• Respect laws on minimum operator age. Manufacturer recommends
a minimum operating age of 16 years old.
• Never open side panels or hood while engine is running or if vehicle
is in motion. Ensure to remove tether cord from post before opening those.
BEFORE STARTING:
Attach tether cord to your clothing. Check proper operation of the throttle
and brake levers each time before starting; they must return to their initial
position when released. Apply parking brake. Turn handlebars all the way
in both directions to check for interference and insure free operation.
AFTER STARTING :
Pull-out tether cord to check if engine shuts off. Re-start and push in
the emergency engine stop switch to check if engine shuts off.
Disengage parking brake before riding to avoid brake fading.
When riding with a passenger:
• Braking ability and steering control are reduced.
• Decrease speed and allow extra space to manoeuver.
• Adjust suspension according to weight.
Remember: you are responsible for the safety of your passenger.
All drivers and passengers must read the following:
• Avoid surprises, be on the look out for the unexpected.
• Operate defensively, scan constantly for people,
objects, conditions and upcoming vehicles.
• Avoid thin ice / open water.
• Use extra caution whenever off-trail.
• Always wear an approved helmet and
clothing appropriate for snowmobiling.
• Never ride under the influence of
alcohol or drugs, even as a passenger.
STARTING PROCEDURE - WARNING LABEL
54
SAFETY INFORMATION
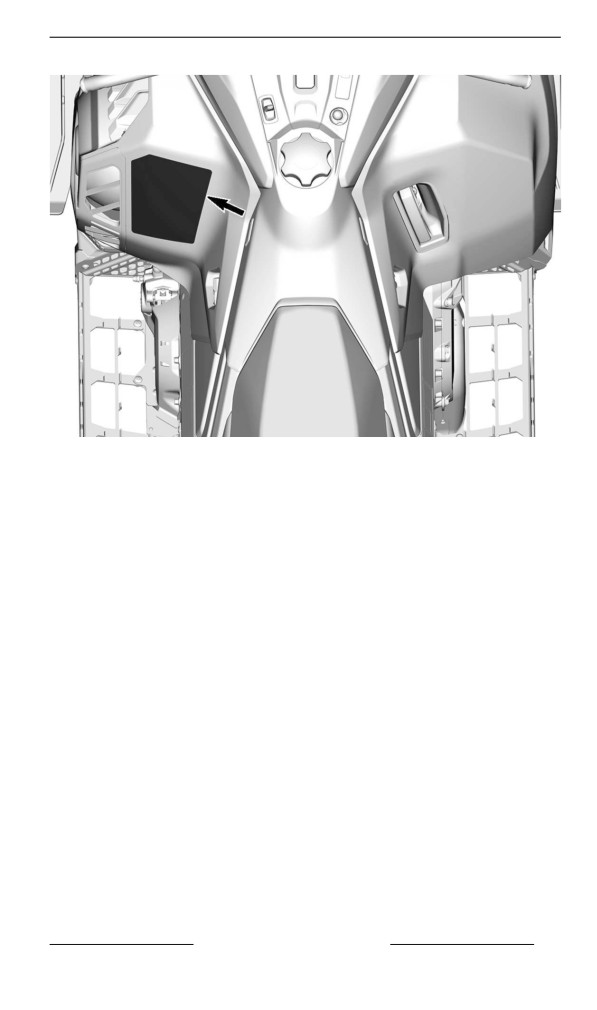
IMPORTANT ON-PRODUCT LABELS (CANADA/UNITED STATES)
LABEL LOCATION
SAFETY INFORMATION
55
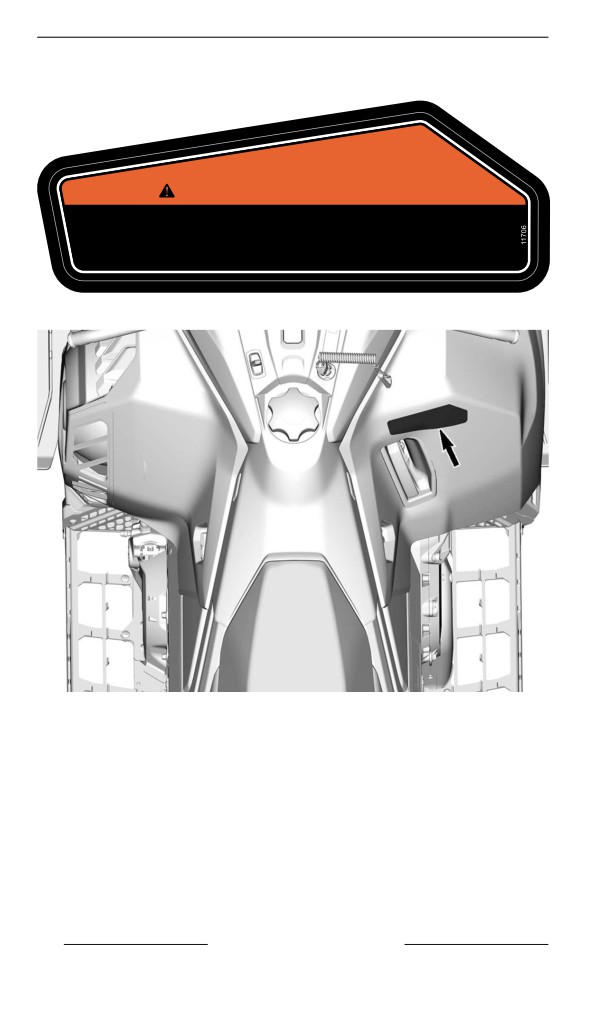
IMPORTANT ON-PRODUCT LABELS (CANADA/UNITED STATES)
Passenger Safety - Warning Label
WARNING / AVERTISSEMENT
This vehicle is designed for one (1) operator and as many passengers as there are
seats with straps or handgrips installed on the vehicle conforming to SSCC standards.
Ce véhicule a été conçu pour un (1) conducteur et autant de passagers qu’il y a de sièges
avec courroies ou poignées installées sur le véhicule et rencontrant la norme SSCC.
PASSENGER SAFETY - WARNING LABEL
LABEL LOCATION
56
SAFETY INFORMATION
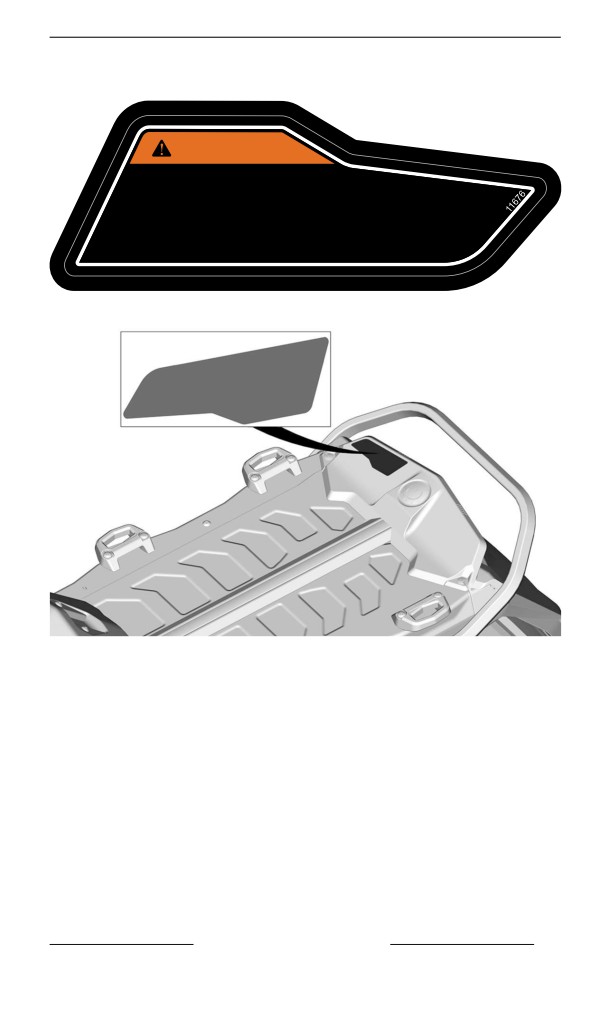
IMPORTANT ON-PRODUCT LABELS (CANADA/UNITED STATES)
Maximum Cargo Load and Towing Capacity – Warning Label
WARNING
Never sit in cargo area
Exceeding maximum cargo load may affect steering control,
braking ability and cause permanent damage.
Maximum cargo load (including tongue weight): 15,8 kg (35 lb) 155 N
Maximum towing capacity: 260 kg (573 lb) 2550 N
CARGO AREA – WARNING LABEL
LABEL LOCATION
SAFETY INFORMATION
57
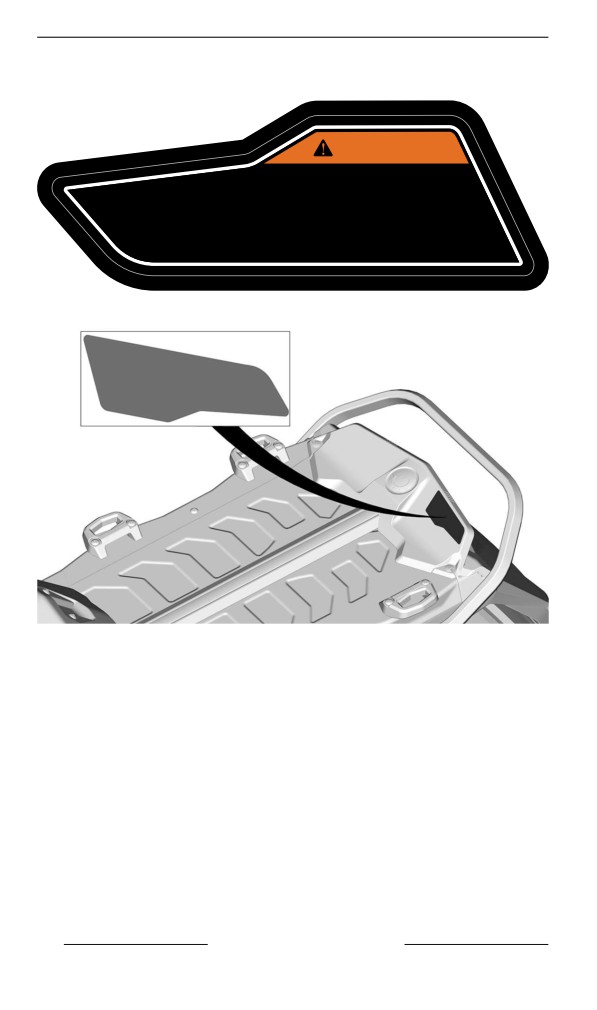
IMPORTANT ON-PRODUCT LABELS (CANADA/UNITED STATES)
Rotating Track - Warning Label
WARNING
Never stand behind or near a rotating track.
Debris could be projected causing severe injuries.
Before removing packed snow / ice, stop engine,
tilt and hold vehicle on the side.
11675
ROTATING TRACK – WARNING LABEL
LABEL LOCATION
58
SAFETY INFORMATION
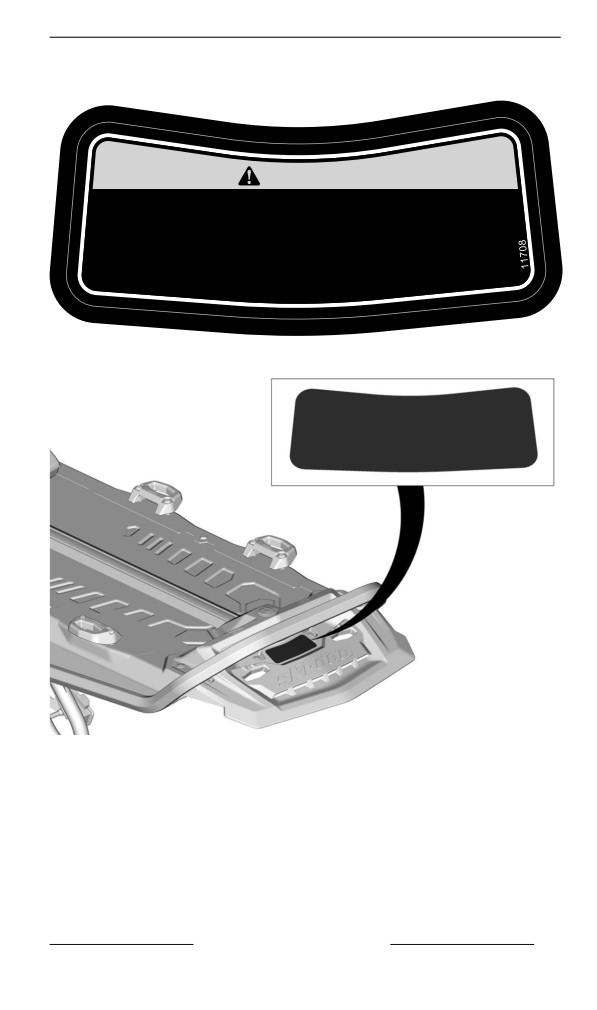
IMPORTANT ON-PRODUCT LABELS (CANADA/UNITED STATES)
Deep Snow Riding - Caution Label
CAUTION
This vehicle is designed for deep snow riding.
In other riding conditions, it is recommended to
install a LinQ Snowflap Extension to reduce snow,
ice and debris projected behind the vehicle while
improving cooling.
DEEP SNOW RIDING - CAUTION LABEL
LABEL LOCATION
SAFETY INFORMATION
59
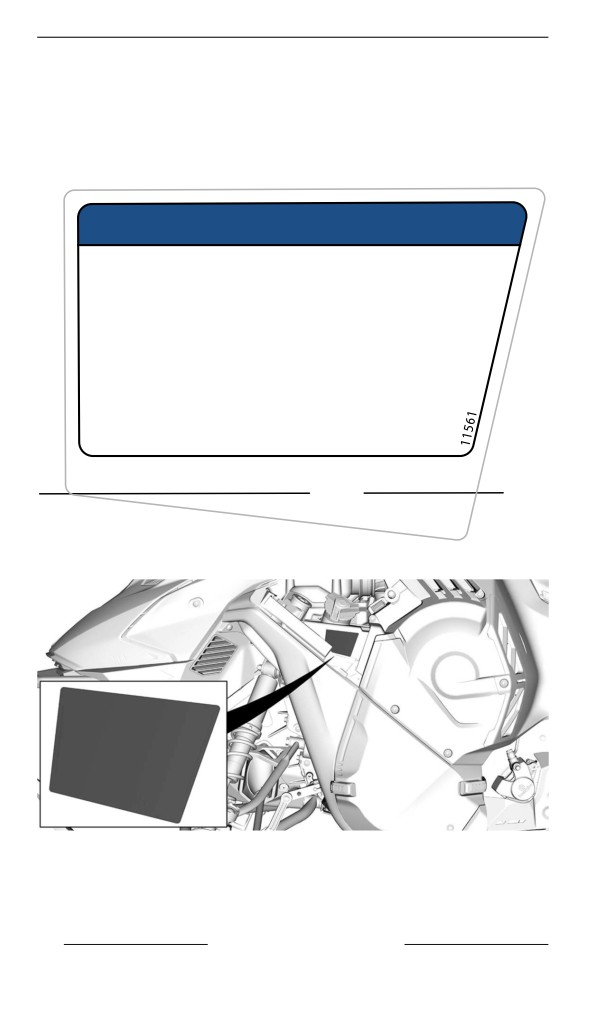
IMPORTANT ON-PRODUCT LABELS (CANADA/UNITED STATES)
Techniicall Information Labells
Recommended Oil - Notice Label
Refer to the Technical Specifications for appropriate injection oil type
for your vehicle engine.
NOTICE
The engine of this snowmobile has been
developed and validated using the BRP
XPS approved lubricant. BRP recommends
the use of its XPS approved lubricant or
equivalent. Damages caused by oil which
is not suitable for this engine may not be
covered by the BRP limited warranty.
See the operator’s guide.
3/4
RECOMMENDED OIL - NOTICE LABEL
TYPICAL – LABEL LOCATION
60
SAFETY INFORMATION
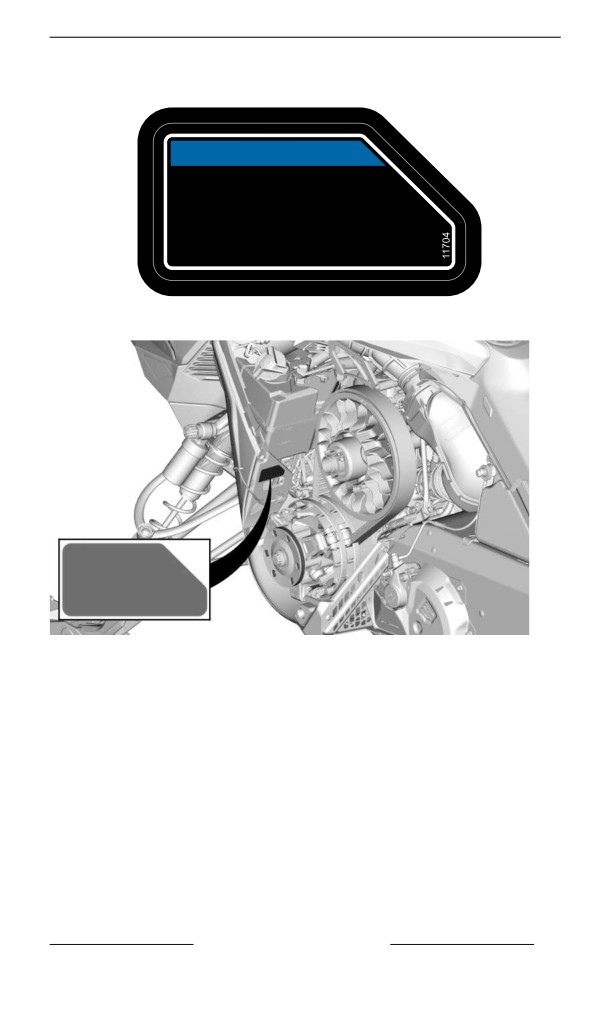
IMPORTANT ON-PRODUCT LABELS (CANADA/UNITED STATES)
Drive Pulley Tightening Torque - Notice Label
NOTICE
Drive pulley bolt recommended torque:
115 -125 Nm ( 85 - 92 lbf•ft )
Not applying the recommended torque may
result in a major failure of the drive pulley
and the engine. Refer to the shop manual
for the complete assembly procedure.
DRIVE PULLEY TIGHTENING TORQUE – NOTICE LABEL
LABEL LOCATION
SAFETY INFORMATION
61
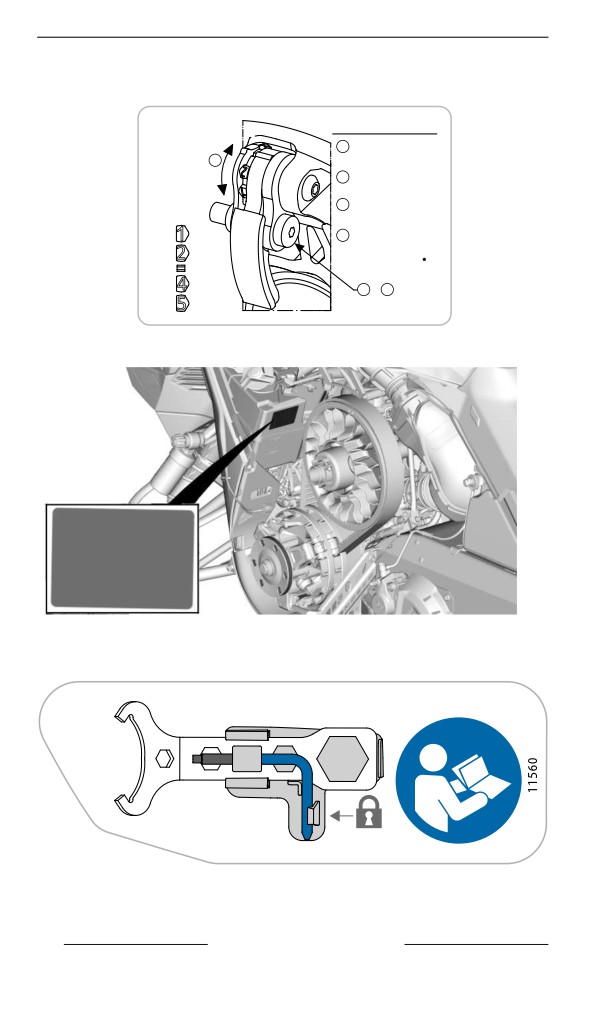
IMPORTANT ON-PRODUCT LABELS (CANADA/UNITED STATES)
Clicker Adjustment - Notice Label
LOWER RPM
CLICKER ADJUSTMENT
( 1 & 2 )
1
-REMOVE
3
TETHER CORD
2
-LOOSEN BOLT
HIGHER RPM
( 4 & 5 )
3
-ADJUST CLICKER
1
1
4 -TORQUE BOLT
( 7 @ 9 Nm )
2
2
( 62 @ 80 lbs in )
3
4
4
2
&
4
5
5
CLICKER ADJUSTMENT - NOTICE LABEL
LABEL LOCATION
Tools - Notice Label
TOOLS - NOTICE LABEL
62
SAFETY INFORMATION
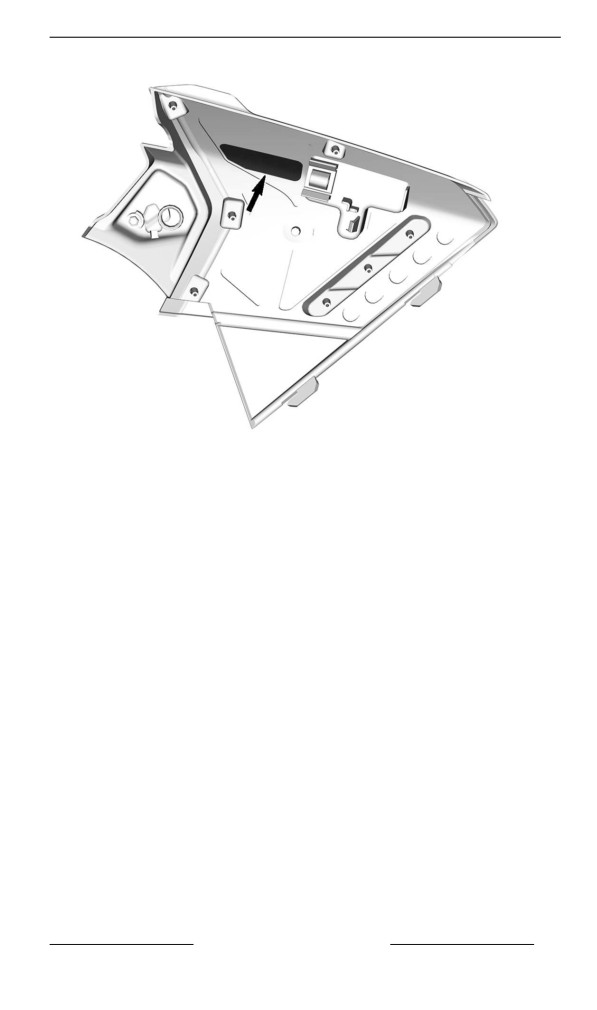
IMPORTANT ON-PRODUCT LABELS (CANADA/UNITED STATES)
LABEL LOCATION – UPPER LH SIDE PANEL
SAFETY INFORMATION
63
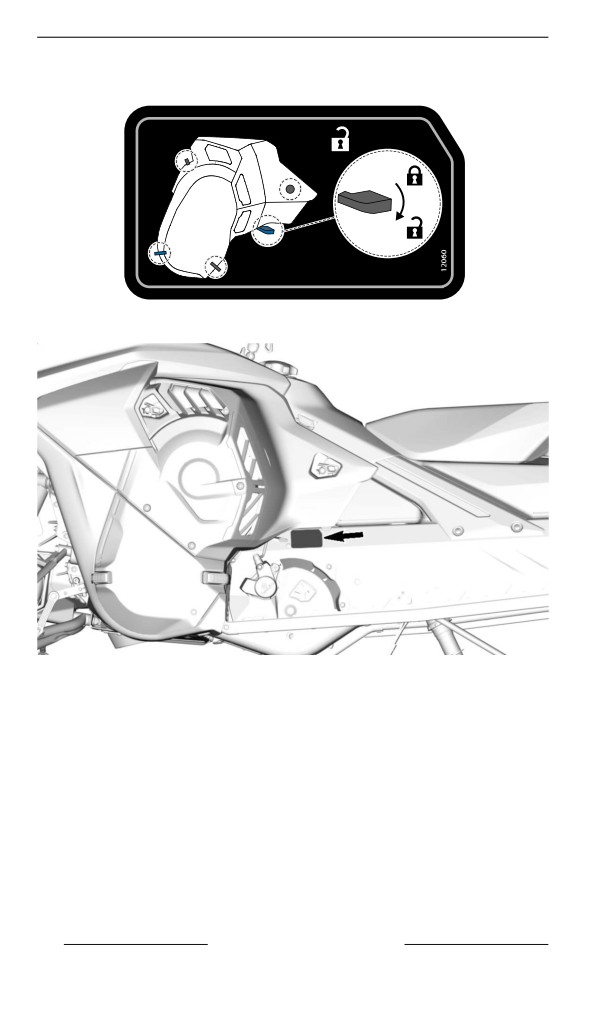
IMPORTANT ON-PRODUCT LABELS (CANADA/UNITED STATES)
LH Side Panel Latch Label
5x
LH SIDE PANEL LATCH LABEL
LABEL LOCATION
64
SAFETY INFORMATION
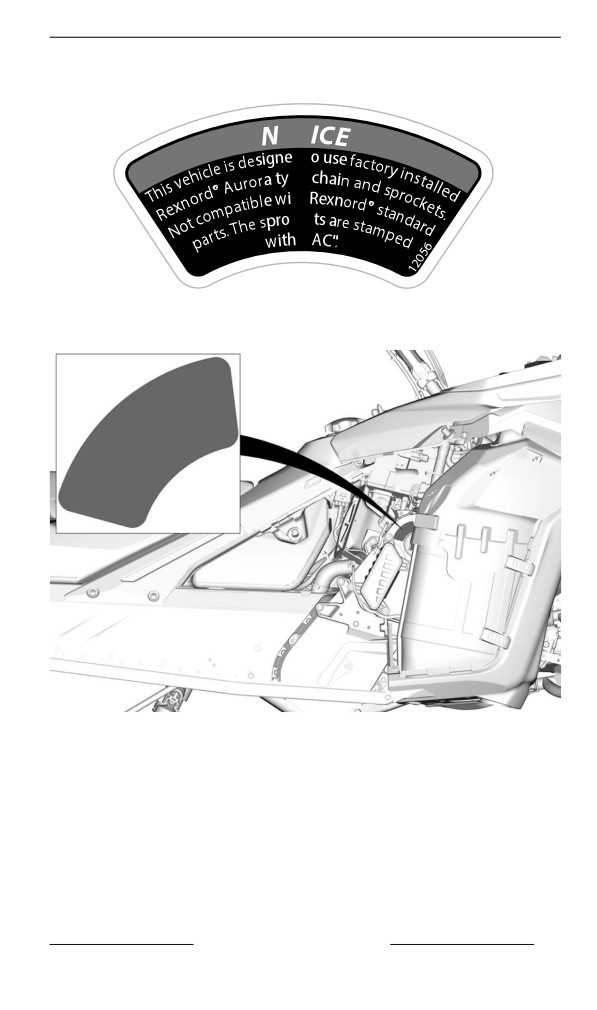
IMPORTANT ON-PRODUCT LABELS (CANADA/UNITED STATES)
Factory Installed Chain and Sprockets - Notice Label
OT
d t
pe
th
cke
"F
FACTORY INSTALLED CHAIN AND SPROCKETS – NOTICE
LABEL
LABEL LOCATION
SAFETY INFORMATION
65
IMPORTANT ON-PRODUCT LABELS (CANADA/UNITED STATES)
Recommended Fuel — Notice Label
Refer to the Technical Specifications for appropriate fuel type for your
vehicle engine.
AKI (RON+MON)/2 OCTANE RATING - NOTICE LABEL
RON OCTANE RATING - NOTICE LABEL
66
SAFETY INFORMATION
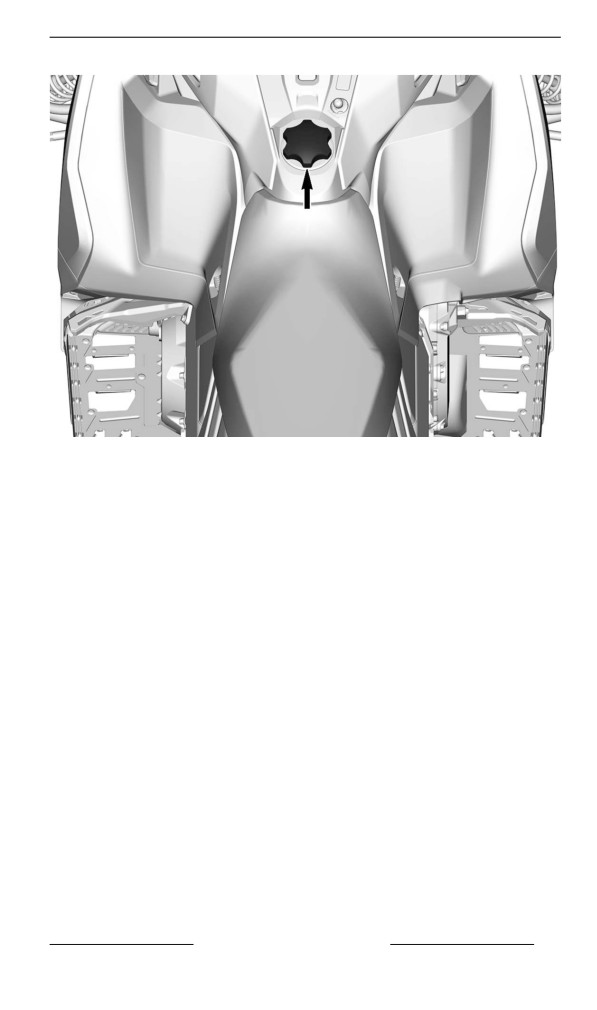
IMPORTANT ON-PRODUCT LABELS (CANADA/UNITED STATES)
SAFETY INFORMATION
67
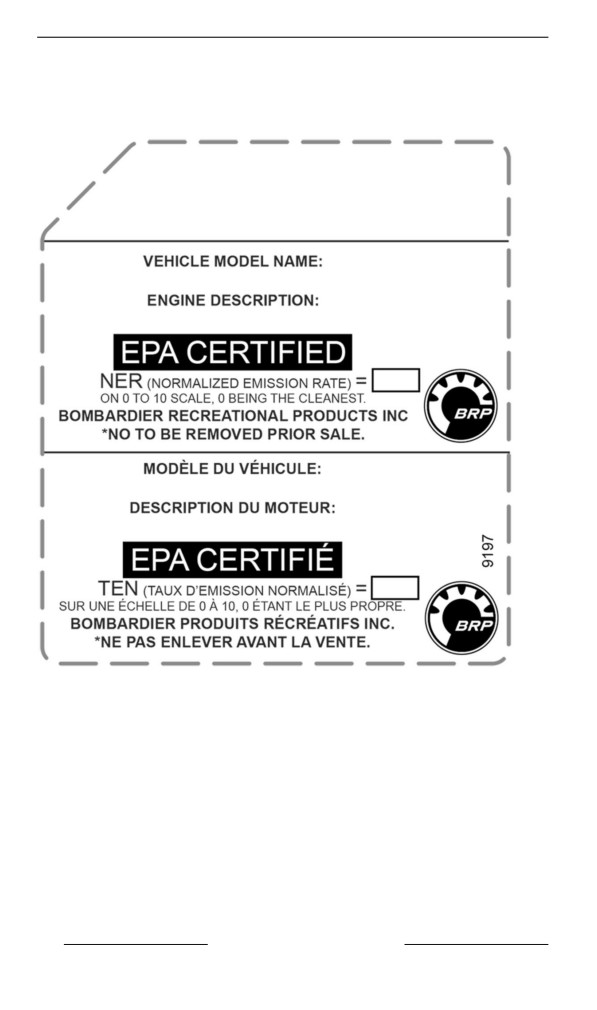
IMPORTANT ON-PRODUCT LABELS (CANADA/UNITED STATES)
Hang Tag(s)
EPA Certified Hang Tag
EPA CERTIFIED HANG TAG
68
SAFETY INFORMATION
IMPORTANT ON-PRODUCT LABELS (CANADA/UNITED STATES)
California Proposition 65 Warning
CALIFORNIA PROPOSITION 65 WARNING
SAFETY INFORMATION
69
IMPORTANT ON-PRODUCT LABELS (CANADA/UNITED STATES)
Altitude Calibration Hang Tag
70
SAFETY INFORMATION
IMPORTANT ON-PRODUCT LABELS (CANADA/UNITED STATES)
SAFETY INFORMATION
71
IMPORTANT ON-PRODUCT LABELS (ALL
COUNTRIES EXCEPT CANADA/UNITED
STATES)
This vehicle comes with a hang tag and labels containing important
safety information.
Any person who rides this vehicle should read and understand this in-
formation before riding.
Vehiiclle Safety Labels
These labels are affixed to the vehicle for the safety of the operator,
passenger or bystanders.
The following labels are on your vehicle and they should be consid-
ered permanent parts of the vehicle. If missing or damaged, the decals
can be replaced free of charge. Visit an authorized BRP snowmobile
dealer.
NOTE:
In the event of any discrepancy between this guide and the vehicle,
the safety labels on the vehicle have precedence over the labels in this
guide.
Shock Absorber - Warning Label
SHOCK ABSORBERS - WARNING LABEL
72
SAFETY INFORMATION
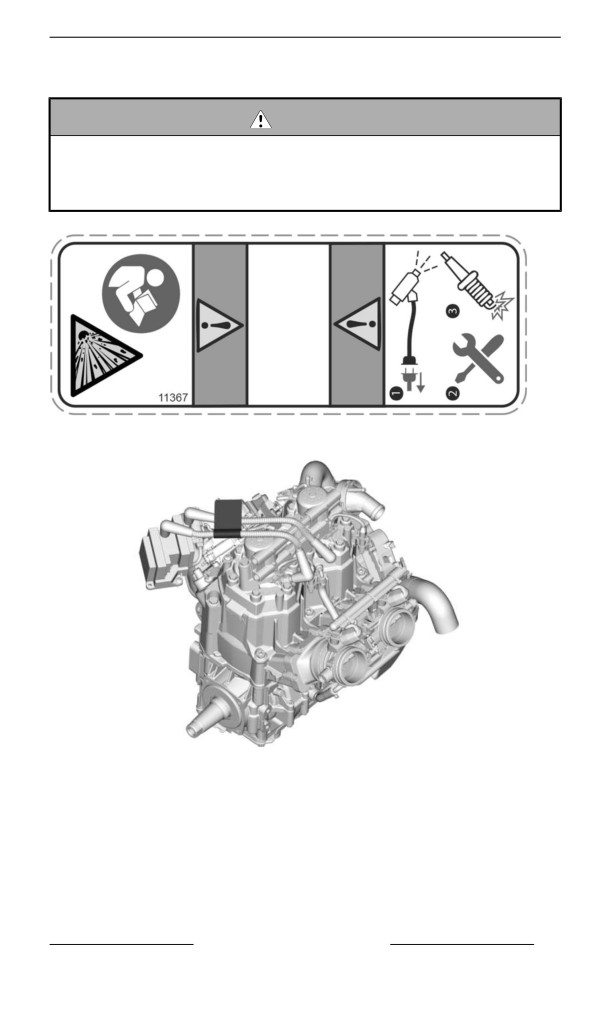
IMPORTANT ON-PRODUCT LABELS (ALL COUNTRIES EXCEPT CANADA/
UNITED STATES)
Disconnect Fuel Injectors - Warning Label
WARNING
– Always electronically disconnect both fuel injectors prior to
testing for ignition spark.
– Otherwise fuel vapors may ignite in presence of a spark cre-
ating a fire hazard.
DISCONNECT FUEL INJECTORS - WARNING LABEL
LABEL LOCATION
SAFETY INFORMATION
73
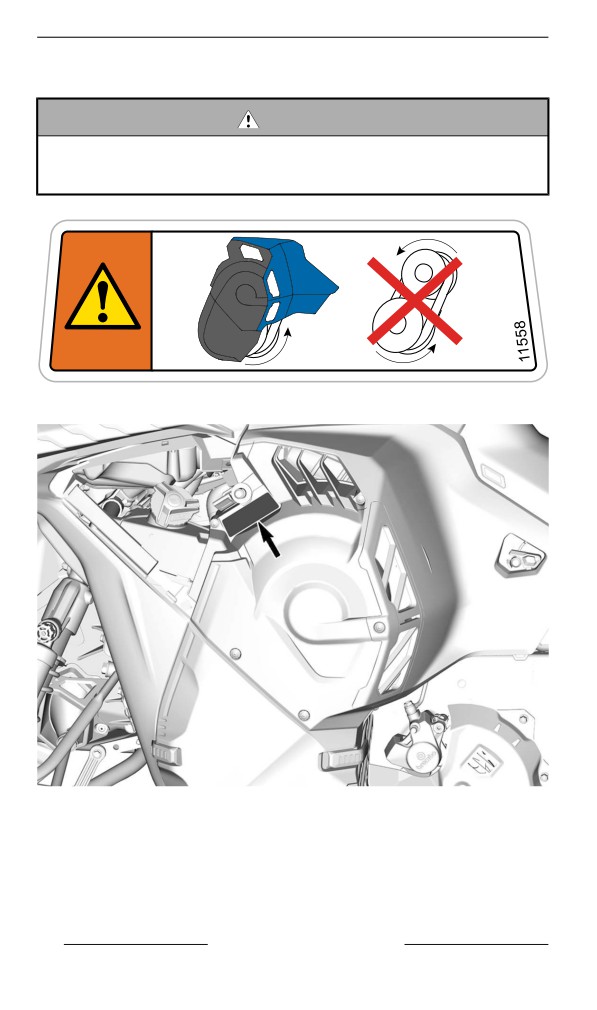
IMPORTANT ON-PRODUCT LABELS (ALL COUNTRIES EXCEPT CANADA/
UNITED STATES)
Pulley Guard - Warning Label
WARNING
This guard must ALWAYS be in place when engine is running.
Beware of rotating parts, they could cause injuries or catch
your clothing.
PULLEY GUARD – WARNING LABEL (PICTO)
LABEL LOCATION
74
SAFETY INFORMATION
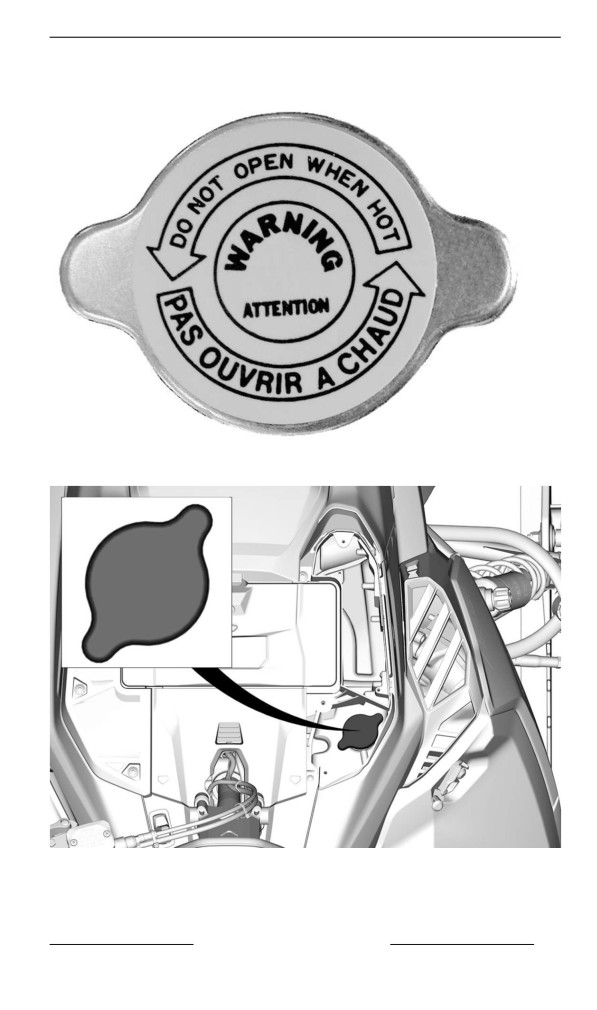
IMPORTANT ON-PRODUCT LABELS (ALL COUNTRIES EXCEPT CANADA/
UNITED STATES)
Do Not Open When Hot - Warning Label
DO NOT OPEN WHEN HOT - WARNING LABEL
LABEL LOCATION – TURBO ENGINE
SAFETY INFORMATION
75
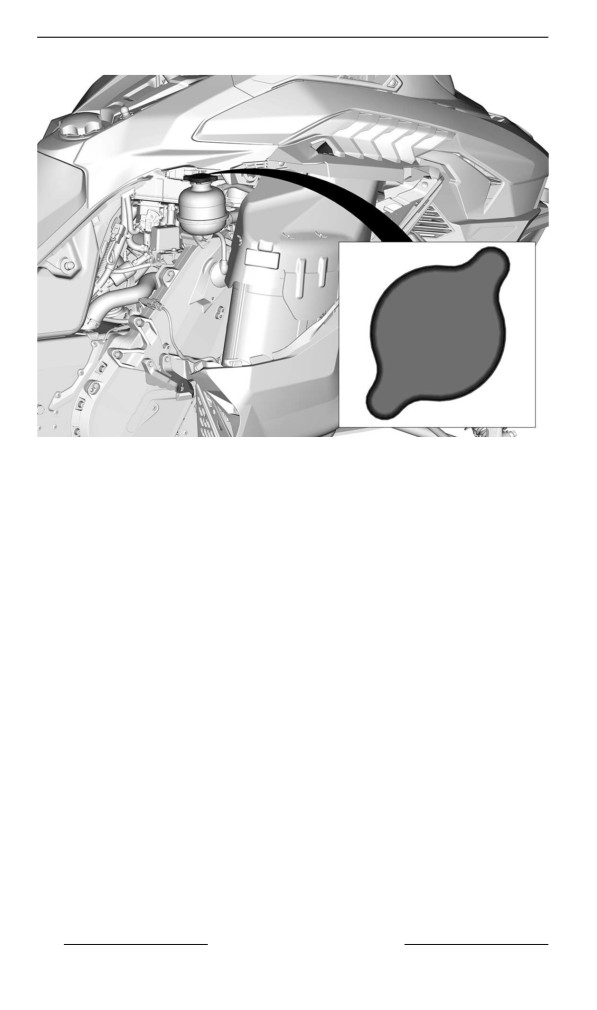
IMPORTANT ON-PRODUCT LABELS (ALL COUNTRIES EXCEPT CANADA/
UNITED STATES)
TYPICAL – LABEL LOCATION – EXCEPT TURBO ENGINE
76
SAFETY INFORMATION
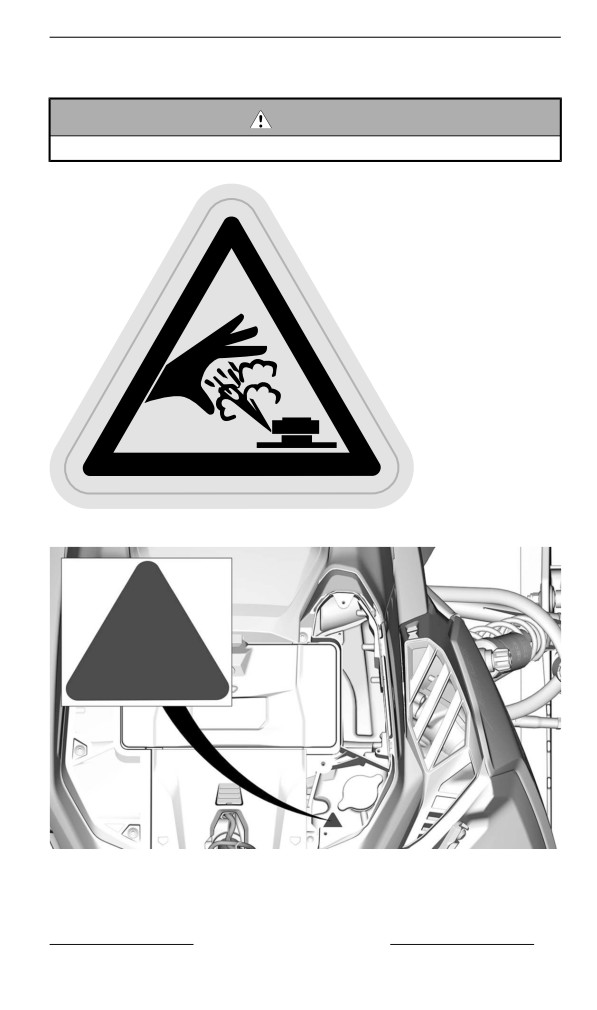
IMPORTANT ON-PRODUCT LABELS (ALL COUNTRIES EXCEPT CANADA/
UNITED STATES)
Do Not Open When Hot - Warning Label
WARNING
Do not open when hot.
516009935
DO NOT OPEN WHEN HOT- WARNING LABEL
LABEL LOCATION – TURBO ENGINE
SAFETY INFORMATION
77
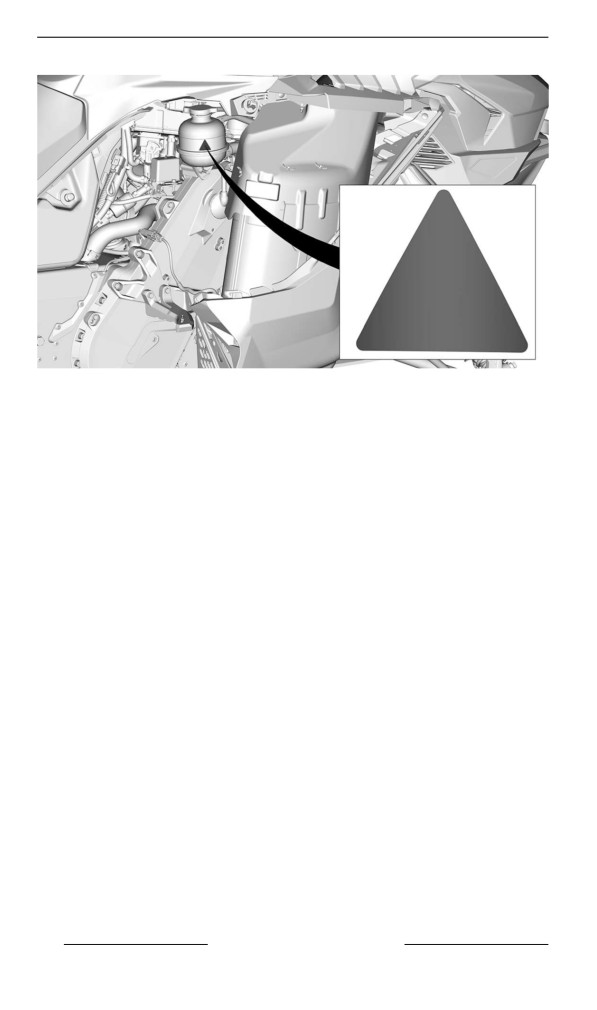
IMPORTANT ON-PRODUCT LABELS (ALL COUNTRIES EXCEPT CANADA/
UNITED STATES)
TYPICAL – LABEL LOCATION – EXCEPT TURBO ENGINE
78
SAFETY INFORMATION
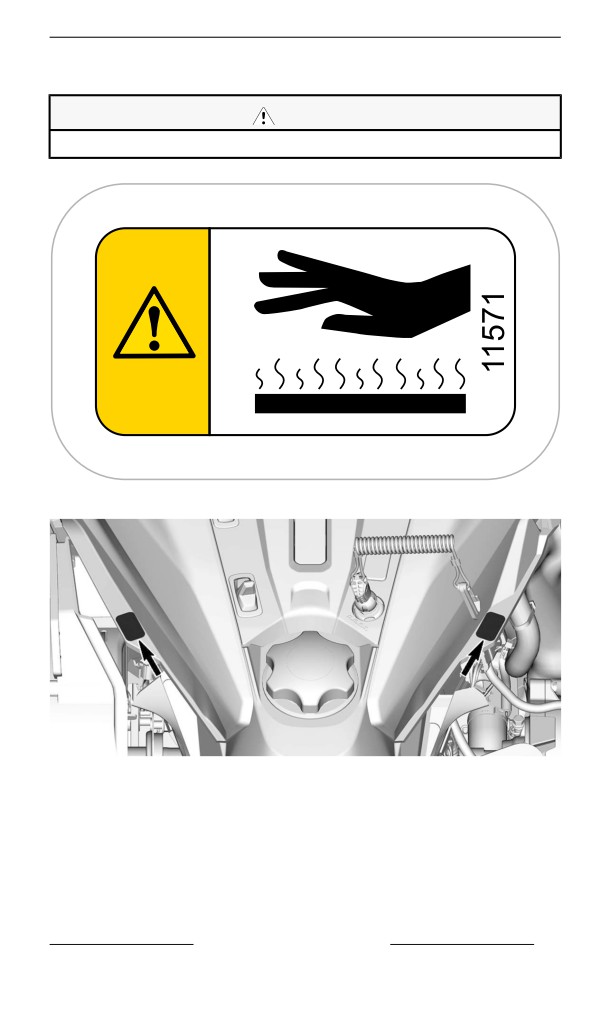
IMPORTANT ON-PRODUCT LABELS (ALL COUNTRIES EXCEPT CANADA/
UNITED STATES)
Beware of Hot Parts - Caution Label
CAUTION
Beware of hot parts.
BEWARE OF HOT PARTS - CAUTION LABEL
TYPICAL – LABEL LOCATION
SAFETY INFORMATION
79
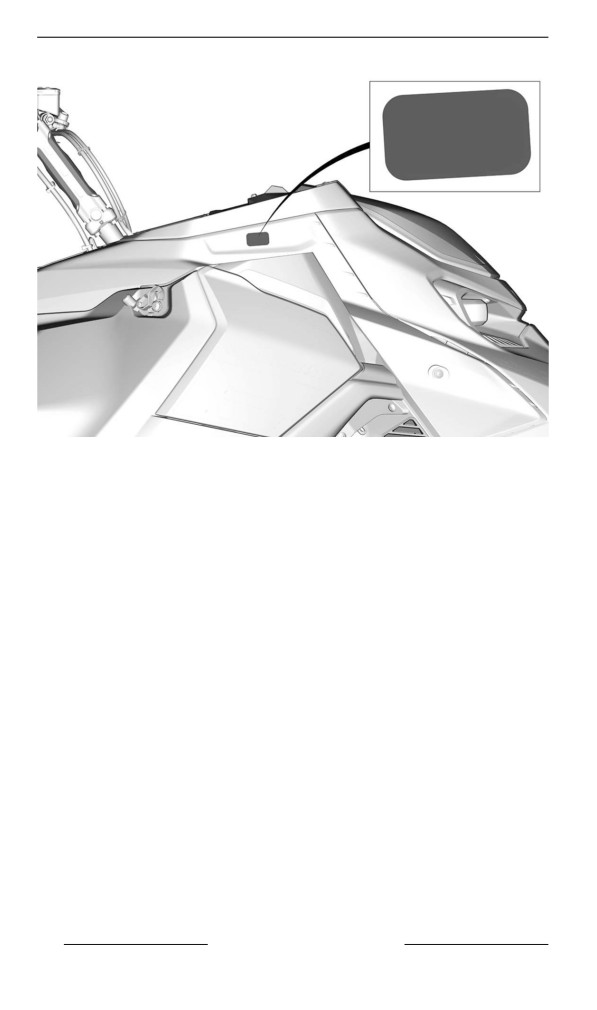
IMPORTANT ON-PRODUCT LABELS (ALL COUNTRIES EXCEPT CANADA/
UNITED STATES)
80
SAFETY INFORMATION
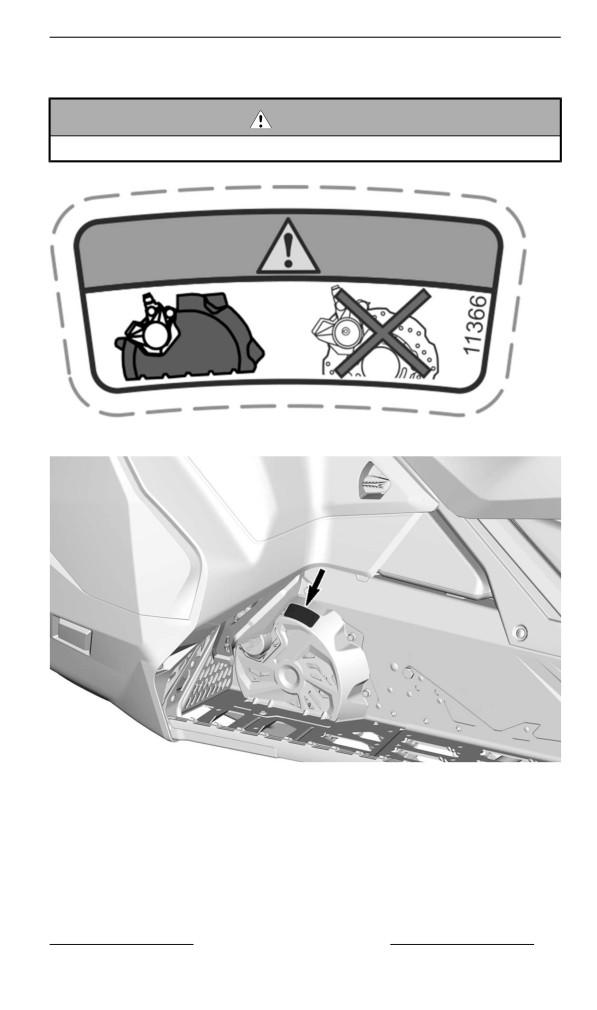
IMPORTANT ON-PRODUCT LABELS (ALL COUNTRIES EXCEPT CANADA/
UNITED STATES)
Disk Guard - Warning Label
WARNING
This guard must ALWAYS be in place when engine is running.
DISK GUARD – WARNING LABEL
TYPICAL – LABEL LOCATION
SAFETY INFORMATION
81
IMPORTANT ON-PRODUCT LABELS (ALL COUNTRIES EXCEPT CANADA/
UNITED STATES)
Starting Procedure - Warning Label
WARNING
– Read and understand all safety labels, locate and read oper-
ator’s guide and watch the safety video (using the QR code
link or visit Ski-Doo web site) before operation.
– Get familiar with your vehicle. Inexperienced riders may
overlook risks and be surprised by vehicle’s specific behav-
ior and terrain conditions. Ride slowly.
– Excessive speed and reckless driving can kill.
– ALWAYS adjust your speed according to snow conditions
and circumstances.
– Steering control and braking ability may be reduced on
hard-pack snow, ice or roads. Reduce speed & allow more
space to stop or turn.
– Respect laws on minimum operator age. Manufacturer rec-
ommends a minimum operating age of 16 years old.
– Never open side panels or hood while engine is running or if
vehicle is in motion. Ensure to remove tether cord from post
before opening those.
Before Starting:
Attach tether cord to your clothing. Check proper operation of
the throttle and brake levers each time before starting; they
must return to their initial position when released. Apply park-
ing brake. Turn handlebars all the way in both directions to
check for interference and insure free operation.
After Starting:
Pull-out tether cord to check if engine shuts off. Re-start and
push in the emergency engine stop switch to check if engine
shuts off. Disengage parking brake before riding to avoid brake
fading.
When riding with a passenger:
– Braking ability and steering control are reduced.
– Decrease speed and allow extra space to manoeuver.
– Adjust suspension according to weight.
Remember: you are responsible for the safety of your passen-
ger. All drivers and passengers must read the following:
– Avoid surprises, be on the look out for the unexpected.
– Operate defensively, scan constantly for people, objects,
conditions and upcoming vehicles.
– Avoid thin ice / open water.
– Use extra caution whenever off-trail.
– Always wear an approved helmet and clothing appropriate
for snowmobiling.
– Never ride under the influence of alcohol or drugs, even as a
passenger.
82
SAFETY INFORMATION
IMPORTANT ON-PRODUCT LABELS (ALL COUNTRIES EXCEPT CANADA/
UNITED STATES)
16+
2
STARTING PROCEDURE - WARNING LABEL (PICTO)
SAFETY INFORMATION
83
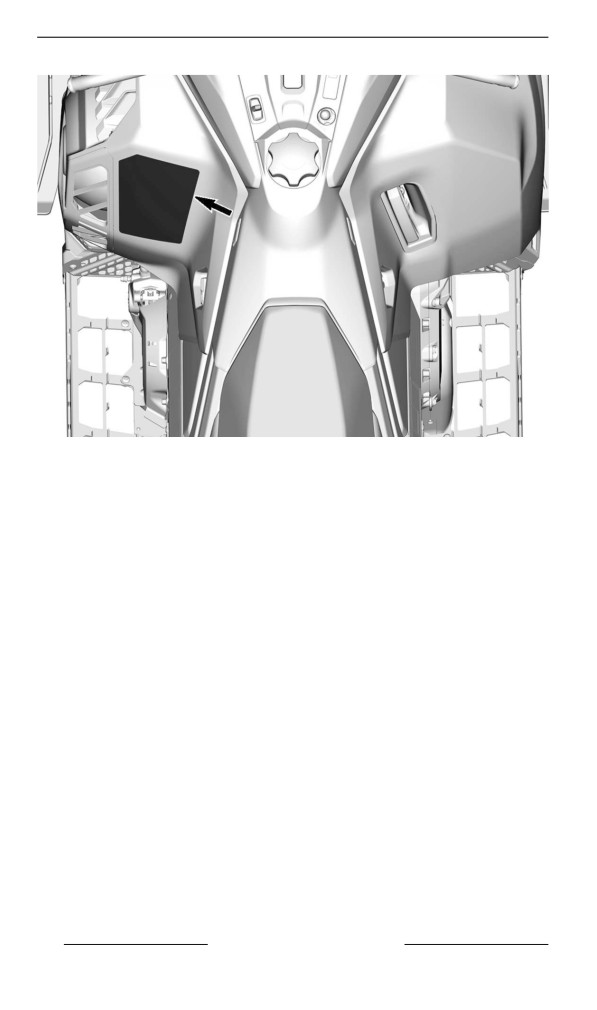
IMPORTANT ON-PRODUCT LABELS (ALL COUNTRIES EXCEPT CANADA/
UNITED STATES)
LABEL LOCATION
84
SAFETY INFORMATION
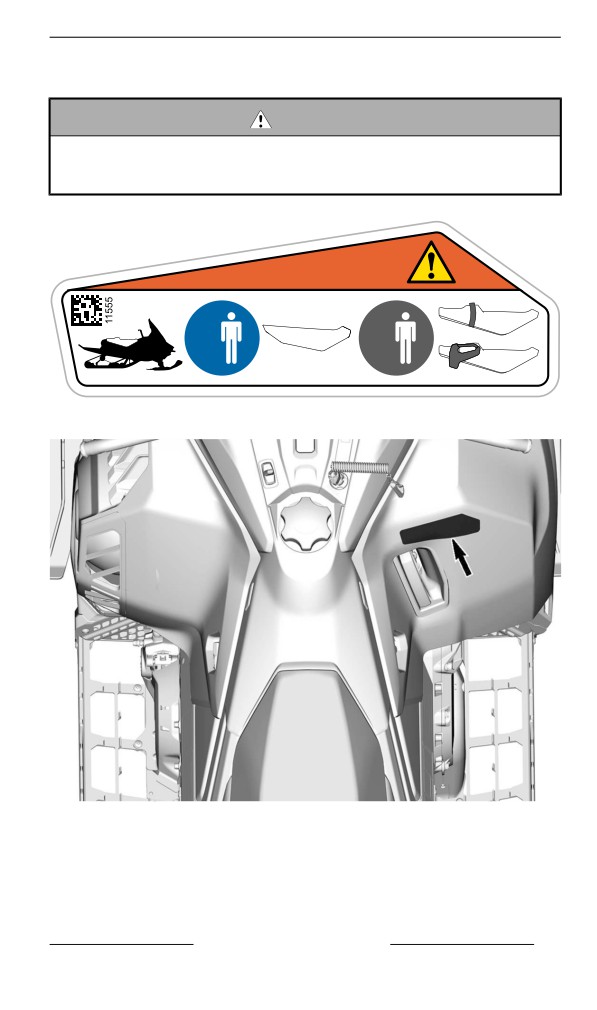
IMPORTANT ON-PRODUCT LABELS (ALL COUNTRIES EXCEPT CANADA/
UNITED STATES)
Passenger Safety - Warning Label
WARNING
This vehicle is designed for one (1) operator and as many pas-
sengers as there are seats with straps or handgrips installed on
the vehicle conforming to SSCC standards.
1
2
PASSENGER SAFETY - WARNING LABEL (PICTO)
LABEL LOCATION
SAFETY INFORMATION
85
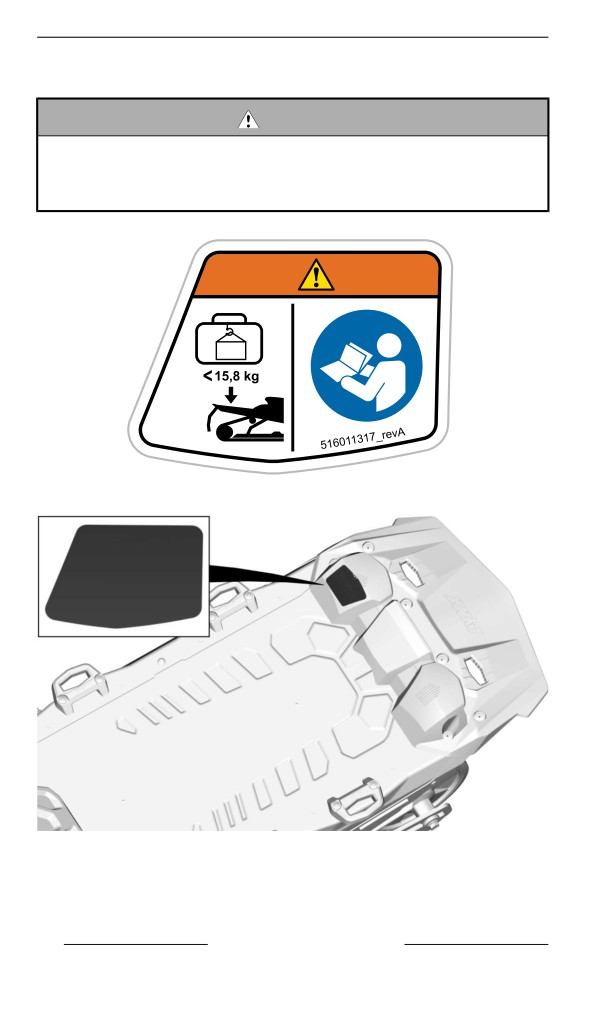
IMPORTANT ON-PRODUCT LABELS (ALL COUNTRIES EXCEPT CANADA/
UNITED STATES)
Maximum Cargo Load — Warning Label
WARNING
– Refer to the operator''s guide for more details.
– Exceeding maximum cargo may affect steering control,
braking ability and cause permanent damage.
– MAXIMUM cargo load: 15.8 kg (155 N)
MAXIMUM CARGO LOAD – WARNING LABEL
LABEL LOCATION
86
SAFETY INFORMATION
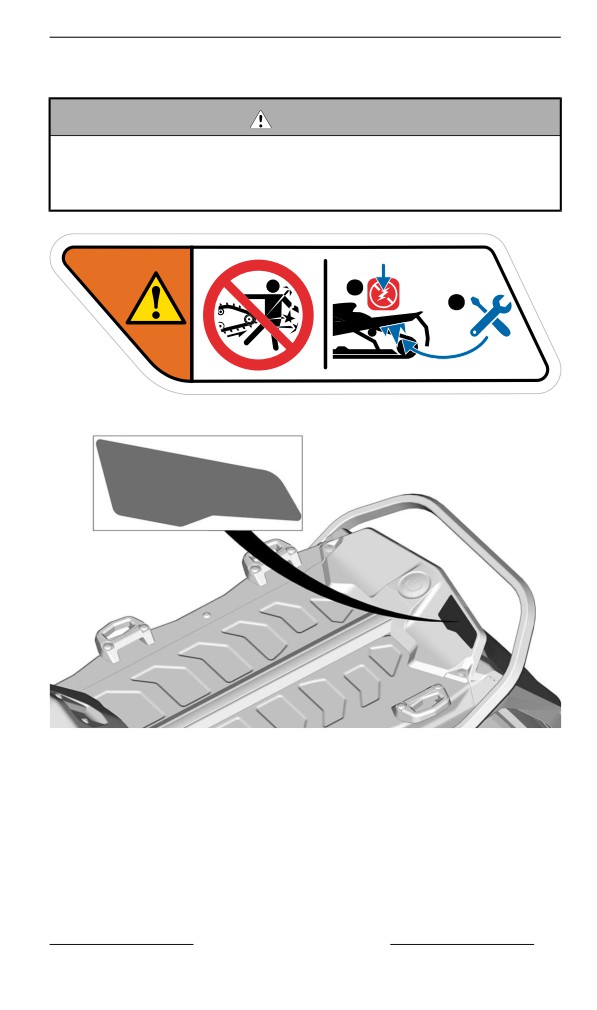
IMPORTANT ON-PRODUCT LABELS (ALL COUNTRIES EXCEPT CANADA/
UNITED STATES)
Rotating Track — Warning Label
WARNING
- NEVER stand behind or near a rotating track. Debris could be
projected causing severe injuries.
- To remove packed snow/ ice, stop the engine, lift and hold ve-
hicle on the side and use tools stored on the drive belt guard.
1
2
11678
ROTATING TRACK — WARNING LABEL
LABEL LOCATION
SAFETY INFORMATION
87
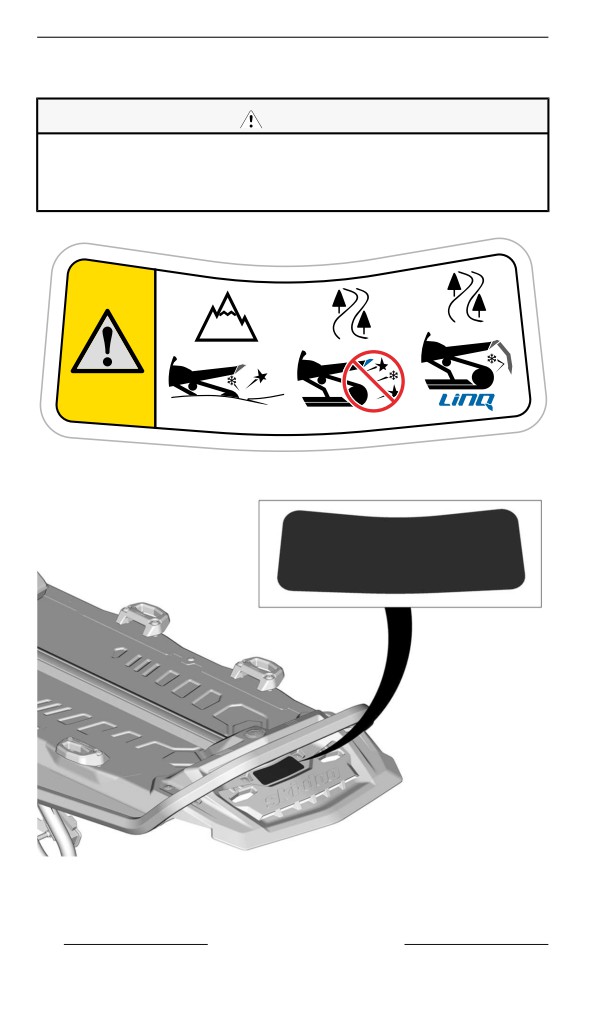
IMPORTANT ON-PRODUCT LABELS (ALL COUNTRIES EXCEPT CANADA/
UNITED STATES)
Deep Snow Riding - Caution Label
CAUTION
This vehicle is designed for deep snow riding.
In other riding conditions, it is recommended to install a LinQ
Snowflap Extension to reduce snow, ice and debris projected
behind the vehicle while improving cooling.
DEEP SNOW RIDING (PICTO) - CAUTION LABEL
LABEL LOCATION
88
SAFETY INFORMATION
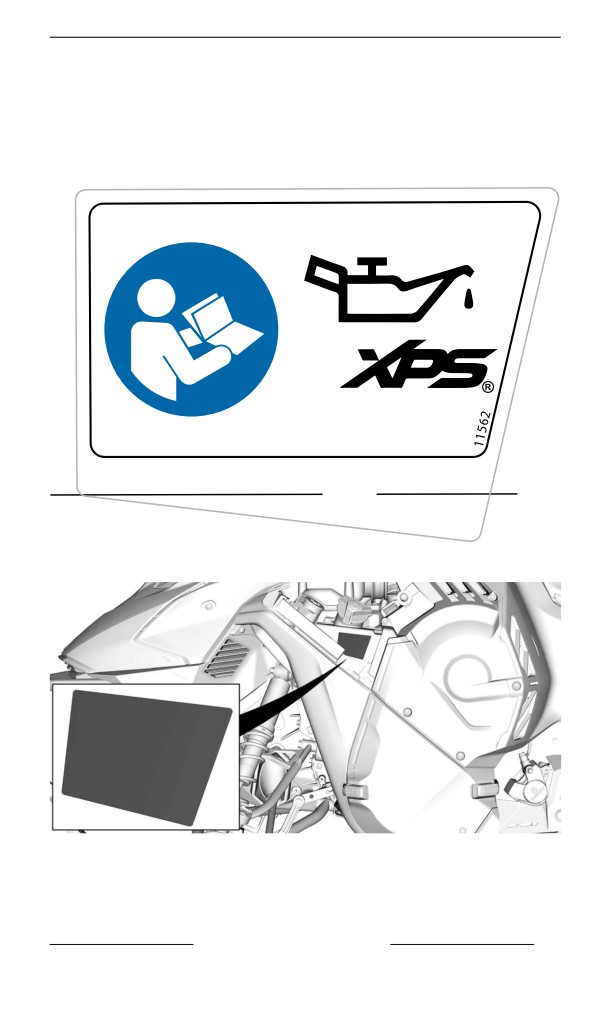
IMPORTANT ON-PRODUCT LABELS (ALL COUNTRIES EXCEPT CANADA/
UNITED STATES)
Techniical Informatiion Labels
Recommended Injection Oil - Notice Label
Refer to the Technical Specifications for appropriate injection oil type
for your vehicle engine.
2T
3/4
RECOMMENDED INJECTION OIL - NOTICE LABEL
TYPICAL – LABEL LOCATION
SAFETY INFORMATION
89
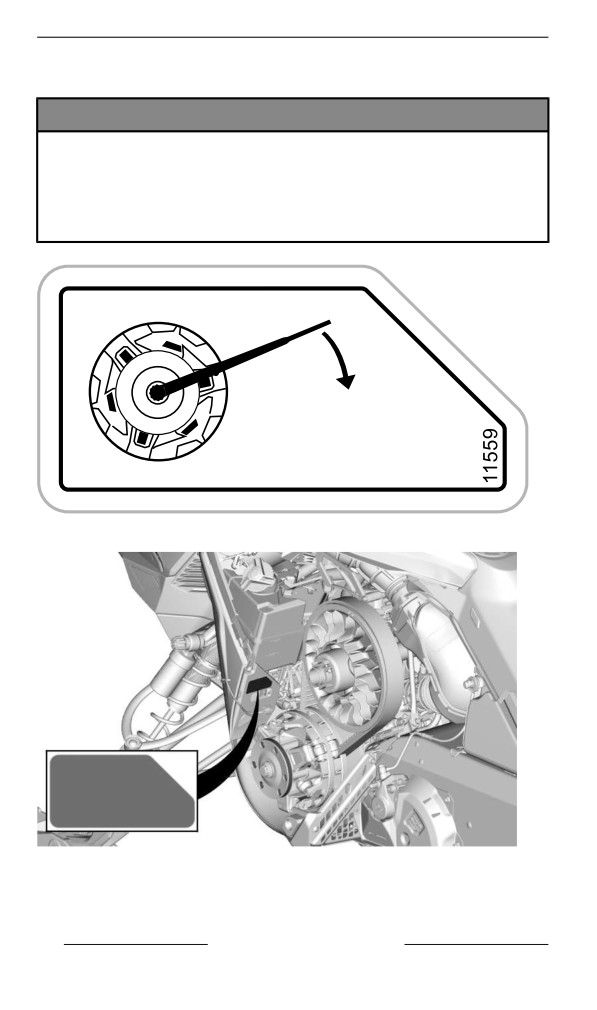
IMPORTANT ON-PRODUCT LABELS (ALL COUNTRIES EXCEPT CANADA/
UNITED STATES)
Drive Pulley Tightening Torque - Notice Label
NOTICE
– Drive pulley bolt recommended torque is 115 to 125 Nm (85
to 92 lbf-ft).
– Not applying the recommended torque may result in a major
failure of the drive pulley and the engine.
– Refer to the shop manual for the complete assembly
procedure.
115-125N·m (85-92 lbf·ft)
DRIVE PULLEY TIGHTENING TORQUE – NOTICE LABEL
LABEL LOCATION
90
SAFETY INFORMATION
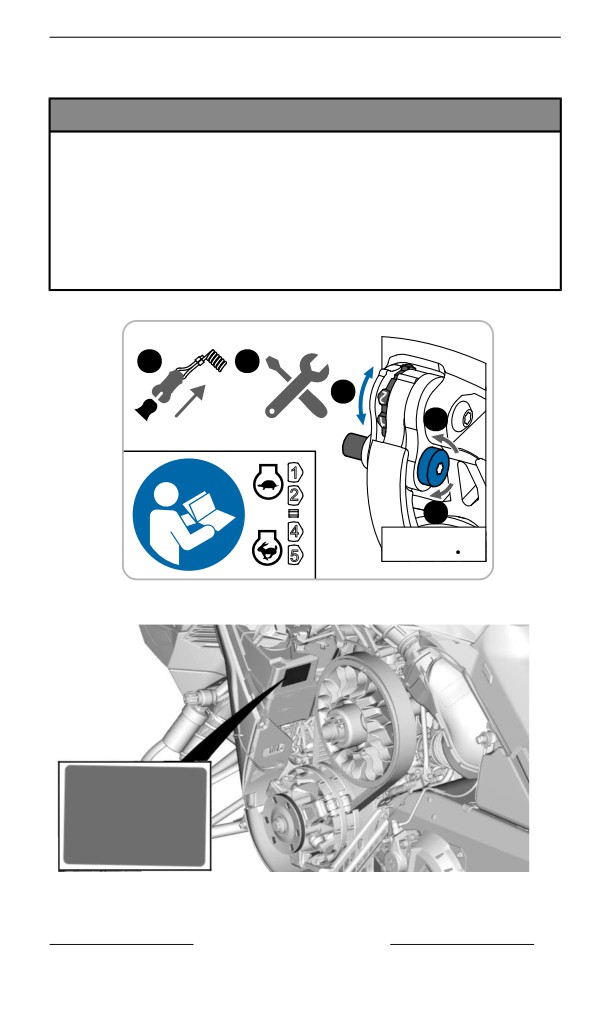
IMPORTANT ON-PRODUCT LABELS (ALL COUNTRIES EXCEPT CANADA/
UNITED STATES)
Clicker Adjustment - Notice Label
NOTICE
Refer to operator’s guide.
Lower RPM : 1 & 2
Higher RPM : 4 & 5
1. Remove tether cord.
2. Remove pulley expander from vehicle.
3. Loosen bolt.
4. Adjust clicker.
5. Tighten bolt to specification.
1
2
4
3
1
2
5
4
( 7 @ 9 Nm )
5
( 62 @ 80 lb in )
CLICKER ADJUSTMENT LABEL
LABEL LOCATION
SAFETY INFORMATION
91
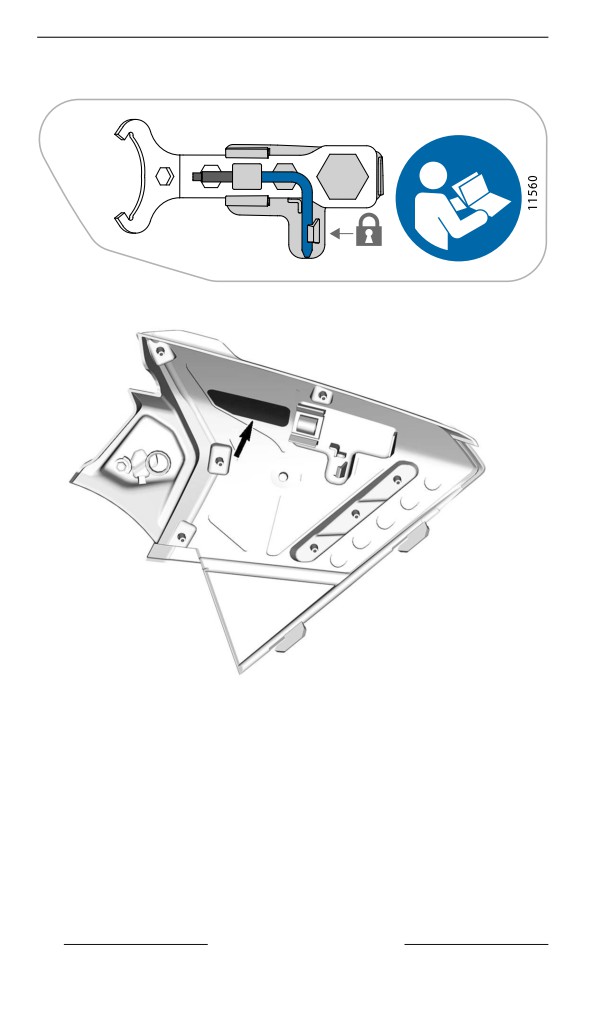
IMPORTANT ON-PRODUCT LABELS (ALL COUNTRIES EXCEPT CANADA/
UNITED STATES)
Tools - Notice Label
TOOLS - NOTICE LABEL
LABEL LOCATION – UPPER LH SIDE PANEL
92
SAFETY INFORMATION
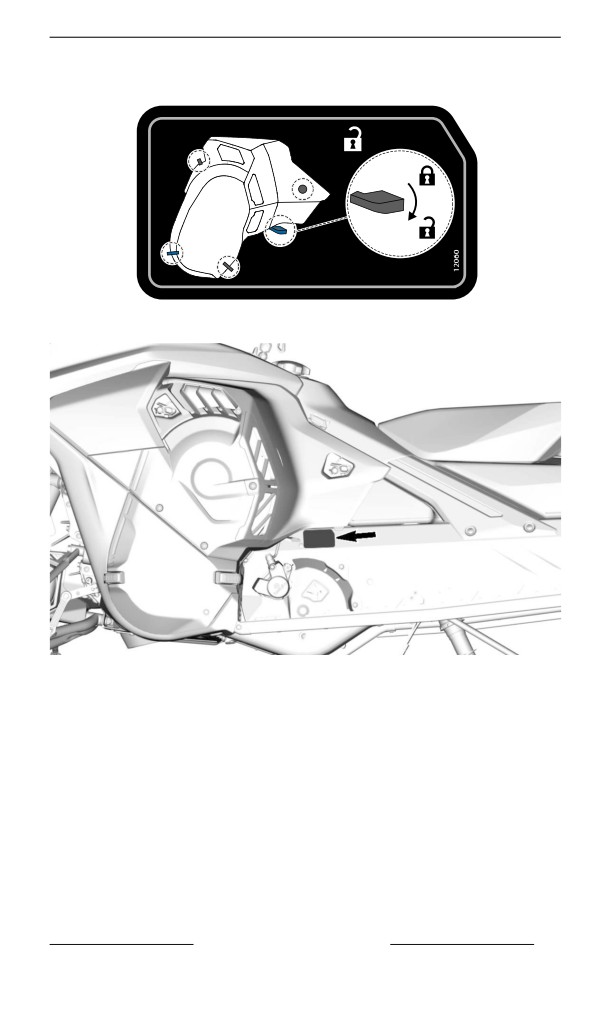
IMPORTANT ON-PRODUCT LABELS (ALL COUNTRIES EXCEPT CANADA/
UNITED STATES)
LH Side Panel Latch Label
5x
LH SIDE PANEL LATCH LABEL
LABEL LOCATION
SAFETY INFORMATION
93
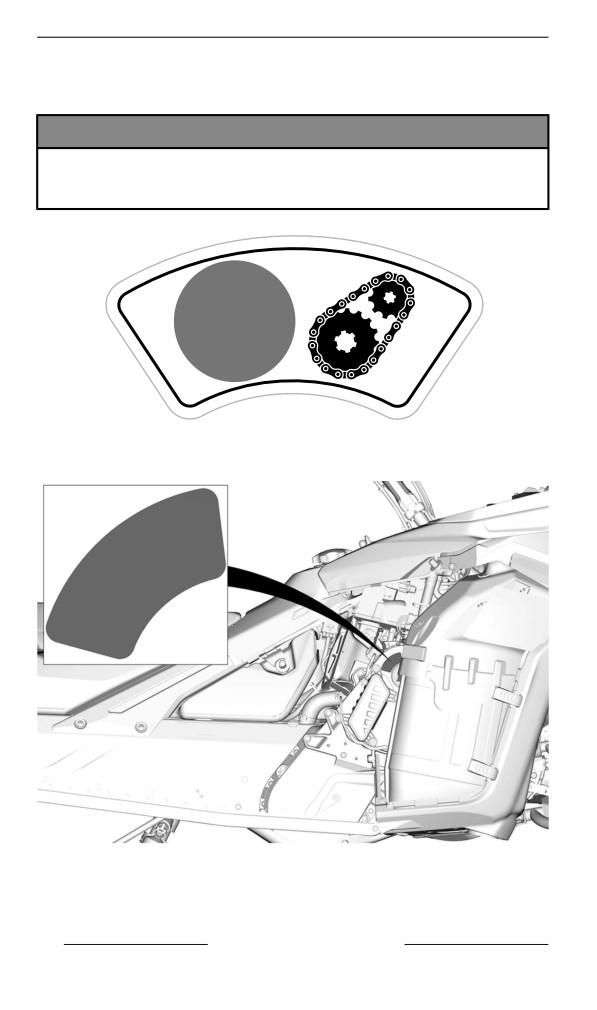
IMPORTANT ON-PRODUCT LABELS (ALL COUNTRIES EXCEPT CANADA/
UNITED STATES)
Factory Installed Chain and Sprockets - Notice Label - Turbo
Engine
NOTICE
This vehicle is designed to use factory installed Rexnord®
Aurora type chain and sprockets. Not compatible with Re-
xnord® standard parts. The sprockets are stamped with “FAC”.
Rexnord®
Aurora
FACTORY INSTALLED CHAIN AND SPROCKETS – NOTICE
LABEL
LABEL LOCATION
94
SAFETY INFORMATION
IMPORTANT ON-PRODUCT LABELS (ALL COUNTRIES EXCEPT CANADA/
UNITED STATES)
Recommended Fuel — Notice Label
Refer to the Technical Specifications for appropriate fuel type for your
vehicle engine.
AKI (RON+MON)/2 OCTANE RATING - NOTICE LABEL
RON OCTANE RATING - NOTICE LABEL
SAFETY INFORMATION
95
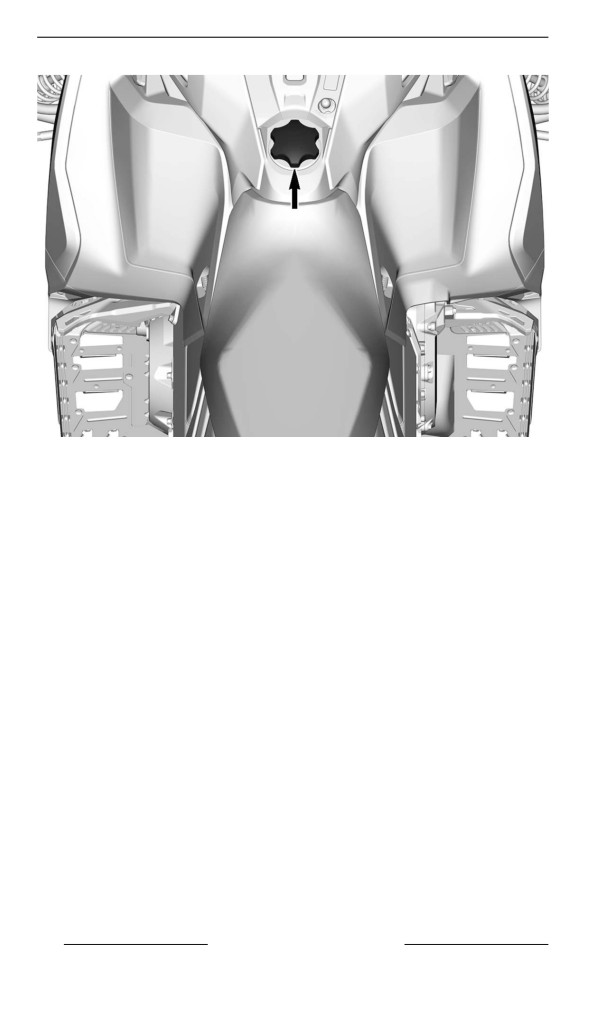
IMPORTANT ON-PRODUCT LABELS (ALL COUNTRIES EXCEPT CANADA/
UNITED STATES)
96
SAFETY INFORMATION
PRE-RIDE INSPECTION
Perform a pre-ride inspection before each ride to detect potential prob-
lems during operation. The pre-ride inspection can help you monitor
wear and deterioration before they become a problem. Correct any
problems that you discover to reduce the risk of an accident or a
malfunction.
Before Starting the Engiine
1. Remove snow and ice from body including lights, seat, footrests,
controls and instruments.
2. Remove packed snow and ice from the rear suspension using the
wrench tool stored on the drive belt guard.
3. Verify that air silencer prefilter is free of snow.
4. Verify that CVT outlet air filter is free from dust accumulation.
Clean as required.
5. Verify that skis and steering operate freely. Check corresponding
action of skis versus handlebar.
6. Check fuel and injection oil for levels and leaks. Replenish if neces-
sary and in case of any leaks; you should seek service from an au-
thorized BRP snowmobile dealer, repair shop, or person of your
own choosing for maintenance, repair, or replacement.
7. All storage compartments must be properly latched and they must
not contain any heavy or breakable objects. Hood and side panels
must be also properly latched.
8. Activate the throttle control lever several times to check that it oper-
ates easily and smoothly. It must return to idle position when
released.
9. Activate the brake lever and make sure the brake fully applies be-
fore the brake control lever touches the handlebar grip. It must fully
return when released.
10. Apply parking brake and check if it operates properly. Leave park-
ing brake applied.
11. Inspect drive belt condition and height. Refer to drive belt in main-
tenance procedures.
After Engiine is Started
For proper engine starting procedure, refer to the appropriate Engine
Starting Procedure.
1. Check headlights high beam and low beam, taillight, stop light and
pilot lamps operation.
NOTE:
You may need to detach tether cord from your clothes to check lights.
In such a case, attach cord as soon as you get back at the controls of
the snowmobile.
2. Check the engine cut-off switch (by pulling tether cord cap) and
emergency engine stop switch operation.
SAFETY INFORMATION
97
PRE-RIDE INSPECTION
3. Release parking brake.
4. Refer to Vehicle warm up and follow instructions.
Pre-Ride Check List
ITEM
OPERATION
ü
BODY INCLUDING
SEAT, FOOTRESTS,
Check condition and remove snow or
LIGHTS, AIR FILTER,
ice.
CONTROLS AND
INSTRUMENTS
CVT OUTLET AIR
Check for ice and debris accumulation
FILTER
and clean as required
SKIS AND STEERING
Check for free movement and proper
ACTION
operation.
SKI RUNNERS
Check for abnormal wear.
FUEL
Check for proper level and no leaks.
INJECTION OIL
Check for proper level and no leaks.
COOLANT
Check for proper level and no leaks.
Check for cracks, fraying or abnormal
DRIVE BELT
wear and proper height.
THROTTLE LEVER
Check for proper operation.
BRAKE LEVER
Check for proper operation.
PARKING BRAKE,
Check for proper operation.
BRAKE
BRAKE FLUID
Check for proper level and no leaks.
STORAGE
Check for proper latching and no
COMPARTMENT
heavy or breakable objects.
Check condition and remove snow or
TRACK
ice.
SLIDER SHOES
Check for abnormal wear.
98
SAFETY INFORMATION
PRE-RIDE INSPECTION
EMERGENCY ENGINE
STOP SWITCH AND
Check for proper action. Tether cord
ENGINE CUT-OFF
must be attached to operator clothing
SWITCH (TETHER
eyelet.
CORD CAP)
LIGHTS
Check for proper operation.
HORN BUTTON (IF
Check for proper operation.
EQUIPPED)
SAFETY INFORMATION
99
REPORTING SAFETY DEFECTS
In Canada, if you believe that your vehicle has a defect which could
cause a crash or could cause injury or death, you should immediately
inform Transport Canada in addition to notifying Bombardier Recrea-
tional Products Inc.
If Transport Canada receives similar complaints, it may open an inves-
tigation, and if it finds that a safety defect exists in a group of vehicles,
it may order a recall and remedy campaign. However, Transport Can-
ada cannot become involved in any individual problems between you,
your dealer or Bombardier Recreational Products Inc.
To contact Transport canada:
819-994-3328 (Gatineau-Ottawa area or internationally)
Toll free : 1 800-333-0510 (in Canada)
Transport Canada - ASFAD
330 Sparks Street
Ottawa, ON
K1A 0N5
100
SAFETY INFORMATION
VEHICLE
INFORMATION
101
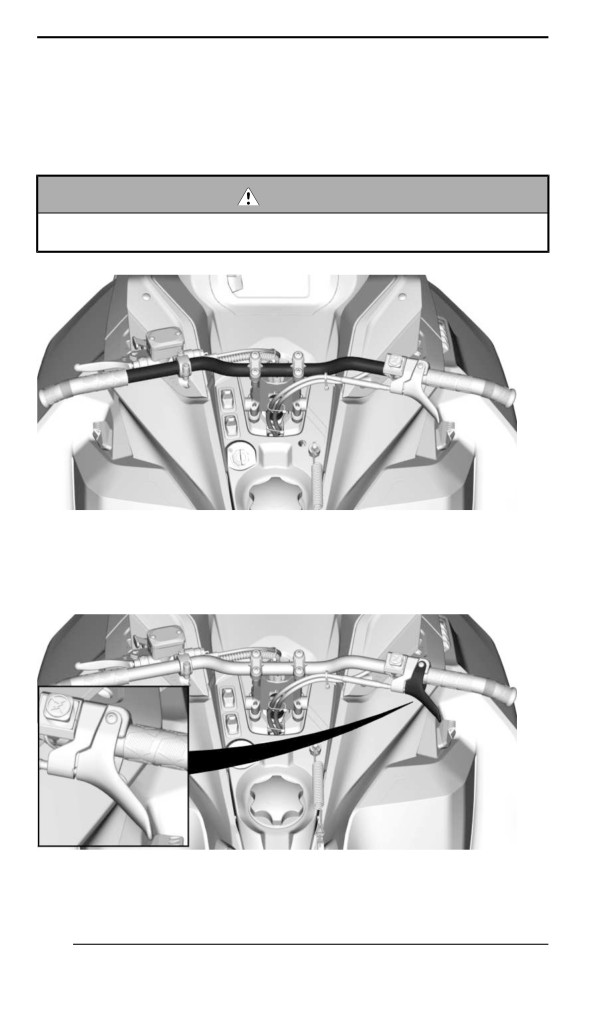
PRIMARY CONTROLS
Handllebar
The handlebar controls the steering of the snowmobile. As the handle-
bar is rotated to right or left, the skis are turned right or left to steer the
snowmobile.
WARNING
Fast reverse while turning, could result in loss of stability and
control.
TYPICAL
Throttlle Lever
Throttle lever is located on the RH side of handlebar.
TYPICAL
102
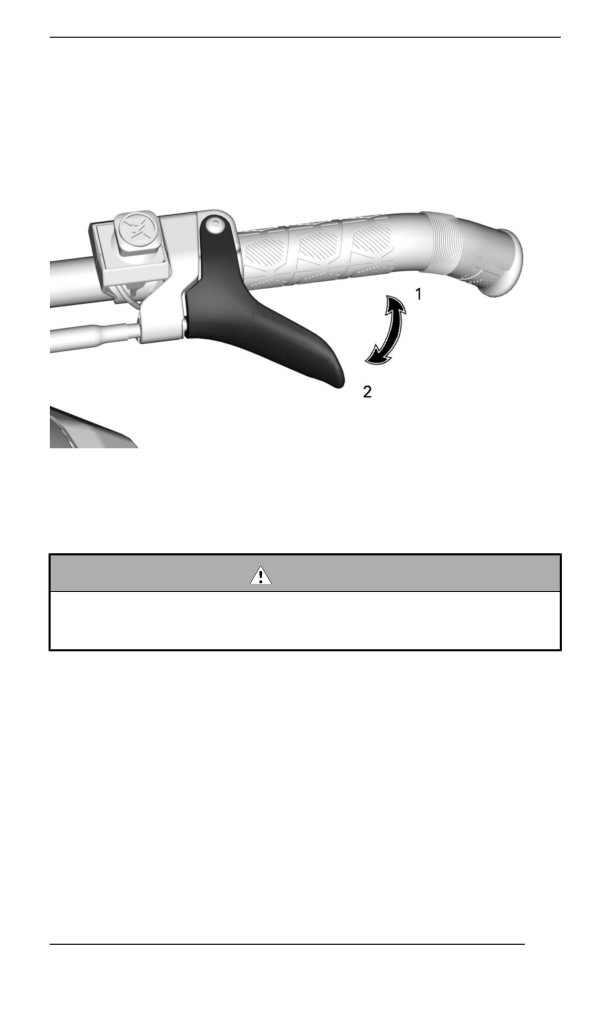
PRIMARY CONTROLS
Designed to be thumb activated. When squeezed, it increases the en-
gine speed. When released, engine speed returns automatically to
idle.
CABLE THROTTLE LEVER
1. To accelerate
2. To decelerate
WARNING
Test the throttle lever operation each time before starting the
engine. The lever must return to the rest position once re-
leased. Otherwise, do not start engine.
Emergency Engine Stop Switch
The emergency engine stop switch is located on the RH side of
handlebar.
103
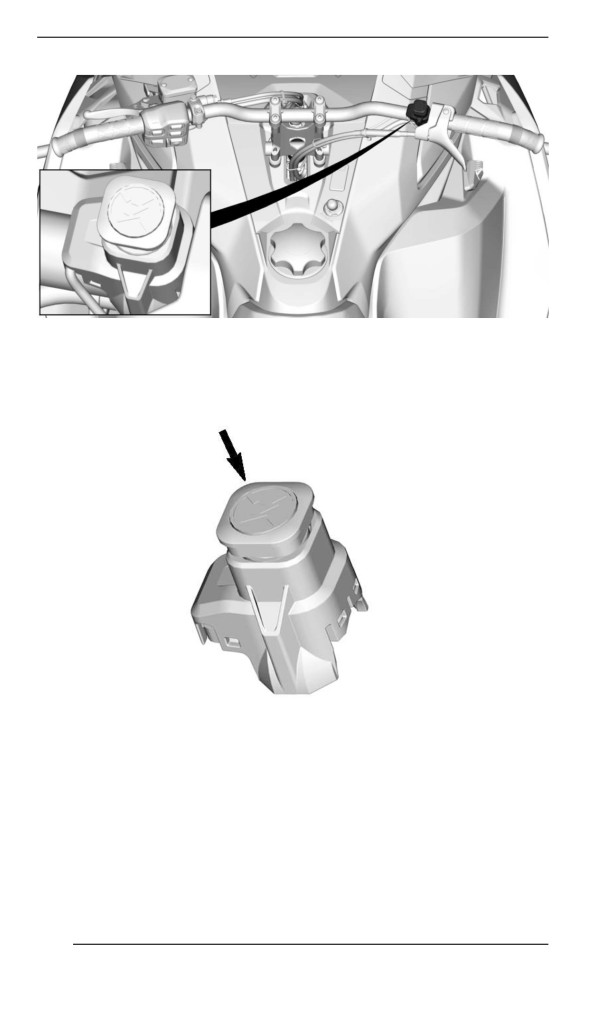
PRIMARY CONTROLS
TYPICAL
To stop the engine in an emergency, push the switch down in OFF po-
sition and simultaneously apply the brake.
OFF POSITION
To allow engine starting, pull the switch up in ON position.
104
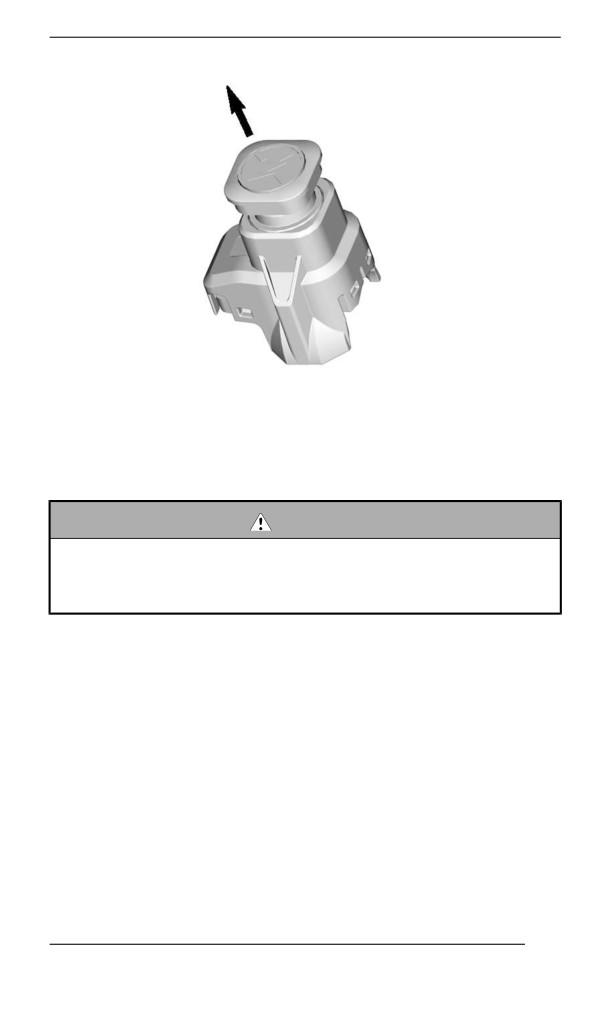
PRIMARY CONTROLS
ON POSITION
All operators of the snowmobile should familiarize themselves with the
function of the emergency engine stop switch by using it several times
on first outing and whenever stopping the engine thereafter. This en-
gine stopping procedure will become a reflex and will prepare opera-
tors for emergency situations requiring its use.
WARNING
If the switch has been used in an emergency caused by a sus-
pected malfunction, the source of the malfunction should be de-
termined and corrected before restarting engine. Visit an
authorized BRP snowmobile dealer for servicing.
Brake Lever
Brake lever is located on the LH side of handlebar.
When squeezed, brake is applied. When released, it automatically re-
turns to the rest. Braking effect is proportional to the pressure applied
on the lever and to the type of terrain and its snow coverage.
105
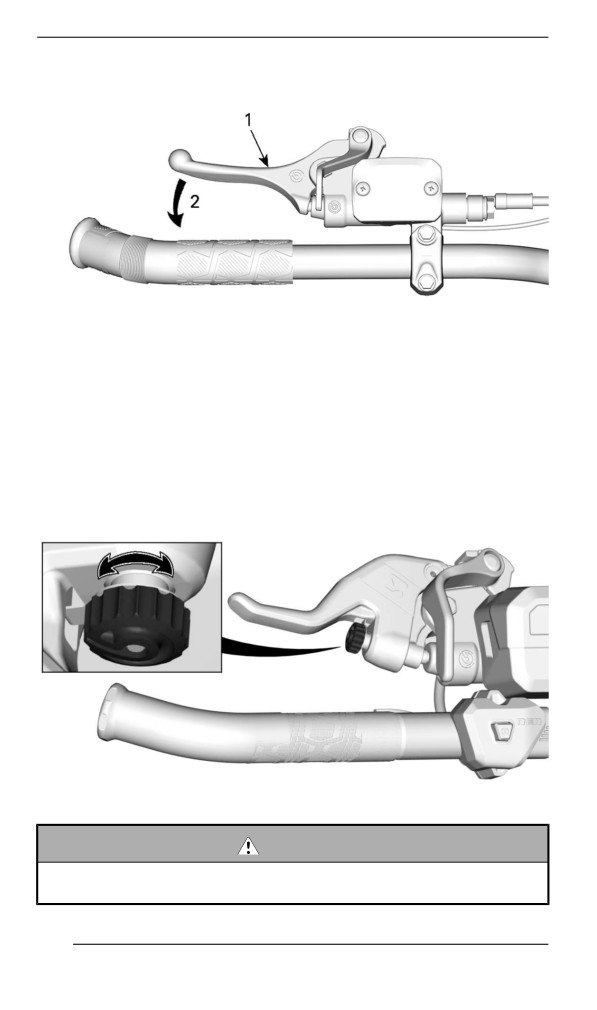
PRIMARY CONTROLS
TYPICAL
1. Brake lever
2. To apply brake
Adjustable Brake Lever (if equipped)
To adjust the distance of reach of the brake lever, turn the adjustment
wheel clockwise or counter clockwise.
Brake Lever Adjustment
WARNING
It is important to adjust the brake lever to the user size and nor-
mal riding position.
106
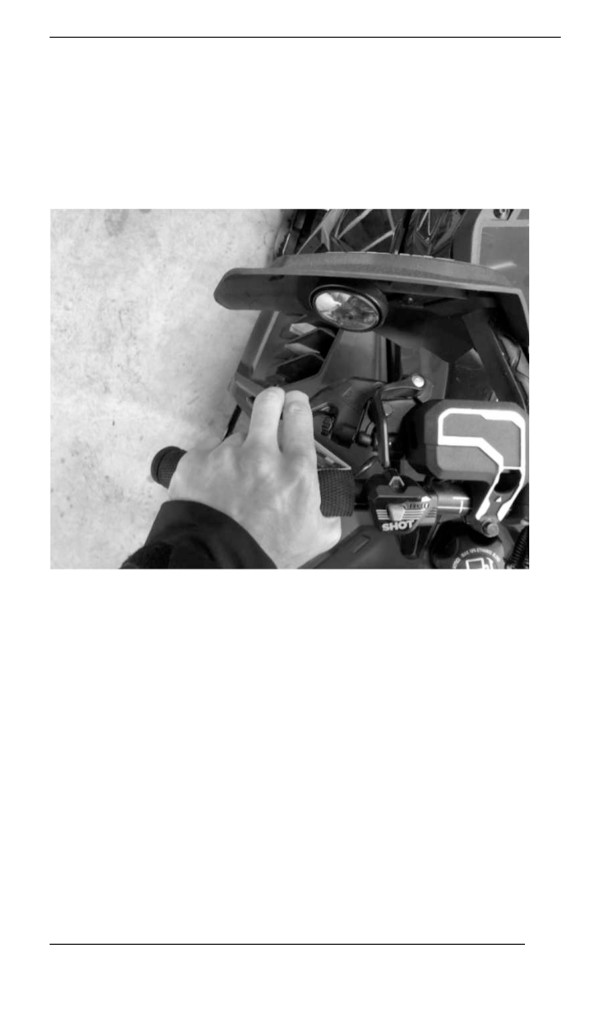
PRIMARY CONTROLS
Proper brake lever position should allow:
- Good support for the index and middle finger on the lever.
- Use the outer end of the lever to optimize the force.
- Proper wrist alignment.
Taking the time to adjust and try out the brake lever before your first
snowmobile outing improves user comfort.
Adjusting the Brake Lever
1. Loosen the two bolts enough to easily move the brake lever on the
handlebar.
NOTE:
If the two bolts are not loosen enough the brake lever can leave marks
on the handlebar.
Models with steel handlebar
107
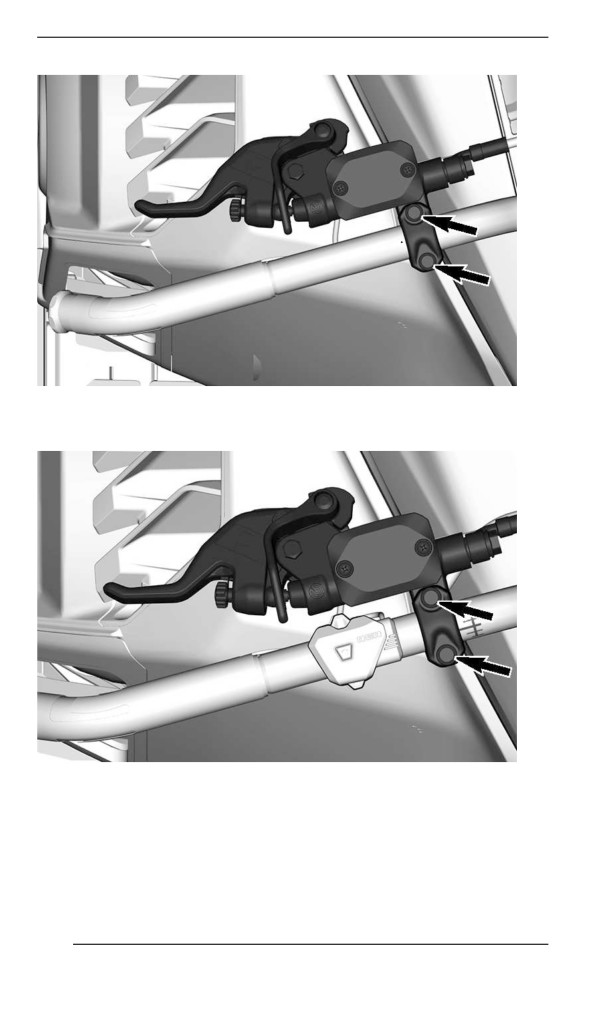
PRIMARY CONTROLS
Models with aluminum handlebar and without multifunction
switch
Models with aluminum handlebar and with multifunction
switch
108
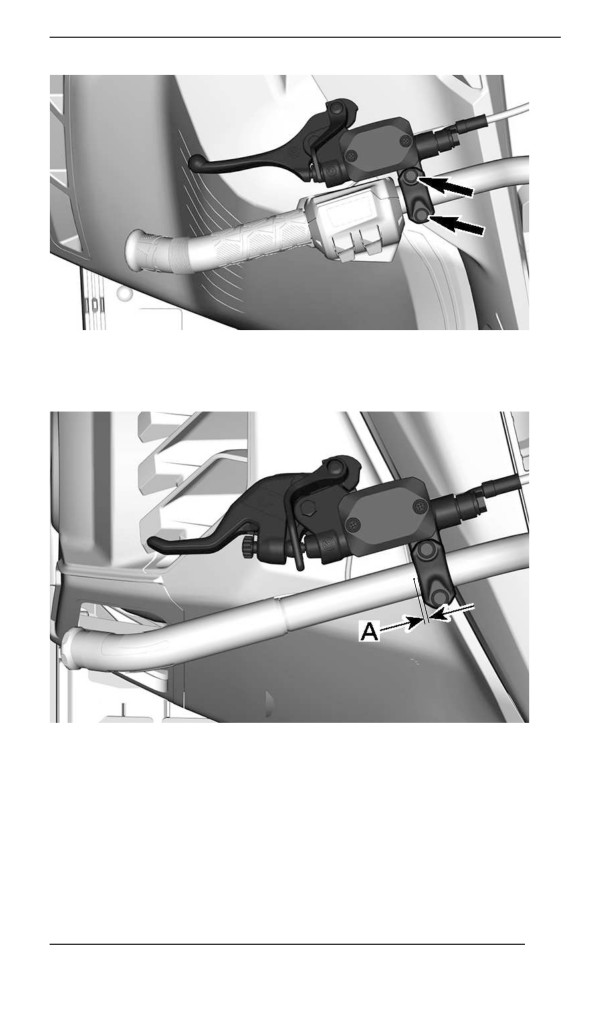
PRIMARY CONTROLS
2. Locate the reference mark on the handlebar and respect the dis-
tance and rotation limits.
Models with steel handlebar
A. 0 to 5 mm (0 to 0.197 in) between the handlebar point and side of
the brake lever
Models with aluminum handlebar and without multifunction
switch
109
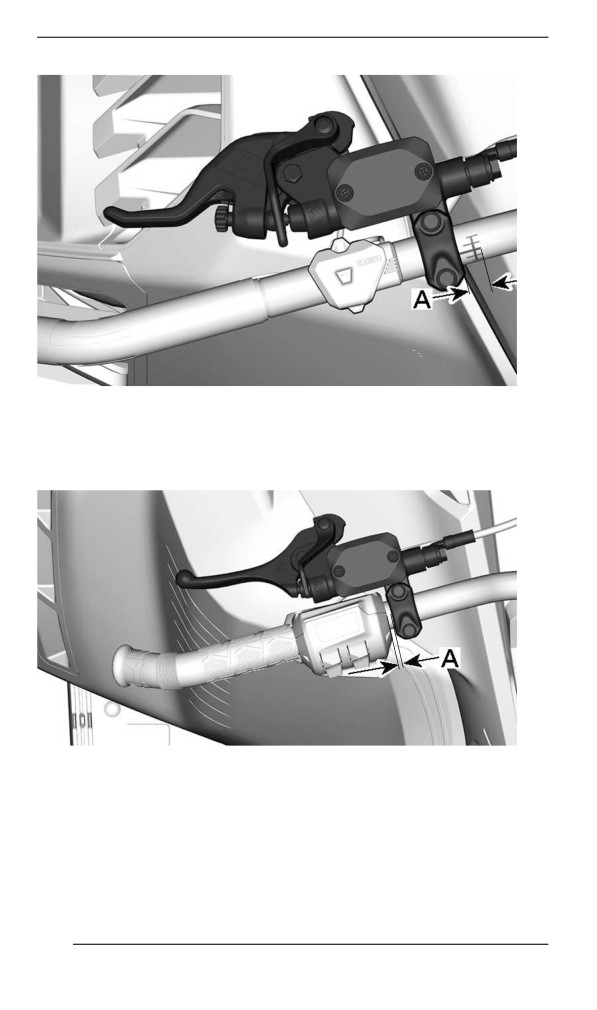
PRIMARY CONTROLS
A. 0 to 9 mm (0 to 0.354 in) between the start of the handlebar mark
and side of the brake lever
Models with aluminum handlebar and with multifunction
switch
A. 0 to 15 mm (0 to 0.590 in) between the side of the multifunction
switch and the side of the brake lever
3. With the operator on the driver seat, put the brake lever in the de-
sired position.
4. Tighten the two bolts to specification.
110
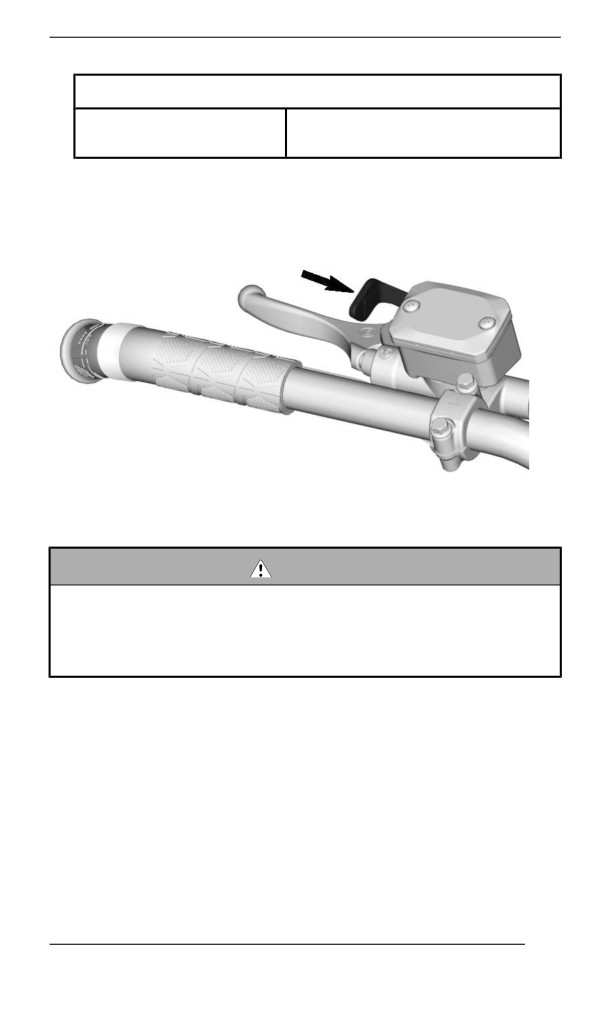
PRIMARY CONTROLS
TIGHTENING TORQUE
Brake lever adjustment
8.5 ± 1.5 Nm (75 ± 13 lbf-in)
bolts
Parking Brake Lever
Parking brake lever is located on the LH side of handlebar.
TYPICAL
Parking brake should be used whenever snowmobile is parked.
WARNING
Make sure parking brake is fully disengaged before operating
the snowmobile. When you ride the vehicle, brake pads that are
caused to drag by a continuous pressure on the lever may
cause damage to the brake system and cause loss of braking
capacity and/or fire.
To Engage Parking Brake
Apply and hold brake, then lock brake lever using the parking brake
lever as shown.
111
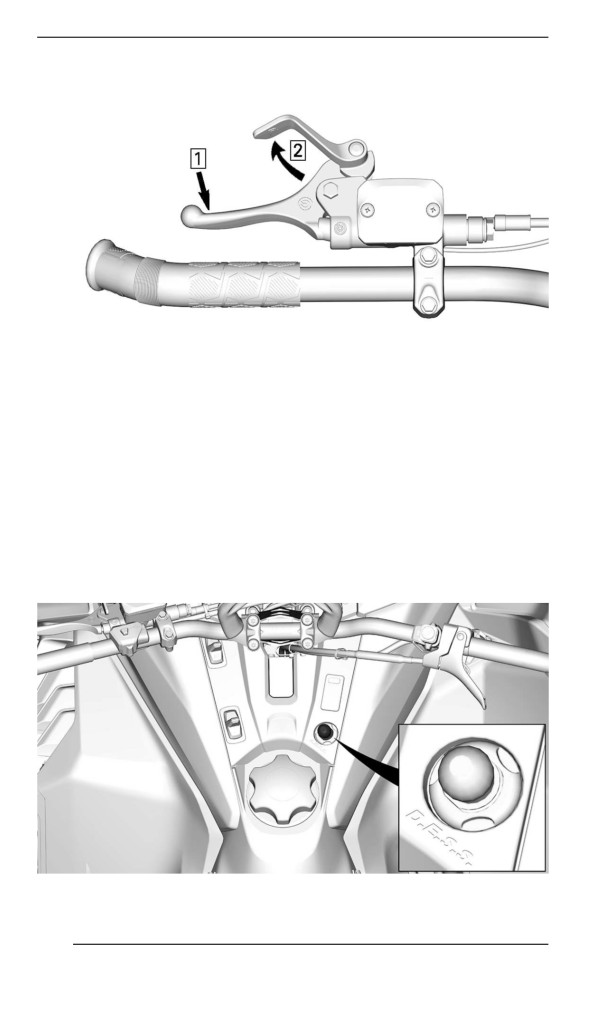
PRIMARY CONTROLS
TYPICAL — ENGAGE MECHANISM
1. Apply and hold brake
2. Lock brake lever using parking brake lever
To Release Parking Brake
Squeeze brake lever. Parking brake lever will automatically return to
its original position. Always release parking brake before riding.
Engiine Cut-off Switch
TYPICAL
112
PRIMARY CONTROLS
The engine cut-off switch (tether cord) is located on the console.
The tether cord cap must be securely snapped on the engine cut-off
switch to allow vehicle operation.
Pulling the tether cord cap from the switch shuts the engine off.
WARNING
Always attach the tether cord eyelet to clothing before starting
the engine.
D.E.S.S. (Digitally Encoded Security System)
The tether cord cap has an integrated D.E.S.S. key to provide you and
your snowmobile with the equivalent security of a conventional lock
key.
The D.E.S.S. key contains an electronic chip which features a unique
permanently memorized digital code.
Your authorized BRP snowmobile dealer has programed the D.E.S.S.
of your snowmobile to recognize the D. E. S. S. key in the tether cord
cap to allow vehicle operation.
If another tether cord is used without programming the D.E.S.S., the
engine will start but will not reach drive pulley engagement speed to
move vehicle.
Make sure the tether cord cap is free of dirt or snow.
D.E.S.S. Flexibility
The D.E.S.S. of your snowmobile can be programmed by your author-
ized BRP snowmobile dealer to accept up to 8 different keys.
We recommend the purchase of additional tether cords from your au-
thorized BRP snowmobile dealer. If you have more than one D.E.S.S.
equipped BRP snowmobile, each can be programmed by your author-
ized BRP snowmobile dealer to accept the other vehicles D. E. S. S.
keys.
113
SECONDARY CONTROLS
Some features may not apply to your model or could be optional.
Vehicle safety labels are not shown on illustrations. For information on
vehicle safety labels, refer to Vehicle Safety Labels.
Console Swiitches
Headlights Dimmer Button
Press to select HI or LOW beam. Lights are automatically ON when
the engine is running.
Heated Grips and Heated Throttle Lever Switch
NOTE:
Under 2000 RPM, heated grips will be limited at 50%.
NOTE:
Battery level will limit heated grips. Under 13 V the heated grips will be
turned off.
The switch on the console controls simultaneously the handlebar grips
and the throttle lever heat intensity.
The balance between the temperature of the throttle lever and the
grips can be adjusted.
Depress switch as required to select heating intensity to keep your
hands at a comfortable temperature.
114
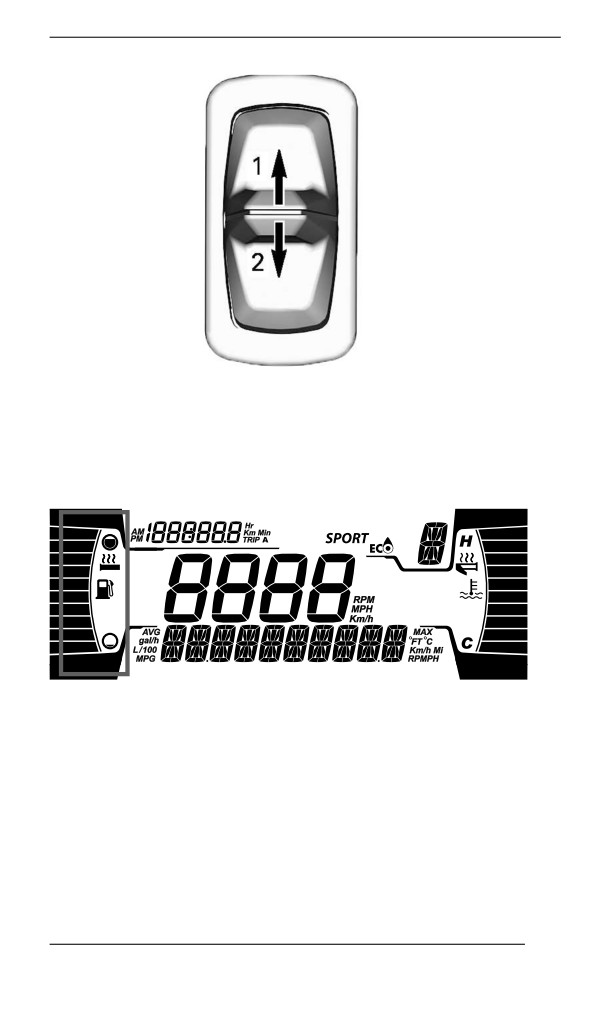
SECONDARY CONTROLS
SWITCH ON CONSOLE
1. Increase heat
2. Decrease heat
The heating intensity is displayed via the digital display.
HEATED GRIPS DISPLAY
115
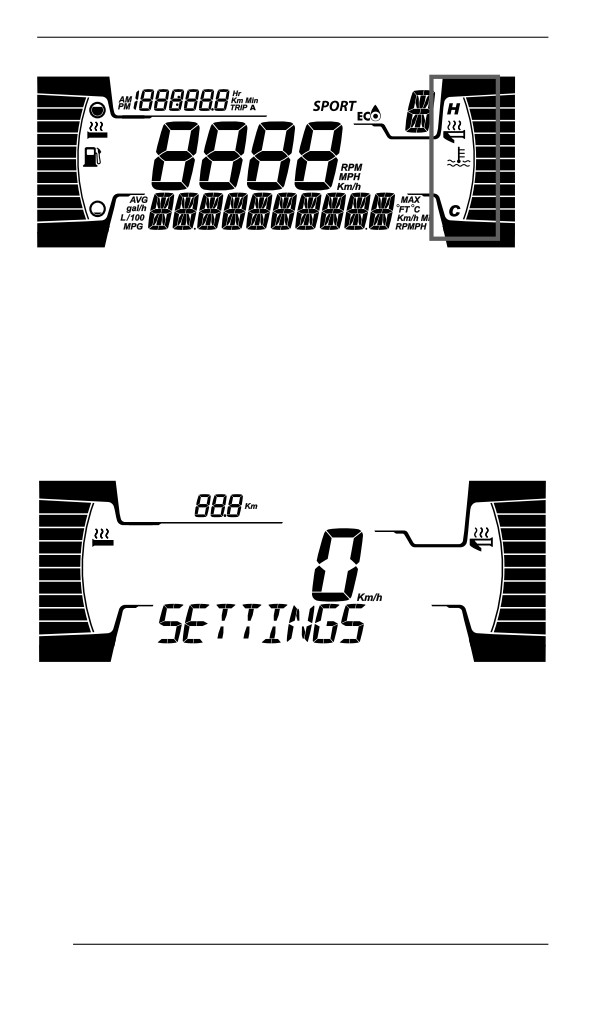
SECONDARY CONTROLS
HEATED THROTTLE LEVER DISPLAY
Heated grips and throttle lever will be OFF when there are no bars dis-
played on the gauge.
When the switch is released, display will return to fuel level and engine
temperature.
Adjjusting the Heated Grips Ballance – 4.5” Digital
Display wiith Consolle Switch
1. Using the LOWER (Mode) button on the digital display, do short
presses until SETTINGS appears. Do a long press to select it.
2. Using the LOWER (Mode) button, do short presses until THUMB
CFG appears. Do a long press to select it.
116
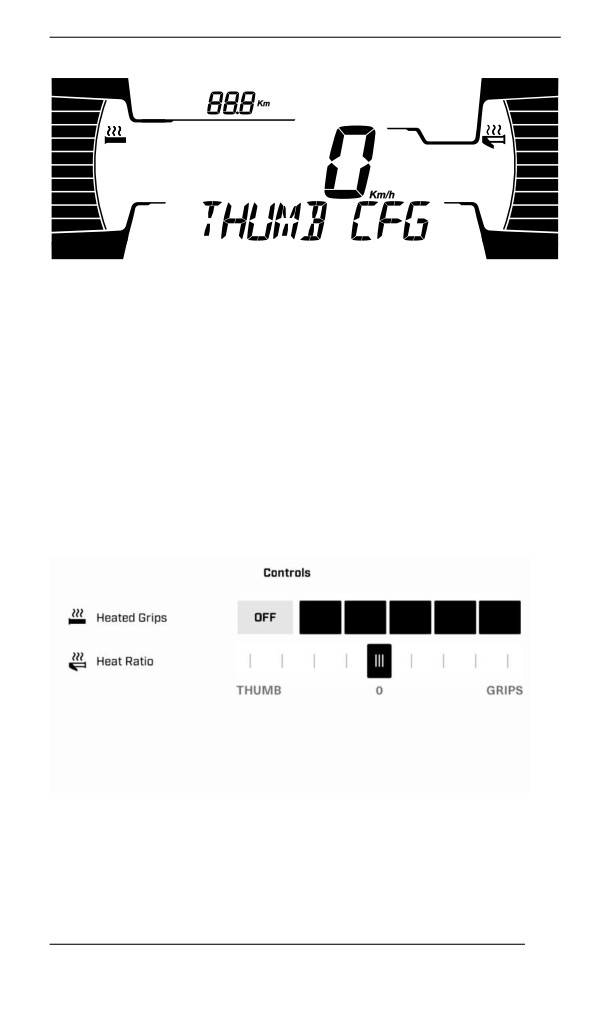
SECONDARY CONTROLS
3. Use the console switch to adjust the heated grips balance between
the thumb and the grips shown on the right side display.
4. Press the LOWER (Mode) button to exit menu.
Adjusting the Heated Grips Balance – 10.25” Color
Touchscreen Diispllay
NOTE: The heated grips balance can only be adjusted using the
touchscreen. The touchscreen is not available when riding.
1. Start the heated grips.
NOTE: The Controls window will automatically open.
2. Slide the Heat Ratio cursor to adjust heated grips balance.
117
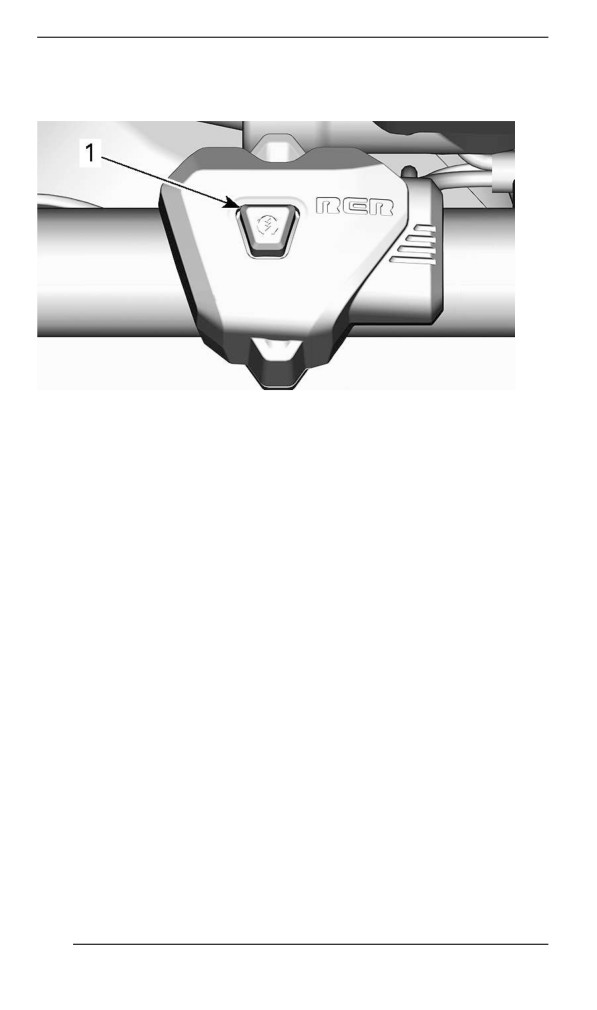
SECONDARY CONTROLS
SHOT/ Ellectric Start/ Electroniic Reverse (RER)
Button
1. Start / RER button
On SHOT and electric start models, press to start engine.
Once engine is started, press to engage the electronic reverse.
Refer to Basic Procedures for instructions on how to use:
- SHOT system (if equipped)
- Electric starter (if equipped)
- Electronic Reverse (RER)
118
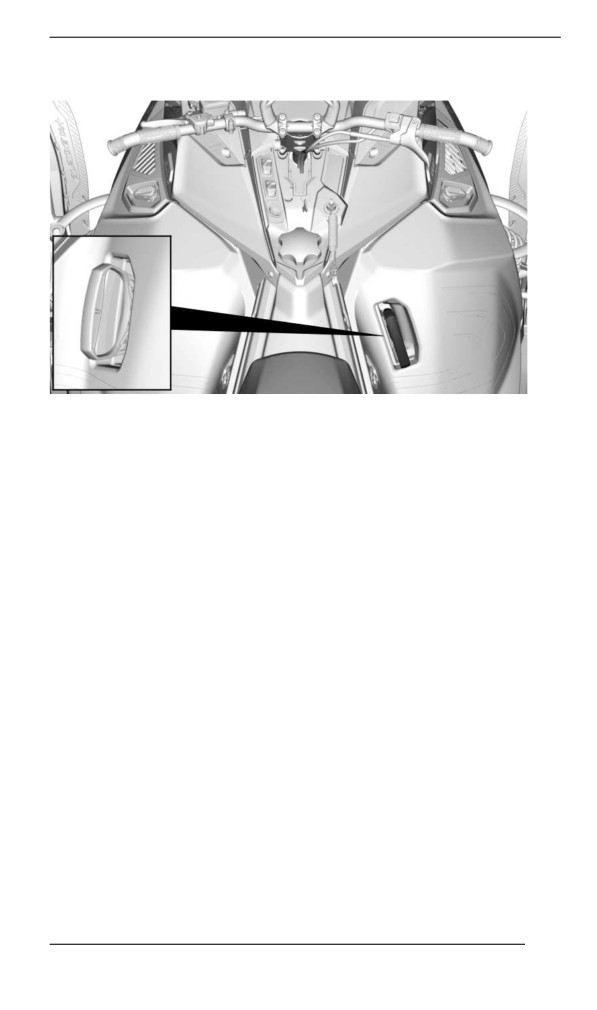
SECONDARY CONTROLS
Rewind Starter Handlle
TYPICAL
Auto-rewind type located on right hand side of snowmobile under the
side panel. Open right hand side panel to access the rewind starter
handle. Refer to Removing the Side Panels in this subsection. To en-
gage mechanism pull handle slowly until a resistance is felt then pull
vigorously. Slowly release handle.
NOTE:
The maximum torque that can be transmitted to the engine by the re-
wind starter is 80 Nm (59 lbf-ft). The maximum force that can be ex-
erted on the on the rope is 2 200 N (494.6 lbf).
119
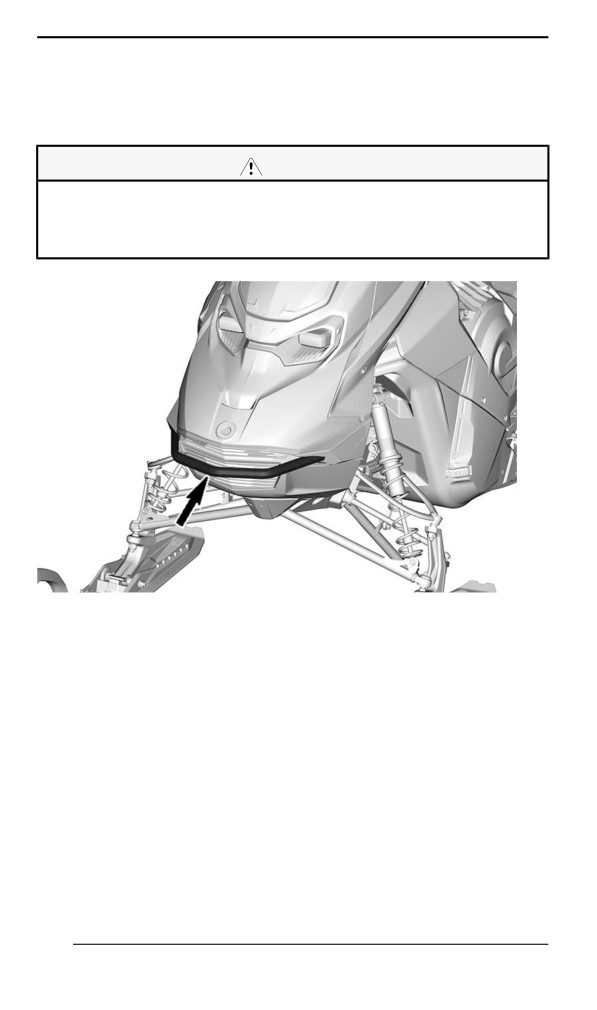
BODY AND SEAT
Front and Rear Bumpers
To be used whenever snowmobile requires manual lifting.
CAUTION
Beware of injuries by using proper lifting techniques, notably
using your legs force. Do not attempt to lift the rear of vehicle if
it is above your limits. Use appropriate lifting device or have as-
sistance to share lifting stress if possible.
TYPICAL FRONT BUMPER
120
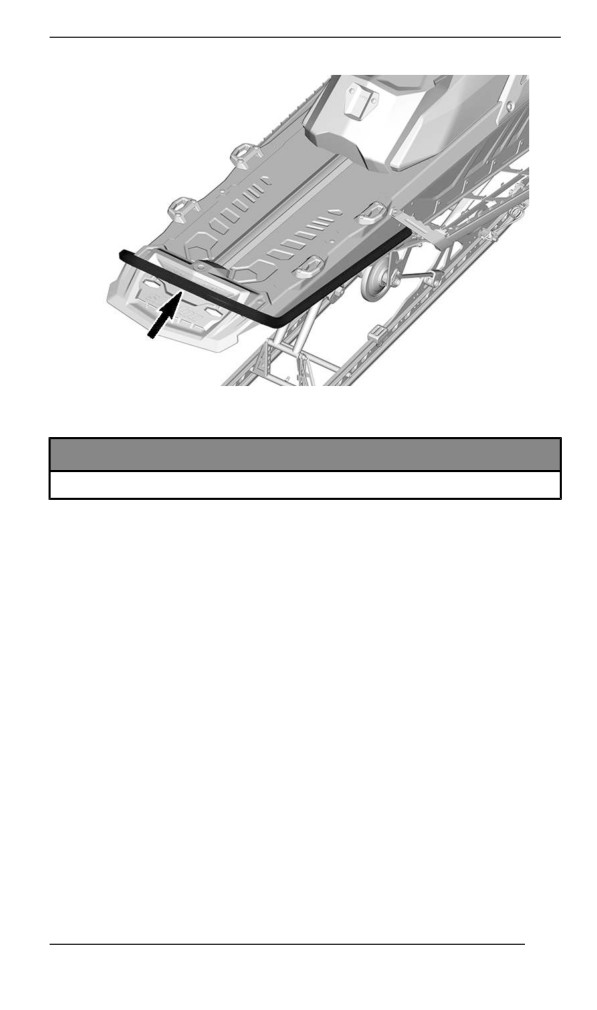
BODY AND SEAT
TYPICAL REAR BUMPER
NOTICE
Do not use skis to pull or lift snowmobile.
Front Storage Compartment
A storage compartment is located at the front of the vehicle, above the
gauge.
The Operator's Guide and the emergency starter rope are in the front
storage compartment.
To open, push the button and lift the cover.
121
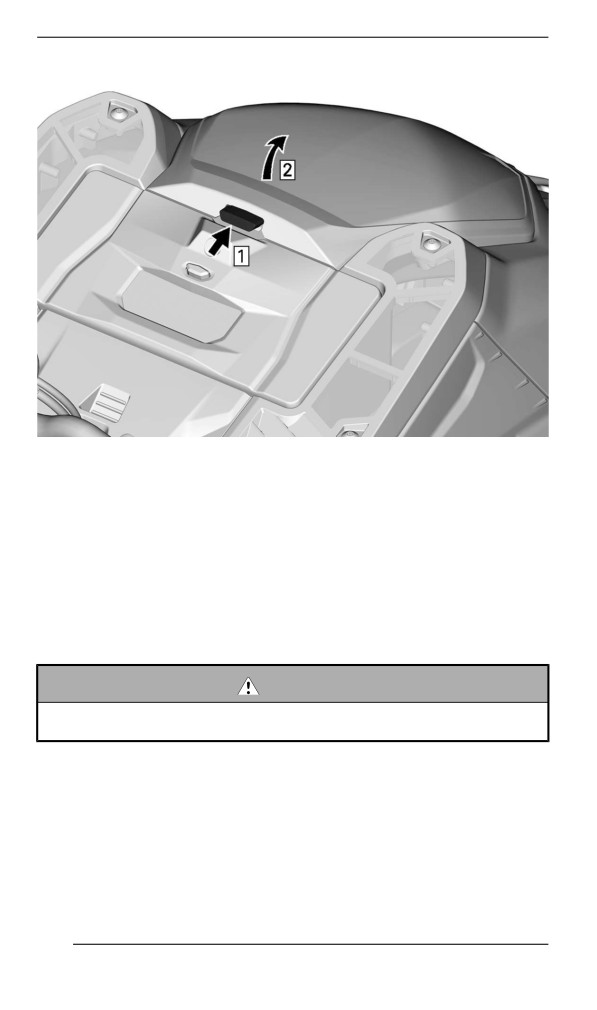
BODY AND SEAT
Step 1. Push button
Step 2. Lift cover
NOTE:
When closing, make sure cover is secured properly. You will hear a
"click".
NOTE: Make sure that the zipper of the cellular pouch is not interfer-
ing when you close the front storage compartment cover.
Side Panells
WARNING
Never operate engine with side panels opened or removed from
vehicle.
Removing the Side Panels
1. RH Side Panel
1. Unlock the following latches.
122
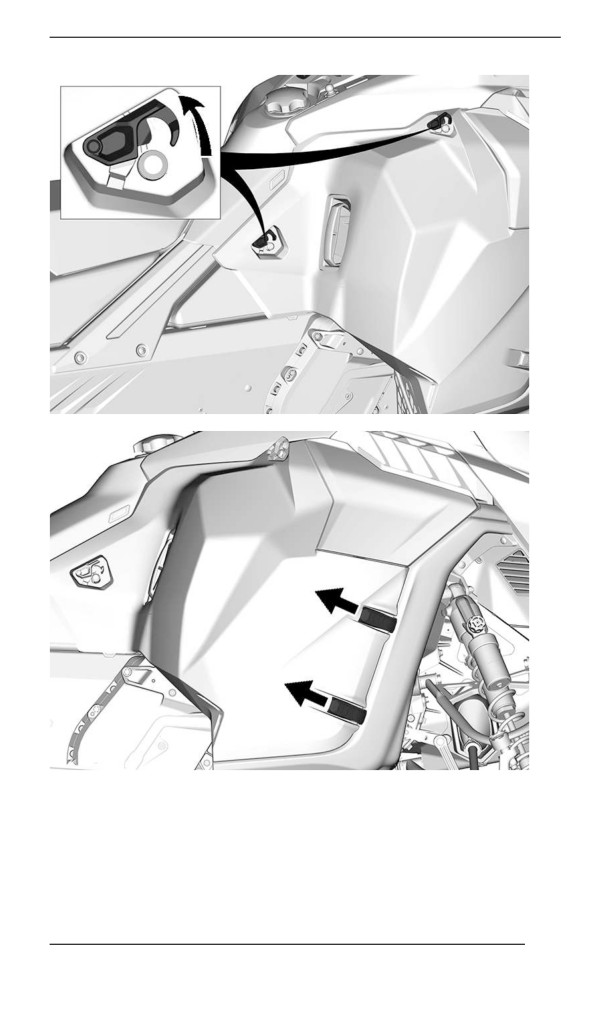
BODY AND SEAT
2. Pivot then slide the side panel.
123
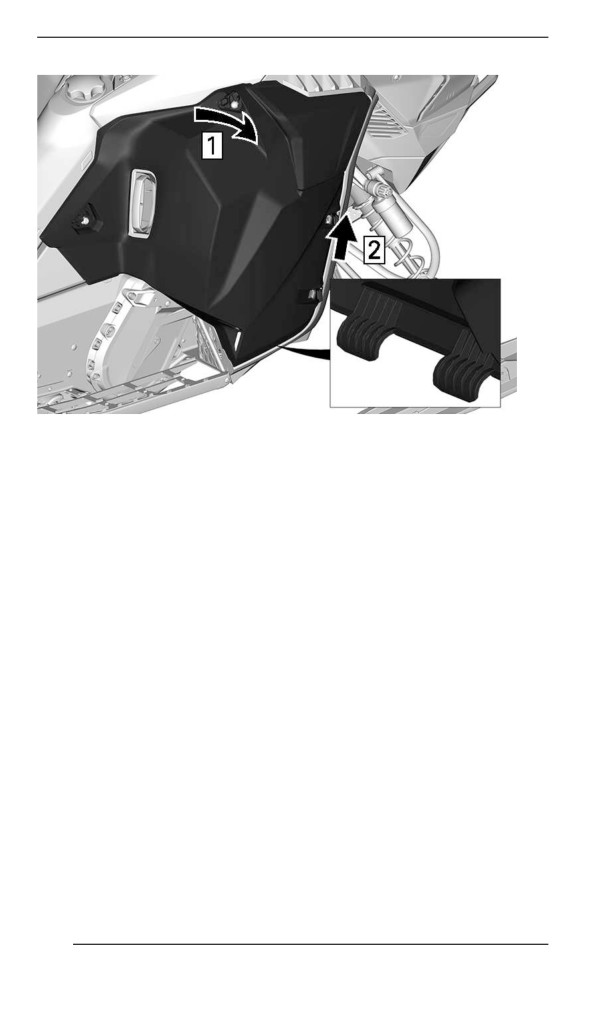
BODY AND SEAT
Step 1. Pivot side panel
Step 2. Slide side panel
124
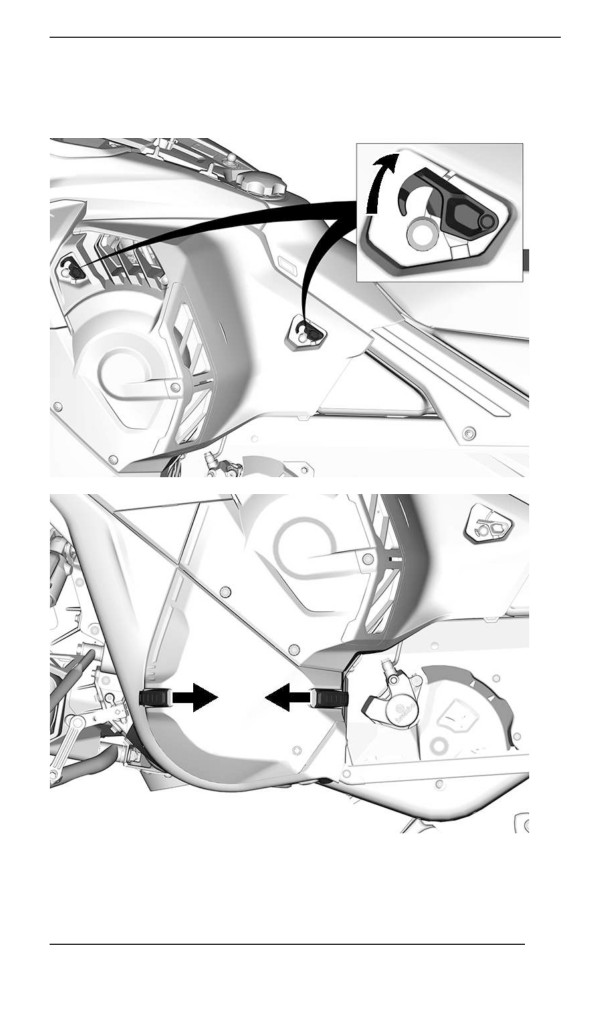
BODY AND SEAT
2. LH Side Panel
1. Unlock the following latches.
2. Remove the upper LH side panel.
125
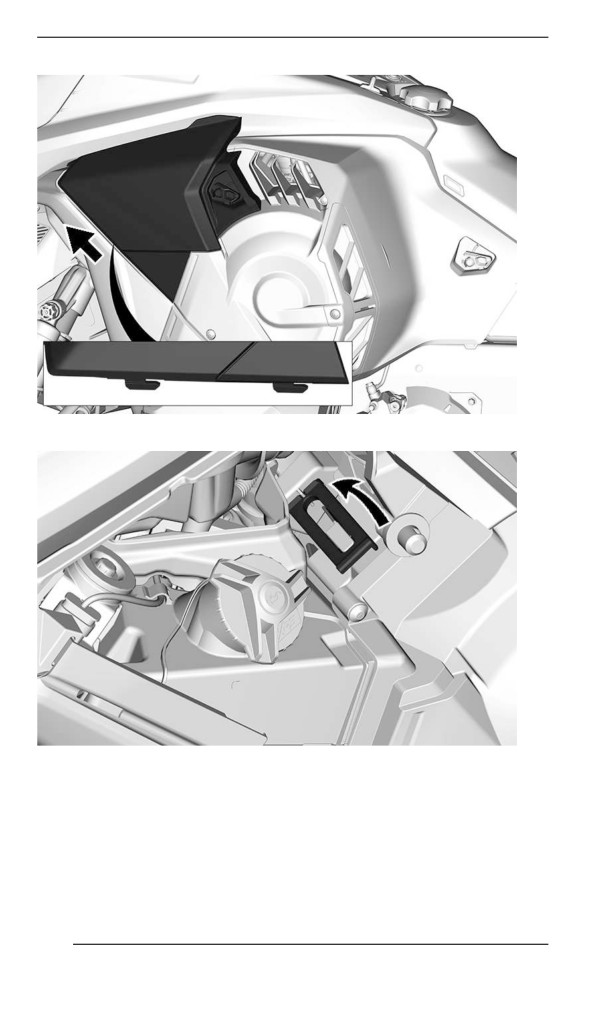
BODY AND SEAT
3. Unlock the following latch.
4. Release the pulley guard safety lock and slide the panel
outwards.
126
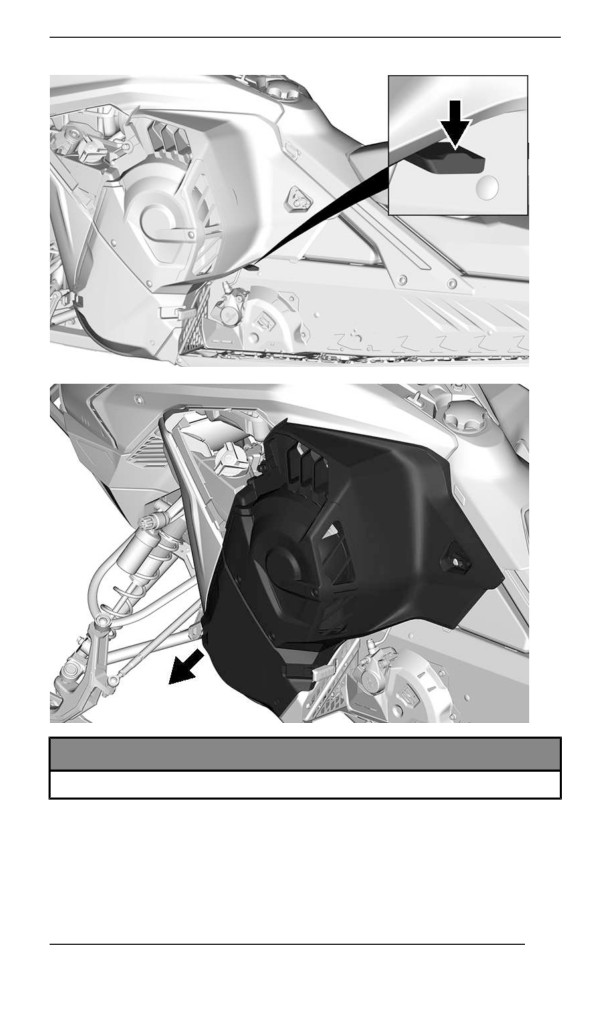
BODY AND SEAT
NOTICE
Make sure to place panel in a safe place to avoid scratching.
Installing the Side Panels
The installation is the reverse of the removal procedure.
127
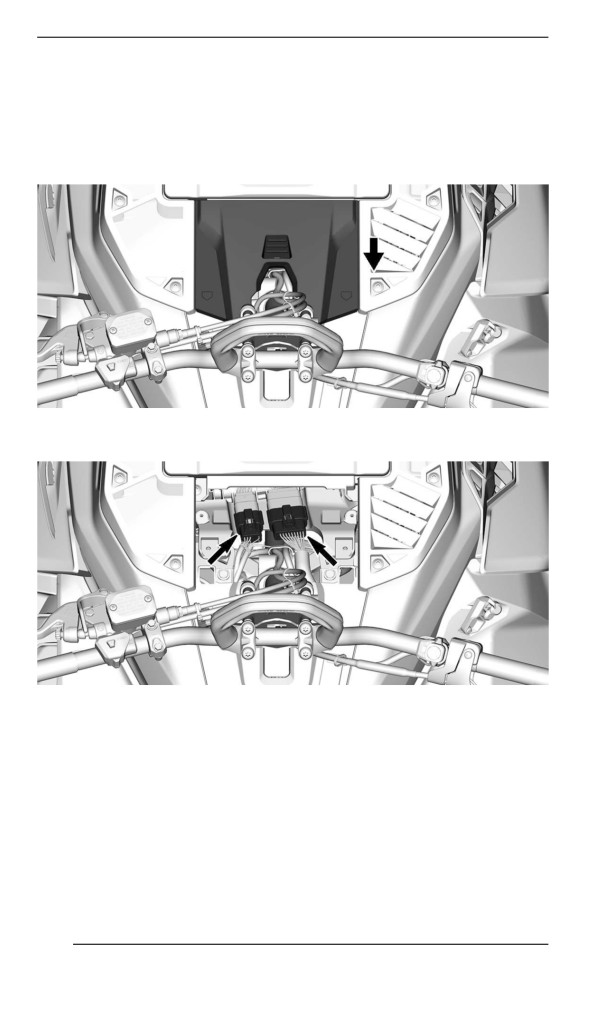
BODY AND SEAT
Upper Body Module
Removing the Upper Body Module
1. Remove both side panels. Refer to Side Panels in this section.
2. Remove the access cover by sliding it rearward.
3. Disconnect the following connectors.
4. Remove the following fasteners.
128
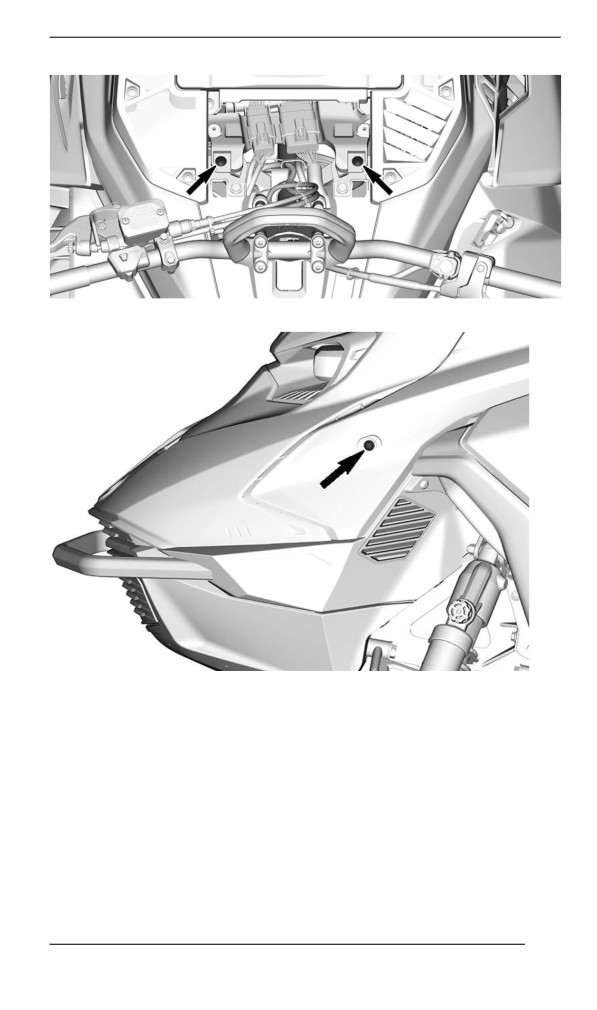
BODY AND SEAT
LH SIDE
5. Loosen the air intake duct clamp.
129
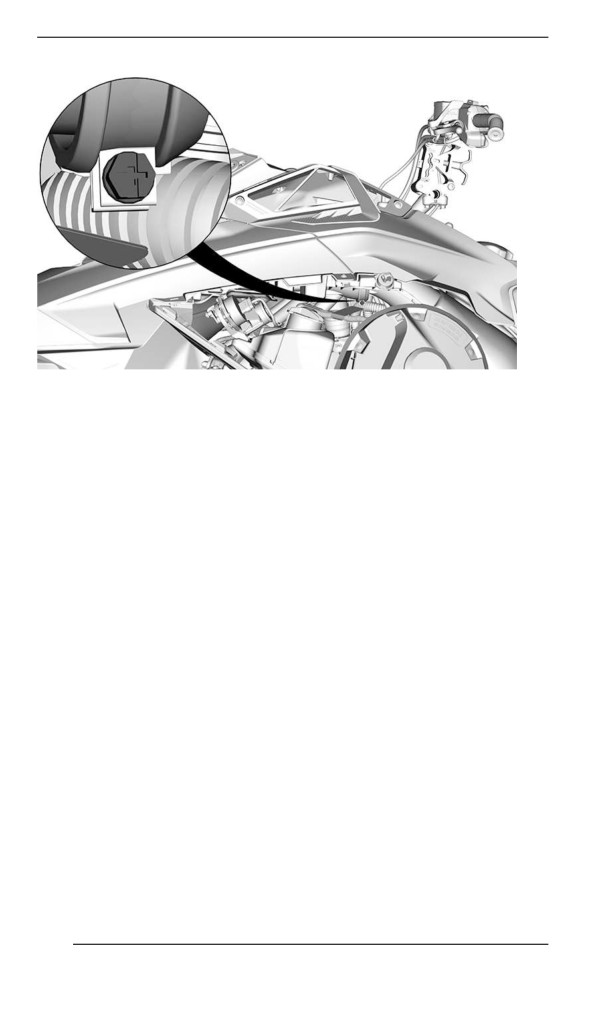
BODY AND SEAT
6. Remove the upper body module.
1. Grab the upper body module in the gauge support area.
2. Pull the module forward.
3. Remove the module from the vehicle.
Installing the Upper Body Module
The installation is the reverse of the removal procedure. However, pay
attention to the following.
1. Ensure to engage front hood tabs in front bottom pan, and rear
side hood tabs in rear console when pushing the module back in
place.
130
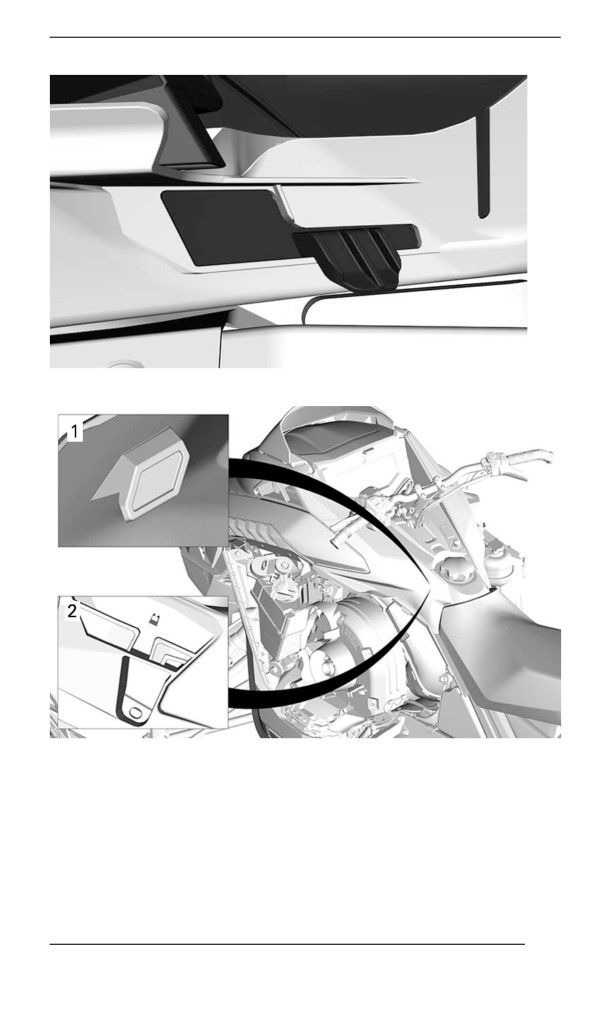
BODY AND SEAT
FRONT HOOD TAB
TYPICAL
1. Rear end hooks
2. Console slots
131
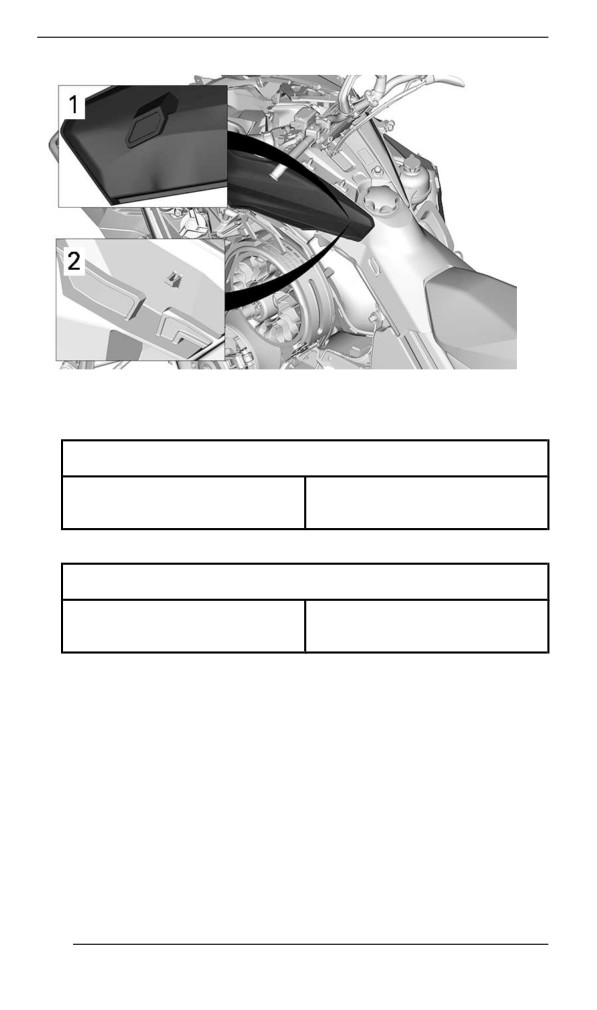
BODY AND SEAT
1. Rear end hooks
2. Console slots
2. Ensure to connect the air intake hose.
Tightening Torque
1.0 ± 0.2 Nm
Intake duct clamp
(9 ± 2 lbf-in)
3. On both sides, install the upper body module retaining screws.
Tightening Torque
1.8 ± 0.2 Nm
Upper body module screw
(16 ± 2 lbf-in)
4. Connect the module connectors.
Seat
Removing the Seat – Front Tab Lock
1. From between the fuel tank and the seat front end, pull the locking
tab upwards.
2. Slide the seat backwards while holding the tab up.
132
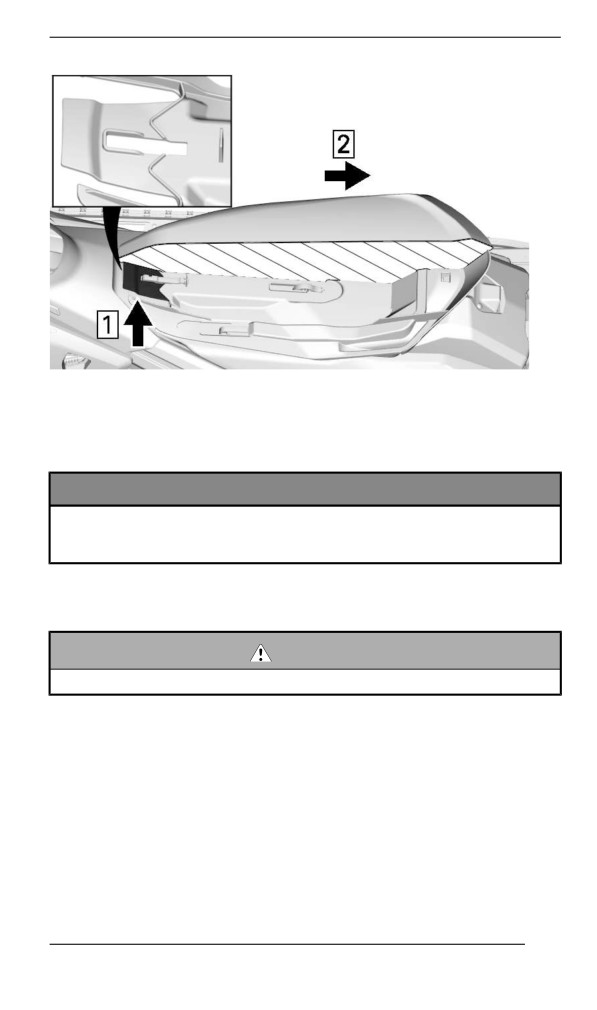
BODY AND SEAT
TYPICAL — CROSSCUT VIEW OF SEAT FOAM
1. Pull upwards
2. Slide backwards
Installing the Seat (tab lock)
NOTICE
Riding the vehicle with any objects between the seat and the
fuel tank could damage the fuel tank. NEVER place any objects
between seat and fuel tank.
Place seat over the hooks, then slide it forward until the tab locks over
the front hook.
WARNING
Make sure seat is securely latched before riding.
133
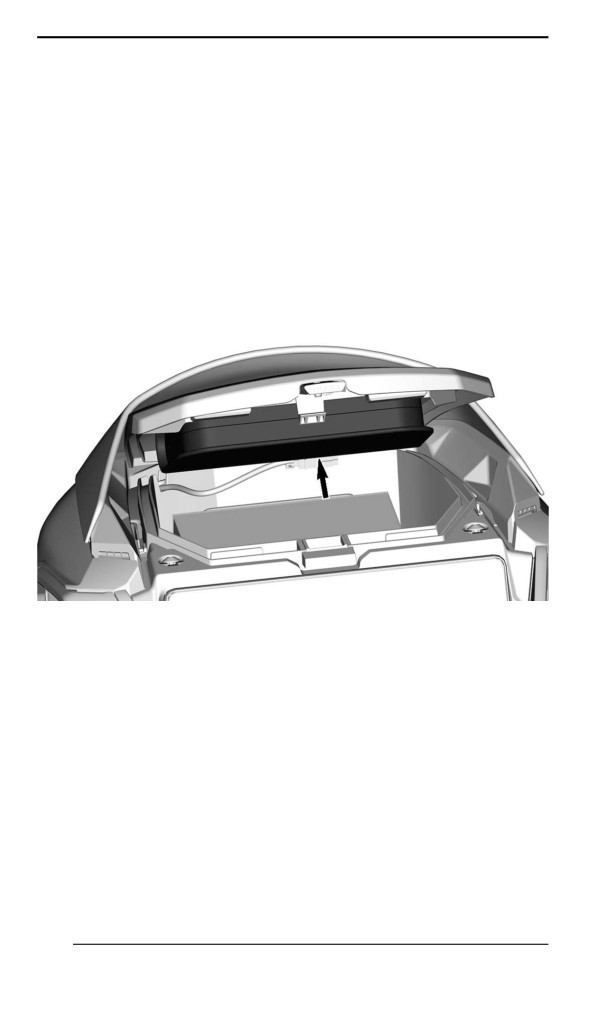
EQUIPMENT
Some features may not apply to your model or could be optional.
Operator''s Guiide
The Operator's Guide should be stored in the Front Storage
Compartment.
Heated Celll Case (iif equipped)
A heated cell case is mounted underneath the front storage compart-
ment cover. It allows to keep your cell phone at a warm temperature
while charging.
The temperature inside the case is kept between 5° C and 15° C (41°
F and 59° F).
Power Outllet - USB (if equiipped)
The USB power Outlet is located in the front storage compartment. It
allows to charge your cell phone while stored in the heated cell case.
134
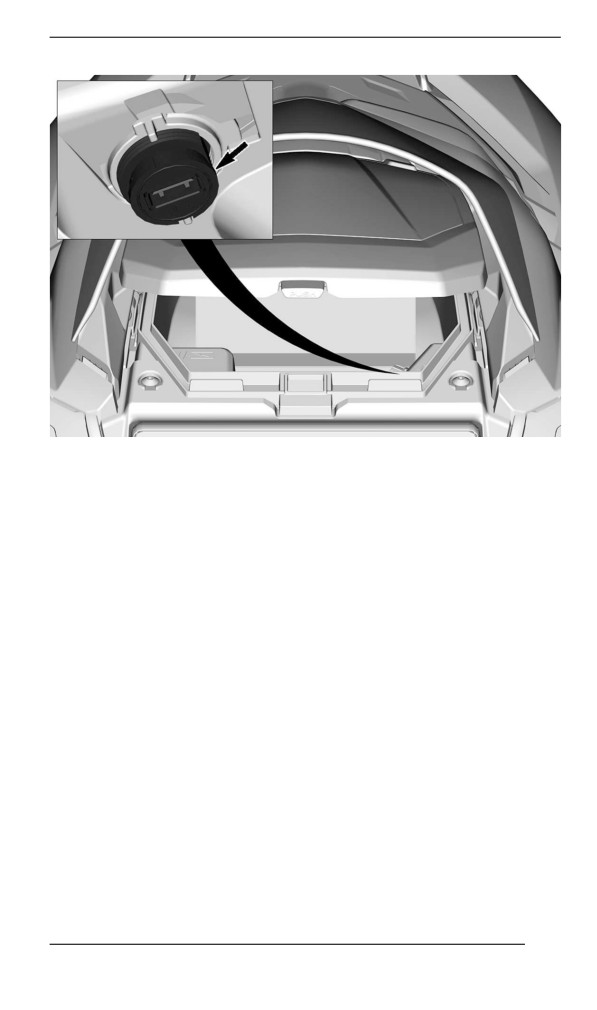
EQUIPMENT
Tools
The inside of the upper LH side panel is designed to hold the tools al-
lowing for basic maintenance.
The tools are supplied with the vehicle. They should always be in-
stalled in their proper location and orientation.
135
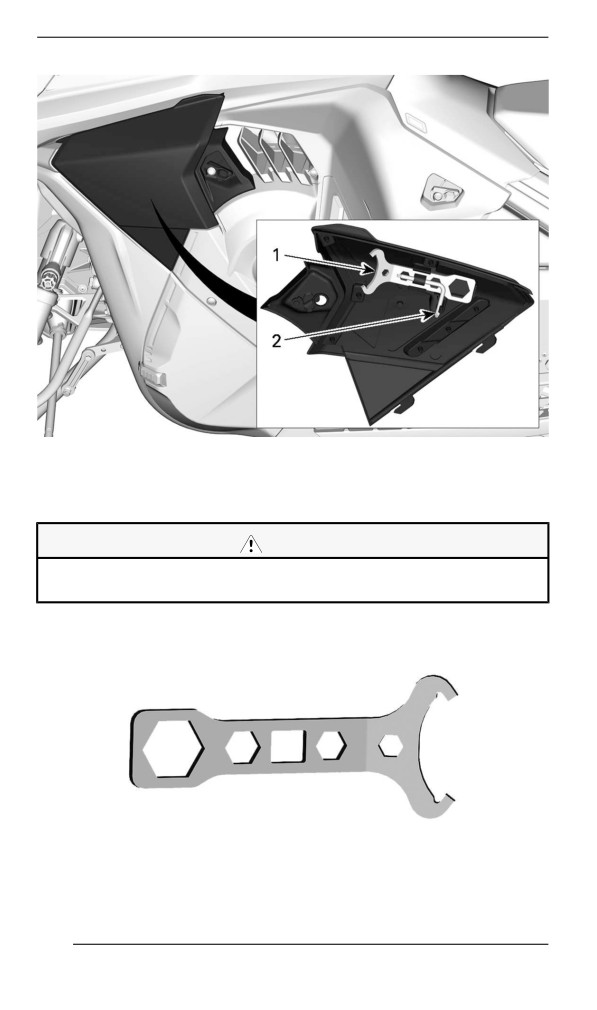
EQUIPMENT
1. Suspension adjustment tool
2. Pulley expander and headlight adjustment tool
Install in the following sequence:
CAUTION
Make sure tools are secured properly. Tools may detach and
cause damage to rotating parts.
1. Press the center of the suspension adjustment tool on the retaining
tabs.
SUSPENSION ADJUSTMENT TOOL
136
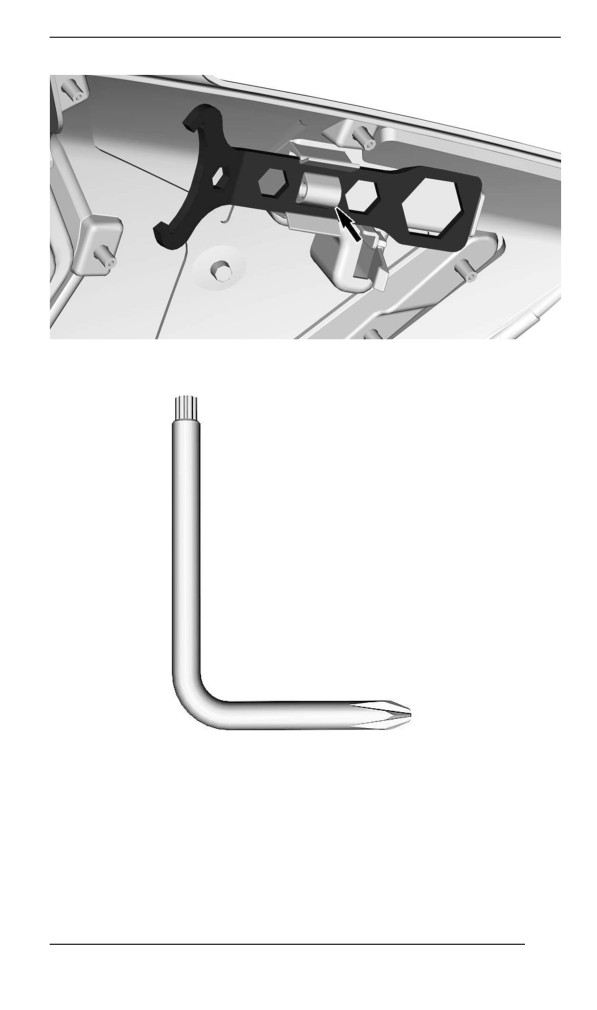
EQUIPMENT
2. Slide the pulley expander and headlight adjustment tool long end
into hole.
PULLEY EXPANDER AND HEADLIGHT ADJUSTMENT TOOL
3. Rotate and clip short end in place.
137
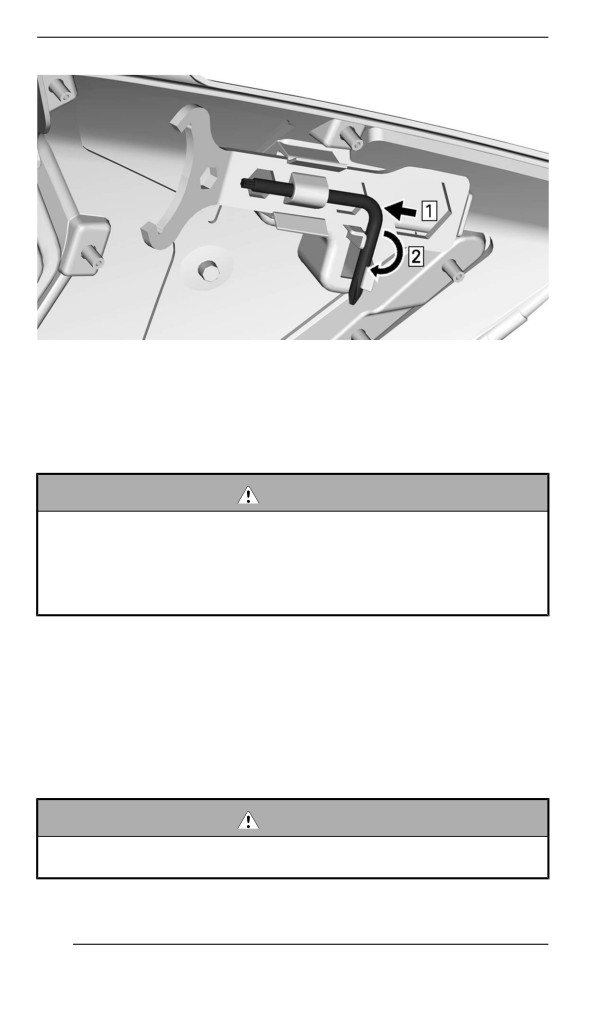
EQUIPMENT
Step 1. Slide
Step 2. Rotate and clip
Drive Belt Guard
The drive belt guard is part of the LH side panel. Refer to Side Panels
in Body and Seat for procedure to remove it.
WARNING
NEVER operate engine:
– Without shields and belt guard securely installed.
– With hood and/or side panels opened or removed.
NEVER attempt to make adjustments to moving parts while en-
gine is running.
Mountaiin Strap
This handlebar strap shall be used only to provide additional pulling
force when snowmobile is stuck in a slanted position. On an excep-
tional basis it can be used at very slow speed only, when standing on
the right running board to bring the vehicle back on its desired path.
When riding, both hands should remain on the handlebar grips to pro-
vide braking capability, as well proper steering and directional control.
Do not use handlebar strap for towing, lifting or side hilling.
WARNING
Do not use while riding at speed. Steering control is highly re-
duced and brake control is not possible.
138
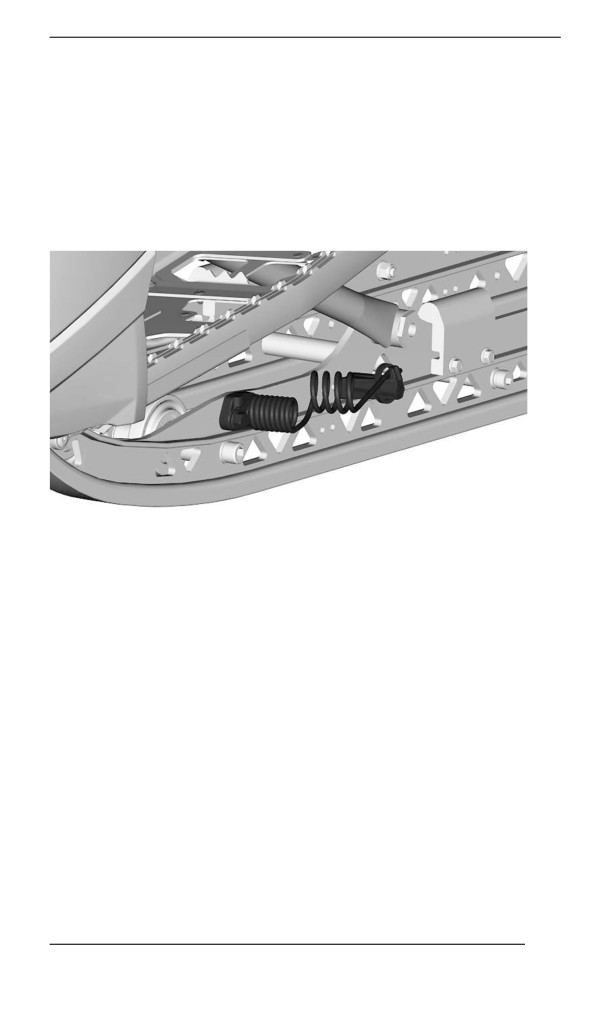
EQUIPMENT
Adjustablle Stopper Strap (If Equipped)
Can be used to adjust the stopper strap length. refer to Tune Your
Ride.
Ice Scratchers
Some models are factory equipped with ice scratchers which provide
lubrication and cooling to slides and track guides for short rides on
ice and hard packed trails.
Ice scratchers must be used whenever the vehicle is operated on a
trail, hard snow or ice.
BRP ice scratchers are designed to be used in forward or reverse.
Spare Driive Bellt Hollder
A spare drive belt can be stored in a holder located at the rear of the
fuel tank.
NOTE:
The spare drive belt is not supplied with the snowmobile.
139
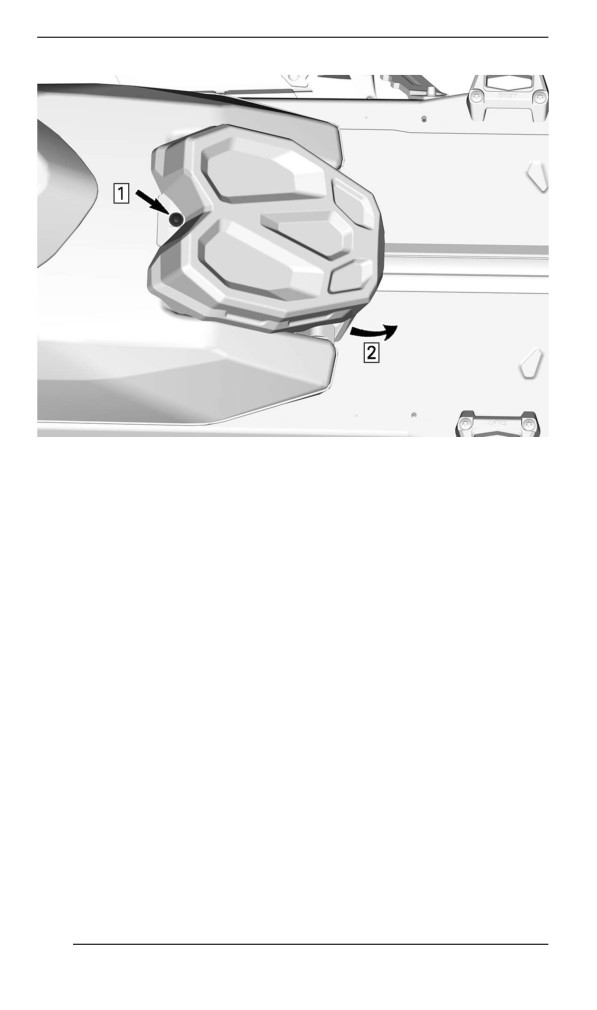
EQUIPMENT
MODELS WITHOUT BATTERY
Step 1. Remove fastener
Step 2. Slide holder
140
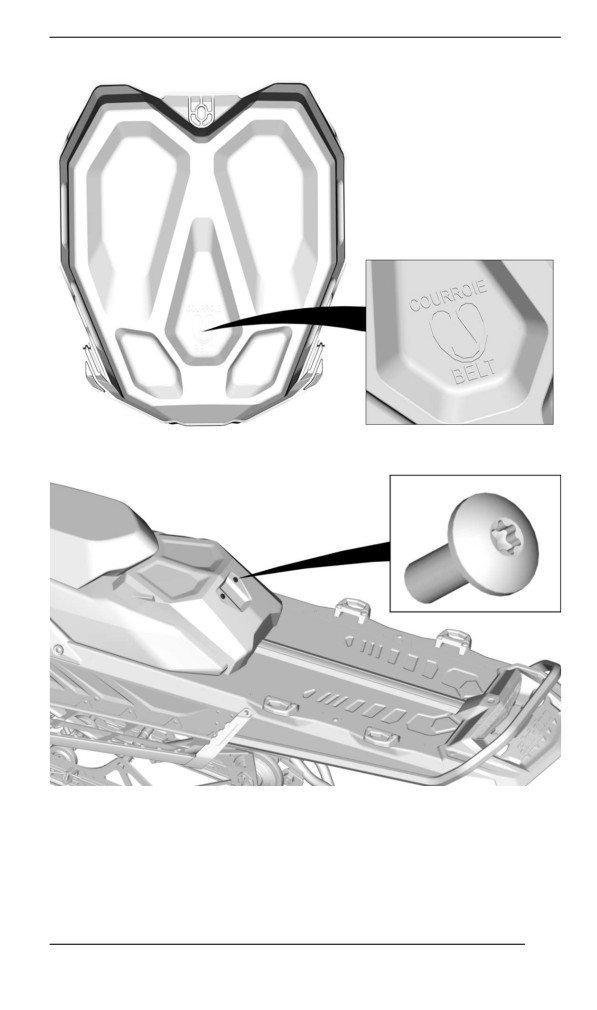
EQUIPMENT
MODELS WITHOUT BATTERY – INSIDE THE COVER
MODELS WITH BATTERY
141
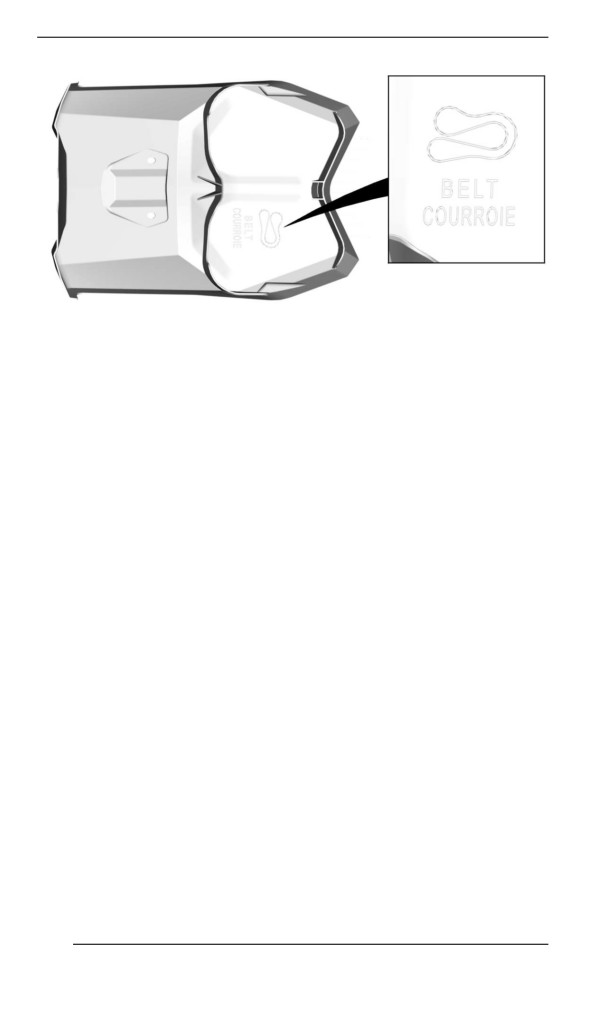
EQUIPMENT
MODELS WITH BATTERY – INSIDE THE COVER
142
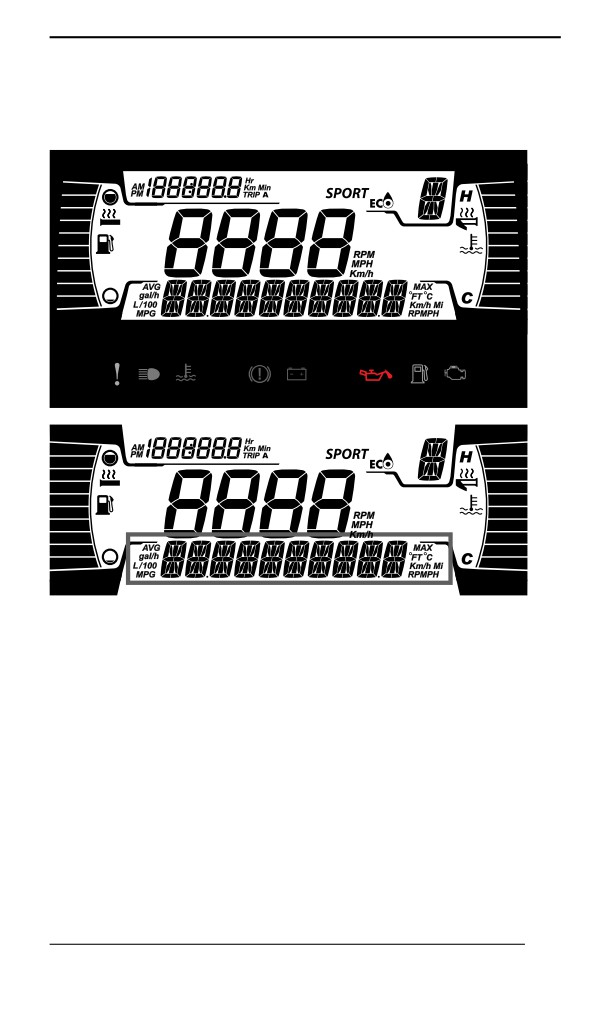
GAUGE – 4.5” DIGITAL DISPLAY
Multifunctiion Display
Lower Display
May display the following:
- RPM
- Speed
- Engine Temperature
- Fuel Statistics
- Settings
- Messages
- Outside temperature (if equipped)
To change the displayed information, use the gauge LOWER (M) but-
ton, or the Mode button on the handlebar multifunction switch, if
equipped.
The SPEED STAT display shows the maximum and the averaged
speed. Hold LOWER button for 3 seconds to reset.
When the SPEED display is chosen, the RPM is shown in the TRIP
display.
143
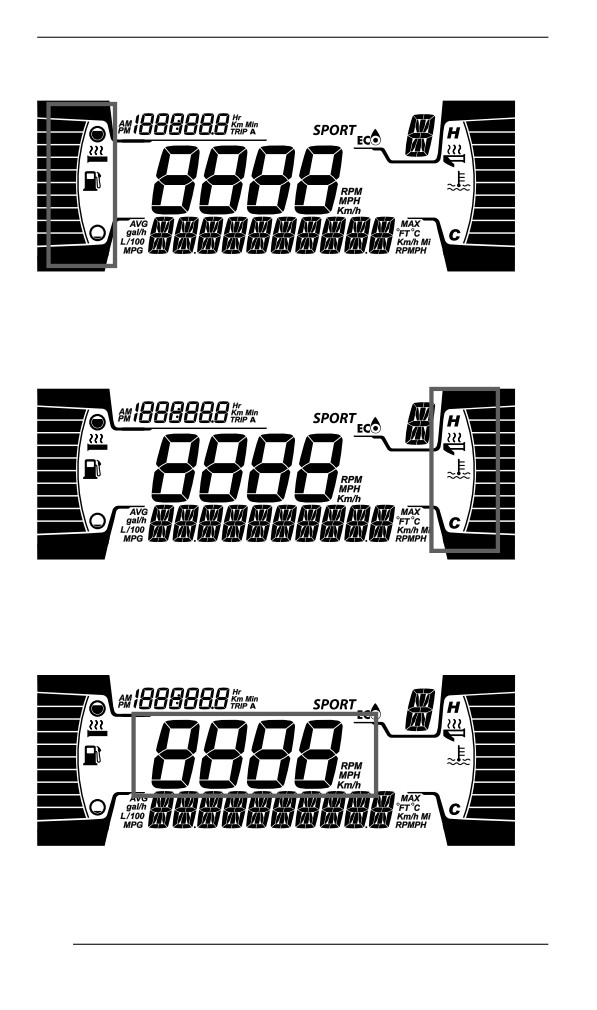
GAUGE - 4.5” DIGITAL DISPLAY
Left Lateral Display
The left lateral display includes:
- Fuel level indicator
- Heated Grip level
Right Lateral Display
The right lateral display includes:
- Engine Temperature
- Heated throttle indicator
Central Display
Display the RPM of the engine or the vehicle speed in Km/h or MPH.
144
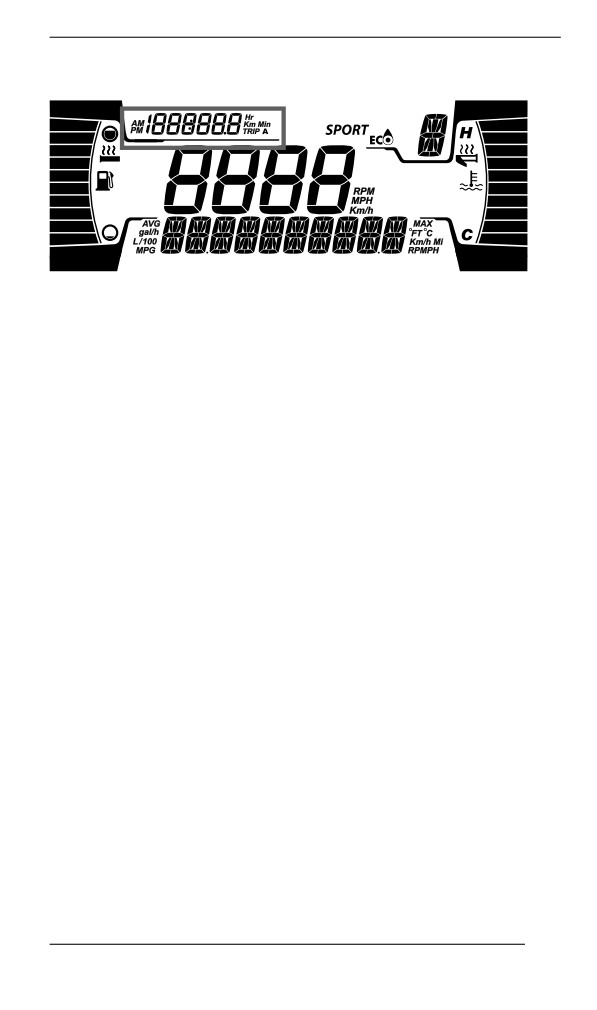
GAUGE - 4.5” DIGITAL DISPLAY
Trip Display
This display shows trip informations:
- Cumulative distance odometer
- Trip A hours
- Trip A distance (Km or mph)
- Vehicle hour meter
- Clock (If battery equipped)
To change the displayed information, use the gauge UPPER (T) but-
ton, or the Trip button on the handlebar multifunction switch, if
equipped.
Warniing Lamps and Indiicators
The following indicator lamps will alert you to a vehicle condition that
may become serious. Some lamps will illuminate when starting the ve-
hicle to make sure they work. If any lamps remain on after starting the
vehicle, refer to the respective system warning lamp for further
information.
NOTE:
Some warning indicators appear in the display of the multifunction
gauge and function the same as an indicator lamp but do not display
when starting the vehicle.
145
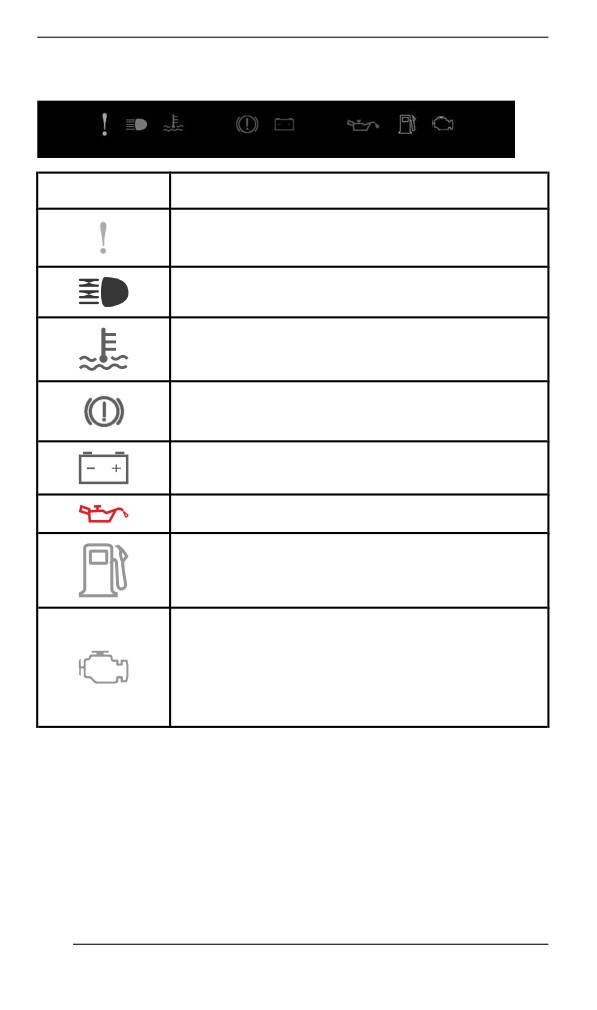
GAUGE - 4.5” DIGITAL DISPLAY
Telltale Lights - Lower Bar
Lights
Description
ORANGE - Vehicle malfunction
BLUE - The high beam are selected
RED - The engine temperature is too high.
RED - Parking brake is engaged or malfunction
of the brake system
RED - The battery voltage too low or problem
with the electrical system
RED - Low injection oil level
ORANGE - Low fuel level
ORANGE
Turn on: Malfunction of the vehicle emissions
control system
Blink: Engine problems, the limp home mode is
activated. Have the vehicle serviced
immediately.
146
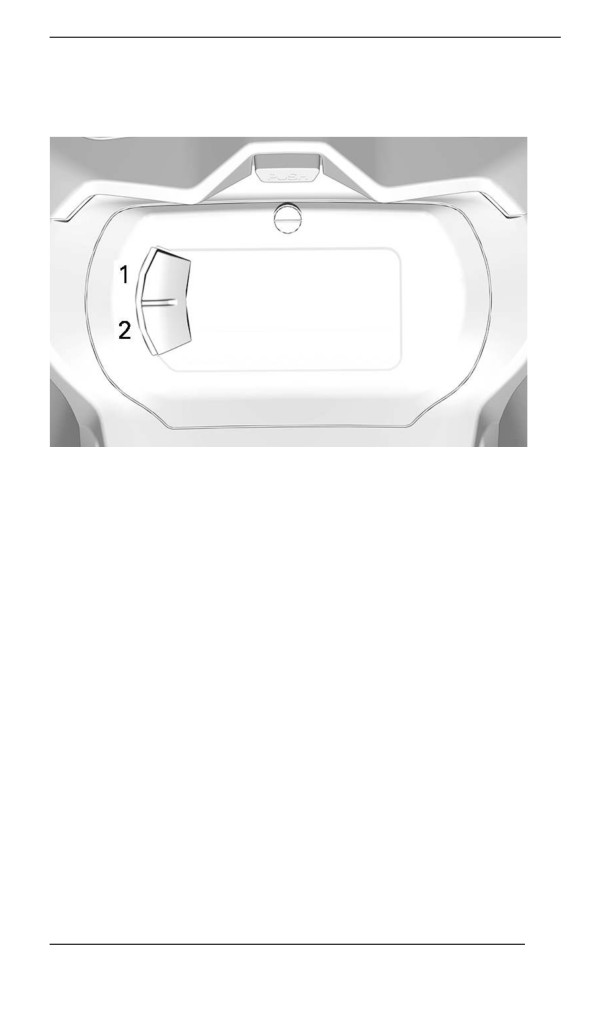
GAUGE - 4.5” DIGITAL DISPLAY
Settiings
Setup
1. Upper button (Trip)
2. Lower button (Menu)
NOTE: A Trip and a Menu buttons can be found on the handlebar
multifunction switch, if equipped.
Using the LOWER (M) button, select SETTINGS and hold to enter
setting menu.
Reset Stats
Using LOWER button, select RESET STAT and hold to reset.
Unit Selection
This multifunction gauge is factory preset in metric units but it is possi-
ble to change it to imperial units.
Using LOWER button, select UNITS and hold button to change units.
Setting Clock
Using LOWER button, select CLOCK to change the clock.
1. Press LOWER button to select clock display.
2. Push and hold LOWER button for 1 second.
147
GAUGE - 4.5” DIGITAL DISPLAY
3. Press LOWER button to select 12:00 AM PM or 24:00 time base.
4. Push and hold LOWER button to acknowledge selection.
5. Press LOWER button to change hours (hours flash).
6. Push and hold LOWER button to acknowledge hour selection.
7. Press LOWER button to switch to minutes (minutes flash).
8. Push and hold LOWER button to acknowledge minutes selection.
Setting Language
The gauge display language can be changed. Refer to an authorized
BRP snowmobile dealer for language availability and to setup the
gauge to your preference.
148
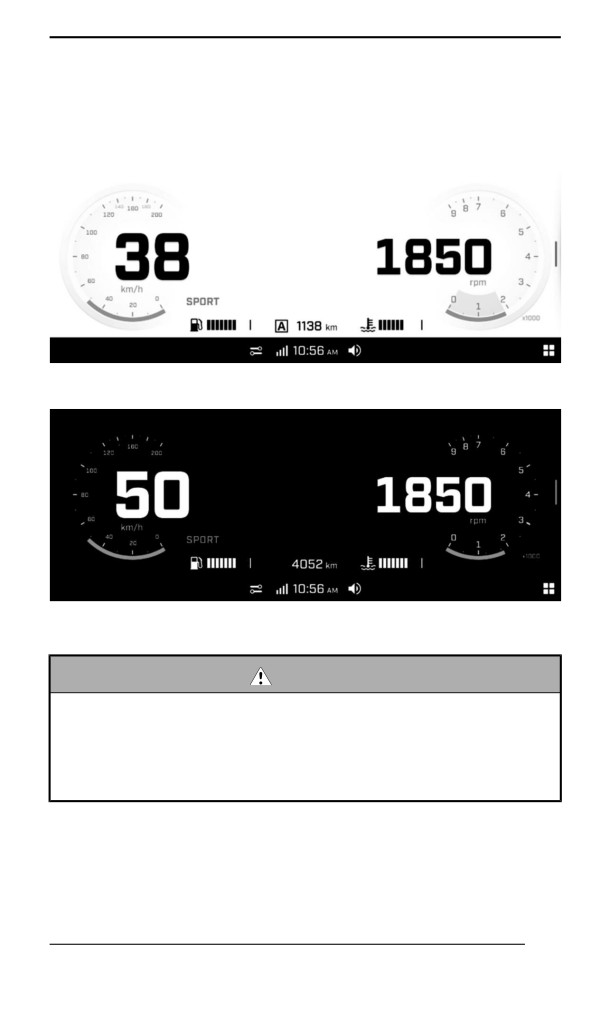
GAUGE – 10.25” COLOR TOUCHSCREEN
DISPLAY
Default Diispllay
Light Mode
Dark Mode
Navigating the Digiitall Diispllay
WARNING
Reading or tampering with the multifunction gauge can distract
you from the operation of the vehicle, particularly from con-
stantly scanning the environment. Always pay attention to road
conditions, ensure your environment is clear and free from ob-
stacles. Furthermore, when riding, only glance at the multifunc-
tion gauge briefly to maintain awareness of road conditions.
The multifunction gauge includes digital gauges (speedometer and
tachometer), indicator lamps and an infotainment center with a digital
screen.
149
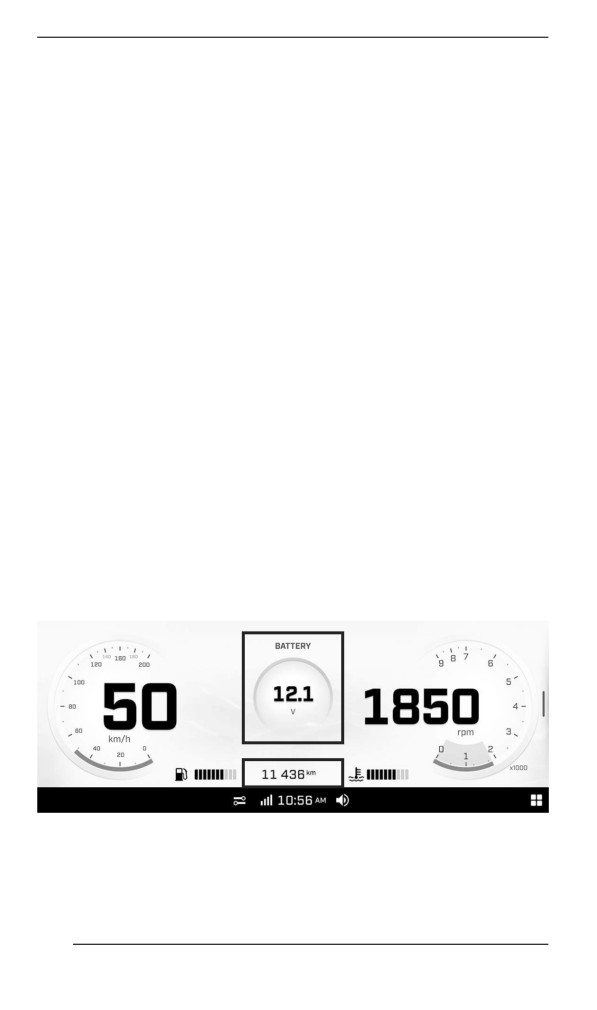
GAUGE - 10.25” COLOR TOUCHSCREEN DISPLAY
We recommend you practice selecting some functions on the infotain-
ment center before getting on the road. You will get used to them and
they will be easier to use on the road.
Use the handlebar multifunction switch to navigate (touchscreen not
available when riding). Refer to Secondary Controls.
Pressing the App Menu button on the handlebar multifunction switch
will make the modal view appear on top of the cluster.
Center Display
In full gauge view, long press in the upper center of the screen to show
one of the following extra gauges. Cycle through the extra gauges with
additional long presses.
- Battery voltage
- Coolant temperature
- Belt temperature (if equipped)
- Smart-Shox suspension type (if equipped)
- Altitude (if equipped)
- Ratio boost (if equipped)
- Air suspension (if equipped)
In full gauge view, long press the lower center of the screen to show
one the following information. Cycle through the informations with ad-
ditional long presses.
- Vehicle total distance
- Vehicle total hours
- Trip A distance
- Trip A hours
- Trip B distance
- Trip B hours
150
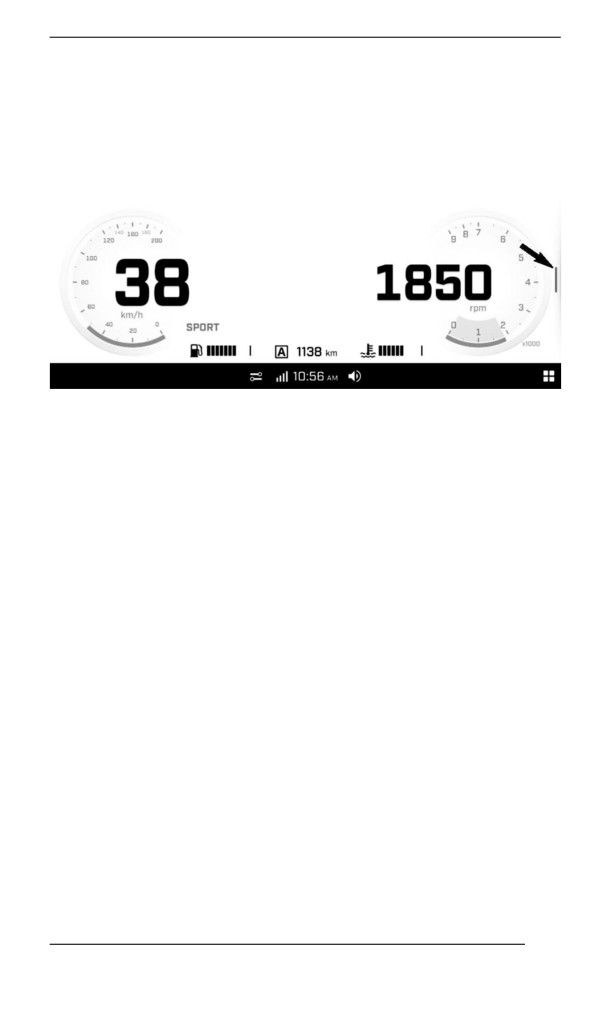
GAUGE - 10.25” COLOR TOUCHSCREEN DISPLAY
Narrow Viiew Display
To change from full gauge view to narrow view, open an app or slide
the divider on the right side.
To change back to full gauge view, cycle through the apps or slide the
divider back in place.
The size of the left and right lateral displays cannot be adjusted.
Left Lateral Display
In narrow view, the left lateral display includes:
- Fuel level indicator
- Engine temperature
- Speedometer
- Tripmeter
- RPM
In narrow view, long press the speedometer to change the display be-
tween speedometer only or speedometer and RPM.
In narrow view, long press the tripmeter to show one of the following
information. Cycle through the informations with additional long
presses.
- Current ride distance
- Current ride hours
- Trip A distance
- Trip A hours
- Trip B distance
- Trip B hours
151
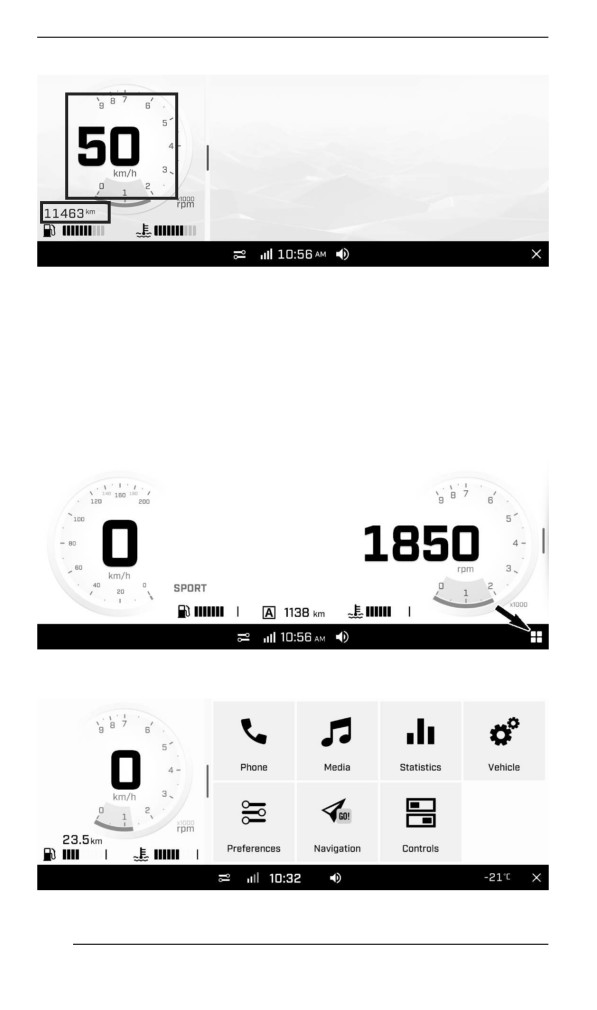
GAUGE - 10.25” COLOR TOUCHSCREEN DISPLAY
Right Lateral Display
In narrow view, the right lateral display includes various apps. Refer to
App Menu for more information.
App Menu
To access the app menu, press the app menu icon on the bottom-right
corner.
Press on an app icon to open it.
152
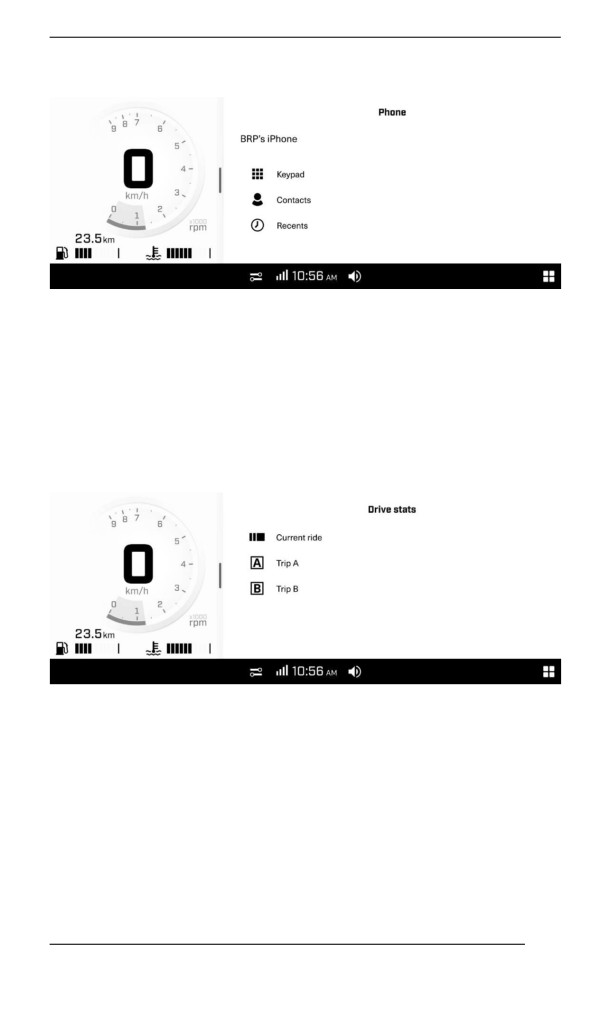
GAUGE - 10.25” COLOR TOUCHSCREEN DISPLAY
Phone
The phone menu is to access:
- The keypad
- The phone contact list
- The phone history
NOTE:
To have access to the Phone menu, a phone and rider helmet must be
paired. Refer to Pair your Smartphone Via Bluetooth.
Statistics
The Statistics menu is used to get :
- Trip distance information
- Trip elapsed time information
- Average speed
3 sets of statistics are kept in memory. Trip A and Trip B can be reset
independently. Current ride statistic will be reset when the vehicle
restart.
153

GAUGE - 10.25” COLOR TOUCHSCREEN DISPLAY
Media
Allow to control volume and music listened in the helmet audio
system.
Gives also song informations when available.
This vehicle is not equipped with speakers. An appropriate helmet
audio system is required to listen to music.
Preferences
The Preferences menu is to:
- Adjust the display brightness and appearance (Light/Dark/Auto)
- Pair Bluetooth devices:
- Phone
- Driver headset
- Passenger headset
- Connect vehicle to a Wi-Fi network
- Access General settings:
- Adjust the units (Imperial/Metric)
- Set the language
- Set the date and time
- Software update
- Get information about manufacturer information and device
regulatory compliance
- Reset to factory settings
- Set the apps to be used while riding
- Set the settings to be used while riding
It is recommended to check for updates regularly.
Quick Preferences
To access the Quick Preferences menu, press the following icon.
154
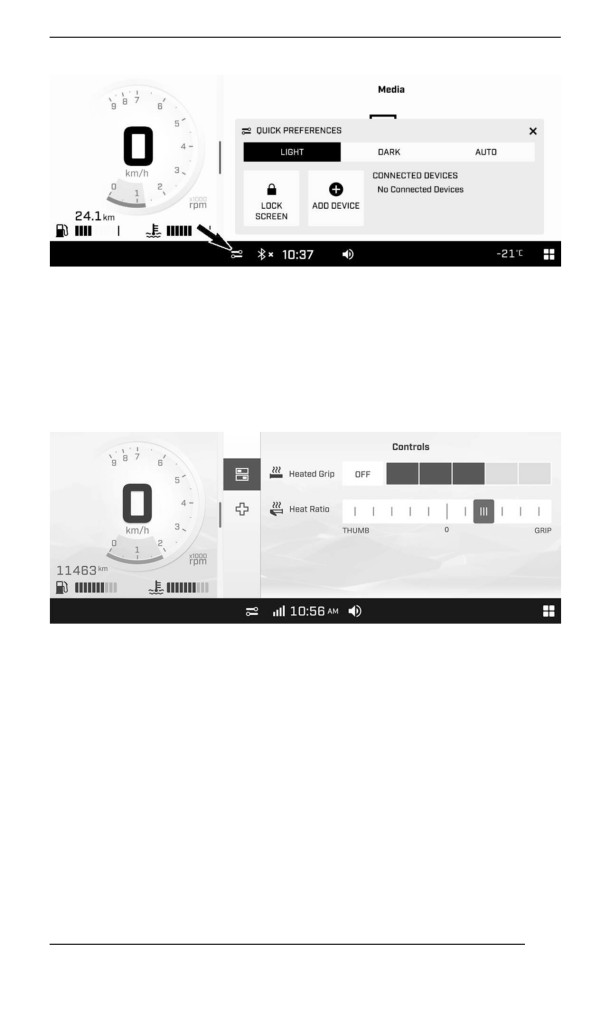
GAUGE - 10.25” COLOR TOUCHSCREEN DISPLAY
The Quick Preferences menu is to:
- Adjust the display appearance (Light/Dark/Auto)
- Lock the screen (press and hold anywhere on the screen to
unlock)
- Add a Bluetooth device
- View connected Bluetooth devices
Vehicle Settings
The Controls app menu is to:
- Adjust heated grips and thumb ratio
- View vehicle Health:
- Vehicle information
- Faults (codes and description)
- Procedures (summerization)
155
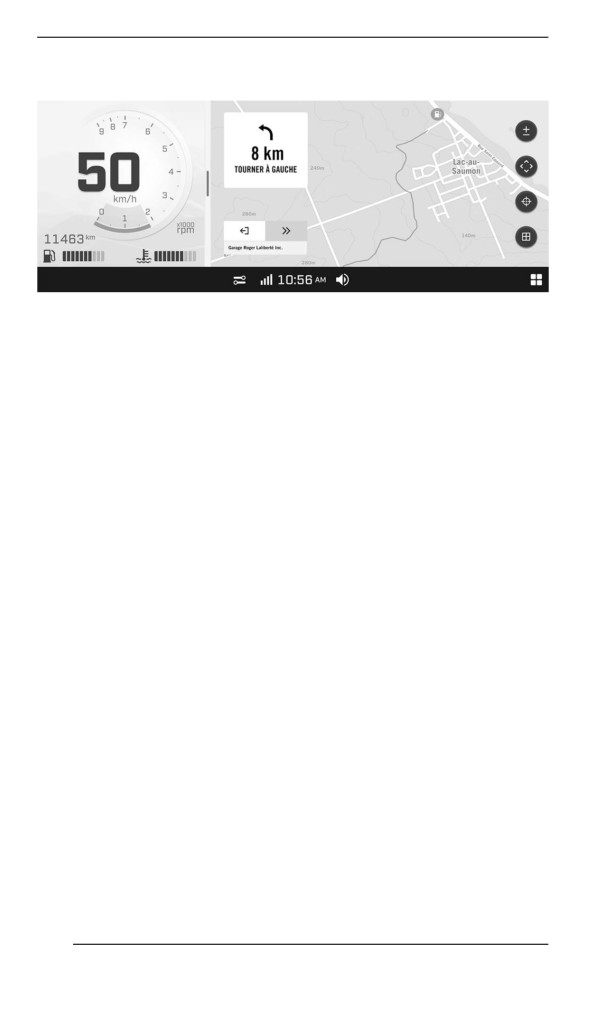
GAUGE - 10.25” COLOR TOUCHSCREEN DISPLAY
BRP GO! App
Before using BRP Connect, the BRP GO! app must be downloaded to
the phone. The app can be downloaded from the Apple App Store or
Google Play Store via a simple search.
NOTE: Not all phones are compatible. User experience may vary.
Visit our website for more details:
NOTE:
The smartphone must be connected with a USB cable to the USB port
located in the glove box.
User's personal data will be deleted from the cluster when the phone
disconnected.
User agrees that personal data (contact list and call history) be trans-
ferred to the cluster when smartphone is connected.
Warning Lamps and Indicators
The following indicator lamps will alert you to a vehicle condition that
may become serious. Some lamps will illuminate when starting the ve-
hicle to make sure they work. If any lamps remain on after starting the
vehicle, refer to the respective system warning lamp for further
information.
NOTE:
Some warning indicators appear in the display of the multifunction
gauge and function the same as an indicator lamp but do not display
when starting the vehicle.
156
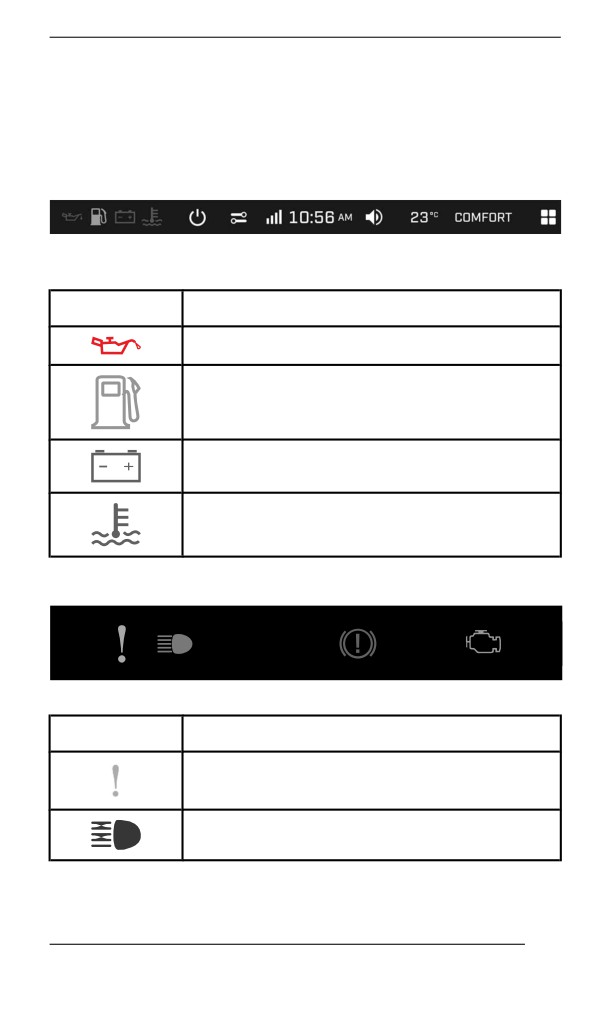
GAUGE - 10.25” COLOR TOUCHSCREEN DISPLAY
Telltale Lights
The telltale lights are separated on two levels:
- Digital bar
- Physical bar
Digital Bar
DIGITAL PILOT LAMP
–
10.25” COLOR DIGITAL
TOUCHSCREEN
Lights
Description
RED - Low engine oil pressure (if applicable)
ORANGE - Low fuel level
RED - The battery voltage too low or problem
with the electrical system
RED - The engine temperature is too high.
Physical Bar
PILOT LAMPS – 10.25” COLOR DIGITAL TOUCHSCREEN
Lights
Description
ORANGE - Vehicle malfunction
BLUE - The high beam are selected
157
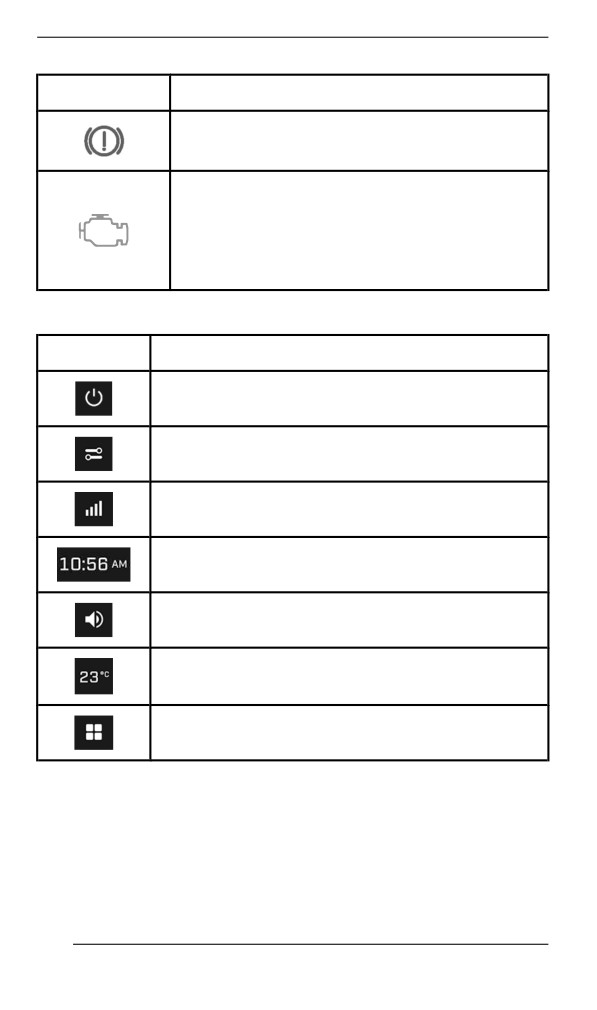
GAUGE - 10.25” COLOR TOUCHSCREEN DISPLAY
Lights
Description
RED - Parking brake is engaged or malfunction
of the brake system
ORANGE
Turn on: Malfunction of the vehicle emissions
control system
Blink: Engine problems, the limp home mode is
activated. Have the vehicle serviced
immediately.
Icons and Indicators - Multifunction Display
Icon
Description
Shut down
Quick Preferences
Smartphone Network connection
Clock
Audio Volume
Ambient Temperature
App menu
Paiiring your Smartphone Via Blluetooth
On the Vehicle
1. Open the App menu.
2. Go to “Preferences”.
3. Select “Bluetooth”.
158
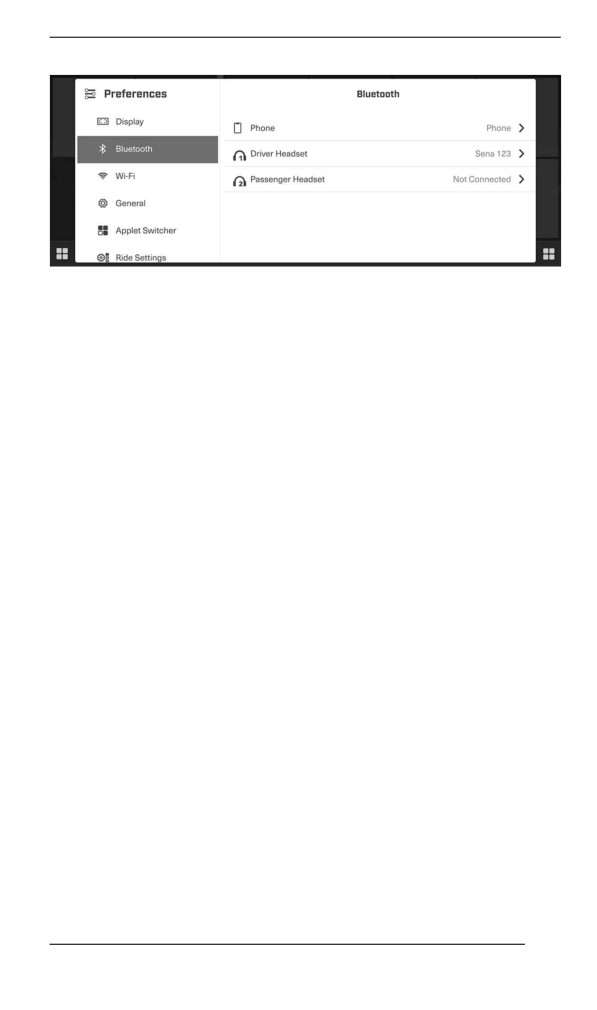
GAUGE - 10.25” COLOR TOUCHSCREEN DISPLAY
4. Select “Phone”.
5. Select “Add Device”.
NOTE: More than one smartphone can be paired with the vehicle.
However, only one will connect at any given time.
On the Phone
1. Activate your phone's bluetooth function.
Refer to your manufacturer's user guide for detailed procedure.
2. Select the bluetooth name of your vehicle display in the list of avail-
able devices.
3. A confirmation number will appear on the display and on the
phone. Make sure that the numbers match.
4. Press Pair on your phone.
5. Allow Contacts and Favorite Sync on your phone.
Pairing a Helmet
To pair a helmet, refer to Pairing your Smartphone Via Bluetooth and
select “Driver Headset” or “Passenger Headset”.
BRP GO! App
1) Download the BRP GO! Smartphone App
Download the BRP GO! app via the App Store for Apple™ or the Goo-
gle™ Play Store for Android.
2) Connect your smartphone using your charging / data transfer
cable
It is recommended to use an original charging cable from the smart-
phone OEM to optimize transfer between the phone and the vehicle.
Use the front USB port.
159
GAUGE - 10.25” COLOR TOUCHSCREEN DISPLAY
1. Unlock your phone screen
2. Connect your phone charging cable
3. A checkmark will appear on your phone screen once the connec-
tion is done.
3) Access your Apps
Press the Apps Button on the handlebar multifunction switch or press
the App Menu icon to access the apps.
Select “Navigation”.
160
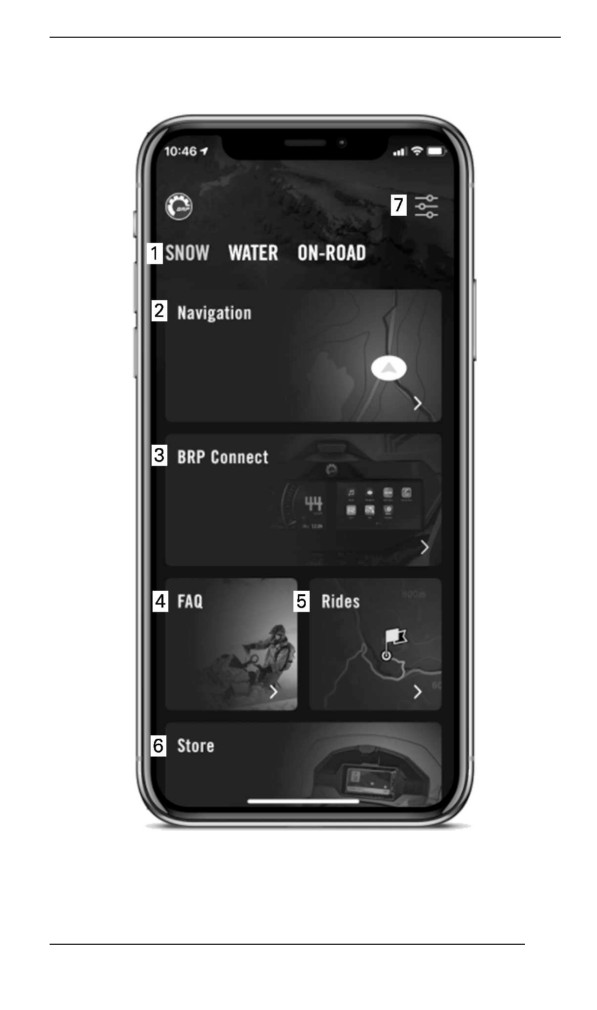
GAUGE - 10.25” COLOR TOUCHSCREEN DISPLAY
Quiick Tour of the BRP GO! App
1. Playground: Select your playground to see content related to your
vehicle. For Ski-Doo snowmobiles, select the Snow playground.
161
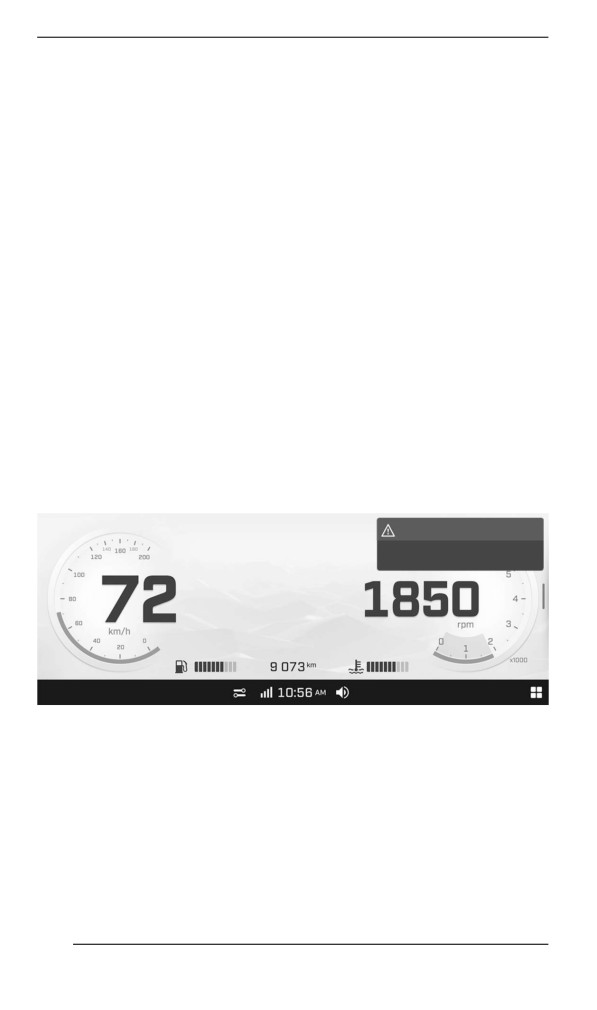
GAUGE - 10.25” COLOR TOUCHSCREEN DISPLAY
2. Navigation: Access all the navigation features of the app such as
route planning, turn-by-turn navigation, friends location, offline nav-
igation, and more. You can access thousands of snowmobile trails
across North America and Europe on the map.
3. BRP Connect: See the list of compatible apps that can be used on
the vehicle's display. You can also access from there the Vehicle
Connection Guide to help you connect your phone to your vehicle's
display.
4. FAQ: This link takes you to answers of common questions asked
by riders like you. An internet connection is required.
5. Rides: Easily access your planned and completed rides made with
the Navigation features of the BRP GO! app.
6. Store: This link takes you to the online store of your vehicle. An in-
ternet connection is required.
7. Settings: Manage your profile and your account settings.
Messages in Multiifunctiion Gauge
Important information about vehicle condition is displayed on the multi-
function gauge. When starting the engine, always look at the gauge
for any indicator lamps or special messages.
Important information messages can also be displayed temporarily to
assist indicator lamps.
Notifications will always appear at the top right corner of the screen.
10.25” COLOR DIGITAL TOUCHSCREEN
There are two types of notifications:
- Vehicle notifications include warning, caution and notice messages
- Infotainment notifications include messages regarding connected
devices
Vehicle notifications have priority over infotainment notifications when
they are both present at the same time.
162
GAUGE - 10.25” COLOR TOUCHSCREEN DISPLAY
In the event vehicle goes into LIMP HOME, BRP recommends having
the vehicle transported. If you operate the vehicle in LIMP HOME,
avoid abrupt maneuvers and immediately go to the nearest authorized
BRP snowmobile dealer to have your vehicle serviced before riding
again. In LIMP HOME, the engine RPM is limited and therefore the ve-
hicle speed.
163
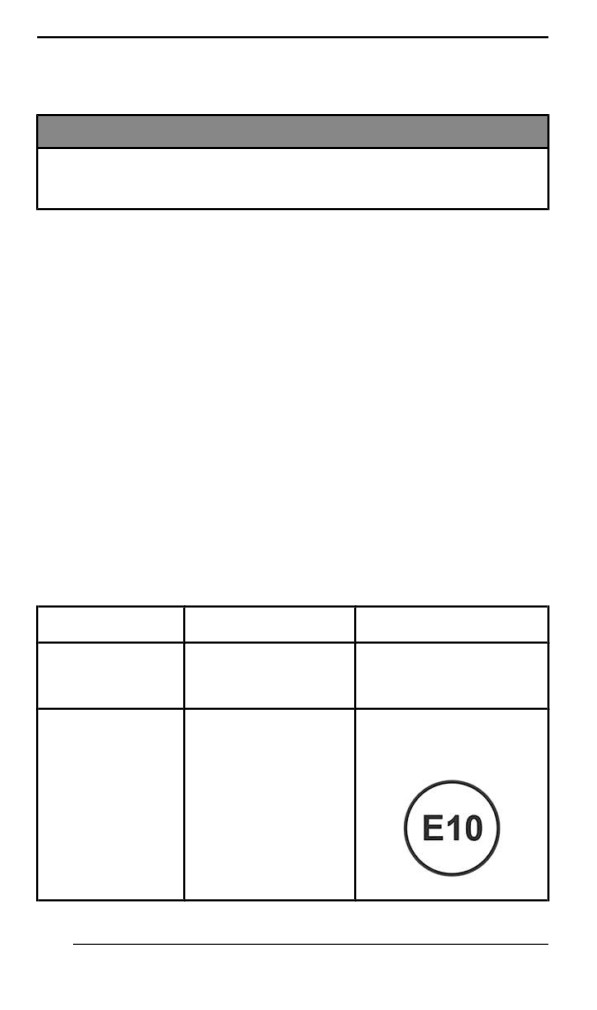
FUEL
Fuel Requirements
NOTICE
Always use fresh gasoline. Gasoline will oxidize; the result is
loss of octane, volatile compounds, and the production of gum
and varnish deposits which can damage the fuel system.
Alcohol fuel blending varies by country and region. Your vehicle has
been designed to operate using the recommended fuels, however, be
aware of the following:
- Use of fuel containing alcohol above the percentage specified by
government regulations is not recommended and can result in the
following problems in the fuel system components:
- Starting and operating difficulties.
- Deterioration of rubber or plastic parts.
- Corrosion of metal parts.
- Damage to internal engine parts.
- Inspect frequently for the presence of fuel leaks or other fuel sys-
tem abnormalities if you suspect the presence of alcohol in gaso-
line exceeds the current government regulations.
- Alcohol blended fuels attract and hold moisture which may lead to
fuel phase separation and can result in engine performance prob-
lems or engine damage.
Recommended Fuel
Use unleaded gasoline containing MAXIMUM 10% ethanol. The gaso-
line must have the following minimum octane requirements.
Fuel type
Engine
Min. octane rating
600R E-TEC
Fuel with NO
91 AKI (RON+MON)/2
850 E-TEC
ethanol
95 RON
850 E-TEC Turbo R
91 AKI (RON+MON)/2
95 RON
Fuel which may
600R E-TEC
contain up to
850 E-TEC
10% MAX
850 E-TEC Turbo R
ethanol
164

FUEL
NOTICE
Never experiment with other fuels. Engine or fuel system dam-
ages may occur with the use of an inadequate fuel.
NOTICE
Do NOT use fuel from fuel pumps labeled E85.
Use of fuel labeled E15 is prohibited by U.S. EPA Regulations.
Fueliing Procedure
WARNING
Always stop engine before refueling.
WARNING
Fuel is flammable and explosive under certain conditions.
Never use an open flame to check fuel level.
Never smoke or allow flame or spark in vicinity.
Always work in a well-ventilated area.
NOTE:
Do not sit or lean on seat when fuel tank cap is not properly installed.
1. Stop engine.
2. Have operator and passenger get off vehicle.
WARNING
Do not allow anyone seated on the vehicle while fueling.
3. Unscrew slowly the fuel reservoir cap counterclockwise to stabilize
pressure before removing it.
NOTE:
A short whistling sound is normal.
165
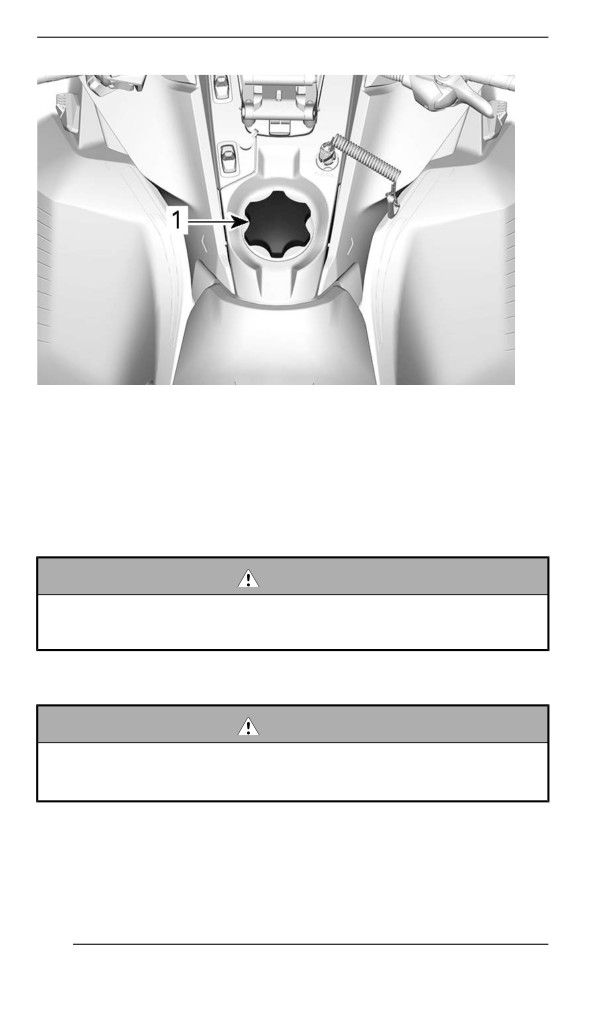
FUEL
TYPICAL
1. Fuel tank cap
4. Insert the spout into the filler neck.
5. Pour fuel slowly so that air can escape from the tank and prevent
fuel flow back. Be careful not to spill fuel.
6. Stop filling when the fuel reaches the bottom of filler neck. Do not
overfill.
WARNING
Never top up the fuel tank before placing the vehicle in a warm
area. As temperature increases, fuel expands and may
overflow.
7. Fully tighten fuel reservoir cap clockwise.
WARNING
Always wipe off any small fuel spillage from the vehicle. If a ma-
jor spillage occurs, remove side panels to remove fuel vapors
from engine compartment before starting.
NOTE:
Do not sit or lean on seat when fuel tank cap is not properly installed.
166
//////////////////////////////////////////