Doosan DX190W. Operation and Maintenance Manual (2006) - page 2
Operating Controls
OP000528
2-3
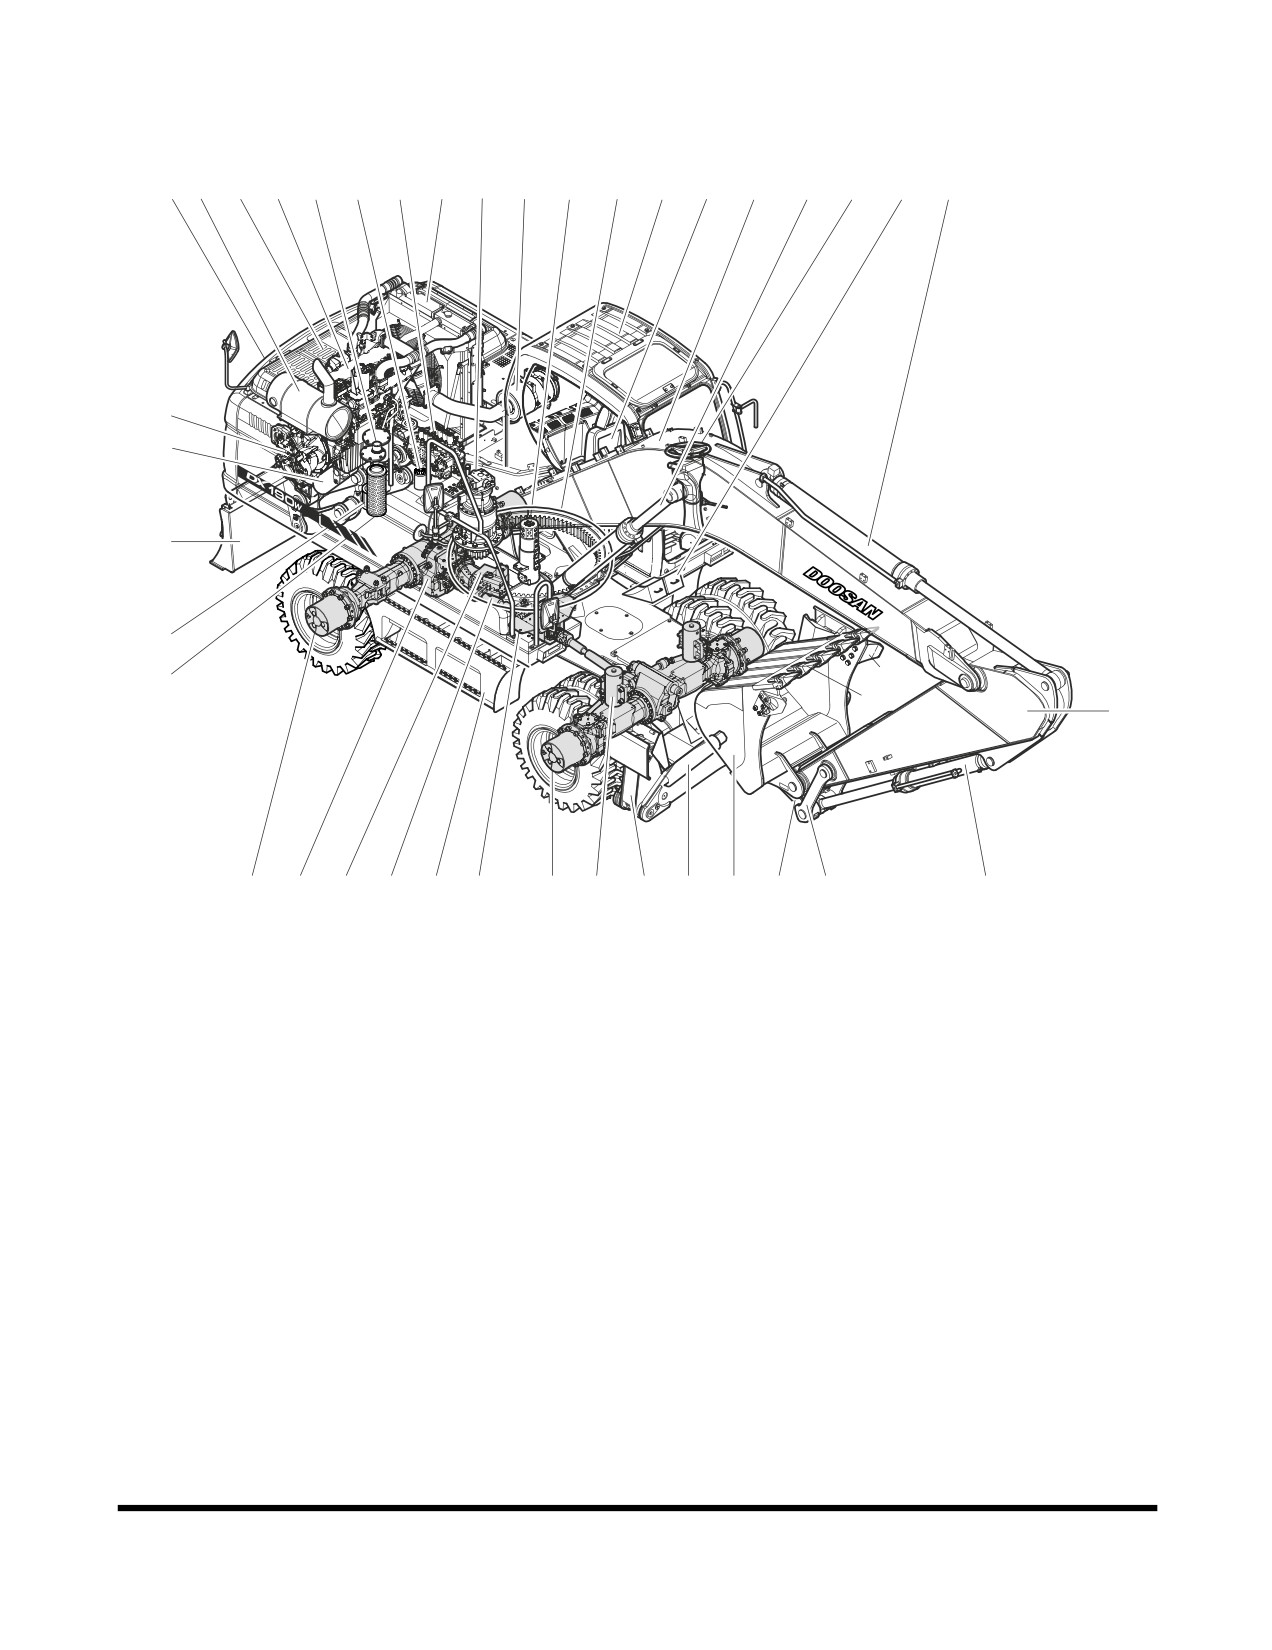
COMPONENT LOCATIONS
1
2
3
4
5
6
7
8
9
10
11
12
13
14
15
16
43
22
17
40
39
38
36
34
24
23
18
35
33
31
32
30
29
27
26
41
42
25
21
20
19
FG008697
Figure 1
Operating Controls
OP000528
2-4
Reference
Reference
Description
Description
Number
Number
1
Counterweight
22
Wheel Chocks
2
Muffler
23
Bucket Tooth
3
Engine Cover
24
Side Cutter
4
Engine
25
Bucket
5
Hydraulic Oil Tank
26
Ram Cylinders
6
Fuel Tank
27
Front Axle
7
Control Valve
29
Swing Lock
8
Radiator And Oil Cooler
30
Step
9
Swing Motor
31
Travel Motor
10
Air Cleaner
32
Propeller Shaft
11
Swivel Joint
33
Transmission
12
Swing Bearing
34
Return Filter
13
Cabin
35
Rear Axle
14
Seat
36
Strainer
15
Boom
38
Dozer Blade
16
Boom Cylinder
39
Dozer Blade Cylinders
17
Arm Cylinder
40
Pumps
18
Arm
41
Outrigger
19
Bucket Cylinder
42
Outrigger Cylinder
20
Guide Link
43
Steering Column
21
Push Link
Operating Controls
OP000528
2-5
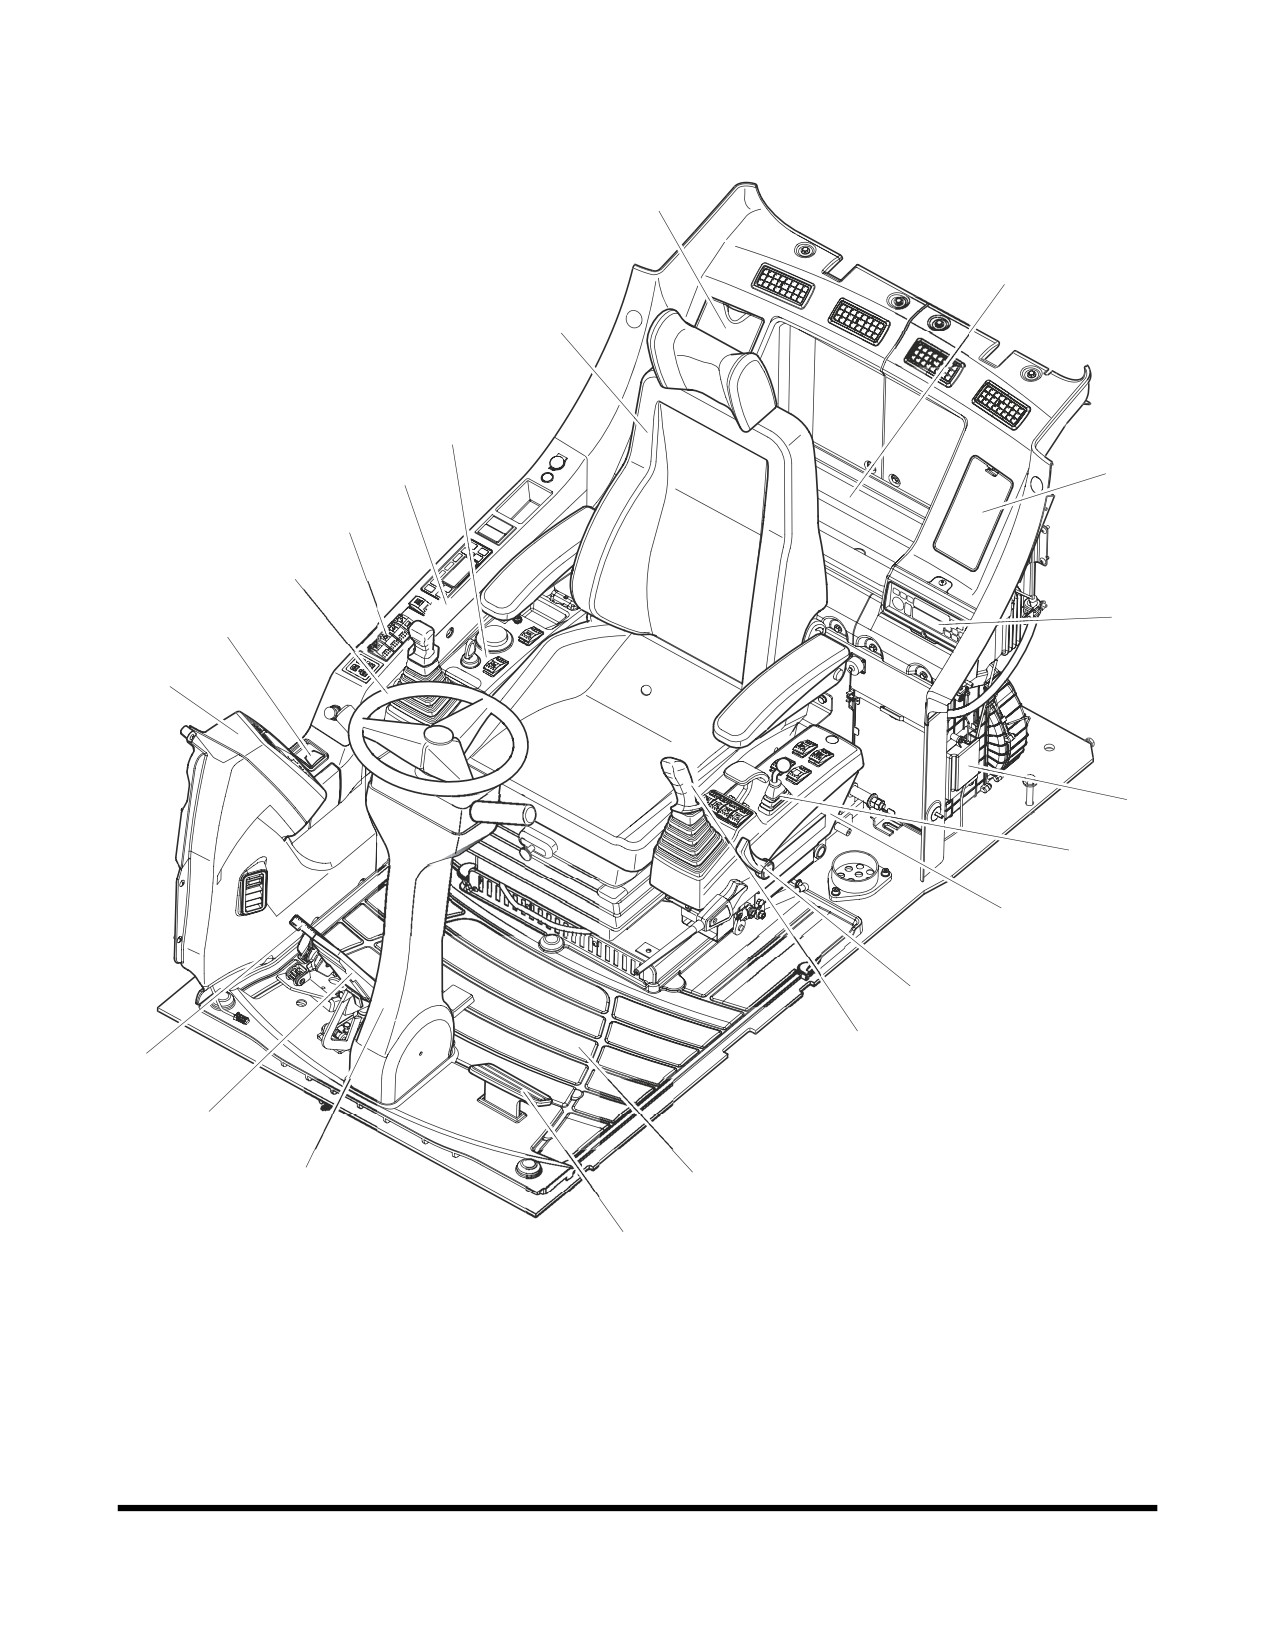
OPERATOR'S AREA
8
21
7
6
5
9
4
3
10
2
1
11
12
13
14
15
20
19
18
16
17
FG006121
Figure 2
Operating Controls
OP000528
2-6
Reference
Reference
Description
Description
Number
Number
1
Instrument Panel
10
Stereo
(See page 2-26)
(See page 2-59)
2
Ashtray
11
Heater and Air Conditioner Unit
(See page 2-71)
12
Dozer Blade Work Lever
3
Steering Handle
13
Left-Control Stand
(See page 2-18)
(See page 2-8)
4
Switch Panel
14
Left-Stand Tilting Lever
(See page 2-8)
(See page 3-14)
5
Right-hand Work Lever
15
Left-hand Work Lever (Joystick)
(Joystick)
(See page 3-27)
(See page 3-27)
16
Floor Mat
6
Right-Control Stand
17
Foot Rest
(See page 2-8)
18
Steering Column
7
Seat
19
Brake Pedal
(See page 2-63)
(See page 3-24)
8
Storage Compartment
20
Accelerator Pedal
(See page 2-71)
(See page 3-24)
9
Fuse Box
21
Electric Box
(See page 2-62)
Operating Controls
OP000528
2-7
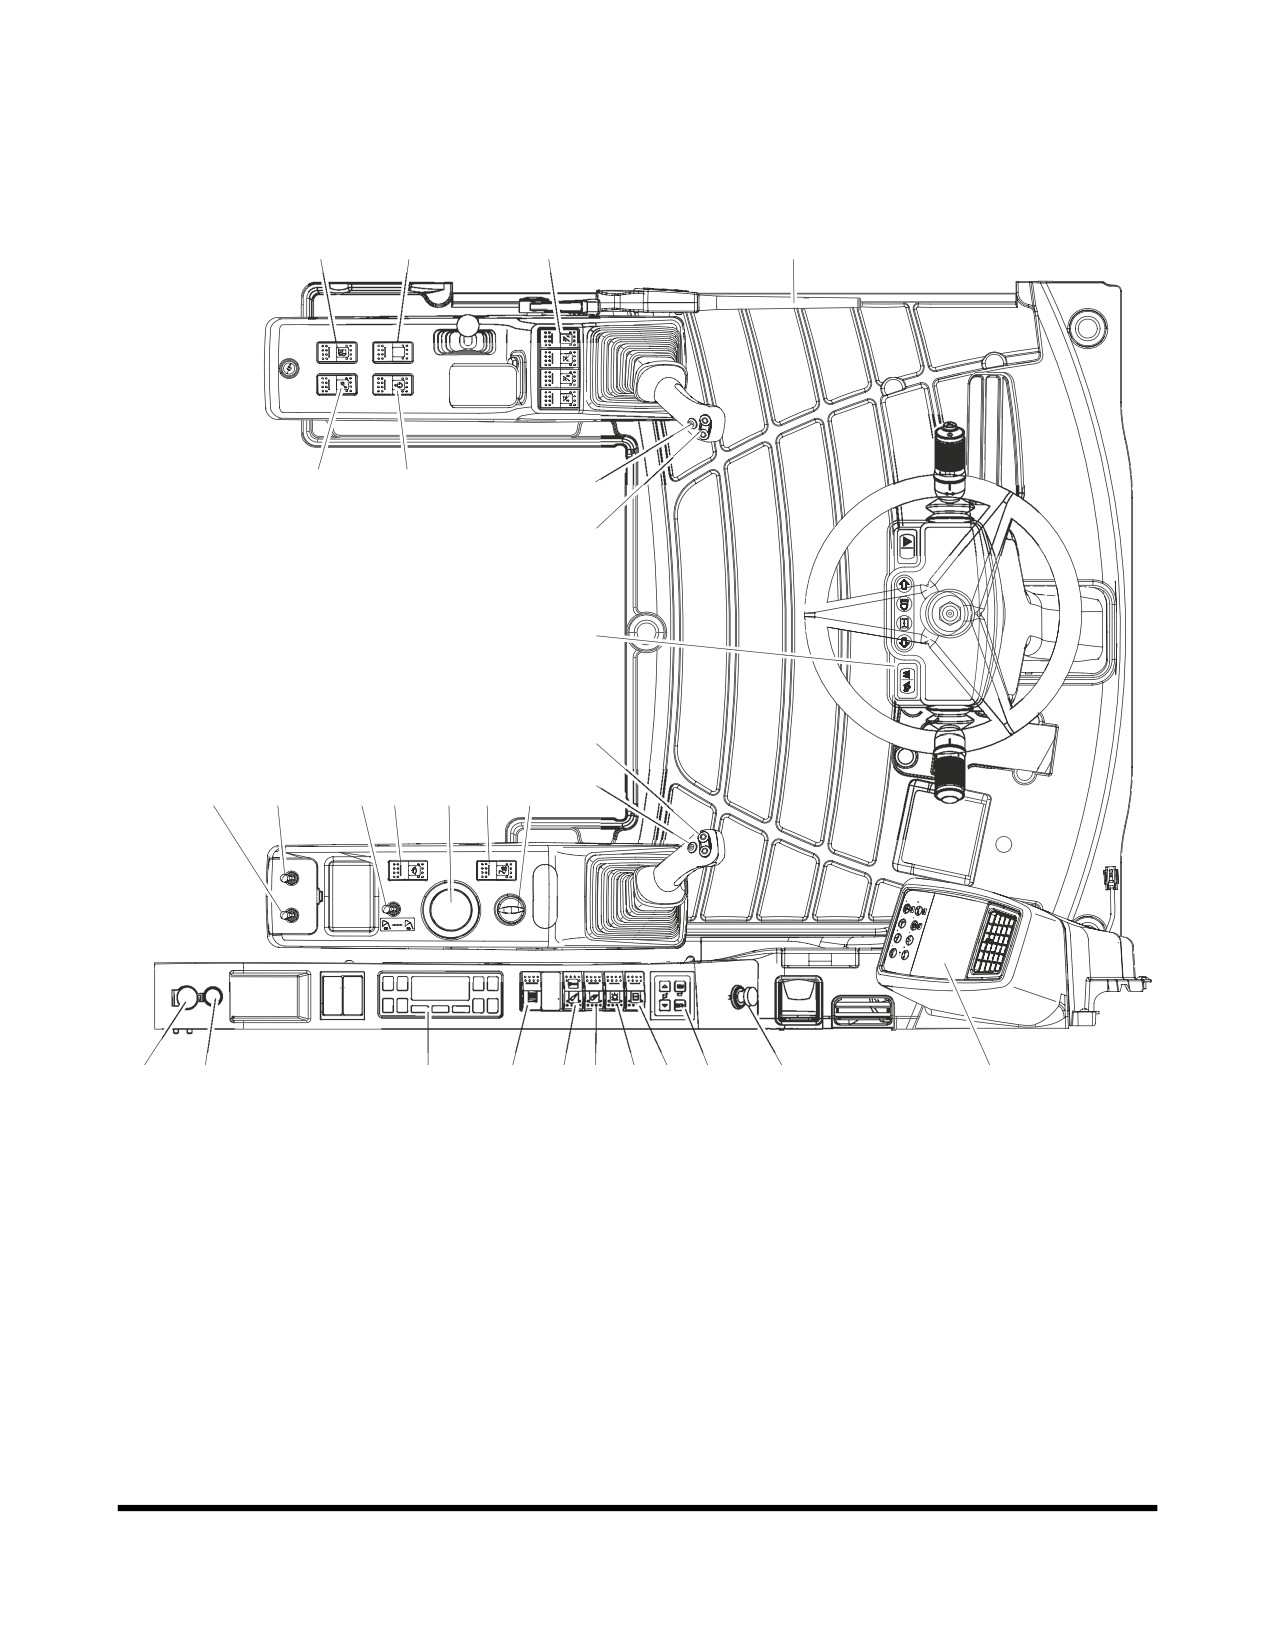
OPERATIONAL CONTROLS AND
PANELS
19
17
21
28
20
18
23
24
22
26
25
4
5
3
13
2
12
1
16
29
14
11
10
9
8
7
6
15
27
FG006122
Figure 3
Operating Controls
OP000528
2-8
Reference
Reference
Description
Description
Number
Number
1
Starter Switch
15
Cigarette Lighter
2
Engine Speed Control Dial
16
Power Socket For 12V
3
Quick Clamp Switch (Optional)
17
Warning Light Switch (Optional)
4
Auxiliary Mode Switch
18
Overload Warning Switch
(Optional)
5
Emergency Stop Switch
19
Fuel Heater Switch (Optional)
6
Audio Control Panel
20
Seat Warmer Switch (Optional)
7
Ram Lock Switch
21
Outrigger Selection Switch
8
Light Switch
22
Steering Console
9
Work Light Switch
23
Horn Button
10
Breaker / Booster / Shear
Selector Switch
24
Rotating Switch
11
Parking Brake Switch
25
Breaker/Booster Switch
12
Cabin Work Light Switch
26
Shear Switch
(Optional)
27
Instrument Panel
13
Lower Wiper Switch (Optional)
28
Safety Lever
14
Heater and Air Conditional
29
Photo Sensor
Control Panel
Operating Controls
OP000528
2-9
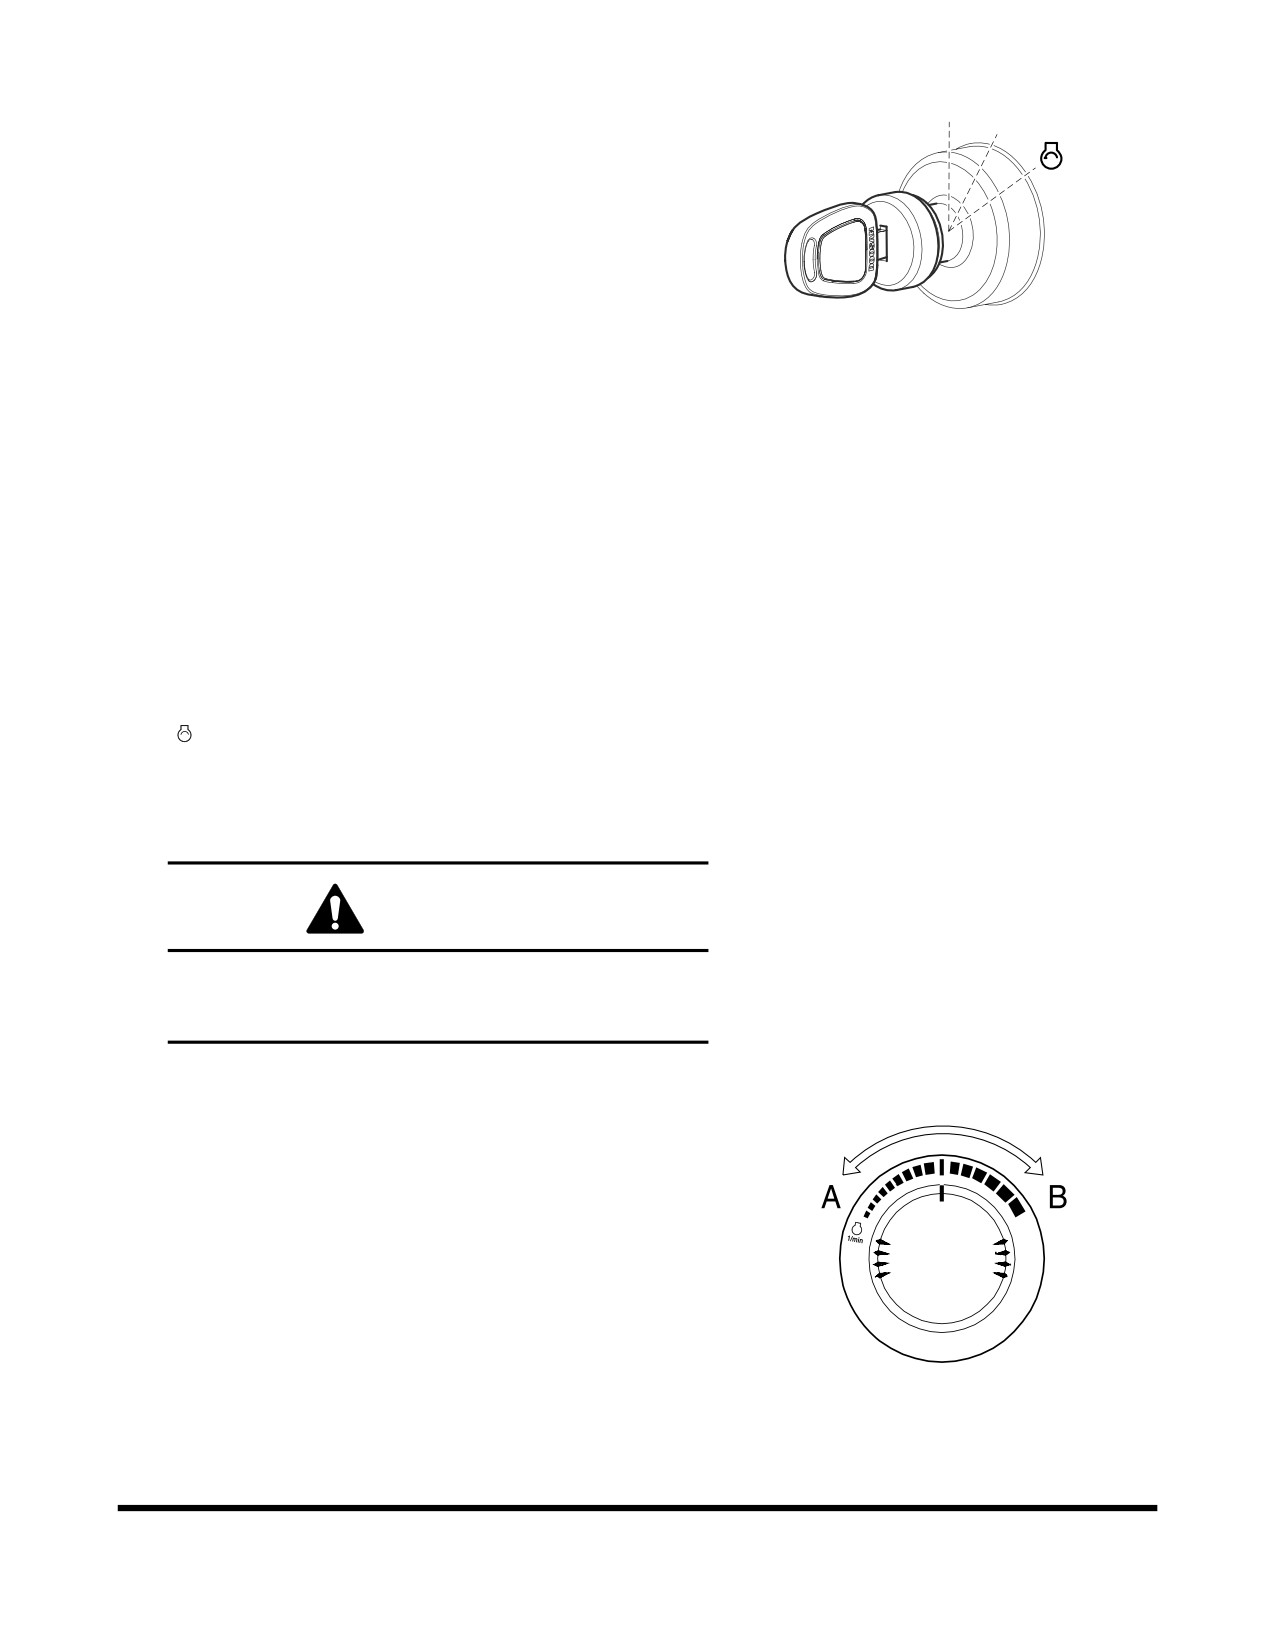
1.
Starter Switch
O
I
A three-position starter switch is used to start or shut down
engine for equipment operation.
O. Turning the switch to this position turns the engine
"OFF" along with its electrical system. In this position
the engine is "OFF" but the interior cabin light and
fuel tank transfer pump (if equipped) are functional.
I.
Turning the switch to this position turns the engine
electrical system "ON." When the switch is first turned
FG000014
"ON" the six indicator/warning lights across the top of
Figure 4
the instrument panel, will light for approximately two
seconds. The battery warning light and the engine oil
pressure warning light should remain "ON" after the
other four have turned "OFF."
NOTE: Preheat Indicator Light - The operation of
the preheat cycle depends on coolant
temperature. When the engine coolant is
cold enough, the preheat indicator light will
remain "ON" until the engine preheat cycle
is completed. The preheat cycle takes
about twenty seconds to complete, and
the indicator light will turn "OFF." When
the light turns "OFF," engage the starter.
. Moving switch to this position will crank engine. When
engine starts, release key and allow it to return to the
"I" (ON) position. Do not operate the starter switch for
more than fifteen seconds at a time. This will help
prevent damage to starter.
WARNING!
DO NOT USE STARTING FLUIDS. The preheat system
could cause the starting fluid to explode. Starting
fluids should never be used.
2. Engine Speed Control Dial
The engine speed is controlled by the dial. Rotating it
clockwise increases engine speed
(rpm) and
counterclockwise decreases engine speed.
A. Low idle (Lowest engine speed)
B. High idle (Highest engine speed)
NOTE: The auto idle system will automatically reduce
engine speed to idle speed approximately four
seconds after all of the control levers are in the
HAOA690L
neutral position. This system is designed to
Figure 5
reduce fuel consumption and noise. See “3.
Auto Idle Selector Button” on page 2-39.
Operating Controls
OP000528
2-10
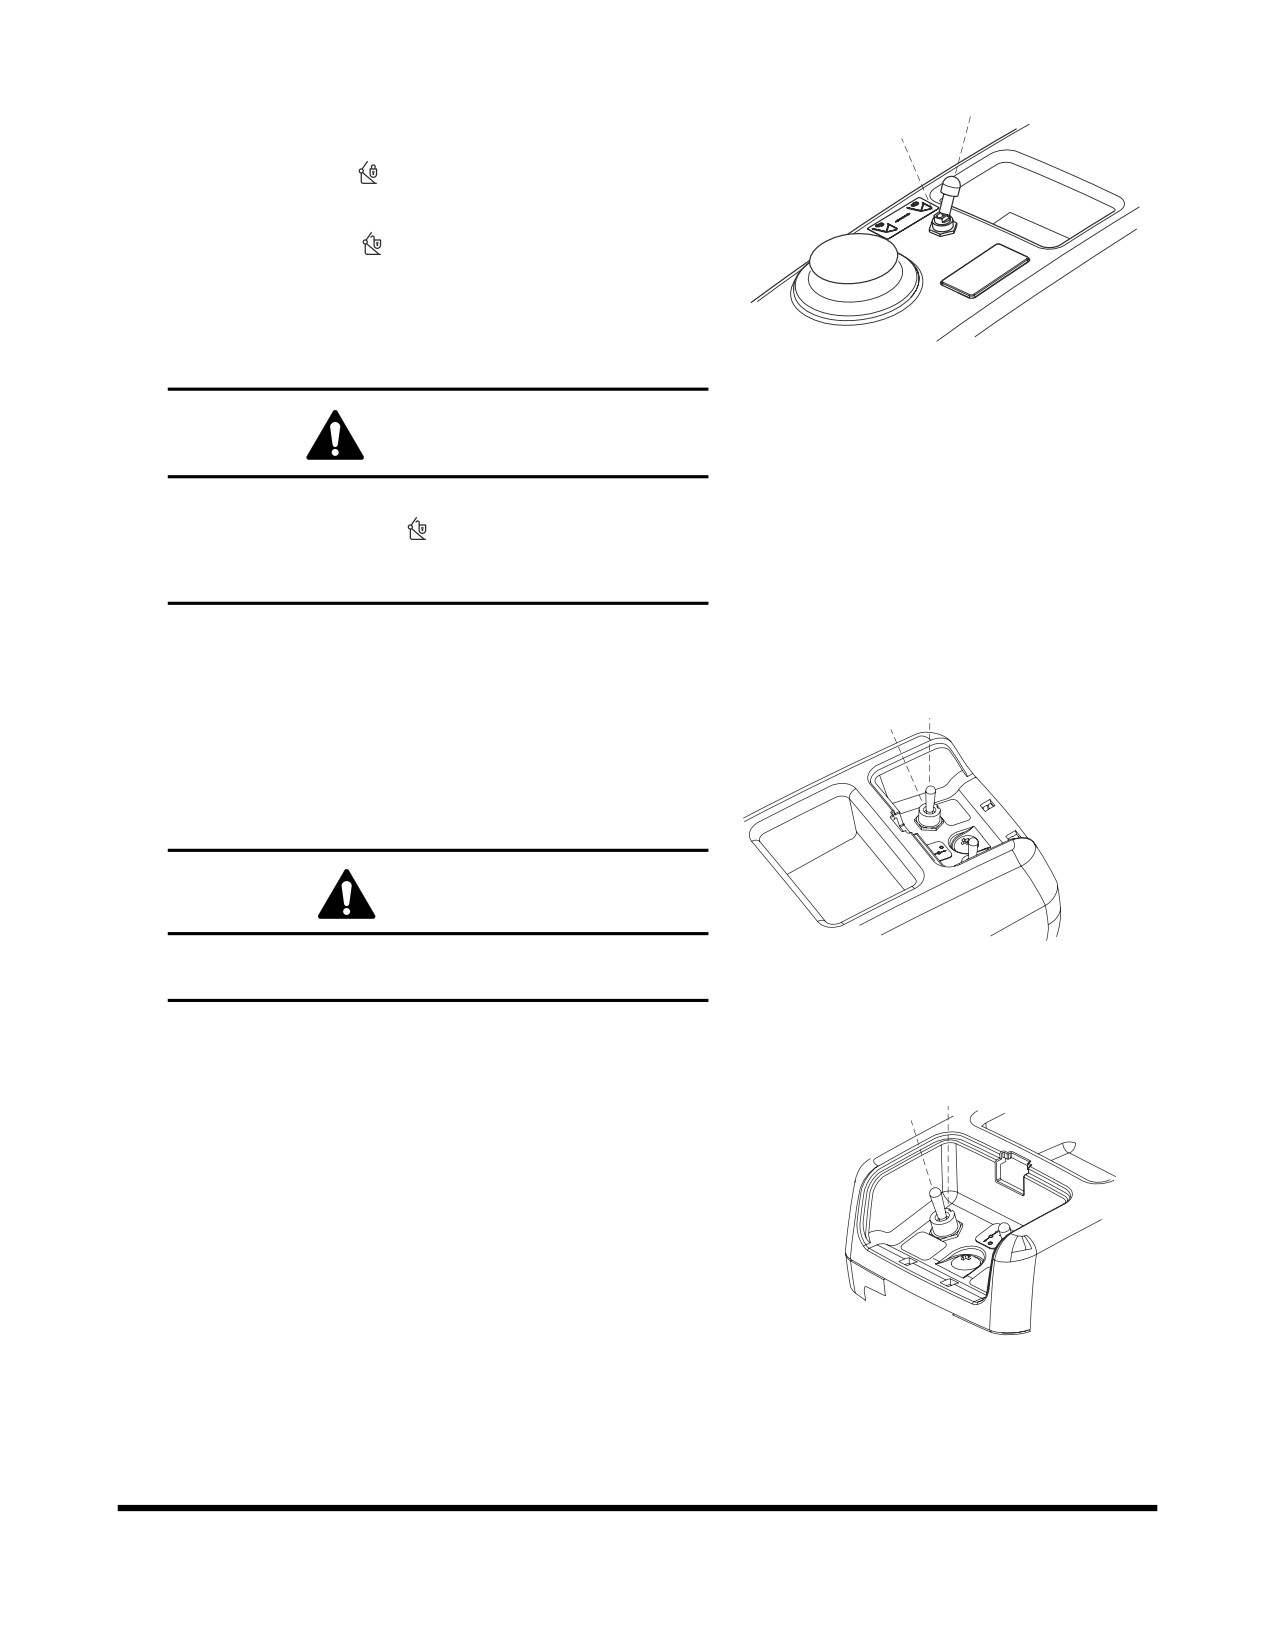
3. Quick Clamp Switch (Optional)
O
Clamp releasing for dispensable attachment is controlled.
I
O. In this position
, the quick clamp is "LOCKED." The
attachment is secured to the arm.
I.
In this position
, the quick clamp is "UNLOCKED."
The attachment is released from the arm.
NOTE: To move the switch, pull up on the toggle
and then move it into the "UNLOCKED"
FG001342
position.
Figure 6
WARNING!
When the attachment is still connected to the machine,
while the switch is "I" (
) position, do not operate the
machine or the attachment might fall to the ground. It
would cause personnel injuries.
4. Auxiliary Mode Switch
O
I
When the control system is out of order, the pump system
can be controlled manually.
O. In this position, the manual pump control is "OFF."
I.
In this position, the manual pump control is "ON."
CAUTION!
FG001343
Be sure to turn pump control to the "O" (OFF) position,
Figure 7
after the control system is operating properly.
5. Engine Emergency Stop Switch
O I
If the engine does not shut down when using the starter
switch, it can be stopped by moving the engine emergency
stop switch to the "I" (EMERGENCY STOP) position.
O. In this position, the engine emergency stop system is
"OFF."
I.
In this position, "EMERGENCY STOP" is selected.
The engine will shut down.
NOTE: When released, the switch will return to its
FG001344
original position "O" (OFF) position.
Figure 8
Operating Controls
OP000528
2-11
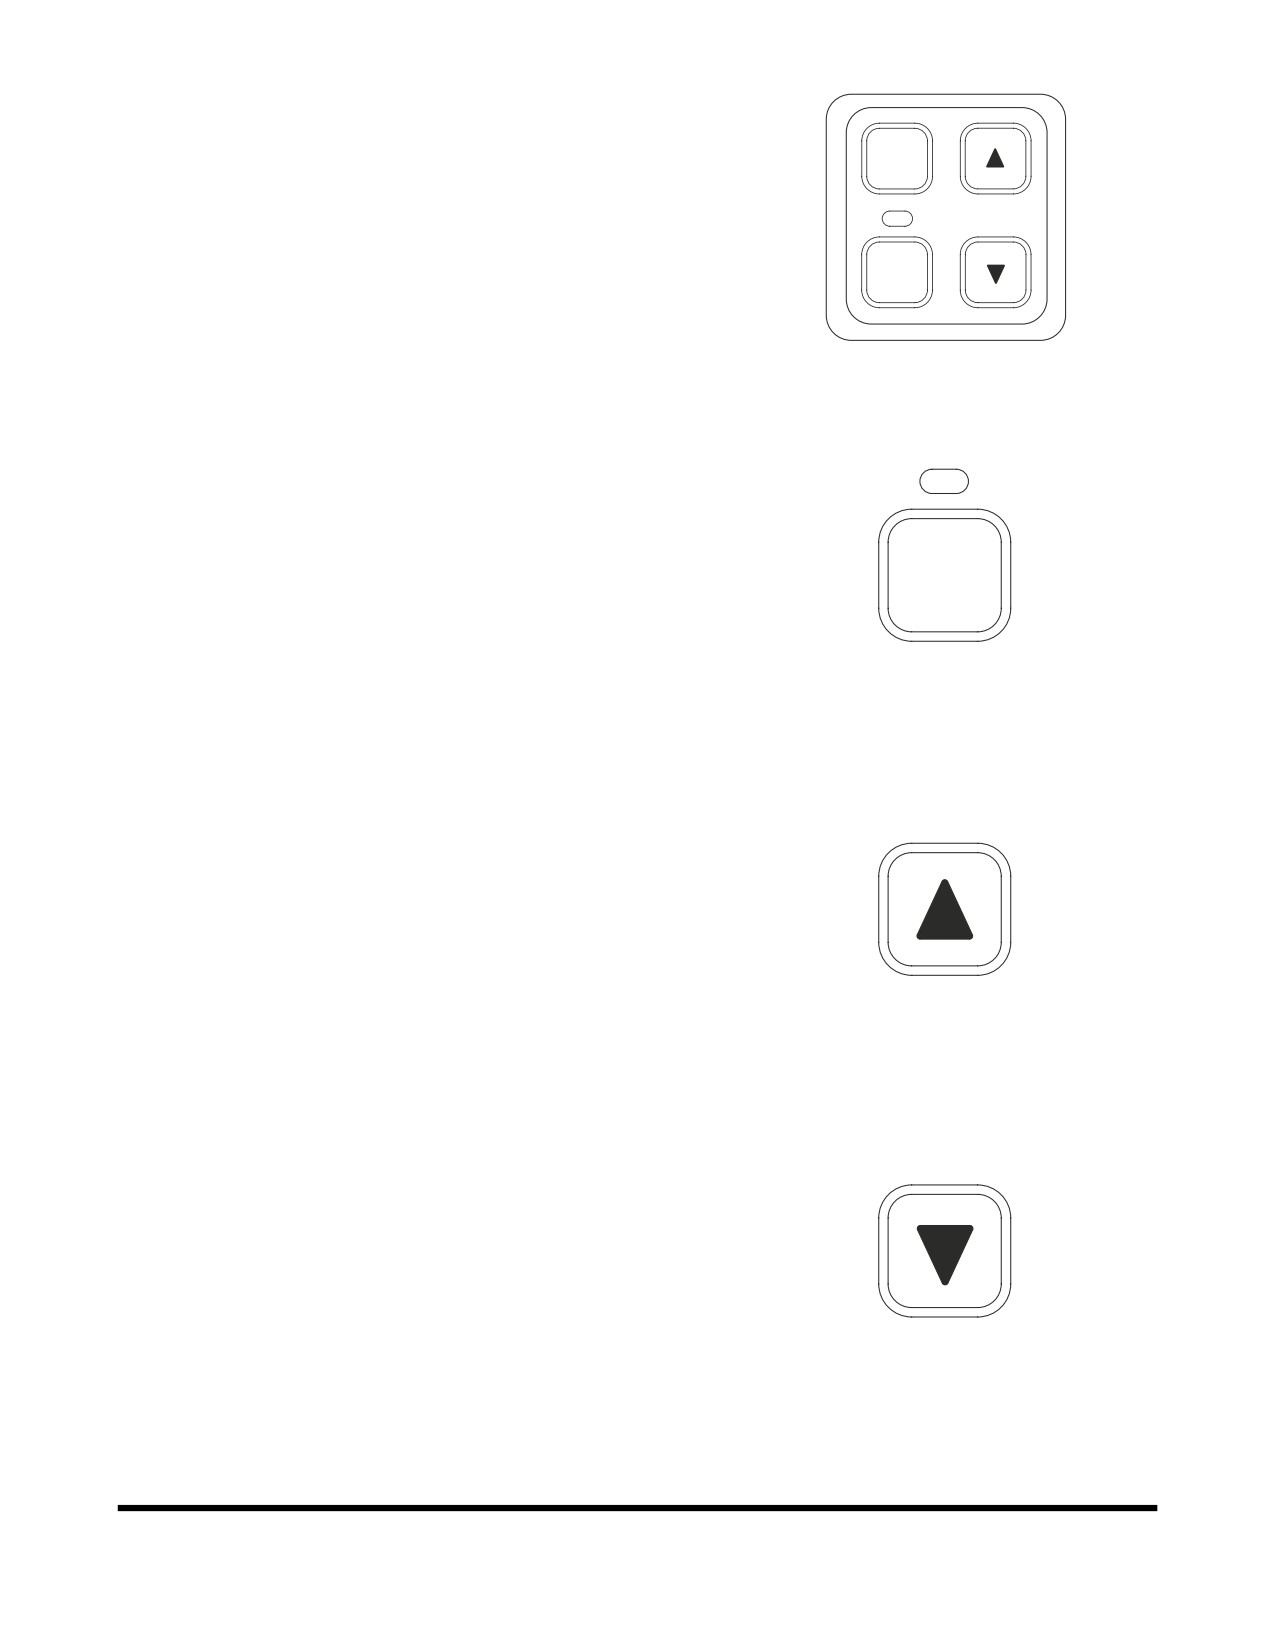
6. Audio Control Panel
The audio system can be remotely controlled using this
panel.
SCAN
PWR
FG000018
Figure 9
Each time this power button is pressed, the audio system
is turned either "ON" or "OFF."
If the audio system turns "ON," an indicator light above the
button turns "ON."
PWR
FG000019
Figure 10
Press the up button, to "INCREASE" volume.
FG000020
Figure 11
Press the down button, to "DECREASE" volume.
FG000021
Figure 12
Operating Controls
OP000528
2-12
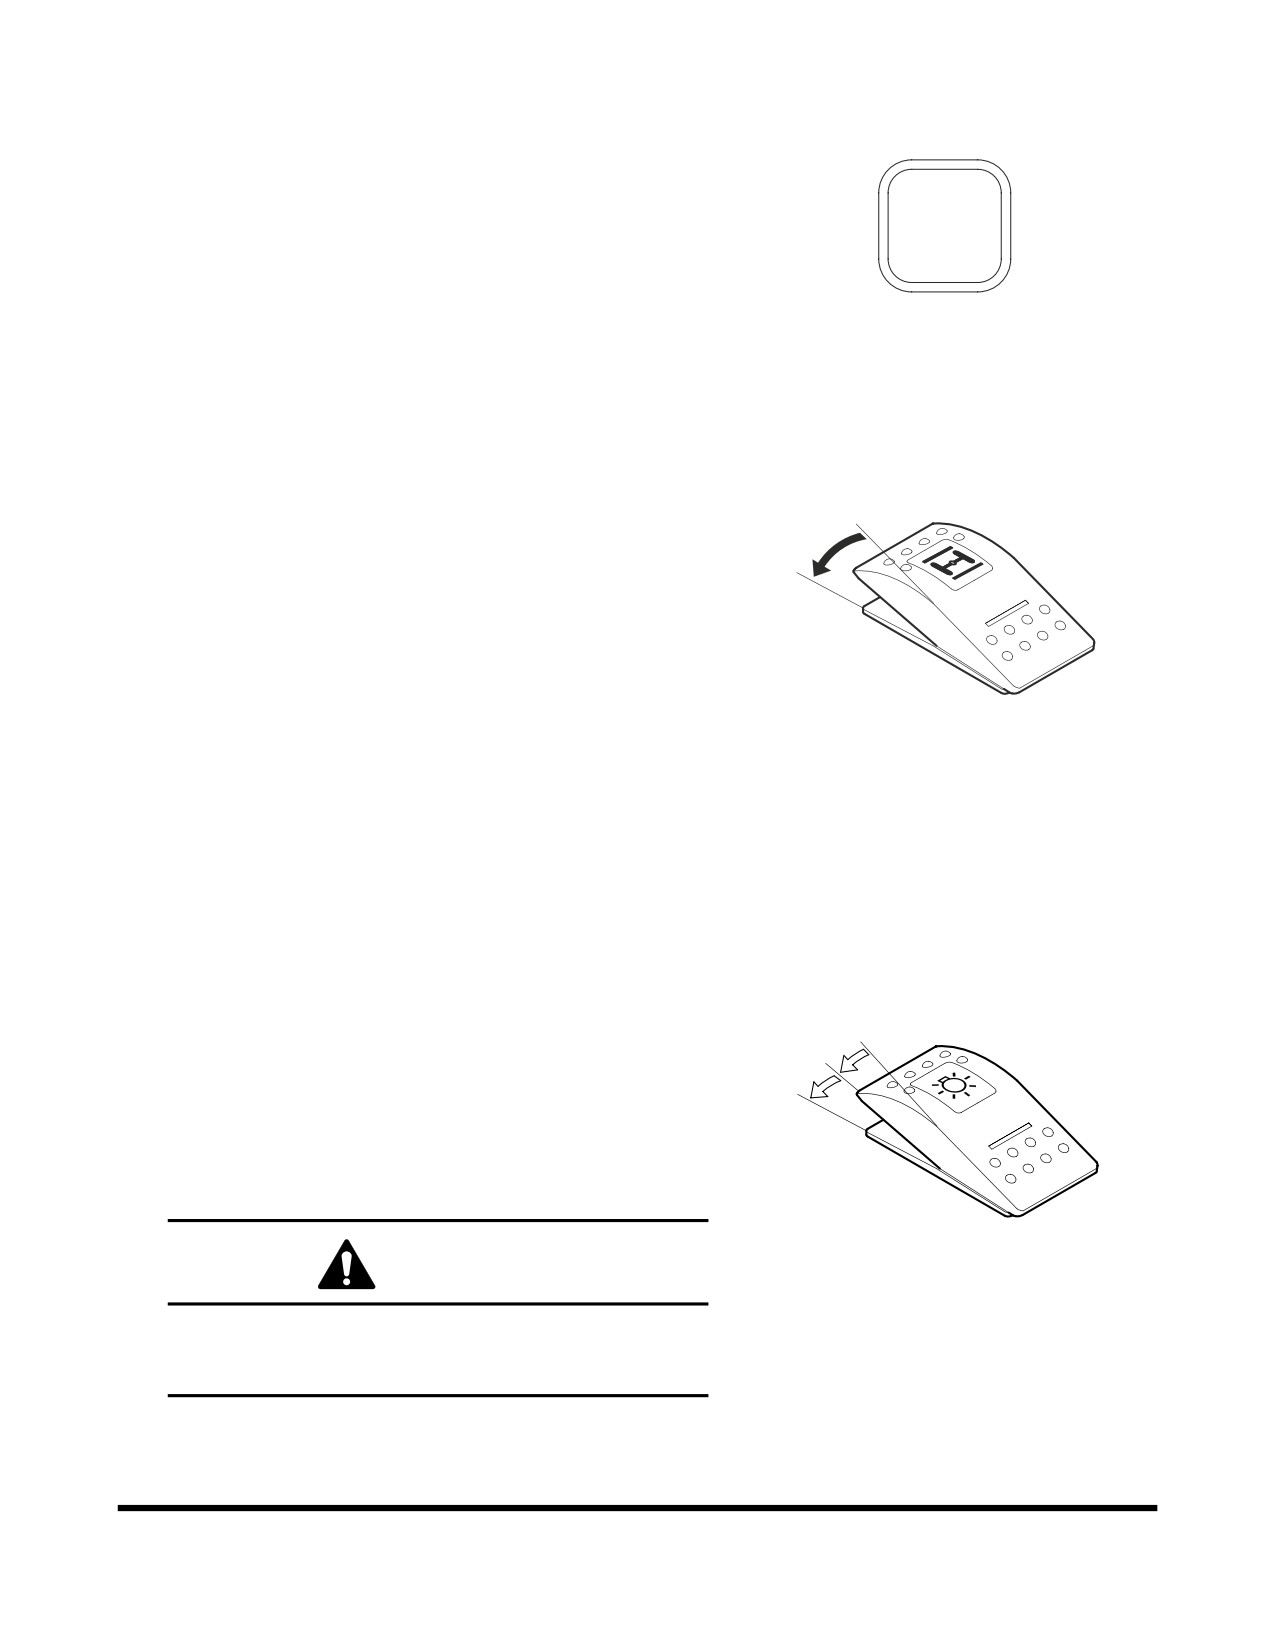
Manual Scan: When pressing scan button once, for less
than half-a-second, the frequency will be moved up in
sequence to the next available signal.
Auto Scan: When pressing scan button for more than a
half-a-second, the frequencies are automatically scanned
to the next higher one and will continue until the button is
SCAN
again pressed to stop the scan.
FG000022
Figure 13
7. Ram Lock Switch
This switch is used to select the operational mode of the
O
ram cylinder.
I
O. In this position, the ram cylinder is "UNLOCKED" and
allows for shock absorption and a more comfortable
ride during travel.
NOTE: The ram cylinder will automatically locked
when the brake pedal is latch position or
when the parking brake switch is engaged.
FG002176
However, the ram cylinder is automatically
Figure 14
unlocked when the transmission lever
position is forward or reverse.
I.
In this position, the ram cylinder is "LOCKED" while in
travel or park mode. Locking the ram cylinder cuts off
the ram lock valve, securing and stabilizing the
equipment from moving while digging.
8. Light Switch
This switch is used to turn on the lights.
O
I
O. In this position, all lights are turned "OFF".
II
I.
In this position, all illumination lights of the instrument
panel and the control switches are turned "ON".
II.
In this position, all illumination lights, work lights and
headlights are turned "ON".
FG000024
Figure 15
CAUTION!
Do not leave instrument panel or work lights "ON"
when the engine is not running. Leaving lights "ON"
with the engine shut down will discharge batteries.
Operating Controls
OP000528
2-13
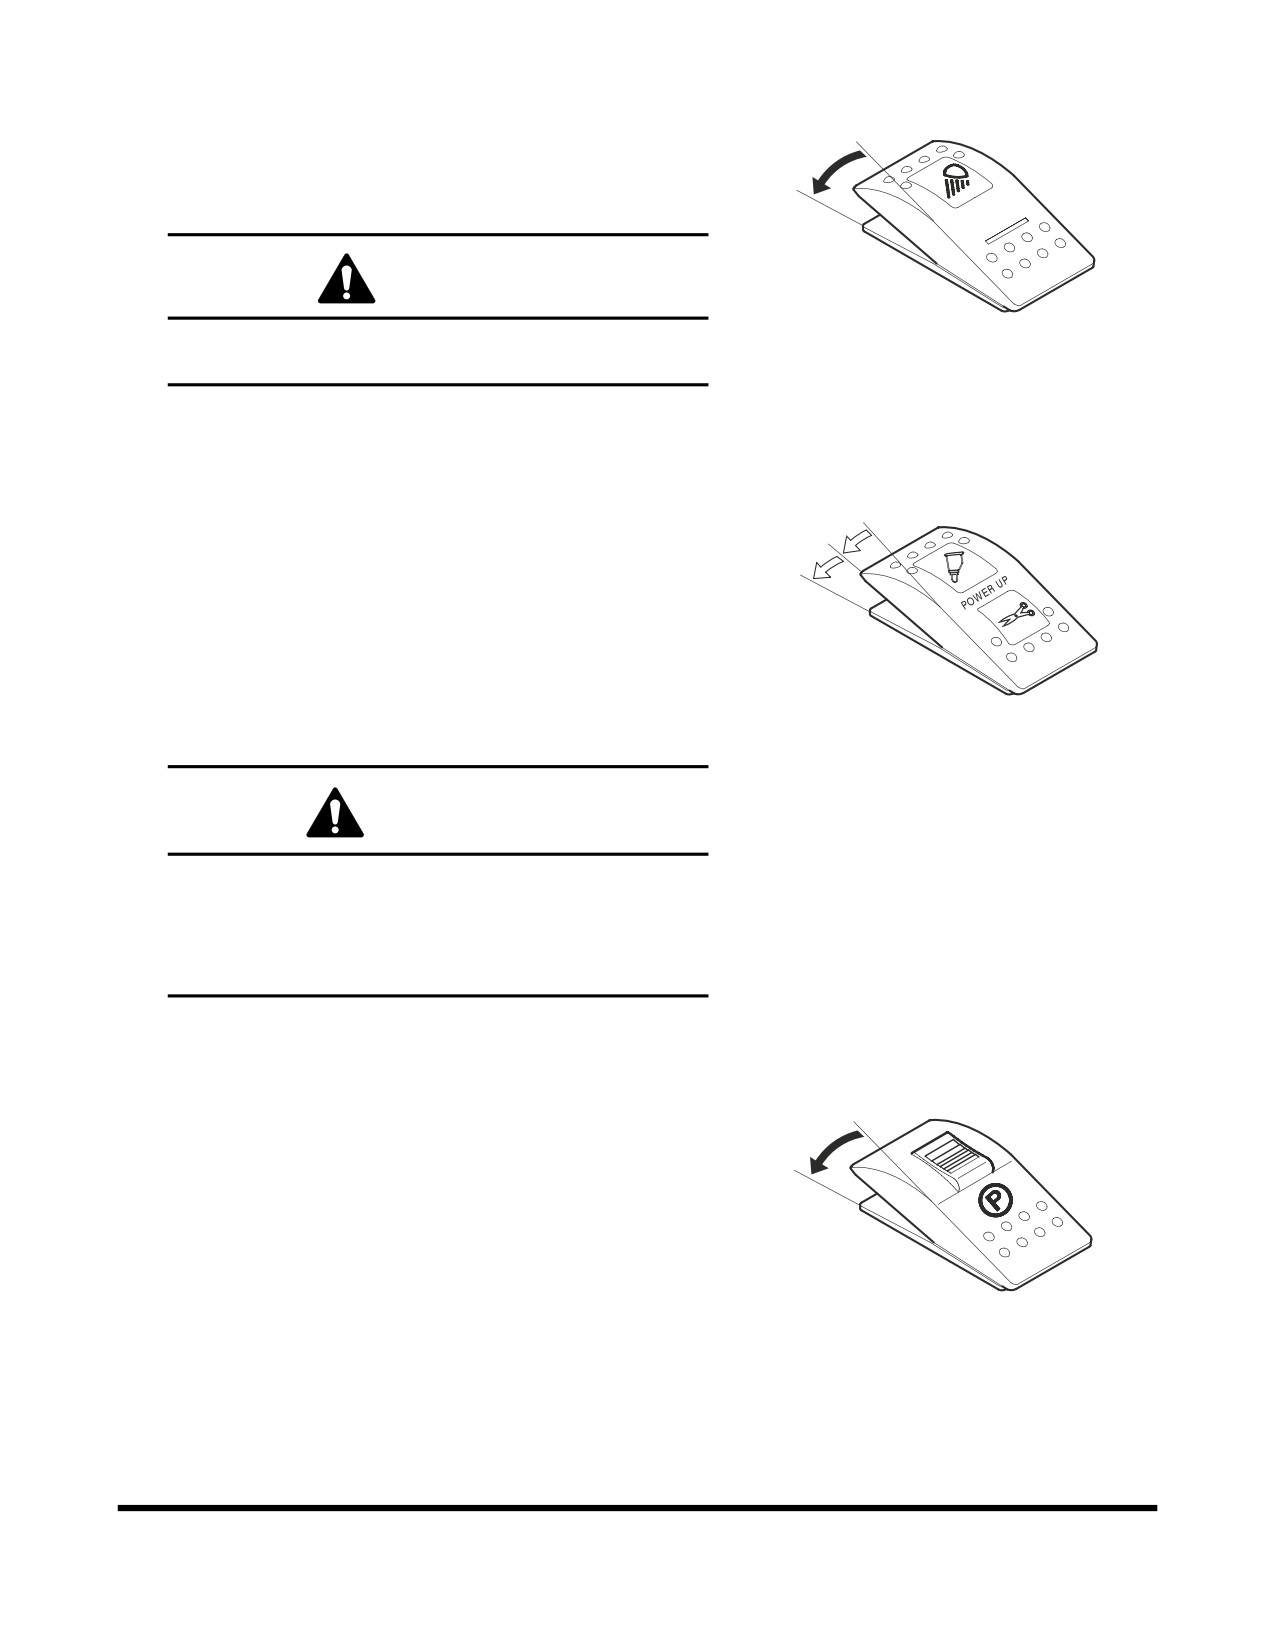
9. Work Light Switch
Operates the work lights mounted on the boom.
O
O. In this position, work light are turned "OFF".
I
I.
In this position, work light will turn "ON".
CAUTION!
Be certain that the work lights are turned "OFF" when
FG002177
traveling on the streets.
Figure 16
10. Breaker / Boost / Shear Selector
Switch
I
O
This switch is used to either select the breaker, power
II
boost, or shear.
O. In this position, a hydraulic pressure rise will be
activated when pressing the button on the right-hand
work lever (joystick).
I.
In this position, shear is activated.
FG000025
II.
In this position, breaker is activated.
Figure 17
WARNING!
Before using any attachment in a work application, be
sure to check its functional control. Make sure that the
desired movement or action is being activated by the
control. e.g. opening/closing, CW/CCW, crowd/dump,
etc.
11. Parking Brake Switch
This switch is used to park the equipment.
O
O. In this position, parking brake is "RELEASED" and
I
the monitor light on the front instrument panel turns
"OFF."
I.
In this position, parking brake is "APPLIED" and the
monitor light on the front instrument panel turns "ON."
FG002178
Figure 18
Operating Controls
OP000528
2-14
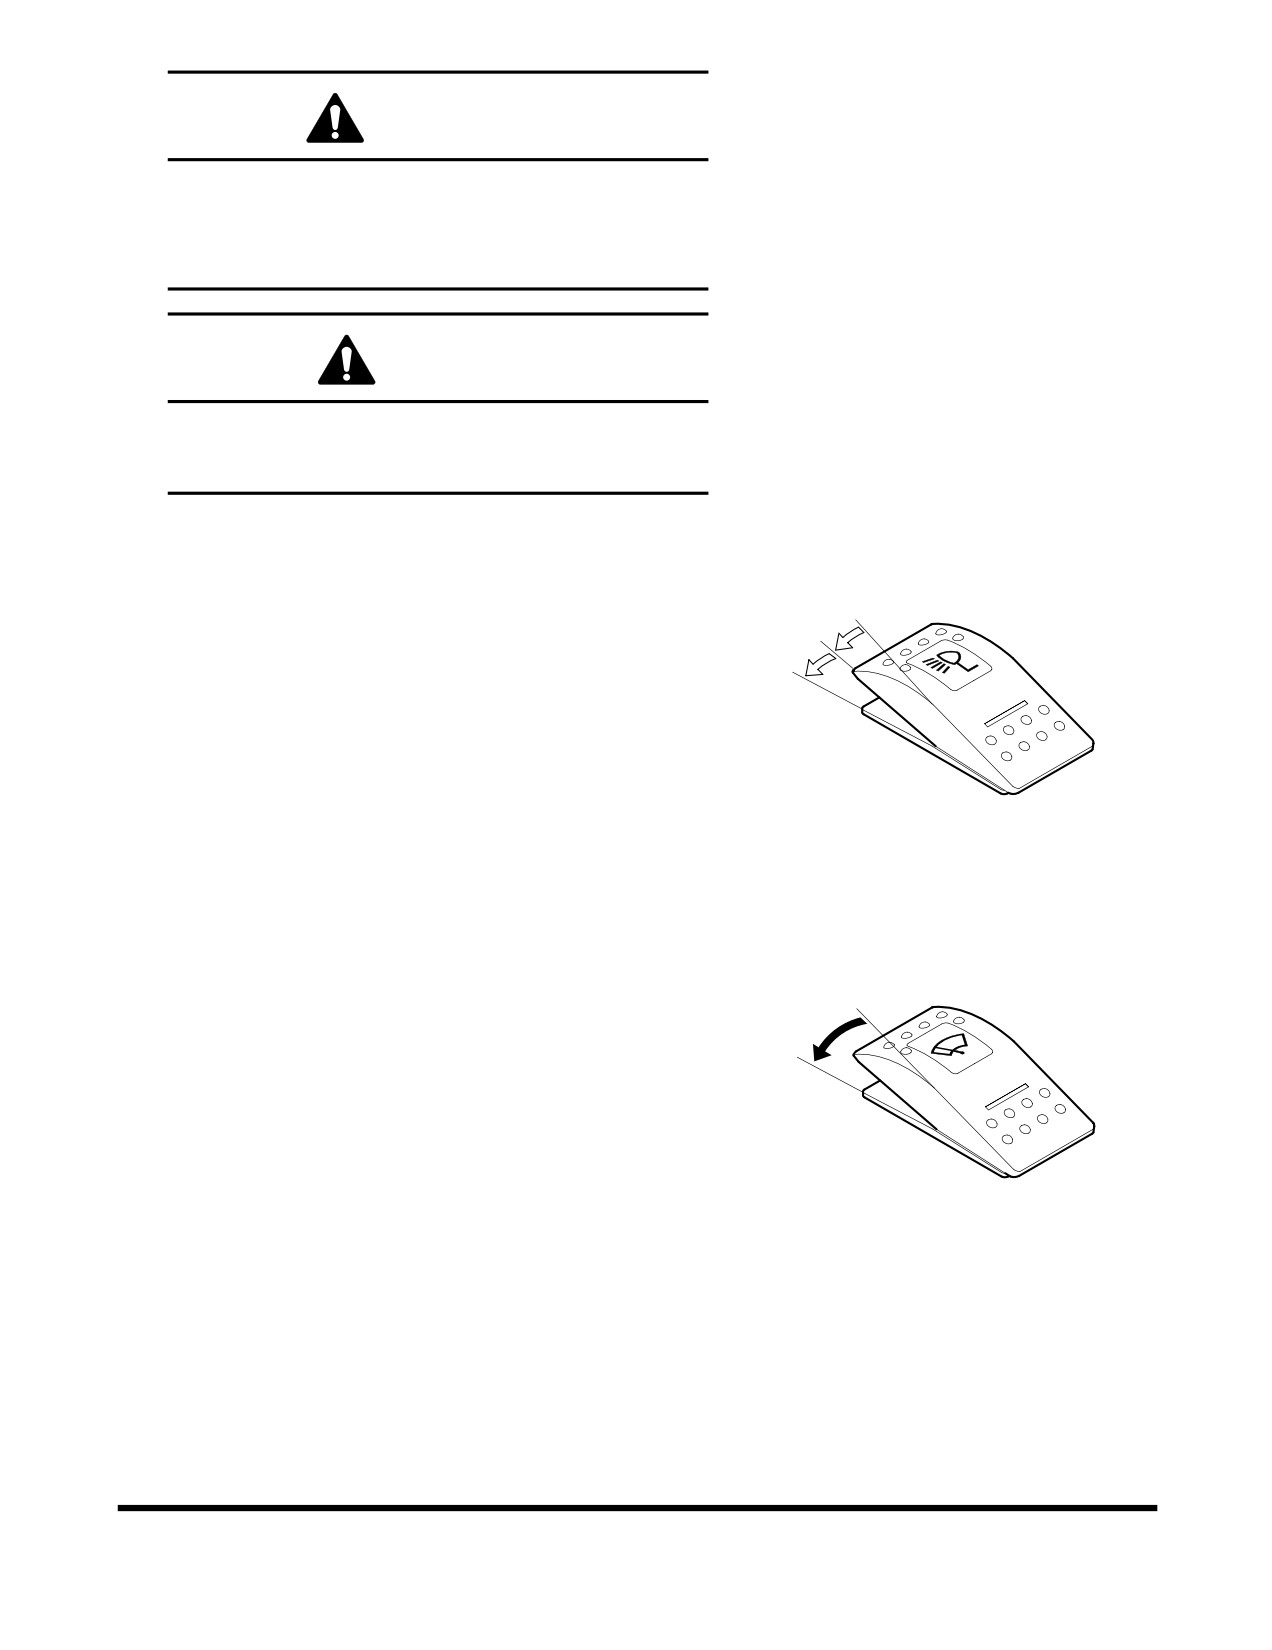
WARNING!
Set the parking brake switch in the "I"(APPLIED)
position before leaving the excavator.
Make sure to "APPLY" the parking brake switch before
trying to start the excavator.
CAUTION!
Do not use the parking brake to stop the excavator,
except in an emergency; otherwise, it might cause
premature wear or damage of the brake.
12. Cabin Work Light Switch (Optional)
This switch is used to control the cabin work lights, if unit is
O
equipped with them.
I
II
O. In this position, all cabin work lights are turned "OFF."
I.
In this position, the front cabin work lights on the front
top of cabin will turn "ON."
II.
In this position, the front cabin work lights on the front
top of cabin and rear cabin work lights on rear top of
cabin will turn "ON."
FG000026
Figure 19
13. Lower Wiper Switch (Optional)
This switch is used to control the lower front window wiper.
O
O. In this position, lower windshield wiper is "OFF."
I
I.
In this position, lower windshield wiper runs at a
constant speed.
NOTE: Operating wiper without washer fluid or when
there is sand or dirt present will damage the
window and wiper.
FG000028
Figure 20
Operating Controls
OP000528
2-15
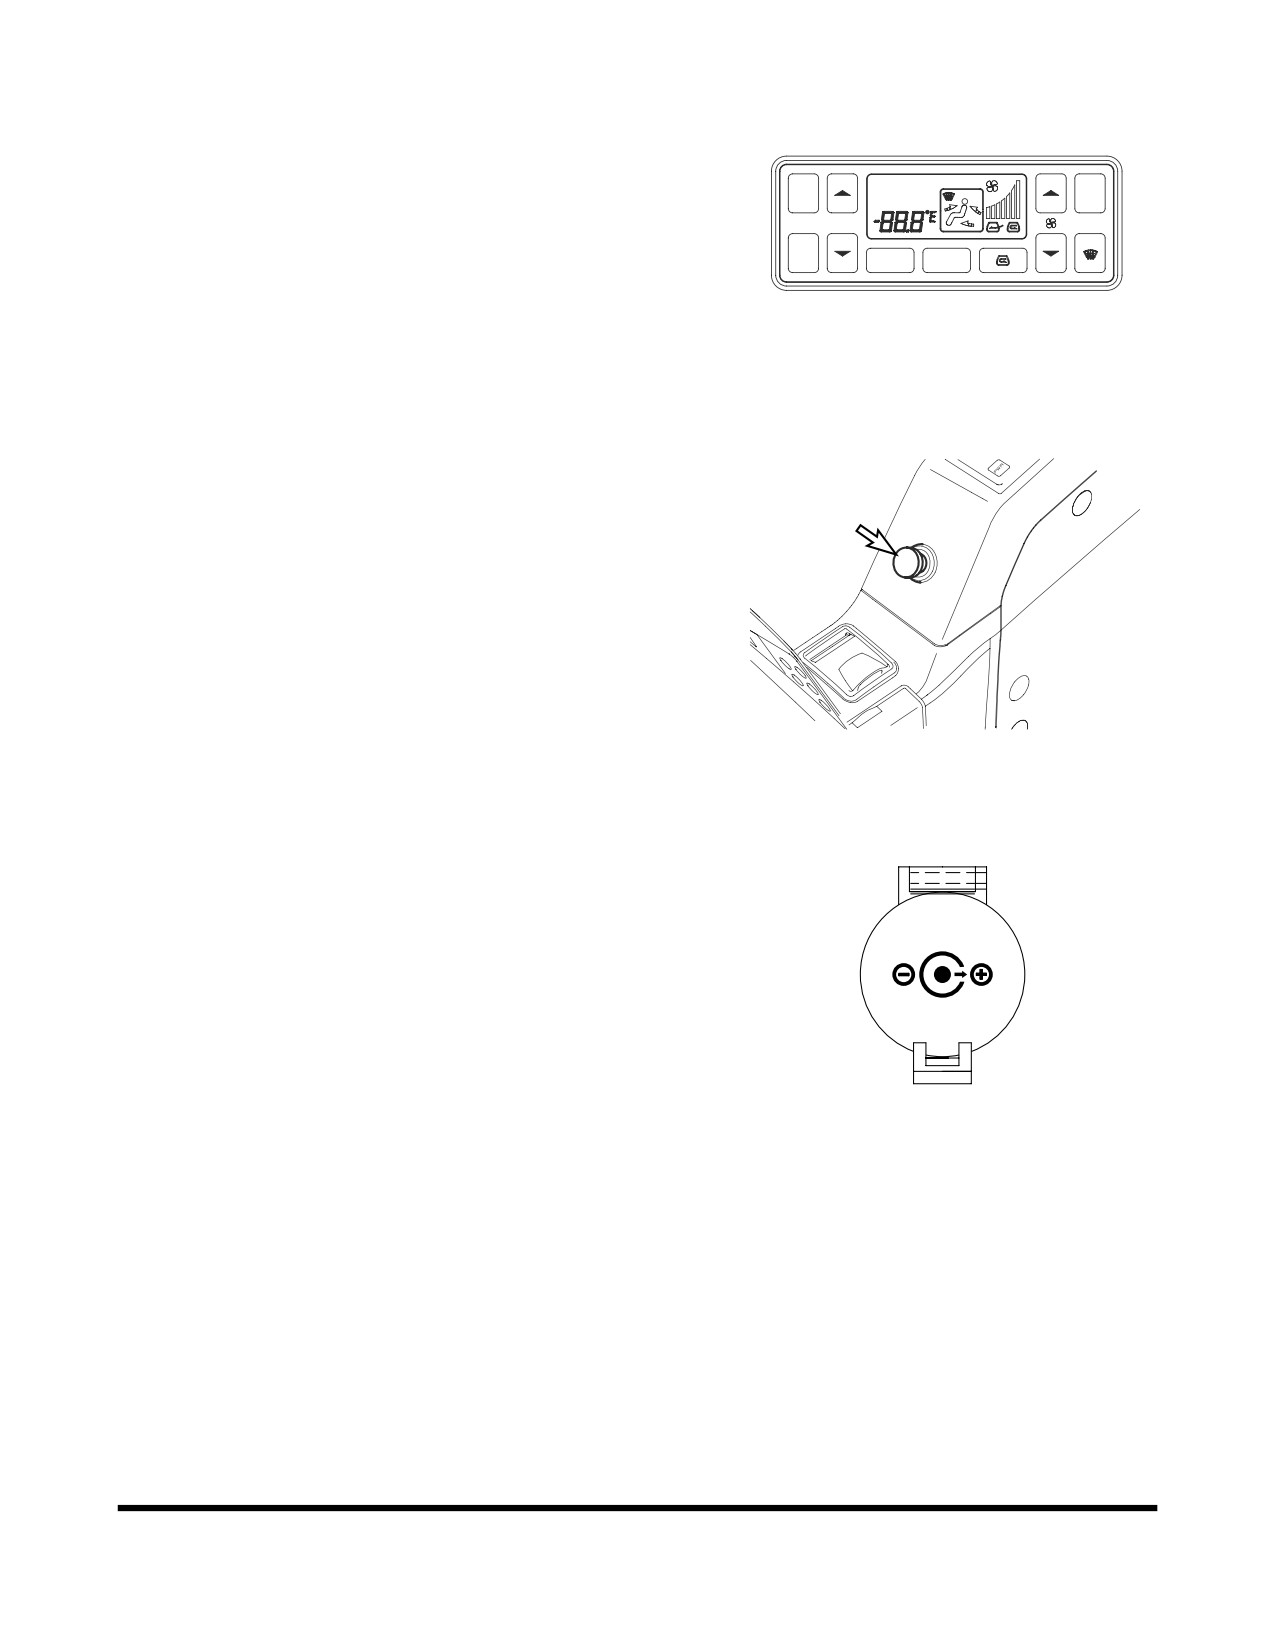
14. Heater and Air Conditioner Control
Panel
This panel is used to control air conditioner and heater in
A/C
OUTSIDE
operator's compartment. Refer to
“Heater and Air
AUTO
AUTO
MAX
A/C
Conditioner Control Panel” on page 2-53 for more details.
TEMP
OFF
SEL
MODE
FG000029
Figure 21
15. Cigarette Lighter
Push the lighter all the way into the socket and release
your hand. After pushing it in, it will be ejected when it is
heated. If it does not eject after a short time, pull it out and
have it serviced.
NOTE: This cigarette lighter is for
24V only. Never
connect a 12V electrical device to the lighter.
FG000030
Figure 22
16. Power Socket for 12 Volt
This is a power socket for only 12V DC devices.
This socket can be used for charging a cellular phone or
powering a small 12V DC electrical device.
Open the cap when using it.
12 V
NOTE: This socket is designed for small electrical
capacity devices. Do not use this socket for
large electrical capacity devices. Thus, damage
HAAE1990
can be avoided.
Figure 23
Operating Controls
OP000528
2-16
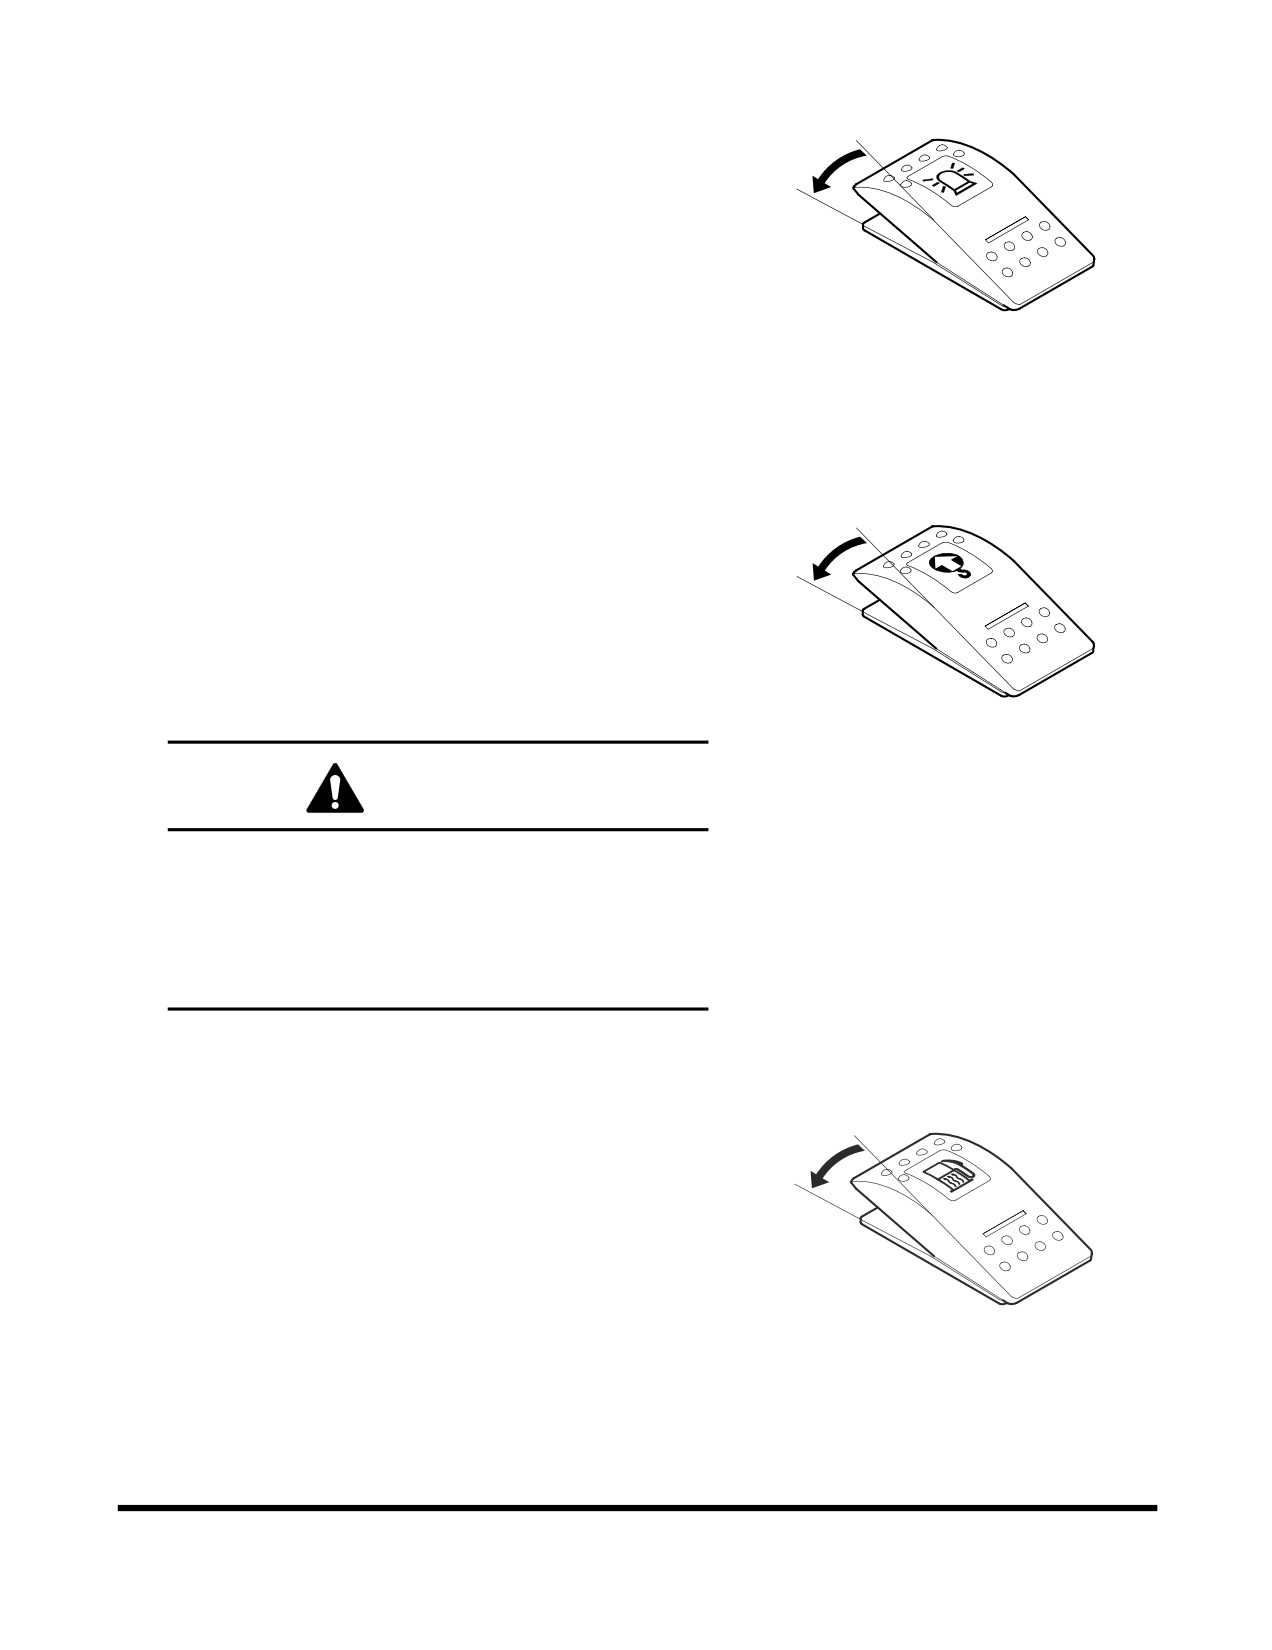
17. Warning Light Switch (Optional)
If unit is equipped with a warning light, push this switch to
O
activate it.
I
O. In this position, the warning light is turned "OFF."
I.
In this position, the warning light turns "ON" and will
start flashing.
FG000027
Figure 24
18. Overload Warning Switch (Optional)
If unit is equipped with an overload warning device, push
O
this switch to activate it.
O. In this position, the overload warning device is turned
I
"OFF."
I.
In this position, when a load is lifted that reaches the
machine safe lifting limit, a warning light on the
instrument panel will turn "ON" and a warning buzzer
will sound.
FG000032
Figure 25
WARNING!
To prevent injury, do not exceed the rated load
capacity of the machine. If the machine is not on level
ground, load capacities will vary. There may be local
government regulations about the use of excavators
for lifting objects.
Please observe these regulations.
19. Fuel Heater Switch (Optional)
This switch is used to activate the fuel heater system.
O
When the switch is activated, the fuel is warmed,
depending upon the temperature of the fuel.
I
NOTE: If the fuel temperature is above 5°C (41°F),
heating system is not activated.
O. In this position, the fuel heater system is turned
"OFF."
I.
In this position, the fuel heater system is turned "ON."
FG000033
Figure 26
NOTE: The starter switch must be "ON."
Operating Controls
OP000528
2-17
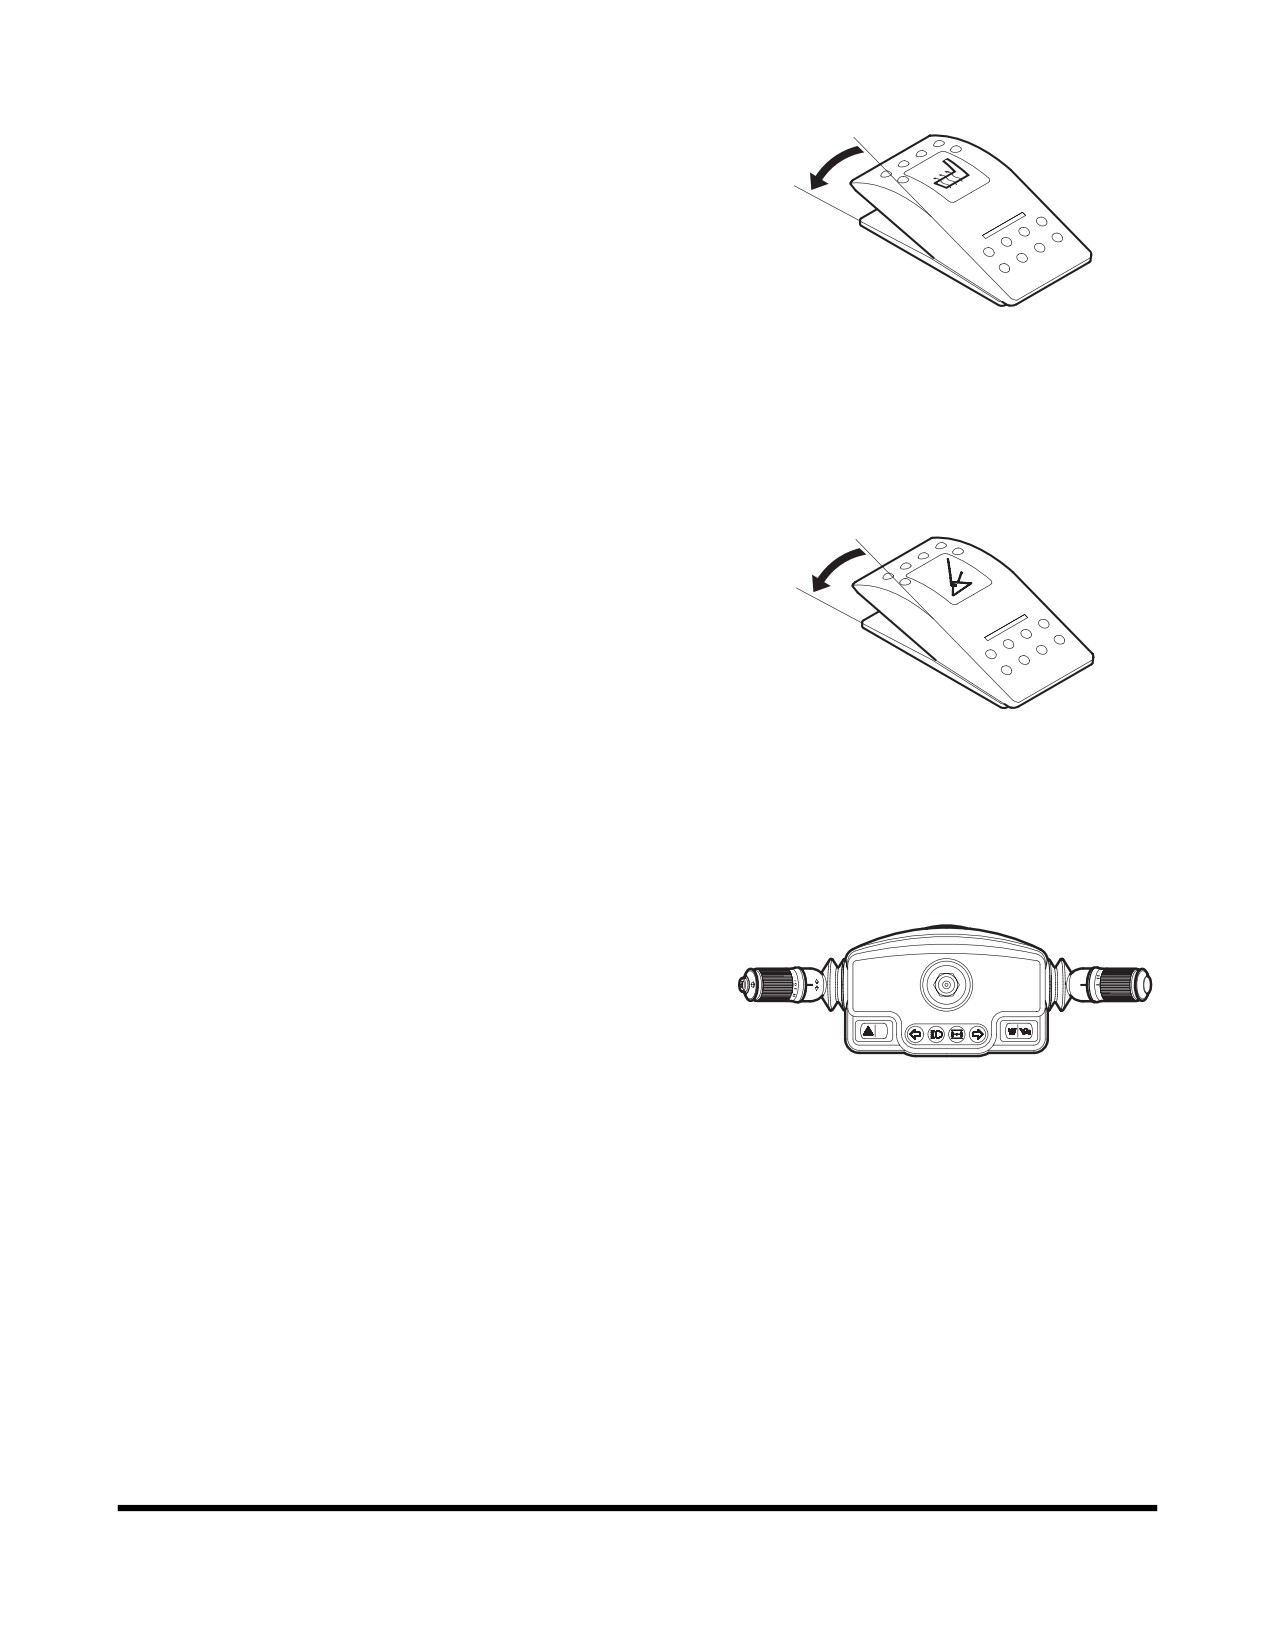
20. Seat Warmer Switch (Optional)
If the seat is equipped with the optional seat warmer,
O
push this switch to activate it.
I
When the seat is warmed, the warmer is automatically
turned "OFF."
O. In this position, the seat warmer is turned "OFF."
I.
In this position, the seat warmer is turned "ON."
NOTE: The starter switch must be "ON" with the engine
FG000034
running, for the heater to operate.
Figure 25
21. Dozer / Outrigger Selector Switch
(Independent Optional)
O
This switch is used to select the operational mode of
front and rear work equipments. (If equipped)
I
Left two switches are for front equipment and right two
switches are for rear equipment.
Each equipment is operated by individually or
simultaneously as selected.
FG002179
O. In this position, equipment is not selected.
Figure 26
I.
In this position, equipment is selected.
22. Steering Console
See “Steering Console” on page 2-22.
FG002180
Figure 27
Operating Controls
OP000528
2-18
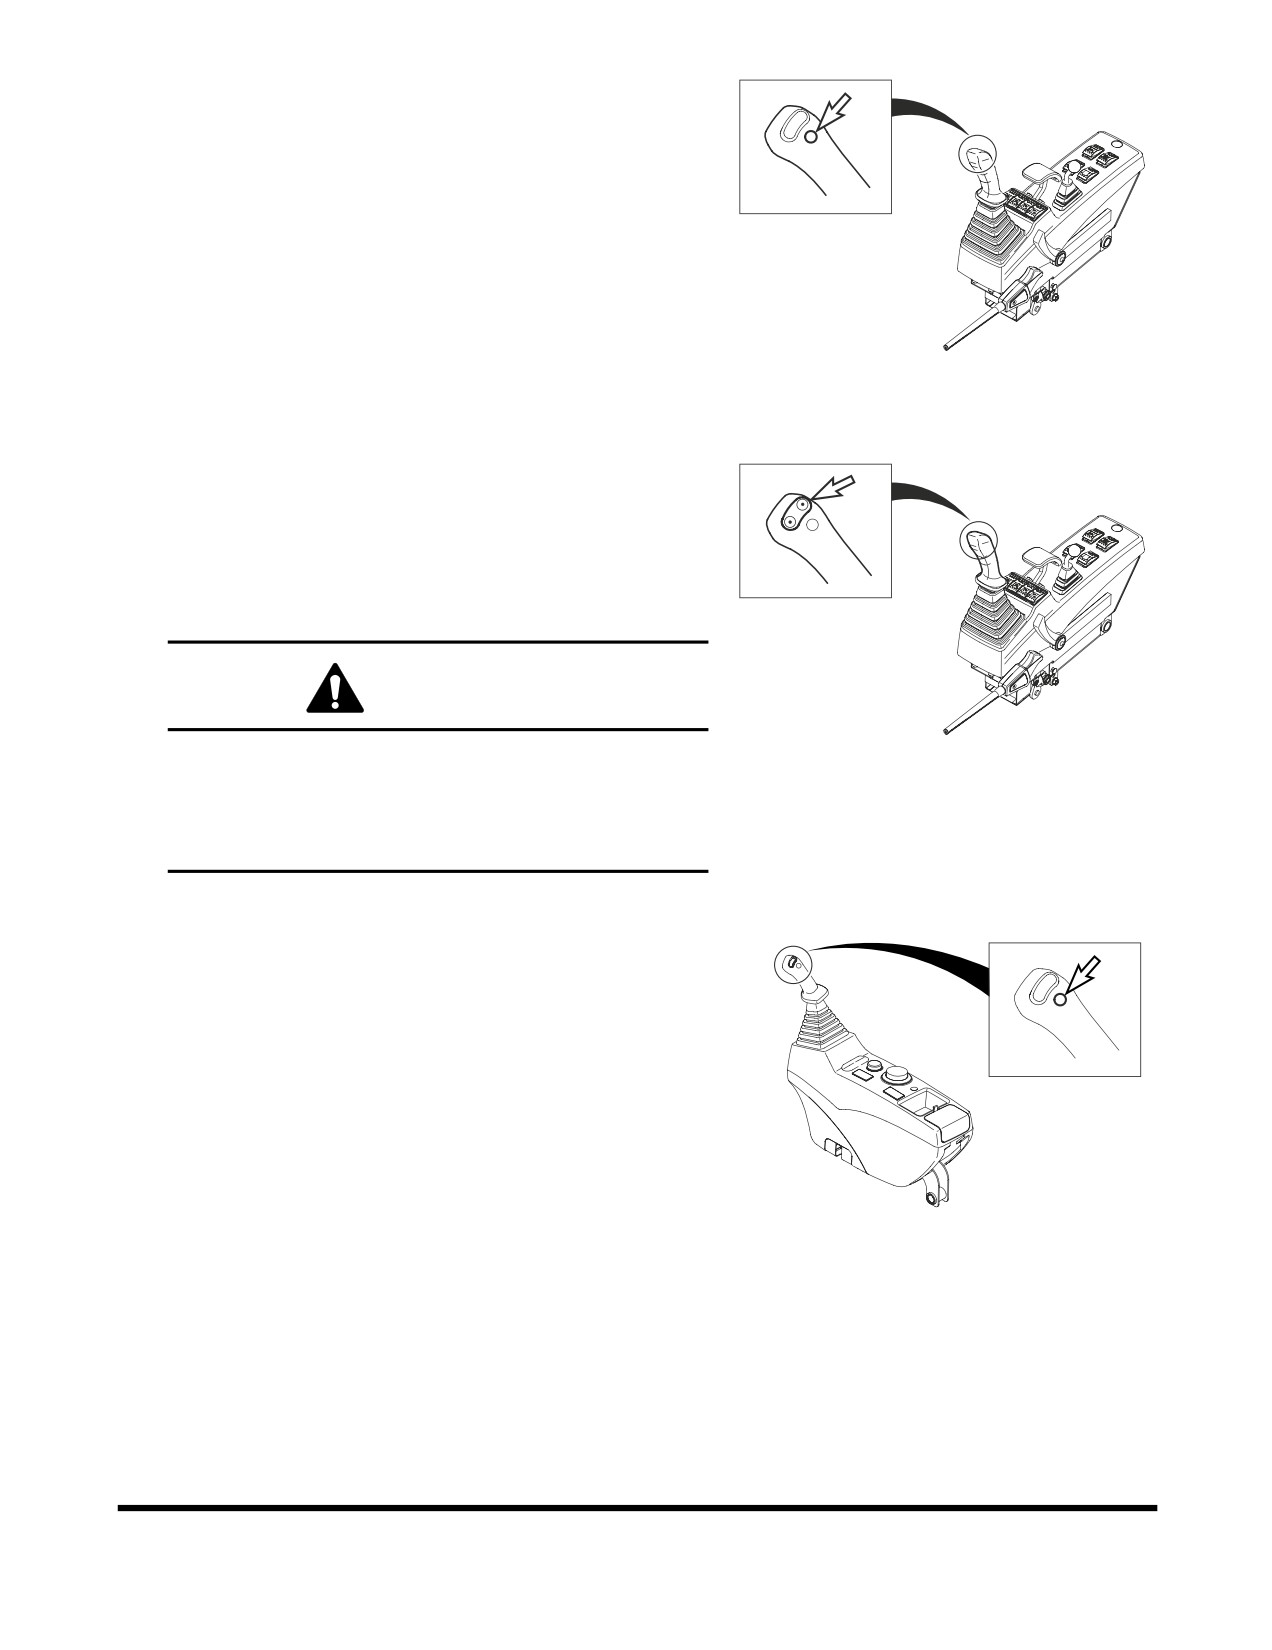
23. Horn Button (Left-hand Work Lever)
Press the lower button on the top of the left-hand work
lever (joystick) to sound horn.
NOTE: The starter switch must be "ON."
FG006175
Figure 30
24. Rotating Buttons
For a machine equipped with an attachment that rotates,
press the upper two buttons on the top of the left-hand
work lever (joystick) to rotate the attachment clockwise or
counterclockwise. Left button is for counterclockwise and
the right one is for clockwise.
WARNING!
FG006176
Before using any attachment in a work application, be
Figure 31
sure to check its functional control. Make sure that the
desired movement or action is being activated by the
control. e.g. opening/closing, CW/CCW, crowd/dump,
etc.
25. Booster Button (Right-hand Work
Lever)
Press the lower button on the top of the right-hand work
lever (joystick) to boost the hydraulic pressure. Refer to the
“Boost Mode” on page 3-26.
NOTE: This button works with the breaker/boost/shear
selector switch. See
“10. Breaker
/ Boost
/
Shear Selector Switch” on page 2-14.
FG000036
Figure 32
Operating Controls
OP000528
2-19
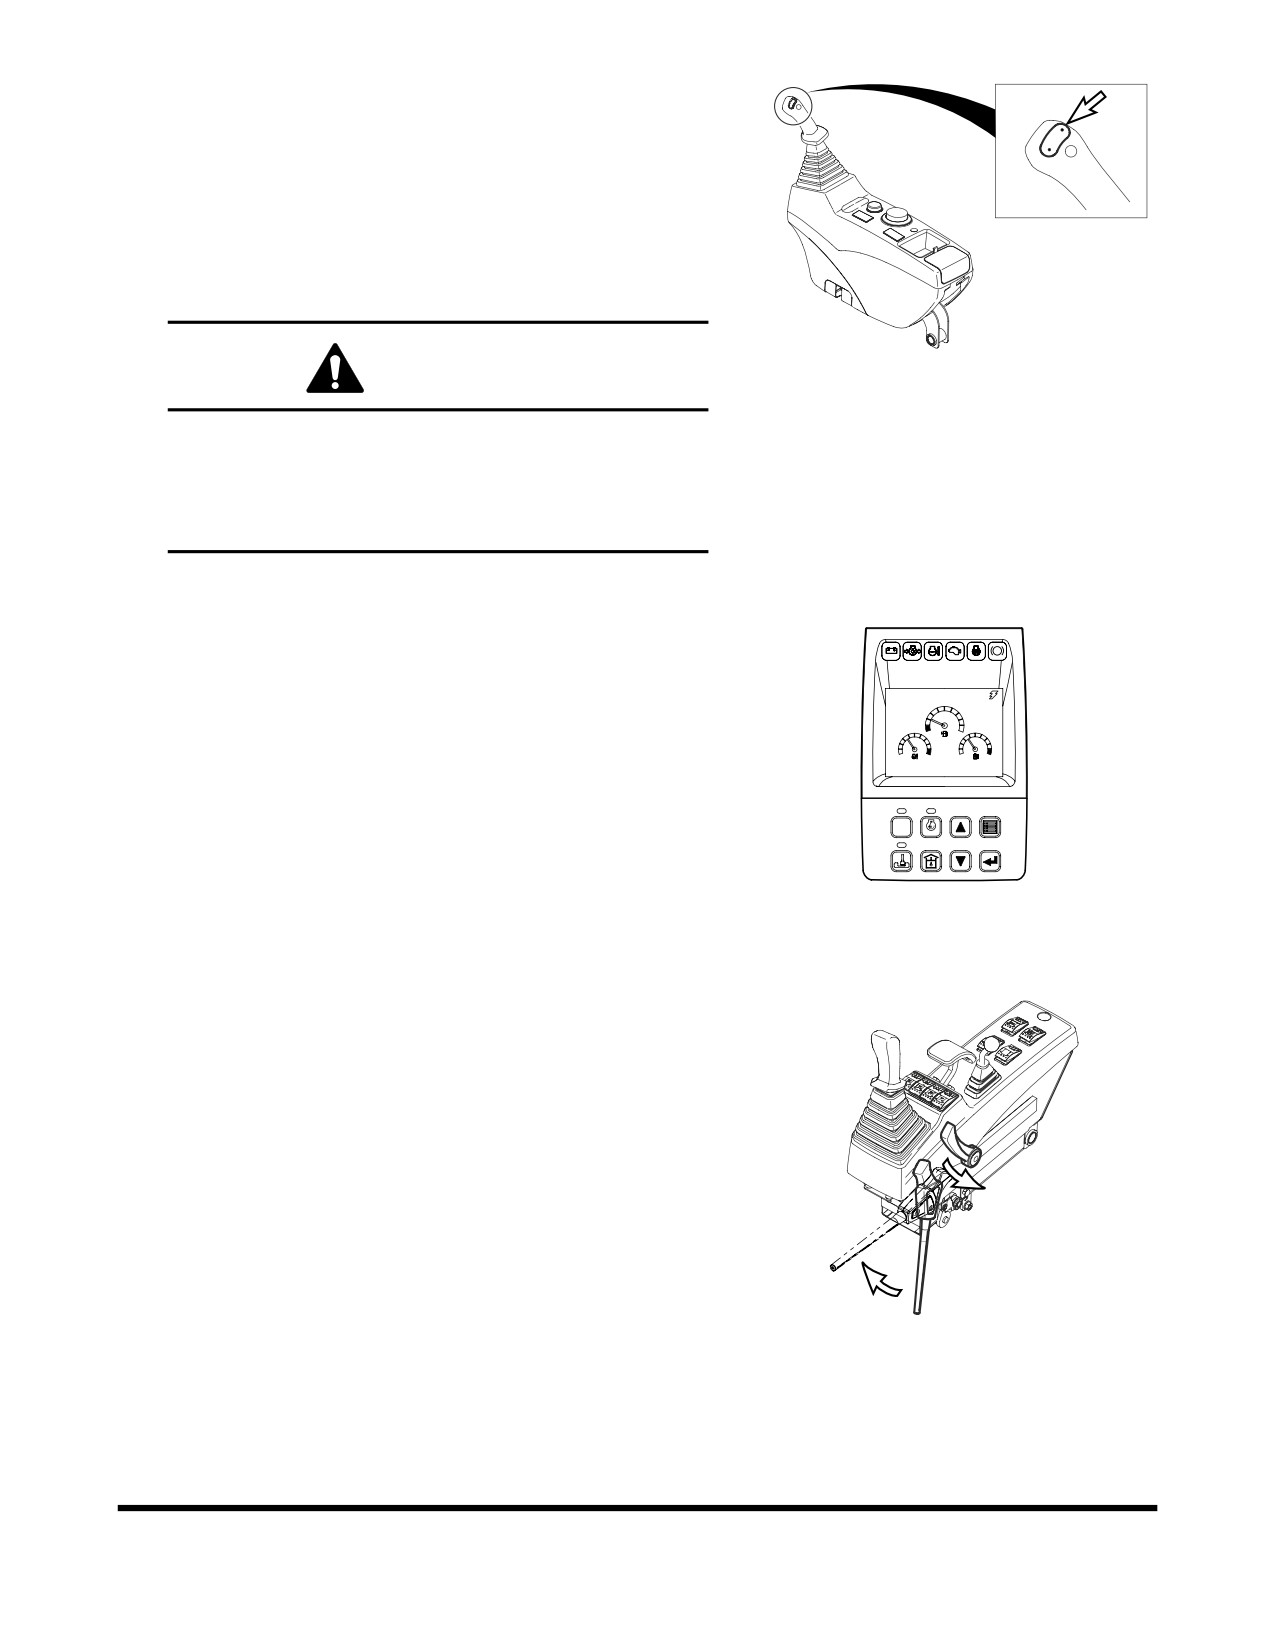
26. Shear Buttons
For a machine equipped with shear, press the two upper
buttons on the top of the right-hand work lever (joystick) to
open or close the shear. Left button is for closing (crowd),
right button is for opening (Dump).
NOTE: These buttons work with the breaker/boost/
shear selector switch. See “10. Breaker / Boost
/ Shear Selector Switch” on page 2-14.
FG000383
Figure 33
WARNING!
Before using any attachment in a work application, be
sure to check its functional control. Make sure that the
desired movement or action is being activated by the
control. e.g. opening/closing, CW/CCW, crowd/dump,
etc.
27. Instrument Panel
CHECK
P
See “Instrument Panel” on page 2-26.
02/05 [MO] 11:30
E
F
C
H
C
H
E/G SPEED
1700
RPM
POWER
1
2
AUTO
3
4
ESC
5
6
7
8
FG007154
Figure 34
28. Safety Lever
See “Safety Lever” on page 3-14.
Unlock
Lock
FG007022
Figure 35
Operating Controls
OP000528
2-20

29. Photo Sensor
The photo sensor detects the radiant energy of the sun.
In auto mode the air conditioner will automatically adjust
the air temperature based on to the detected radiant
energy.
FG000399
Figure 36
Operating Controls
OP000528
2-21
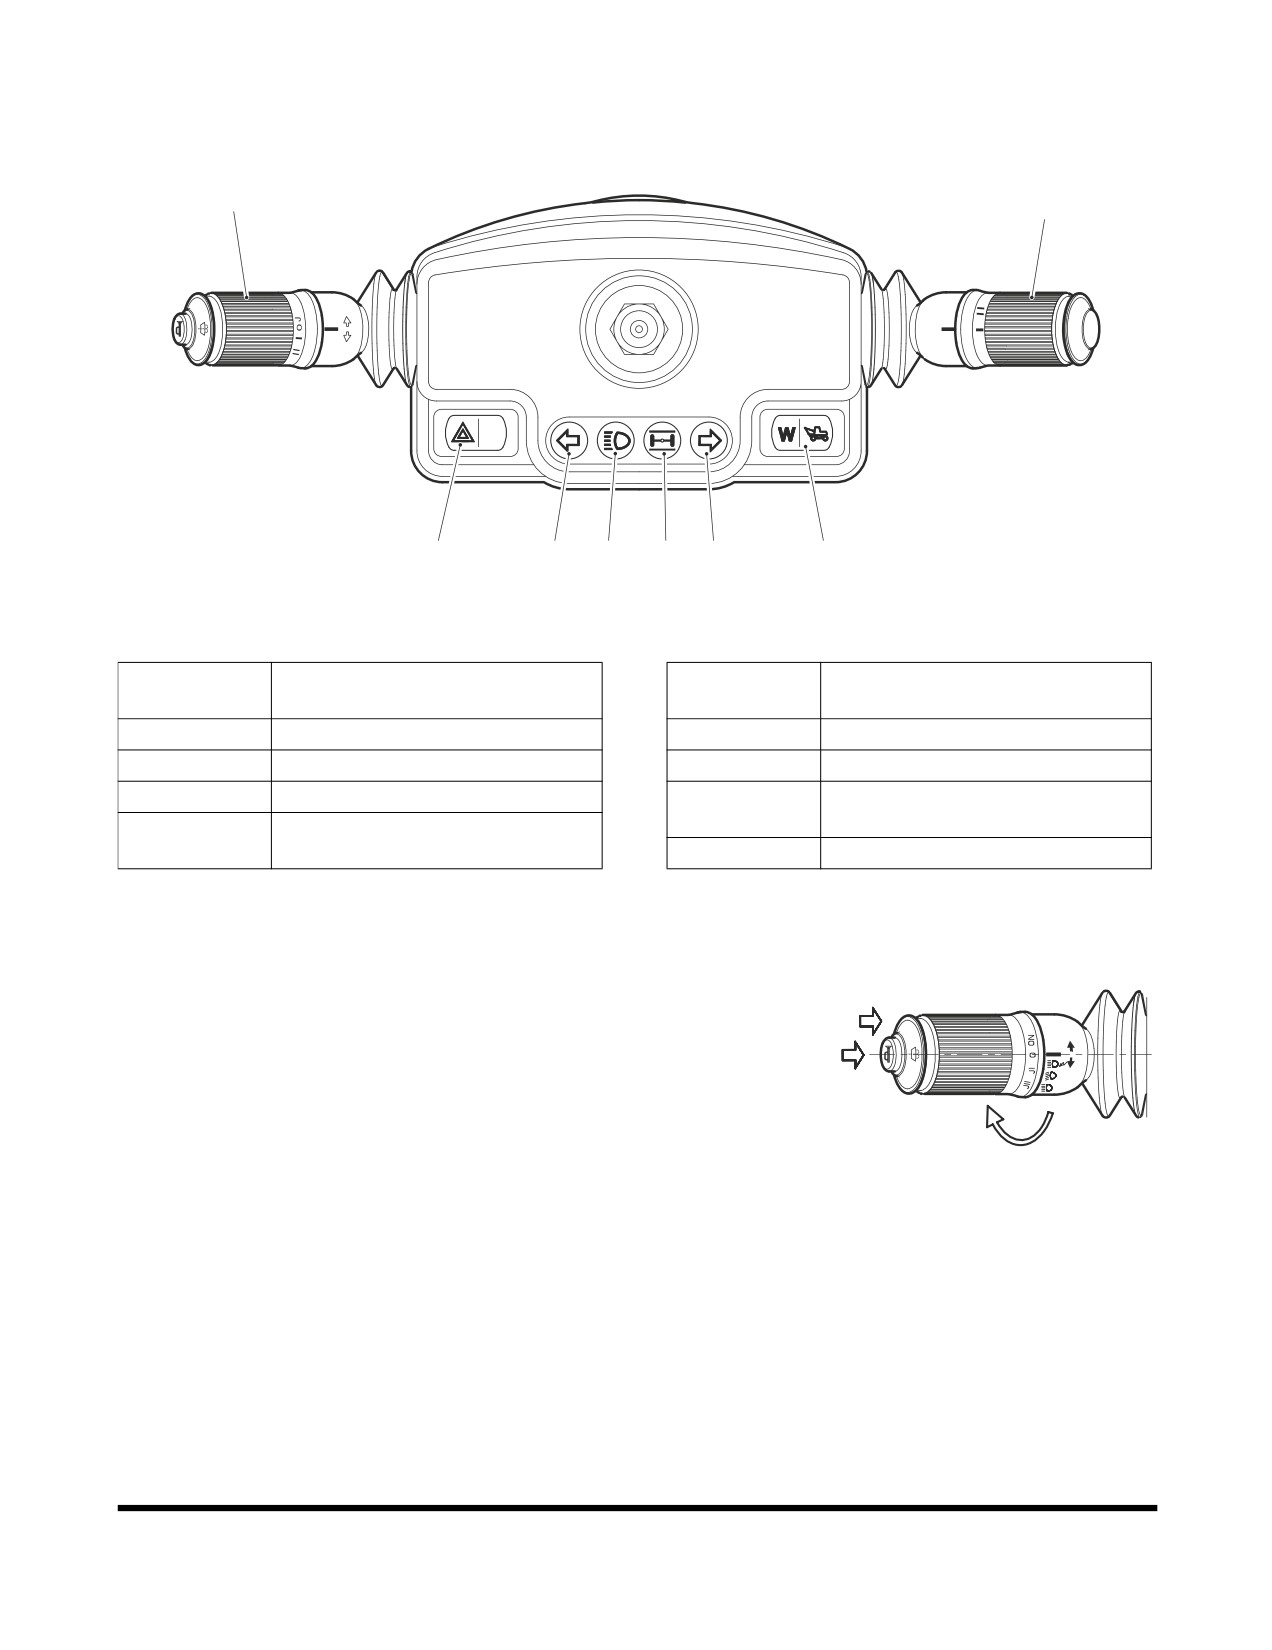
Steering Console
1
2
8
7
6
5
4
3
FG002181
Figure 37
Reference
Reference
Description
Description
Number
Number
1
Combination Switch
5
Ram Lock Indicator Light
2
Transmission Selector Switch
6
High Beam Indicator Light
3
Work/travel Selector Switch
7
Left Turn Signal Light & Hazard
Warning Light
4
Right Turn Signal Light & Hazard
Warning Light
8
Hazard Warning Light Switch
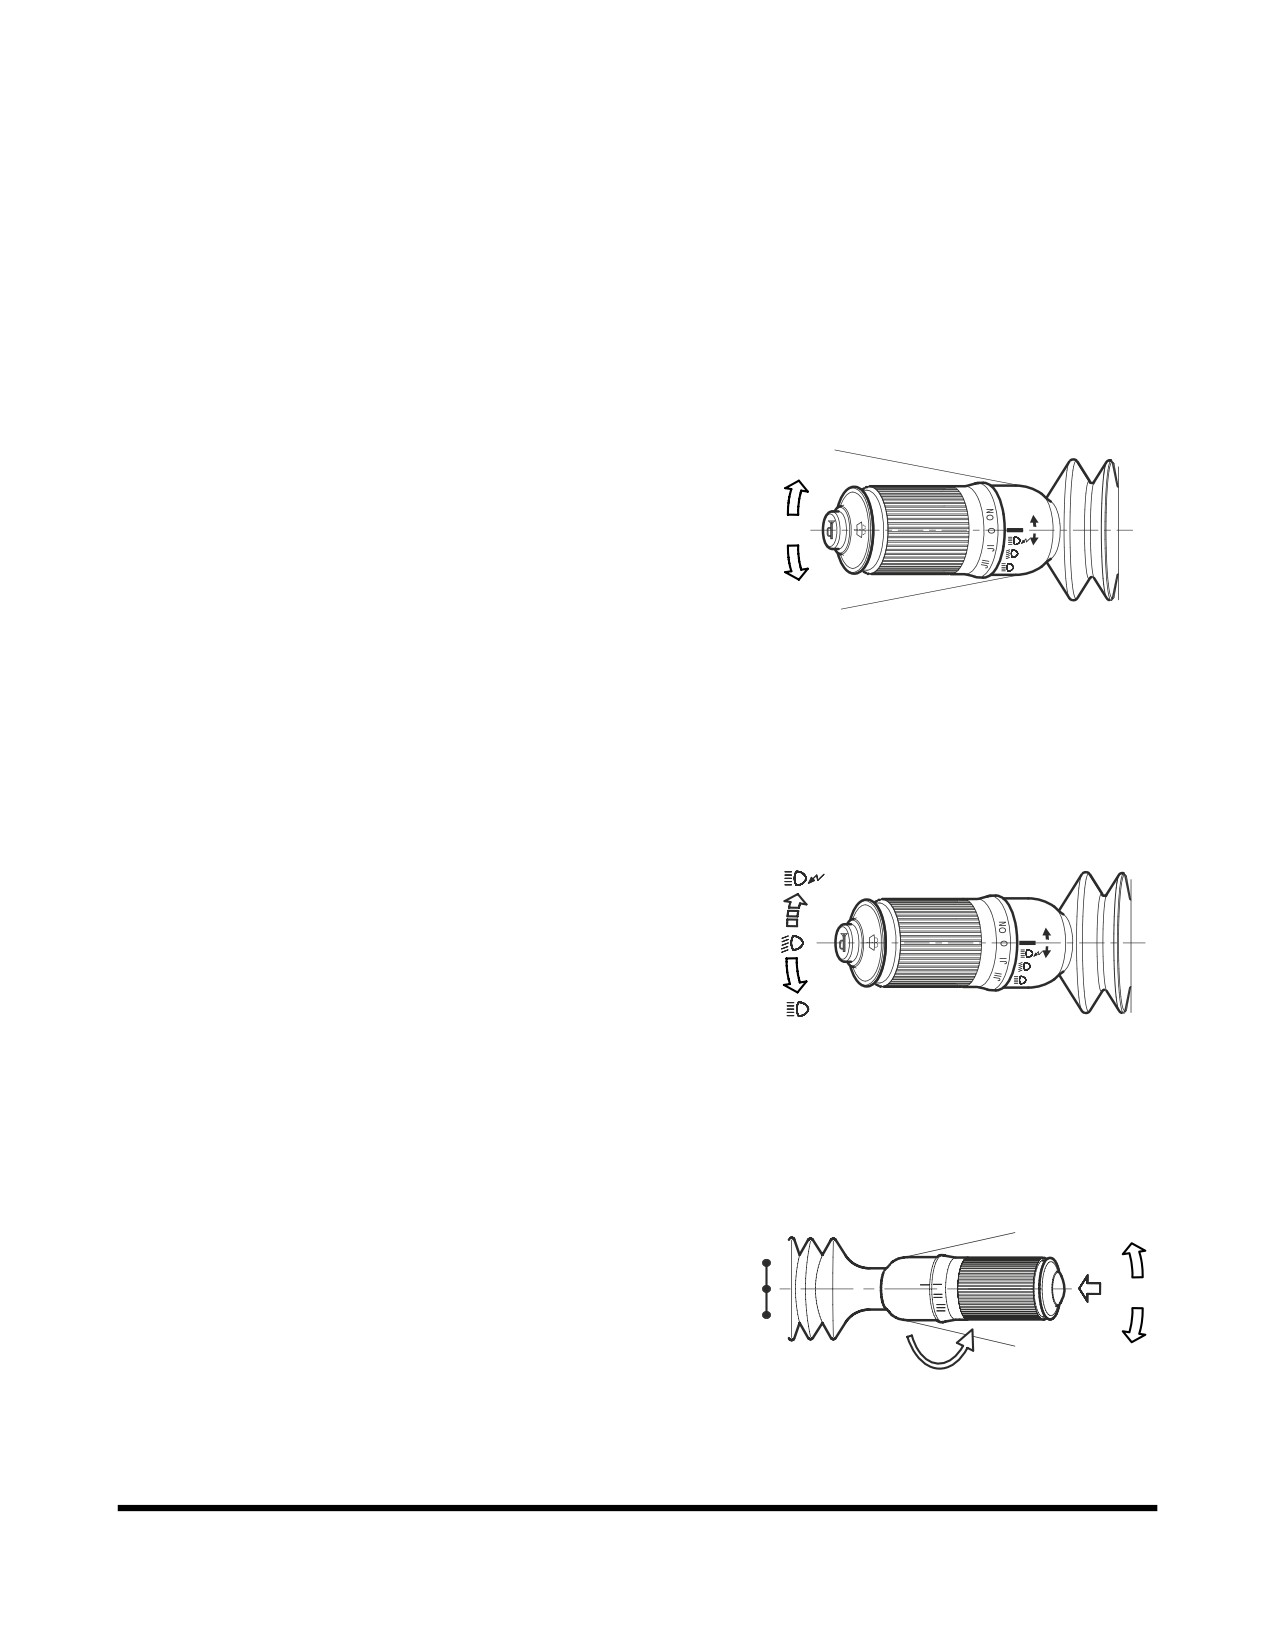
1.
Combination Switch (LH)
A. Windshield wiper switch
Activates the windshield wiper when the outside area
B
of the lever is rotated.
C
ON : In this position, windshield wiper run at constant
speed.
O : In this position, windshield wiper is "OFF"
A
JI
: In this position, windshield wiper runs
approximately on a three second intermittent
FG007018
cycle.
Figure 38
JII
: In this position, windshield wiper runs
approximately on a six second intermittent
cycle.
B. Windshield washer switch
When the outside area of the lever is pressed, it
activates the washer pump and sprays fluid onto the
windshield. (Only while being pressed.)
Operating Controls
OP000528
2-22
NOTE: Do not operate windshield wiper without any
washer fluid. If you operate it in spite of running
out of fluid, the washer motor may be damaged.
Check level in washer tank, and add fluid as
required.
NOTE: If you use soapy water or synthetic detergent
instead of window cleaning fluid, the wiper
blade or painted surfaces may be damaged.
C. Horn switch
The center button of the lever activates the horn.
(Only while being pressed.)
D. Turn signal lever
Operates the left and right direction lights.
R
a.
Right side direction switch - Pushing the lever
a
forward, activates the right side direction lights
and the direction indicator light on the
instrument panel.
b
b.
Left side directional switch - Pushing the lever
L
back, activates the left side directional lights
and the directional indicator light on the
instrument panel.
FG002183
Figure 39
NOTE: When the turn is completed the lever
automatically returns to the "NEUTRAL"
position. Should it not, it can be manually
returned by hand.
E. Dimmer switch
a.
Pull up - Momentarily turns "ON" both the low
beams and high beams.
(Returns to
a
"NEUTRAL" position when released.)
b.
Neutral position - Normal low beams.
b
c.
Push down - Locks into position and lights up
the high beams.
c
NOTE: High and low beams will only function with the
light switch in the "II" position.
FG006179
Figure 40
2.
Transmission Selector Switch (RH)
a.
Forward travel - Pushing the lever forwards the front
selects the forward travel gear.
a
F
b.
Neutral
- Central position puts the gear in the
F
d
"NEUTRAL" position.
N
b
c.
Reverse travel - Pull the lever to the rear to select the
R
reverse gear.
R
c
d.
Cruise control switch - When this switch is pressed
e
while traveling, the travel speed is maintained without
FG006180
using the foot pedal. While in this mode the engine
Figure 41
speed can be adjusted by turning the engine speed
Operating Controls
OP000528
2-23
control dial. If the brakes are applied or if the travel
selector lever is moved to the "NEUTRAL" position
the cruise control is turned "OFF."
When the auto idle mode is selected, the engine
speed is lowered approximately 4 seconds after the
cruise is turned "OFF."
The cruise control is not activated in the reverse
travel mode.
e.
Travel speed selector switch - Selects one of three
travel speeds in forward and reverse.
"I" Position - Creep speed.
"II" Position - Low speed.
"III" Position - High speed.
3.
Work/travel Selector Switch
This switch is used to select work or travel modes.
O. In this position, "Work Mode" is selected for normal
operation.
O
I.
In this position, "Travel Mode" is selected for street
travel.
W
I
CAUTION!
FG002190
Figure 42
When the switch is in the "I" position the work levers
(joysticks) are not functional.
Although it is possible to travel with the switch in the
work mode position, extreme caution should be
exercised since the front attachment can be moved by
accidentally touching the work levers (joysticks).
In the above condition the engine speed will not
increase even though the foot pedal is pressed to the
maximum position, this is not a malfunction.
4.
Left Turn Signal Light & Hazard Warning Light
This light blinks when left turn signal is turned "ON."
Both lights blink when warning lights are turned "ON."
NOTE: If left and light turn indicators blink together, or if
they blink faster than normal, a light build is not
operating of flasher solenoid is damaged.
ACO0242L
Figure 43
Operating Controls
OP000528
2-24
5.
Ram Lock Indicator Light
This light turns "ON" when the ram lock cylinder is
"APPLIED".
FG002187
Figure 44
6.
High Beam Indicator Light
This light turns "ON" when the head lights are turned to
"HIGH BEAM."
HA0O2023
Figure 45
7.
Right Turn Signal Light & Hazard Warning Light
This light blinks when right turn signal is turned "ON."
Both lights blink when warning lights are turned "ON."
O
NOTE: If left and right turn indicators blink together, or if
they blink faster than normal, a light bulb is not
operating of flasher solenoid is damaged.
I
FG002191
Figure 46
8.
Hazard Warning Light Switch
This light is used when the equipment is stopped due to a
malfunction or when an emergency occurs. When this
switch is pressed the directional indicator lights in front and
back of the machine light up and flash, warning others in
the area. At the same time the directional indicator lights
on the instrument and hazard warning light switch will light
up to warn the operator. The hazard warning lights operate
independent of the starter switch.
O. In this position, hazard warning lights are turned
ACO0243L
"OFF."
Figure 47
I.
In this position, hazard warning lights are turned
"ON."
Operating Controls
OP000528
2-25
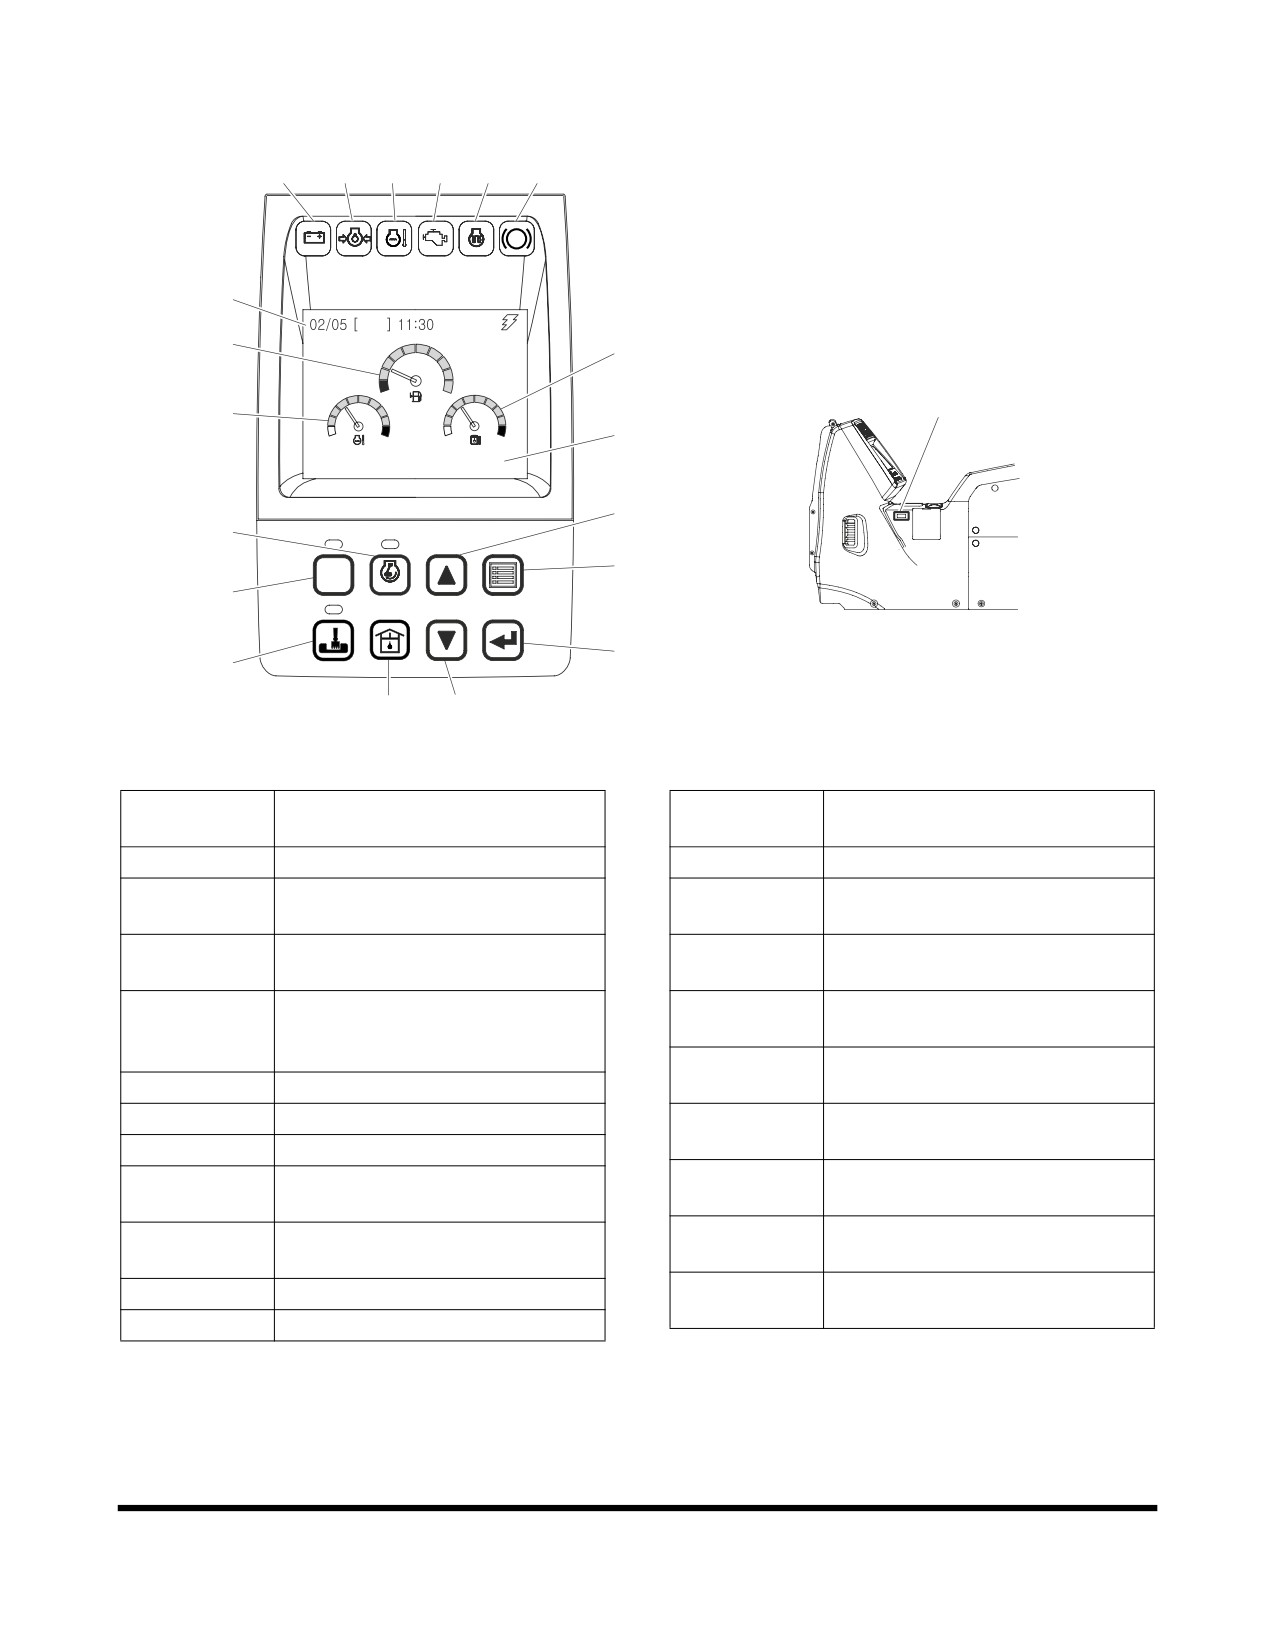
INSTRUMENT PANEL
7
8
9
10
11
12
CHECK
P
5
MON
1
3
E
F
6
2
C
H
C
H
4
E/G SPEED
1700
RPM
17
15
19
POWER
AUTO
13
1
2
3
4
ESC
20
14
5
6
7
8
16
18
FG006164
Figure 48
Reference
Reference
Description
Description
Number
Number
1
Fuel Gauge
12
Parking Brake Indicator Light
2
Engine Coolant Temperature
13
Power Mode Selector Button
Gauge
(See page 2-38)
3
Hydraulic Oil Temperature
14
Trenching Mode Selector Button
Gauge
(See page 2-38)
4
Multifunction Gauge and Graphic
15
Auto Idle Selector Button
Information Area (See page
(See page 2-39)
2-32)
16
Flow Control Button
5
Digital Clock
(See page 2-39)
6
Hour Meter
17
Up Arrow Button
(See page 2-40)
7
Charge Warning Light
18
Down Arrow Button
8
Engine Oil Pressure Warning
(See page 2-41)
Light
19
Display Selector Button
9
Engine Coolant Temperature
(See page 2-41)
Warning Light
20
Selection Button
10
Engine Check Warning Light
(See page 2-41)
11
Preheat Indicator Light
Operating Controls
OP000528
2-26
Functional check
When the engine starter switch is turned to the "I" (ON) position,
all gauge bands, switch/button indicator lights and indicator/
warning lights will turn "ON" and the alarm buzzer will sound
about two seconds.
During this functional check, a LOGO will appear on the multi
function gauge in the graphic information area (3 and 4, Figure
48).
Password Activated
If a password has already been set and the system has been
"LOCKED," the password display will appear on the screen once
the functional check has been completed. Enter the password
into the text area and then engage the starter.
NOTE: Refer to
“Set Password
(Lock and Unlock)” on
page 2-47, for further details.
CAUTION!
If the password does not match the stored password, the
engine will not start.
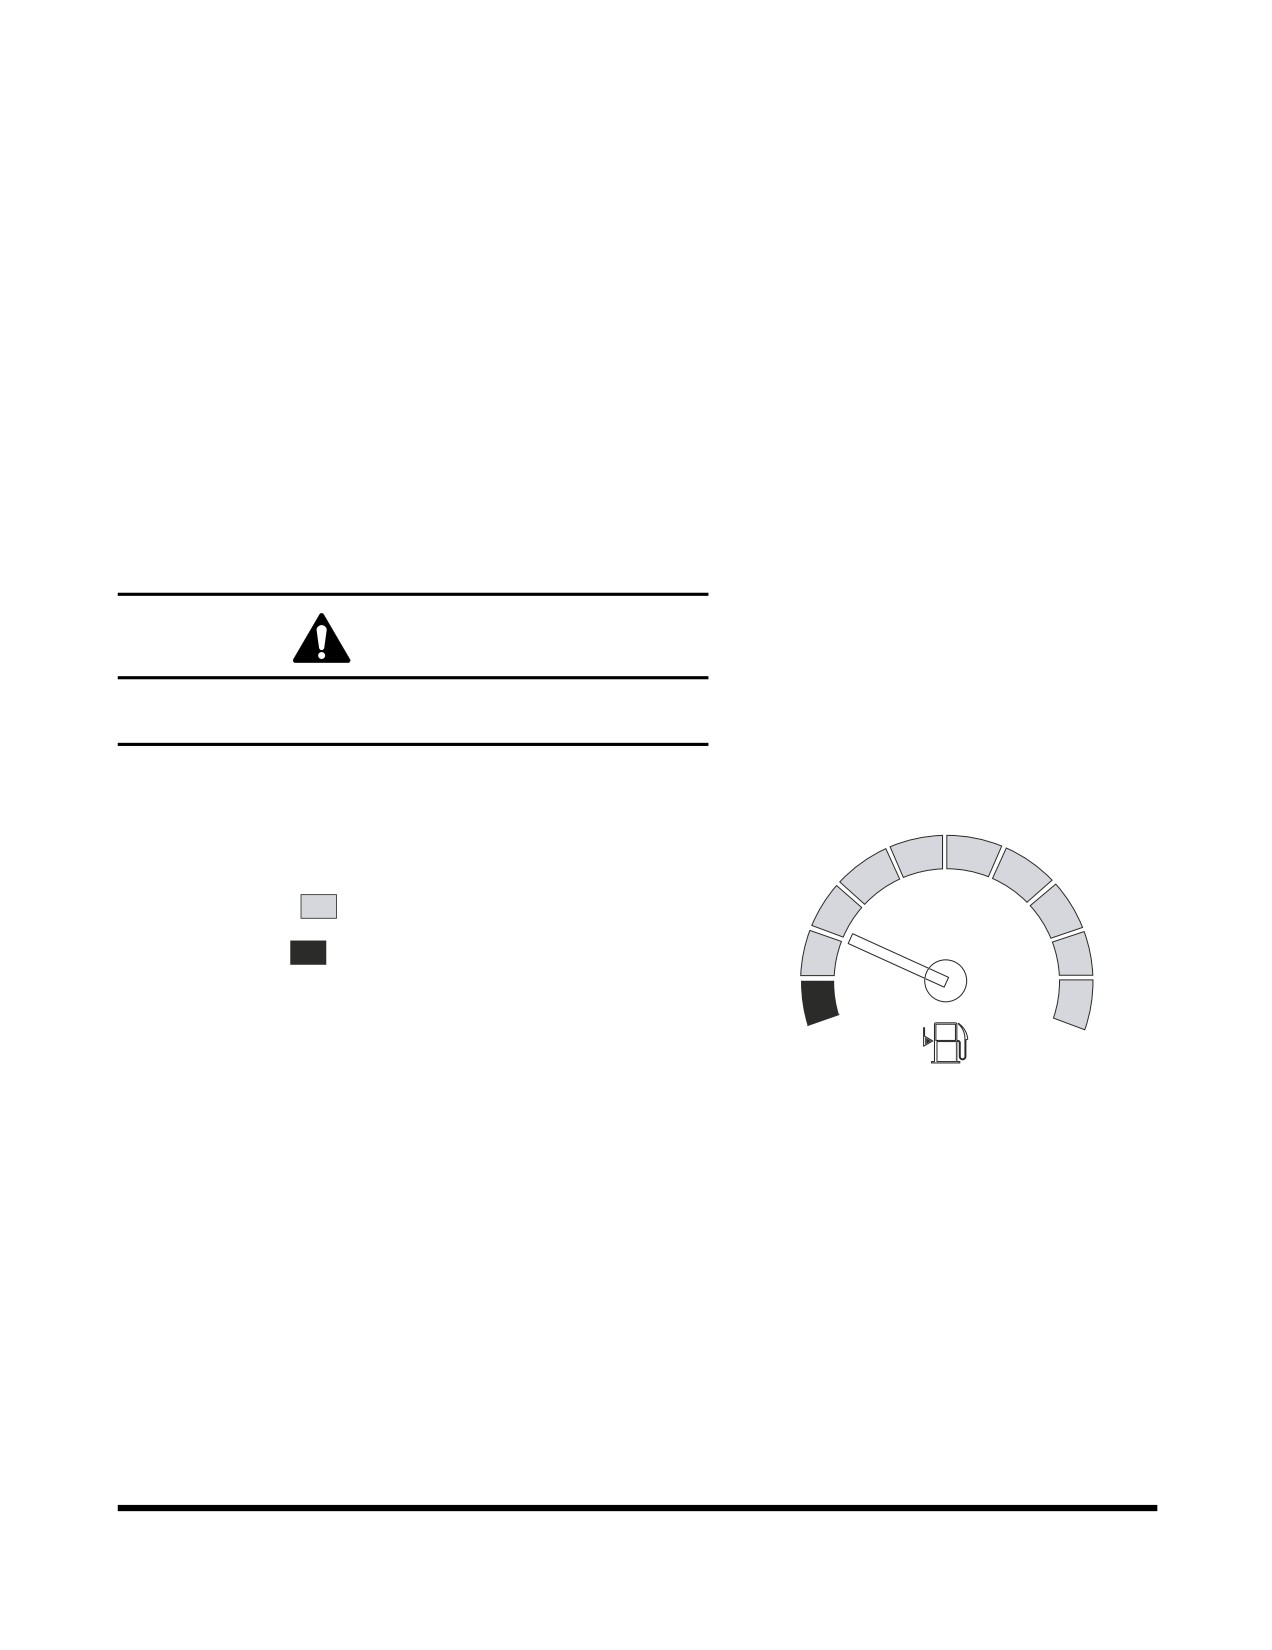
1. Fuel Gauge
Shows remaining fuel quantity in tank.
BLUE ZONE (
) - Indicates a normal fuel quantity.
RED ZONE (
) - Indicates that the fuel level is low.
If the gauge pointer moves into the red zone, the fuel level
symbol will turn "ON," and be display in the screen. Stop
E
F
operation and immediately and add fuel.
NOTE: See “Abnormal State Warning Symbols” on
FG000040
page 2-34, for location of this warning symbol
Figure 49
and others.
Check the fuel level on firm, level ground.
Operating Controls
OP000528
2-27
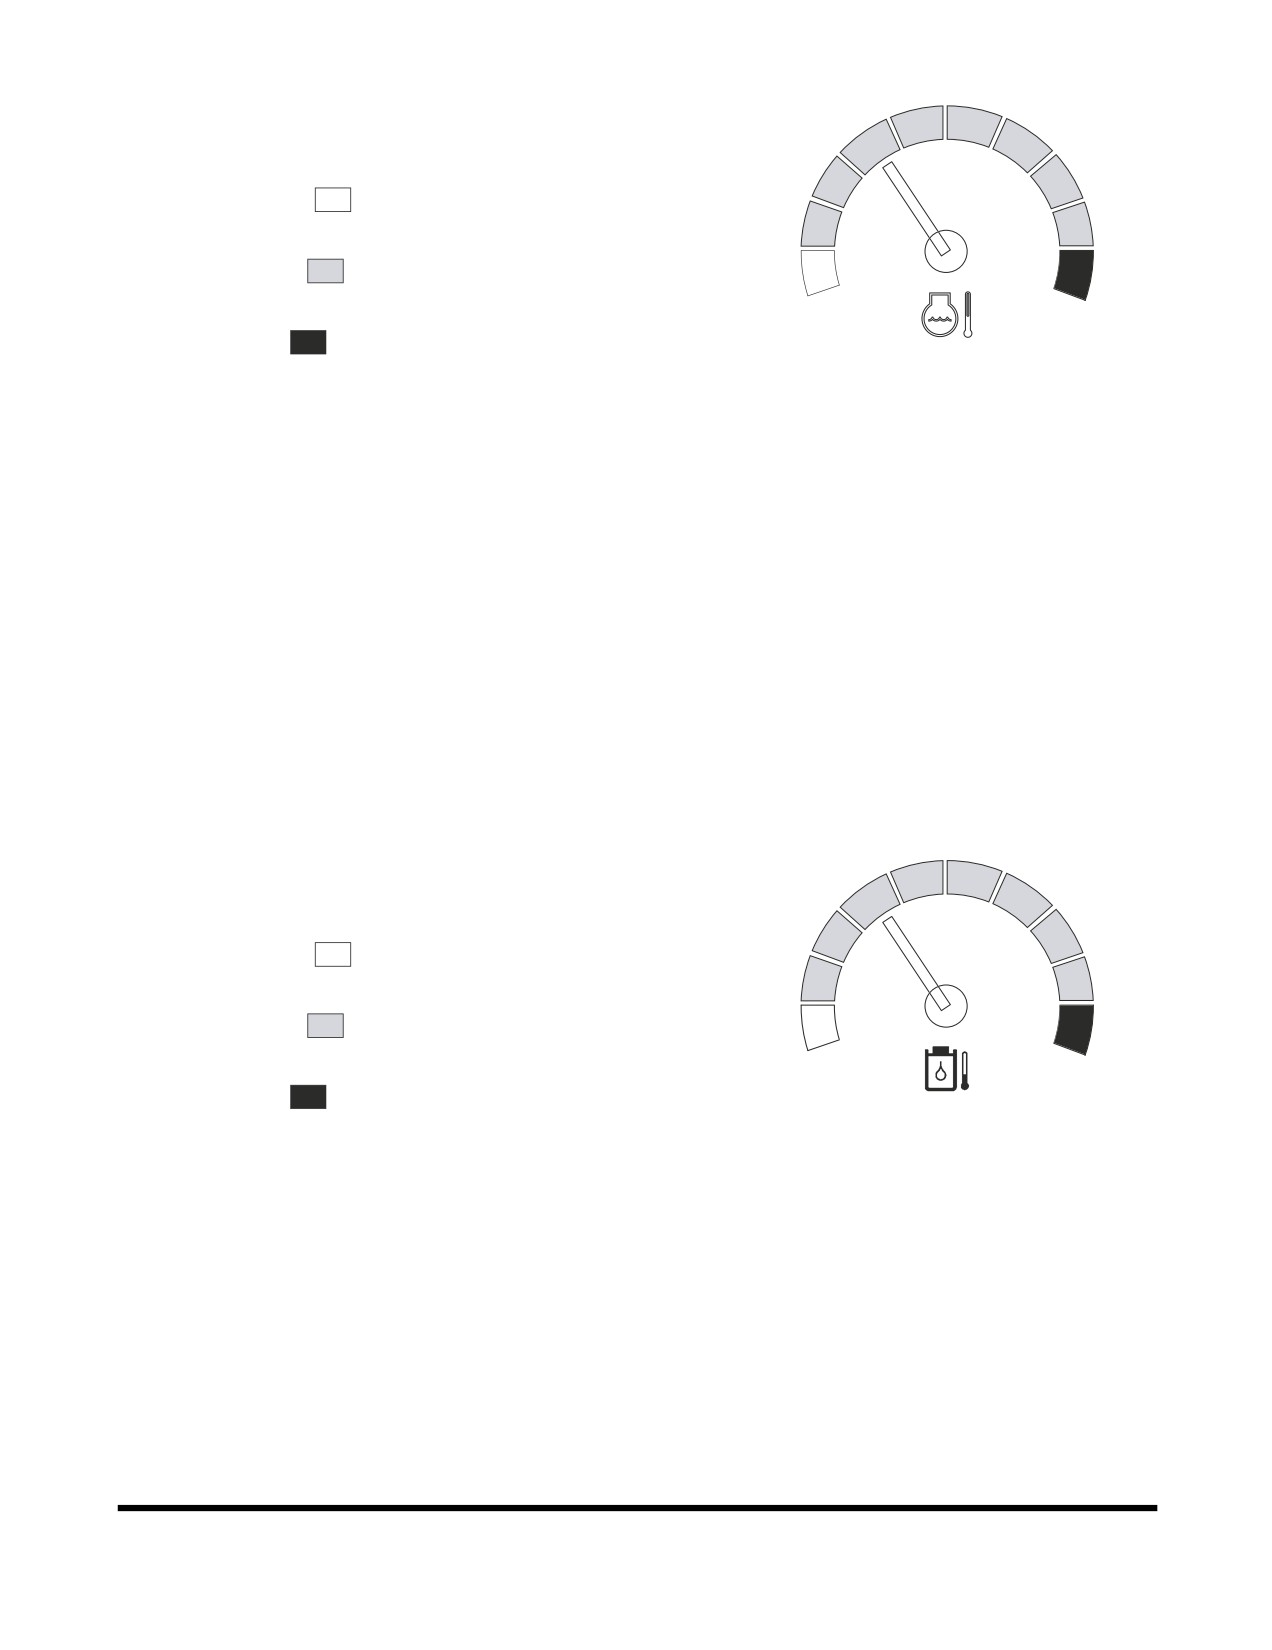
2.
Engine Coolant Temperature Gauge
The colored bands indicate the temperature of the engine
coolant.
WHITE ZONE (
) - Indicates temperature is lower than
the normal operating temperature.
BLUE ZONE (
)
- Indicates temperature is within the
normal operating range.
C
H
RED ZONE (
) - Indicates temperature is too high.
FG000041
Figure 50
During operation, the pointer must be in the blue zone.
If the gauge pointer moves into the red zone, the engine
coolant temperature warning light will turn "ON," a warning
buzzer will sound, and the engine speed will be
automatically reduced. Allow the engine to run at low idle
speed until the temperature gauge registers in the blue
zone again. When the blue zone is reached, allow the
engine to idle for an additional three - five minutes before
shutting down the engine. If not allowed to idle, heat surge
may develop which will damage the engine. Allowing the
engine to idle will dissipate heat. Check the coolant level,
look for a loose fan belt, inspect for debris around radiator,
and so on.
When the temperature reaches the normal range, the
engine speed will automatically recover.
3. Hydraulic Oil Temperature Gauge
The colored bands indicate the temperature of the
hydraulic oil
WHITE ZONE (
) - Indicates temperature is lower than
the normal operating temperature.
BLUE ZONE (
)
- Indicates temperature is within the
normal operating range.
C
H
RED ZONE (
) - Indicates temperature is too high.
FG000042
Figure 51
During operation, the pointer must be in the blue zone.
If the gauge pointer moves into the red zone, the hydraulic
oil temperature symbol will turn "ON," and be display in the
screen. Allow the engine to run at low idle speed until the
temperature gauge registers in the blue zone again.
NOTE: See “Abnormal State Warning Symbols” on
page 2-34, for location of this warning symbol
and others.
Operating Controls
OP000528
2-28
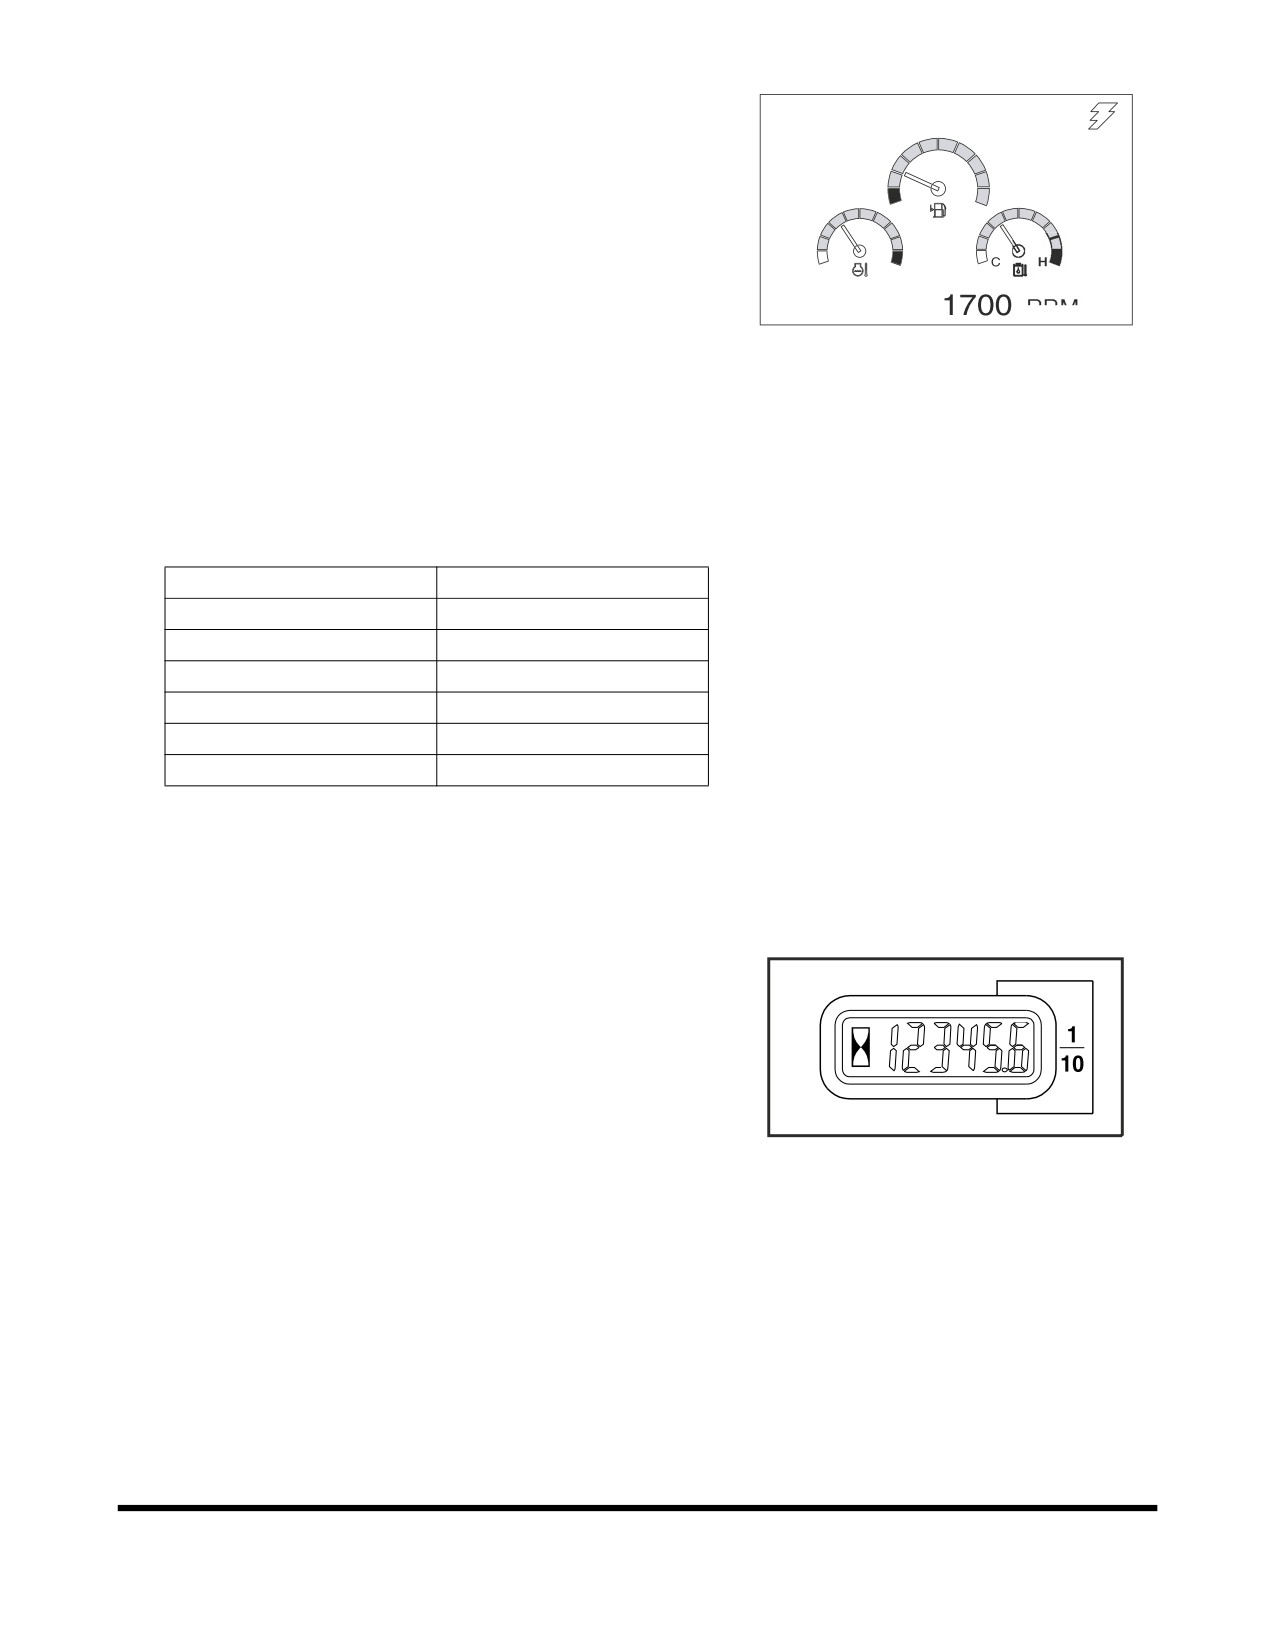
4. Multifunction Gauge and Graphic
02/05 [MO] 11:30
Information Area
See “Multifunction Gauge and Graphic Information” on
page 2-32. This section will have a more in-depth
E
F
explanation of the display area.
C
H
E/G SPEED
RPM
FG000043
Figure 52
5. Digital Clock
A digital clock, shows the current time. The displayed
contents are as follows.
Display
Description
MM/DD [W] HH:mm
MM
Month
DD
Date
W
Day
HH
Hour
FG000044
mm
Minute
Figure 53
A (P)
AM (PM)
Refer to the “Setting Main Menu” on page 2-40 for time
setting.
6. Hour Meter
The hour meter is used to indicate the total number of
running hours on the engine. The meter will flash every
four seconds when the engine is running to indicate that it
is functioning properly.
HAOA601L
Figure 54
Operating Controls
OP000528
2-29
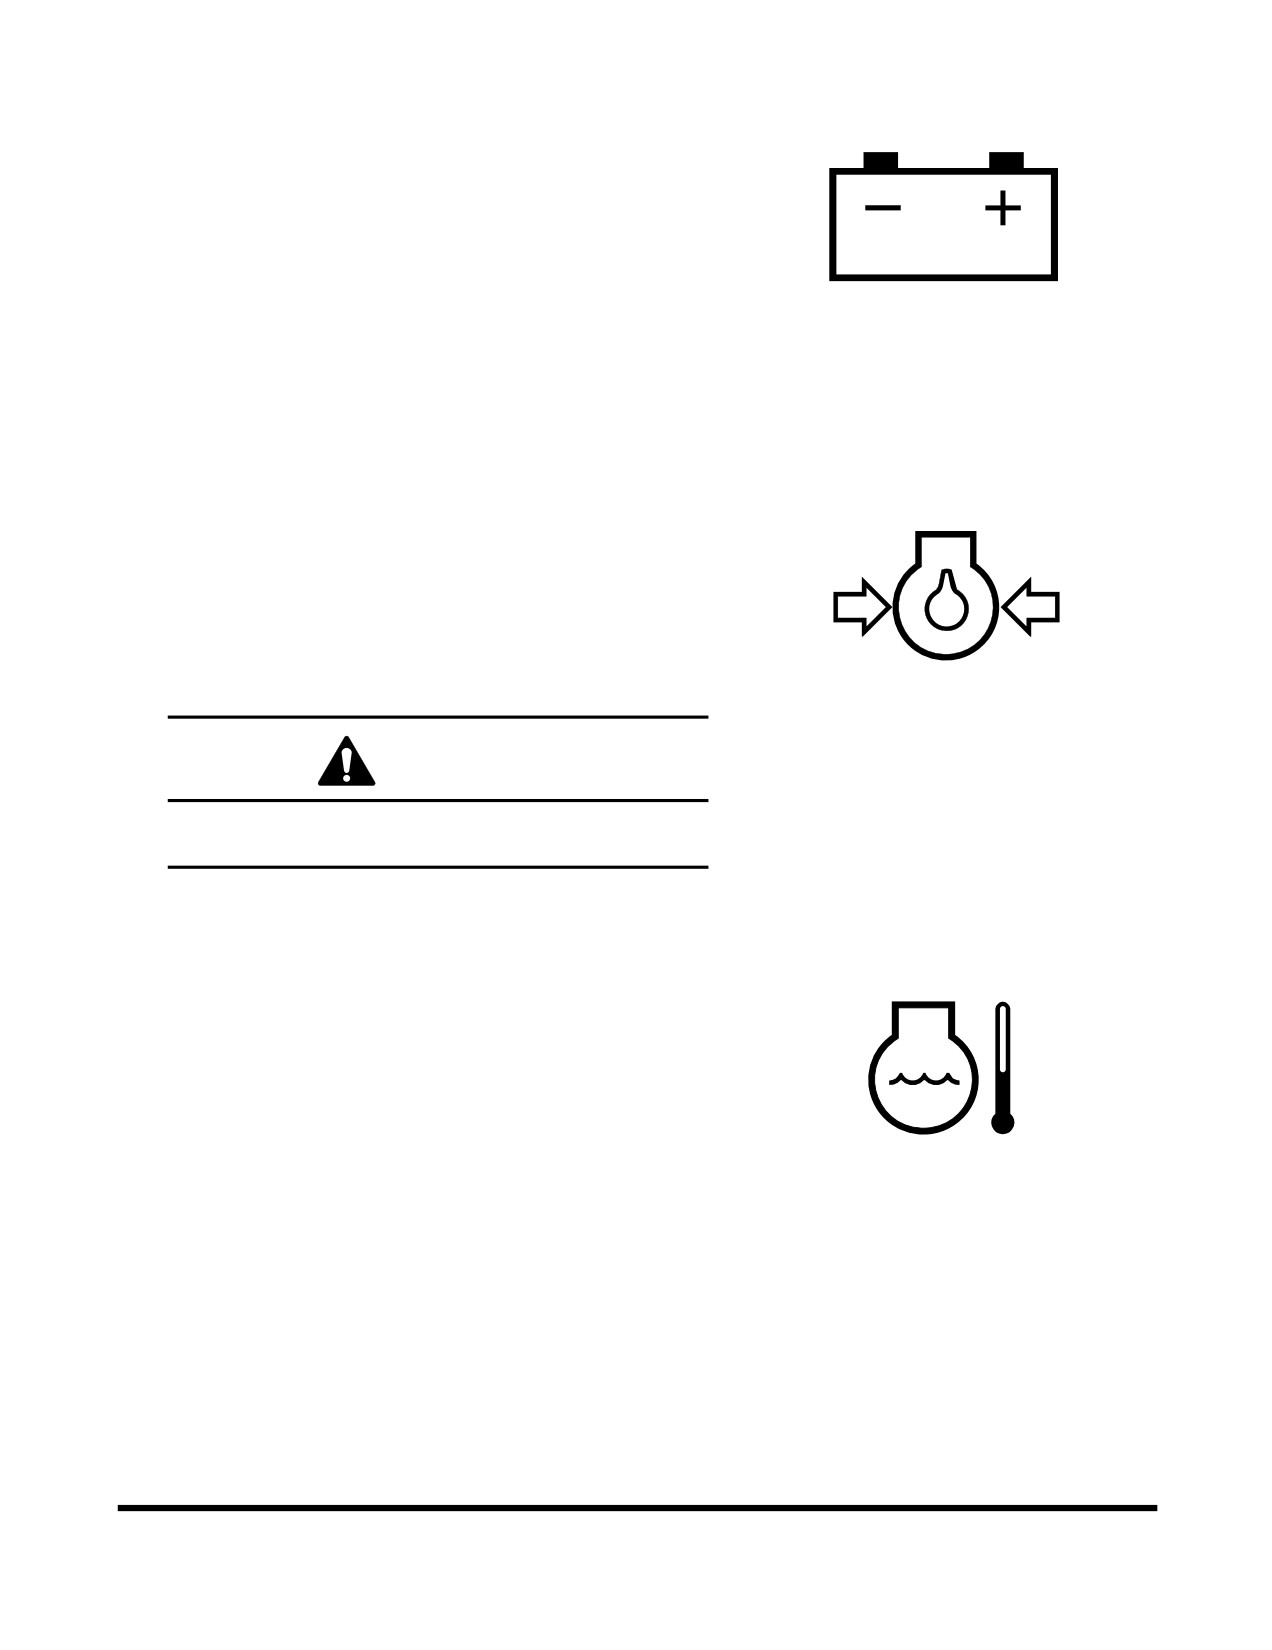
7. Charge Warning Light
This indicator light will turn "ON" when the engine starter
switch is turned "ON," and should go "OFF" after the
engine starts. If it does not turn "OFF," shut the engine
down immediately and determine the cause of the
problem.
HAOA610L
Figure 55
8. Engine Oil Pressure Warning Light
This indicator light will turn "ON" when the engine starter
switch is turned "ON," and should go "OFF" after the
engine starts. For example, if the engine oil pressure
becomes too low, the light will turn "ON" and a warning
buzzer will sound. If this happens, shut the engine down
immediately and determine the cause of the problem. If
you continue to work when this light is "ON," it will result in
serious engine damage.
HAOA620L
Figure 56
CAUTION!
If you continue to work when this light is "ON," it will
result in serious engine damage.
9. Engine Coolant Temperature Warning
Light
If engine coolant overheats, this light will turn "ON," an
alarm will sound, and the engine speed will be
automatically reduced, until coolant temperature drops. Do
not turn engine "OFF" because this will cause coolant
temperature to rise and may cause engine to siege due to
heat surge.
NOTE: Check the engine coolant temperature gauge. If
HAOD350L
the gauge pointer moves into the red zone, the
Figure 57
engine coolant temperature warning light will
turn "ON," a warning buzzer will sound, and the
engine speed will be automatically reduced.
Allow the engine to run at low idle speed until
the temperature gauge registers in the blue
zone again. When the blue zone is reached,
allow the engine to idle for an additional three -
five minutes before shutting down the engine. If
not allowed to idle, heat surge may develop
which will damage the engine. Allowing the
Operating Controls
OP000528
2-30
engine to idle will dissipate heat. Check the
coolant level, look for a loose fan belt, inspect
for debris around radiator, and so on.
When the temperature reaches the normal
range, the engine speed will automatically
recover.
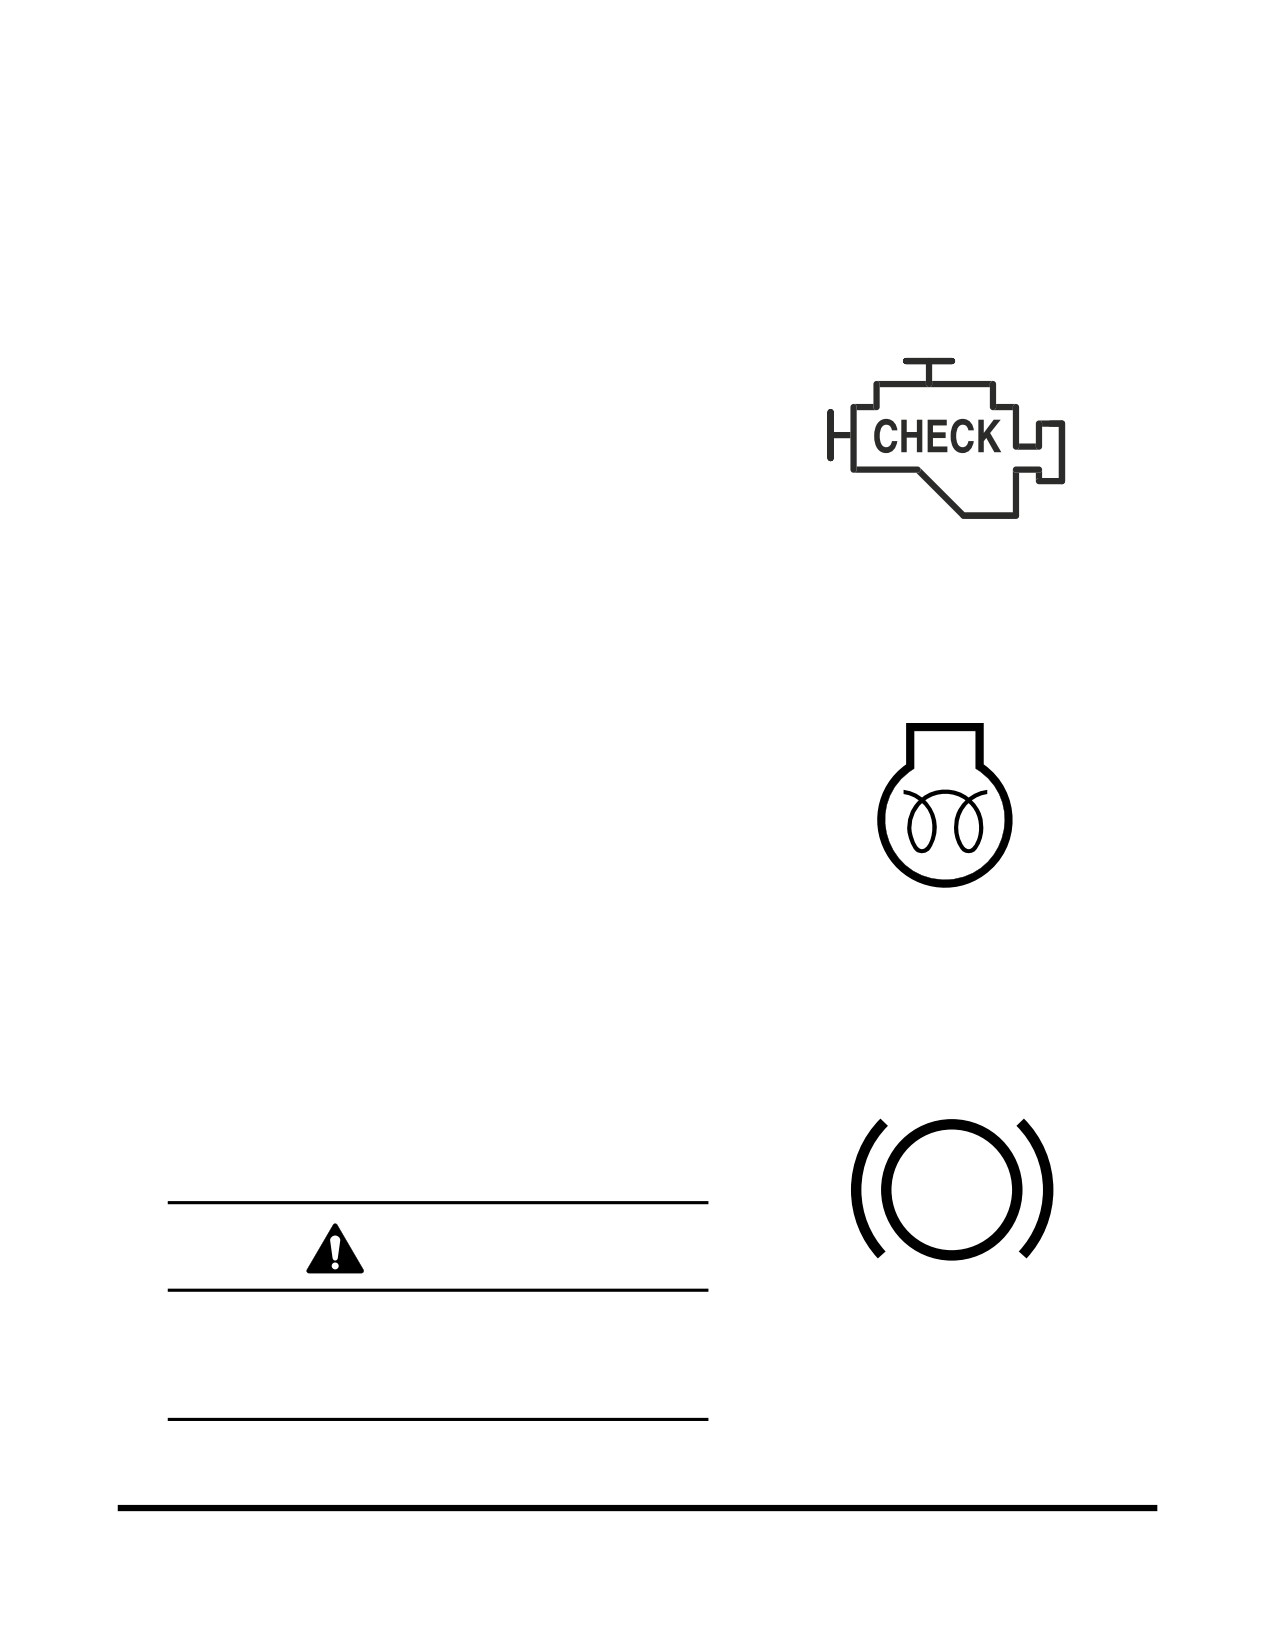
10. Engine Check Warning Light
This indicator light will turn "ON," when the engine needs to
be check.
NOTE: If this light turns "ON" stop the machine and
repair the cause of the fault.
FG000045
Figure 58
11. Preheating Indicator Light
In cold weather this light indicates that the engine preheat
function is operating.
When this indicator light turns "OFF," it means that the
engine preheat cycle has been completed.
HAAE2000
Figure 59
12. Parking Brake Indicator Light
When parking brake is "APPLIED", this light turns "ON".
If vehicle is moved while parking brake applied, a warning
alarm will sound.
P
WARNING!
If machine is moved while this light is "ON" it could
BCS0790L
cause premature wear or damage of the brakes.
Figure 60
Always "RELEASE" parking brake and make sure this
light is "OFF" before moving machine.
Operating Controls
OP000528
2-31
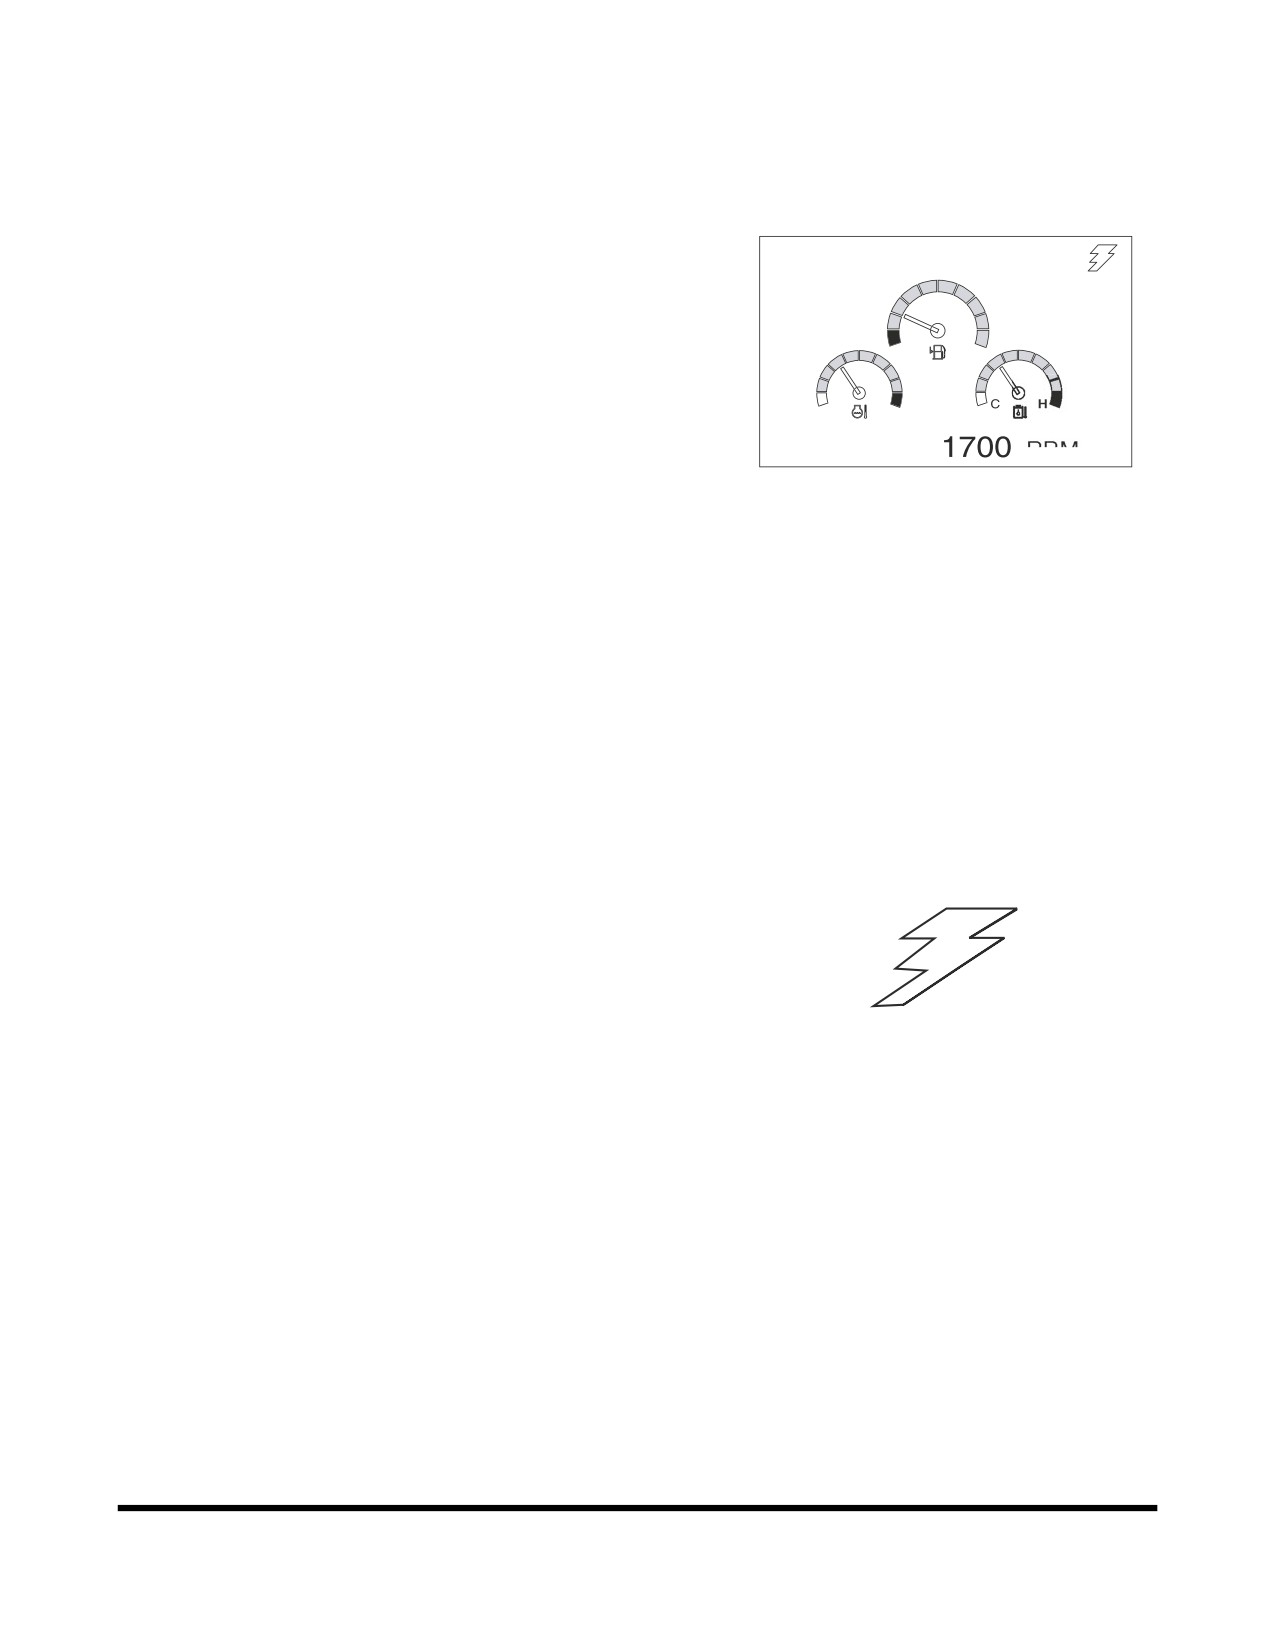
MULTIFUNCTION GAUGE AND
GRAPHIC INFORMATION
When the engine starter switch is turned to the "I" (ON) position,
a LOGO will appear on the display screen for about two
02/05 [MO] 11:30
seconds.
When the LOGO disappears, the multifunction gauge and
graphic information screen will appear.
E
F
The engine rpm is normally displayed at the bottom of the
screen when the starter switch is first turned "ON." Each time the
C
H
display selector button (19, Figure 48) is pressed, the digital
readout changes in the following sequence; Engine speed
E/G SPEED
RPM
(RPM) -> Battery voltage (VOLT) -> Front pump pressure (BAR)
FG000043
-> Rear pump pressure (BAR).
Figure 61
NOTE: See Figure 64 thru Figure 67.
A digital clock is located at the top of the display.
By using a combination of the mode selector buttons,
information for filters and oils can also be displayed.
The display can also be set for the desired language.
Refer to the “Setting Main Menu” on page 2-40 for the language
selection and information display sequences.
Communication Indicator
Indicates the condition of communication between main
controller and instrument panel.
1.
Normal Condition:
The symbol will sequentially move like lightening.
NOTE: See Figure 64 thru Figure 67.
2.
Abnormal Condition:
If the symbol is not displayed, it means there is a
FG000047
communication error.
Figure 62
NOTE: See Figure 63.
Operating Controls
OP000528
2-32
Communication Error Warning
If a communication error is generated between e-EPOS
controller and instrument panel, this symbol will be displayed.
When this symbol is displayed, contact a DOOSAN distributor or
sales agency.
NOTE: If a communication error occurs during operation, the
last mode setting is stored. e.g. power mode, work
mode and auto idle are stored during failure.
NOTE: When starter switch is turned to the "I" (ON) position
FG000048
during a state of communication error failure, the
Figure 63
e-EPOS controller will default to the following modes.
Power mode: Standard mode
Working mode: Digging mode
Auto idle: "ON" (Selection state)
Engine Speed
The engine speed is numerically displayed.
E/G SPEED 1700 RPM
FG000049
Figure 64
Battery Voltage
The battery voltage is numerically displayed. With the engine
running, the reading should be between 26V - 30V.
When the starter is engaged or the preheat system is being
used, the voltage can temporarily drop below 24V, but this is a
BATTERY 28.0 VOLT
normal condition.
FG000050
Figure 65
Operating Controls
OP000528
2-33
Front Hydraulic Pump Pressure
The front pump pressure is numerically displayed.
NOTE: This pump is closest to engine flywheel housing
or is the upper one of hydraulic pump.
FRONT PUMP 320 BAR
It displays the reading in BARs.
FG000051
Figure 66
Rear Hydraulic Pump Pressure
The rear pump pressure is numerically displayed.
NOTE: This pump is the farthest from engine flywheel
housing or is the lower one of hydraulic pump.
REAR PUMP 313 BAR
It displays the reading in BARs.
FG000052
Figure 67
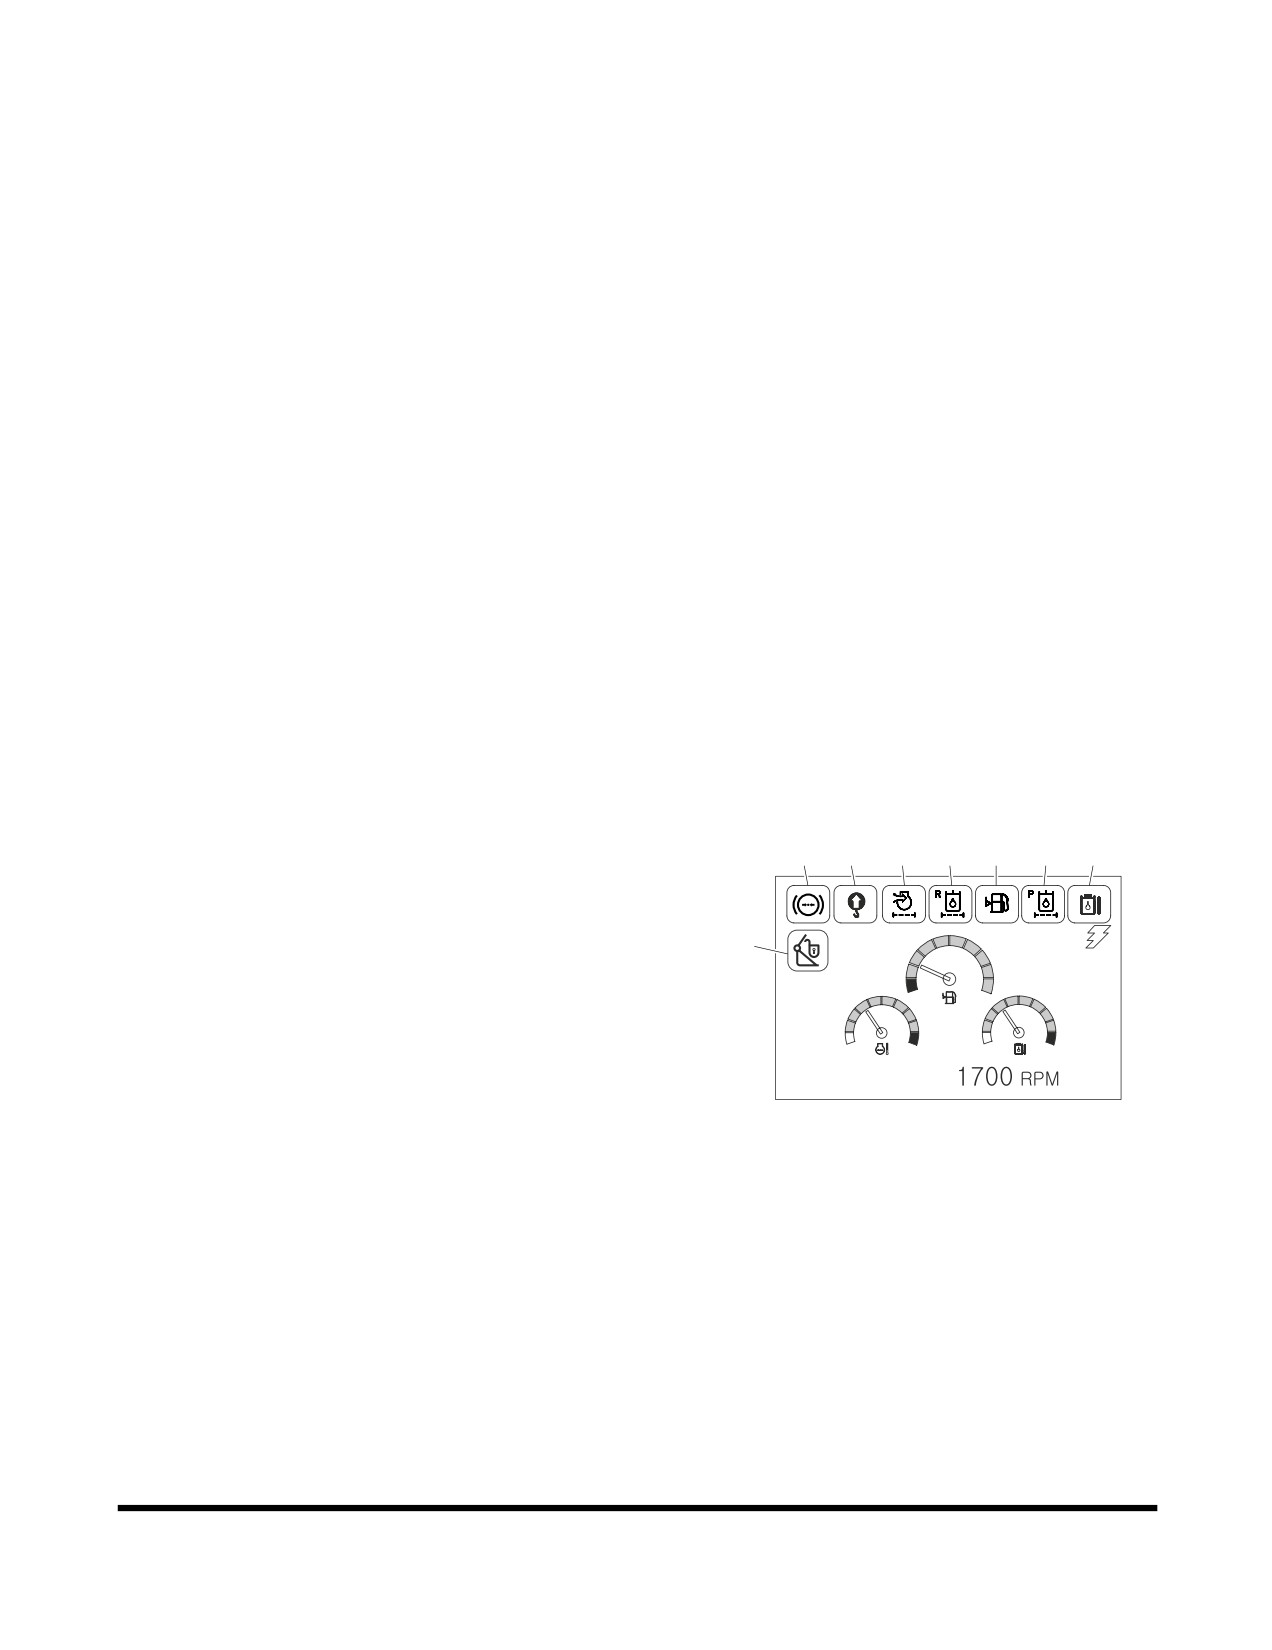
Abnormal State Warning Symbols
7
6
5
4
3
2
1
1.
Hydraulic Oil Overheating Warning
2.
Pilot Filter Clogged Warning
8
3.
Fuel Shortage Warning
E
F
4.
Return Filter Clogged Warning
C
H
C
H
5.
Air Cleaner Clogged Warning
6.
Overload Warning (Optional)
E/G SPEED
FG006166
7.
Brake Oil Pressure Warning
Figure 68
8.
Quick Clamp Released Warning
Operating Controls
OP000528
2-34
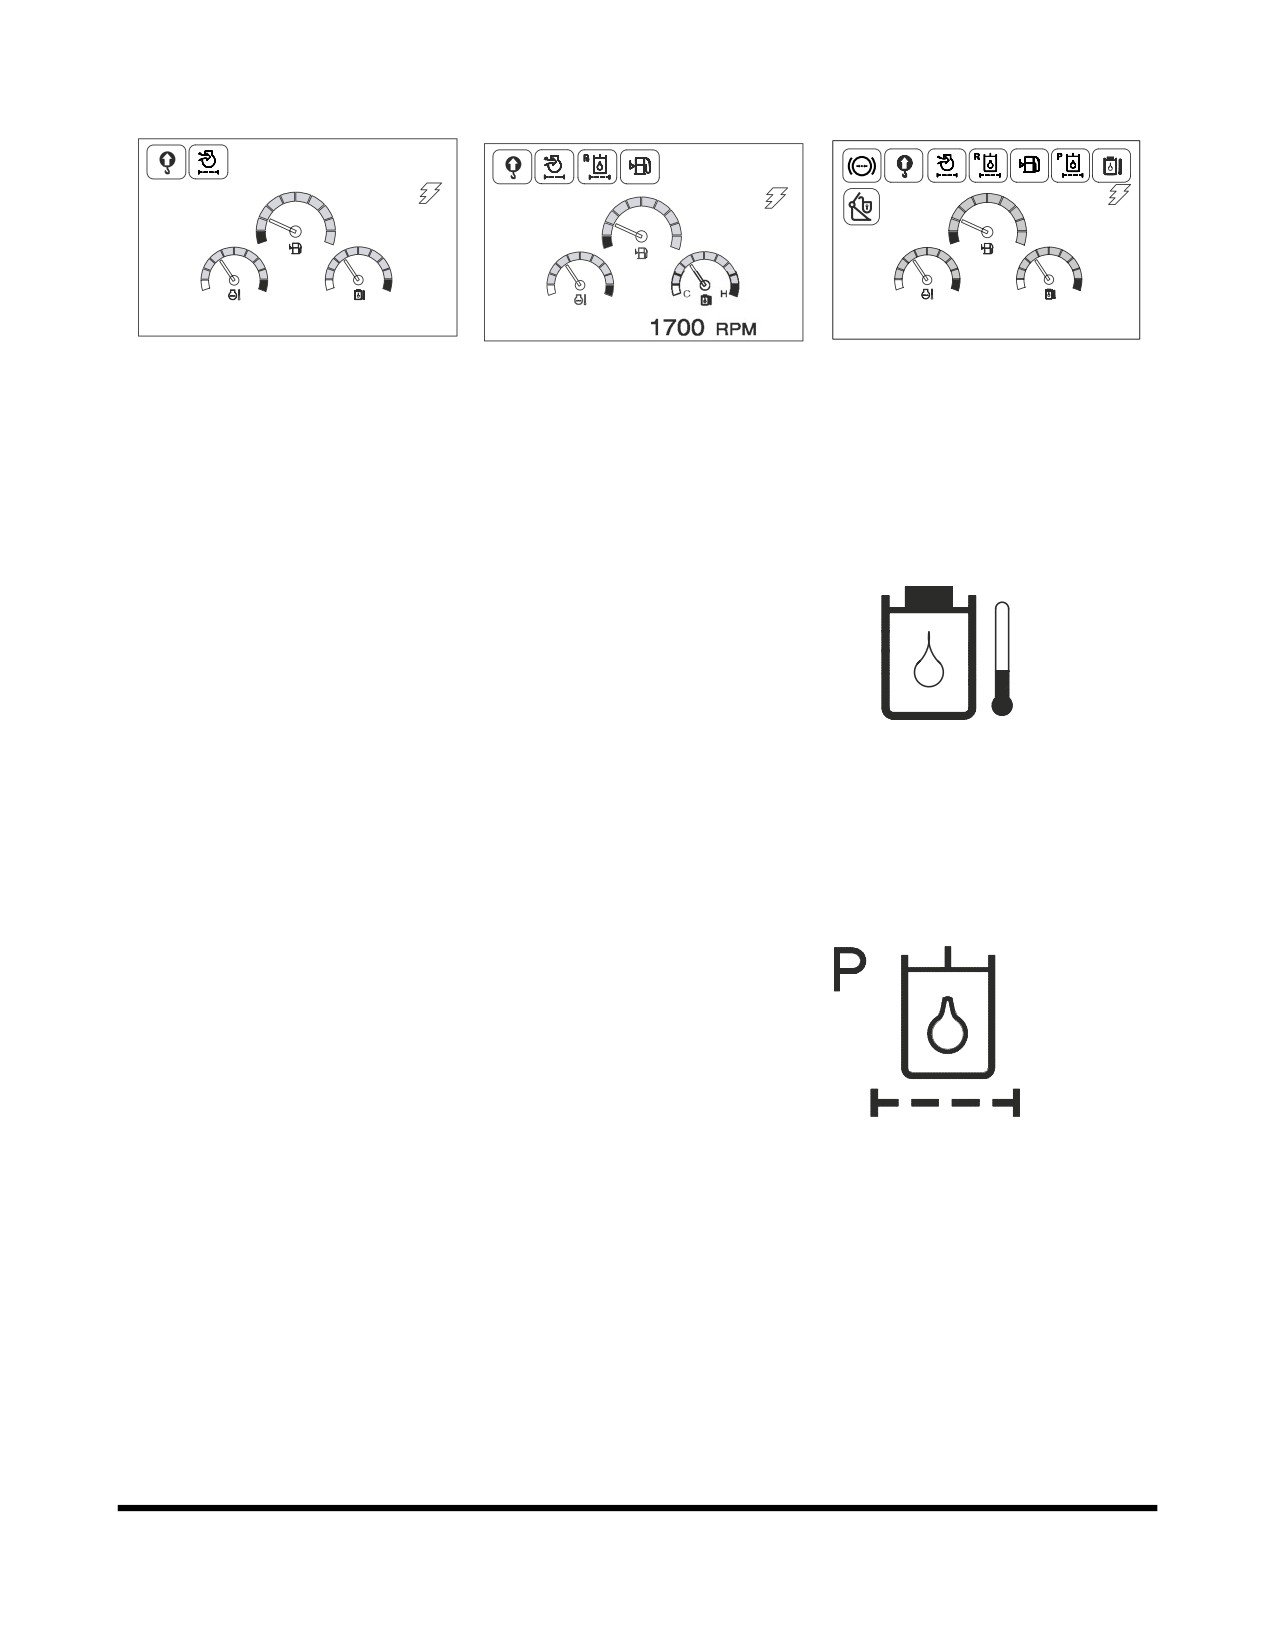
Examples of Warning Display
02/05 [MO] 11:30
02/05 11:30
E
F
E
F
E
F
C
H
C
H
C
H
C
H
C
H
E/G SPEED 1700 RPM
E/G SPEED
E/G SPEED 1700 RPM
FG000059
FG000060
FG006167
<2 kinds of warning displayed>
<4 kinds of warning displayed>
<6 kinds of warning displayed>
Figure 69
1.
Hydraulic Oil Overheat Warning
If the hydraulic oil temperature is too high, this symbol
appears on the screen.
FG000056
Figure 70
2.
Pilot Filter Clogged Warning
This symbol indicates when the pilot filter clogged.
If this symbol is displayed, immediately stop operation and
replace the pilot filter.
After the pilot filter has been serviced, restart machine
operation to remove the warning symbol.
FG000055
Figure 71
Operating Controls
OP000528
2-35
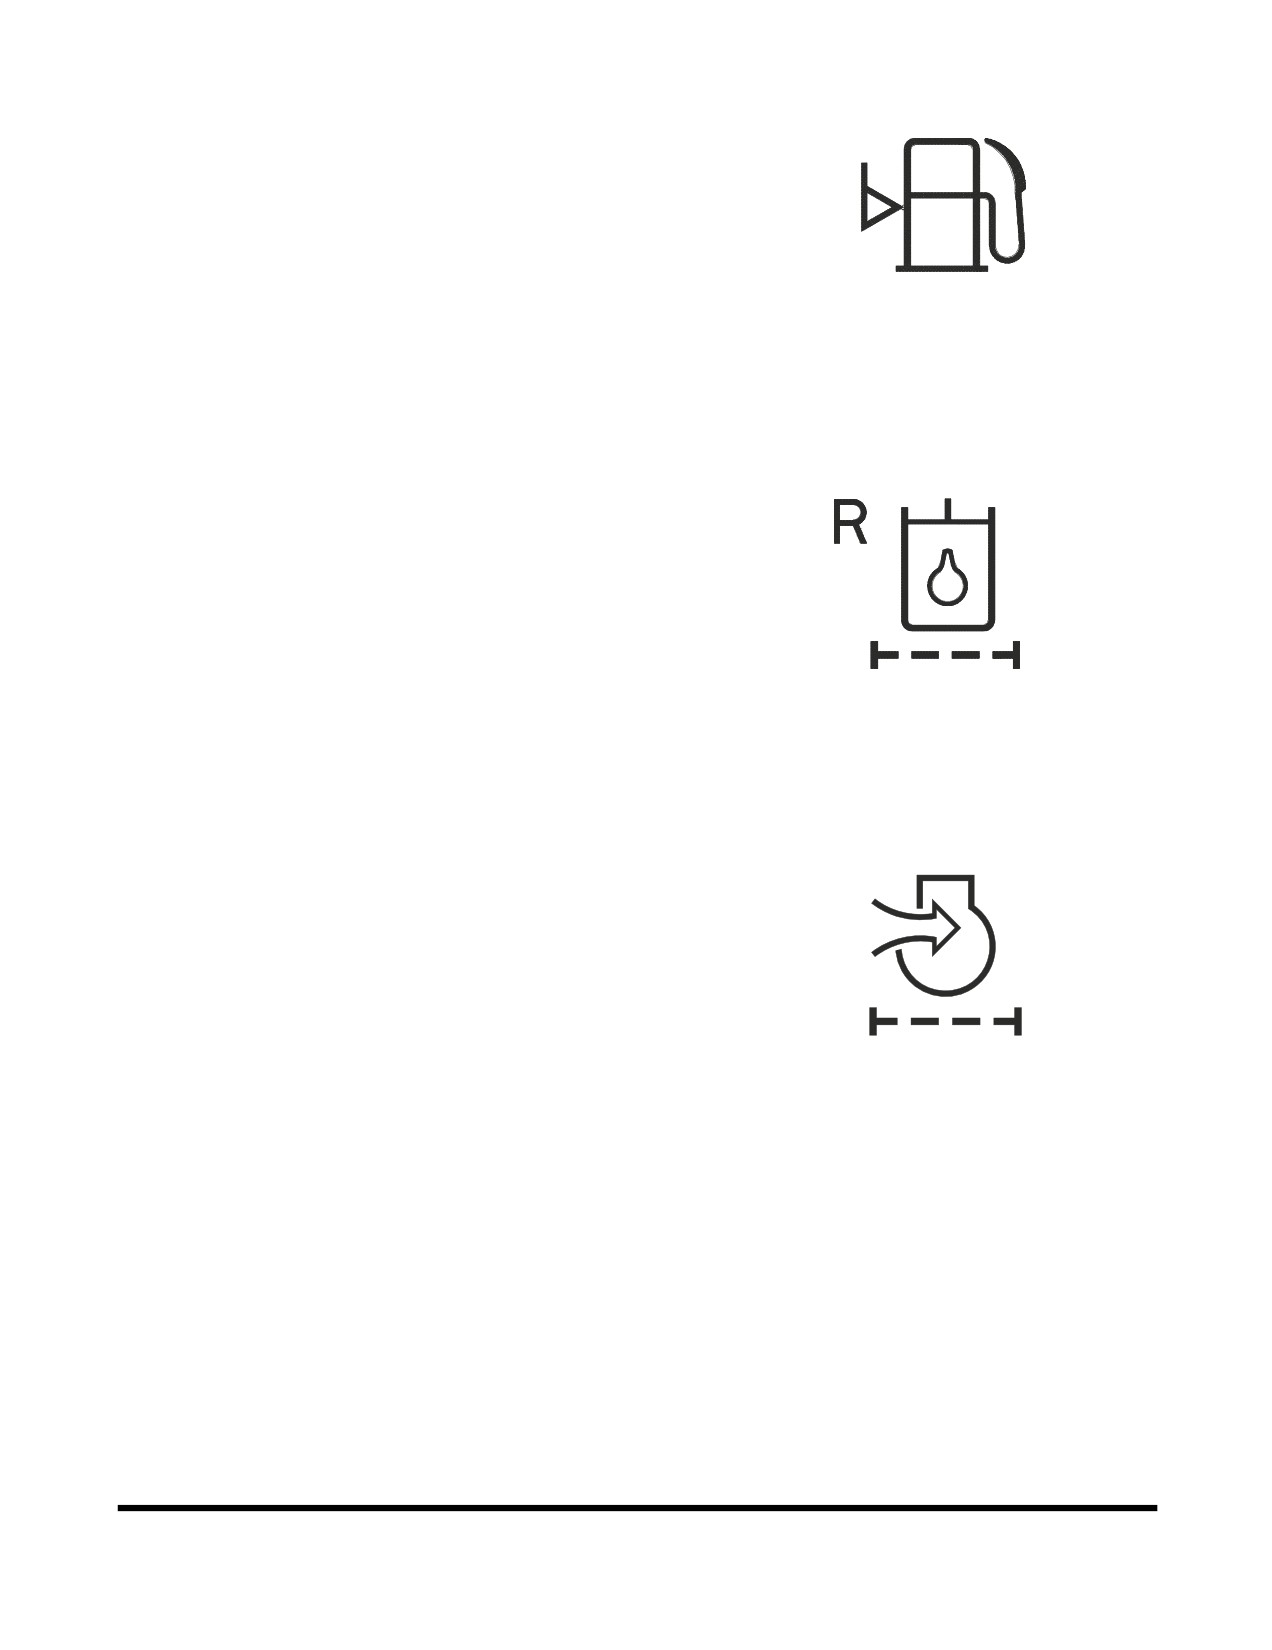
3.
Fuel Shortage Warning
If the fuel quantity is too low, this symbol appears on the
screen.
If this light turns "ON," add fuel as soon as possible.
FG000057
Figure 72
4.
Return Filter Clogged Warning
This symbol indicates when the hydraulic return filter is
clogged.
If this symbol is displayed, immediately stop operation and
replace the return filter.
After the return filter has been serviced, restart machine
operation to remove the warning symbol.
FG000054
Figure 73
5.
Air Cleaner Clogged Warning
This symbol indicates when the air cleaner is clogged.
If this symbol is displayed, immediately stop operation and
replace or clean the air filter.
After the air filter has been serviced, restart machine
operation to remove the warning symbol.
FG000053
Figure 74
Operating Controls
OP000528
2-36
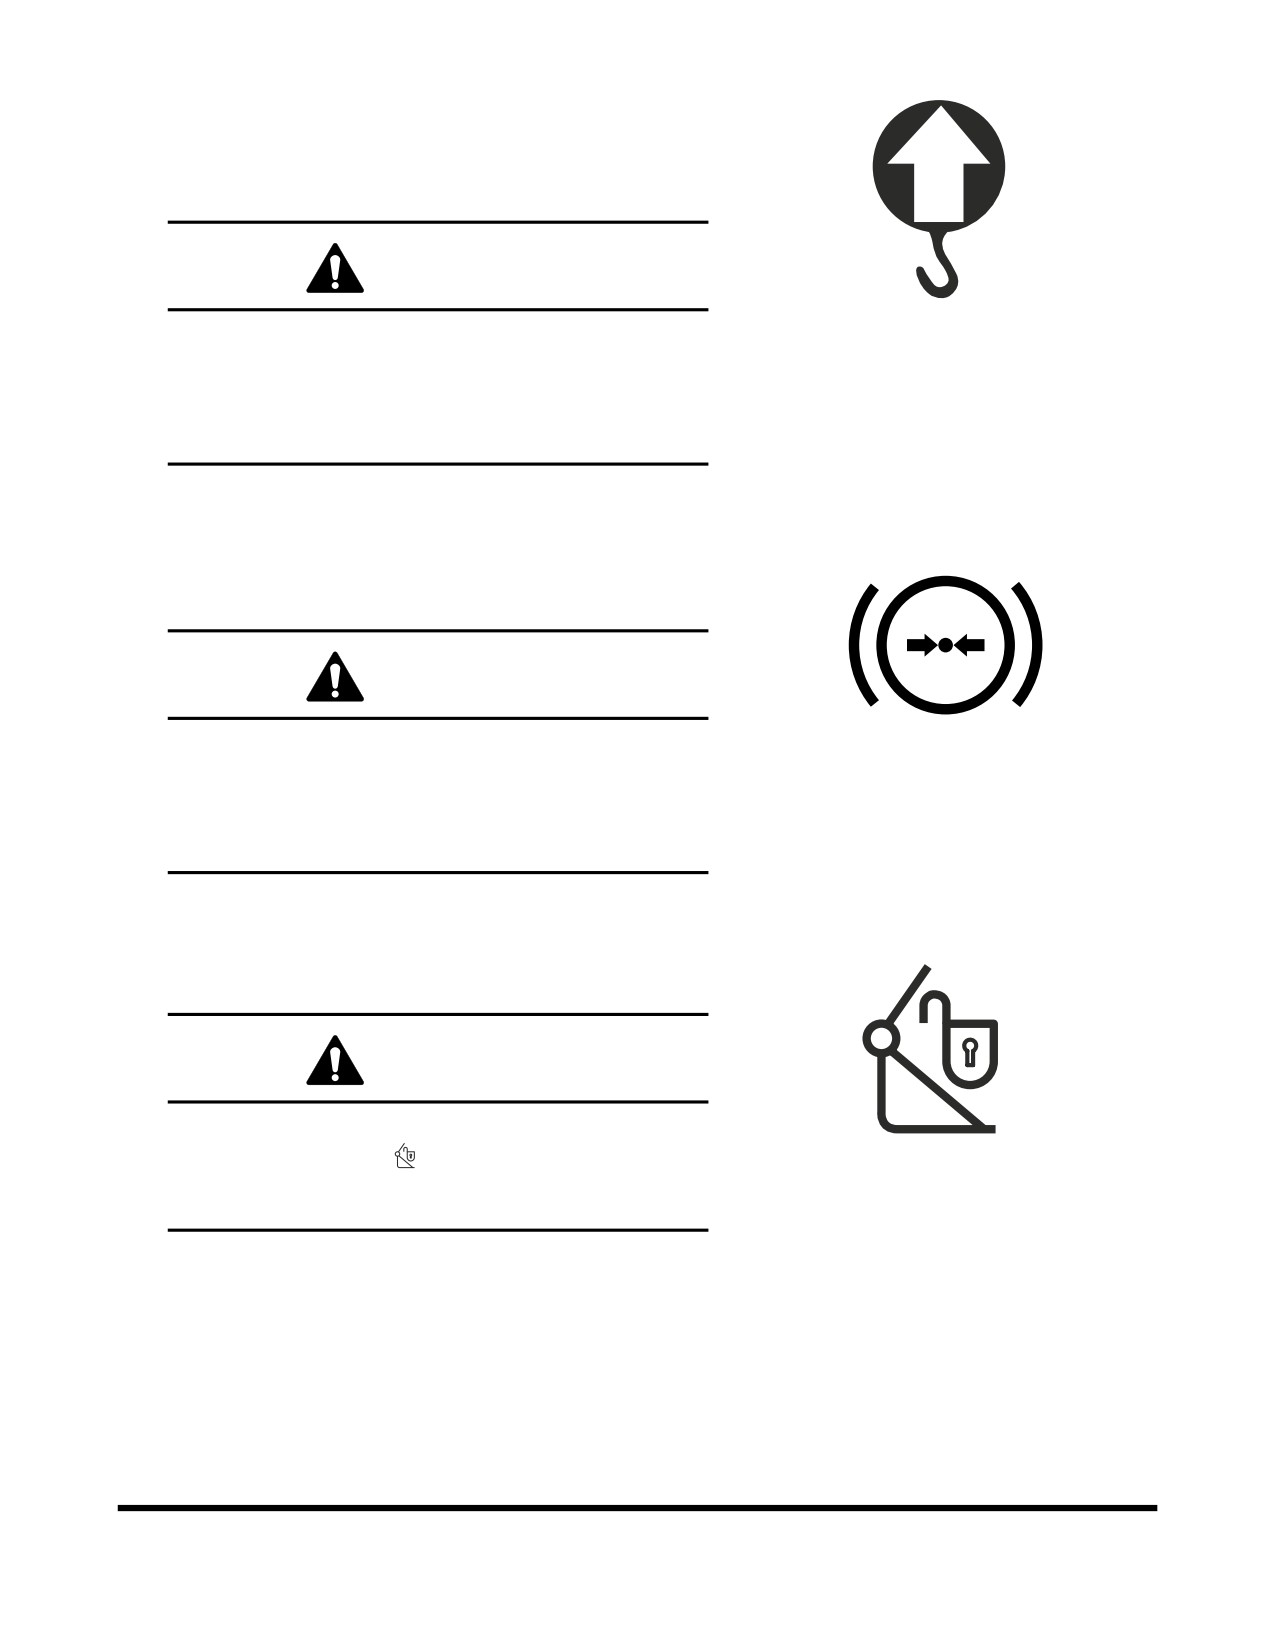
6.
Overload Warning (Optional)
If the overload warning switch is turned "ON," and this
symbol appears on the screen and the warning buzzer
sounds, that indicates that overloaded condition is
occurring. Immediately reduce the load.
WARNING!
If this warning appears on the screen and a warning
FG000253
buzzer sound, reduce the load immediately.
Figure 75
If you continue to work, the machine can be turned
over or damage to hydraulic components and
structural parts could occur.
7.
Brake Oil Pressure Warning
This symbol indicates when the hydraulic pressure drops
brake oil circuit when the symbol indicates and alarm also
sounds.
WARNING!
Never operate or travel machine when this light is
turned "ON" or when alarm is sounding.
BCS0800L
Always investigate cause of the drop in brake oil
Figure 76
pressure, and repair problem before operating or
traveling machine.
8.
Quick Clamp Released Warning
If the quick clamp switch is "UNLOCKED", and this symbol
appears on the screen and the warning buzzer sound.
WARNING!
When the attachment is still connected to the machine,
while the switch is "I"(
) position, do not operate the
machine or the attachment might fall to the ground. It
FG002195
would cause personnel injuries.
Figure 77
Operating Controls
OP000528
2-37
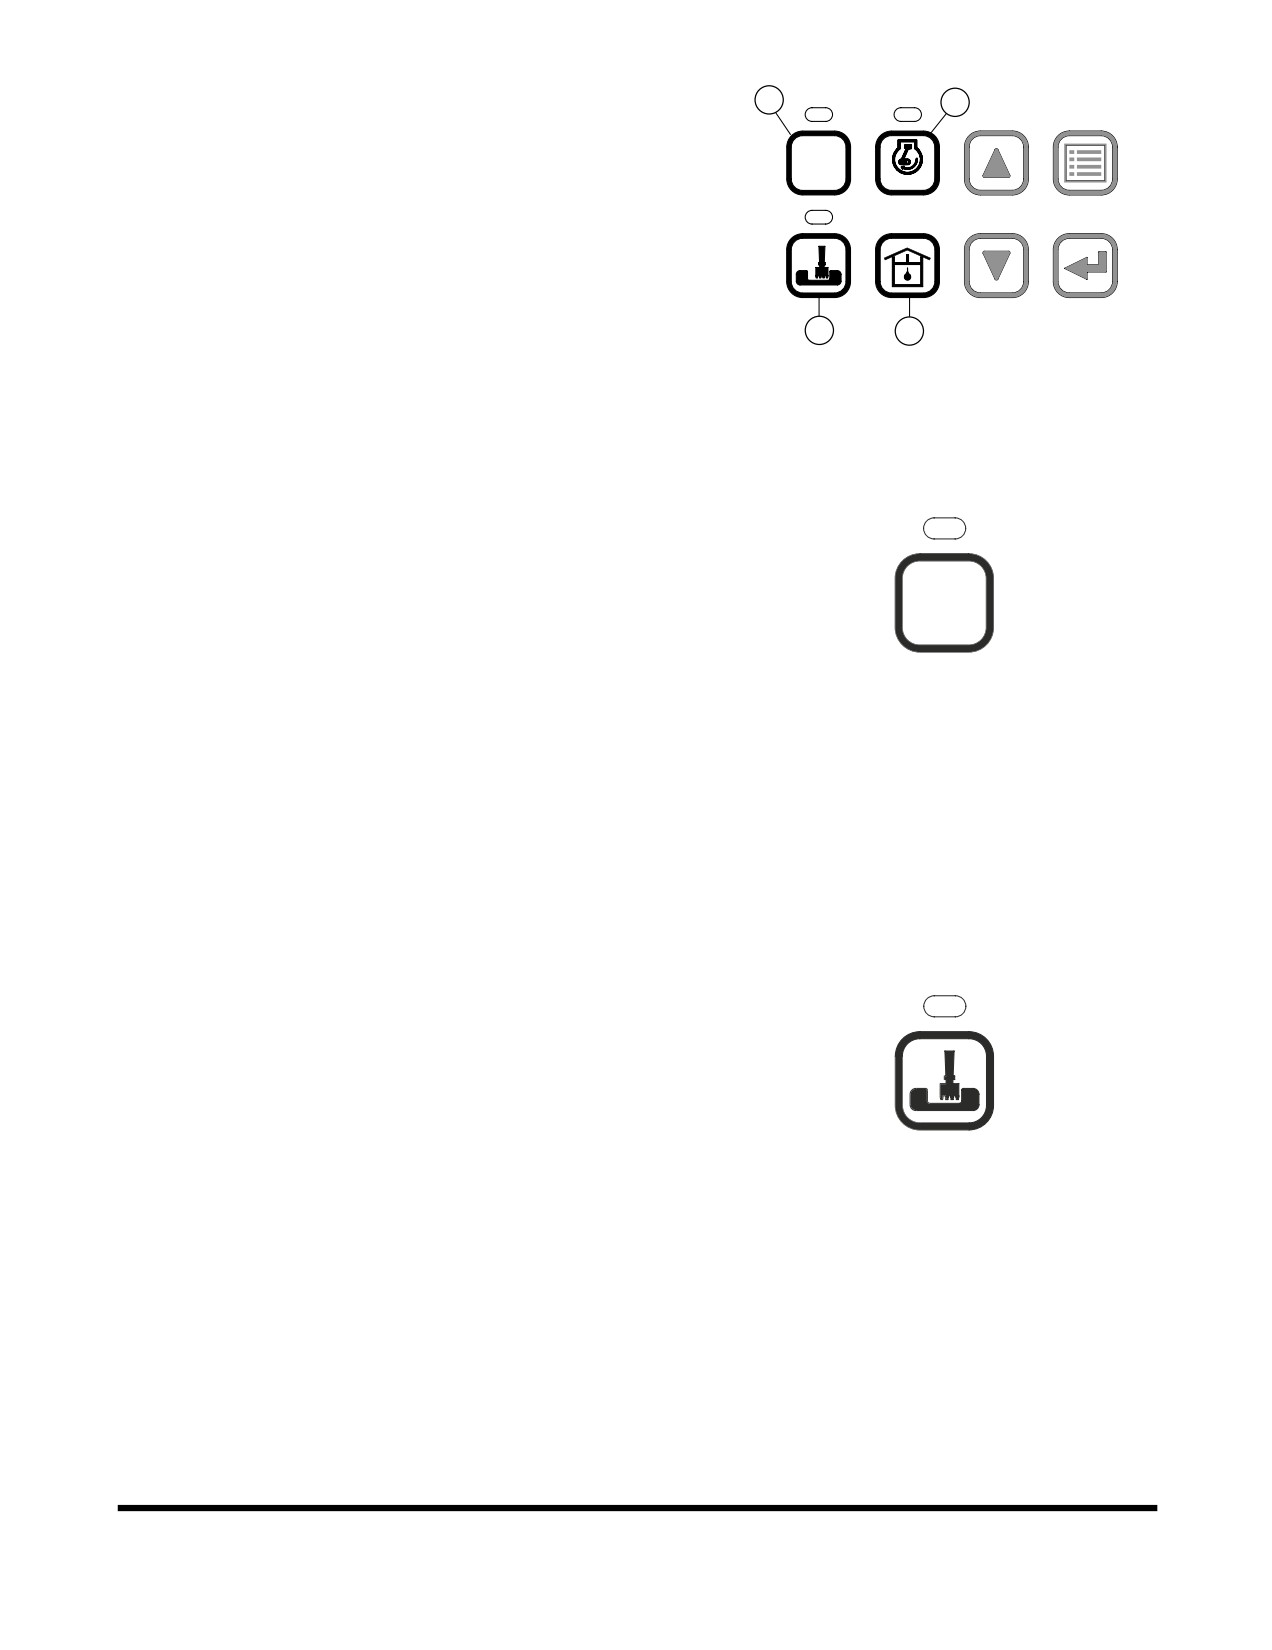
MODE SELECTOR BUTTONS
1
3
1.
Power Mode Selector Button
POWER
2.
Trenching Mode Selector Button
AUTO
1
2
3
4
ESC
3.
Auto Idle Selector Button
4.
Flow Control Button
5
6
7
8
2
4
FG001338
Figure 78
1. Power Mode Selector Button
This power mode is suitable for heavy-duty work that
requires a high operating speed. Push this button to turn
power mode "ON" or "OFF."
When the power mode button is pushed to the "ON"
POWER
position, an indicator light above it turns "ON."
1
When the power mode button is pushed again, it is turned
"OFF" and the power mode is deactivated and returns to
the standard operating mode.
FG000063
When turning the engine starter switch to the "I" (ON)
Figure 79
position, the power mode is automatically defaulted to
"Standard Mode."
NOTE: For further details, see “Mode Selection” on
page 3-25.
2. Trenching Mode Selector Button
This work mode is suitable for smooth trench or smooth
trench wall. Push this button to turn trenching mode "ON"
or "OFF."
When the trenching mode button is pushed to the "ON"
position, an indicator light above it turns "ON."
5
When the trenching mode button is pushed again, it is
turned "OFF" and the trenching mode is deactivated and
returns to the digging mode.
FG000064
When you turn the engine starter switch to the "I" (ON)
Figure 80
position, the work mode is automatically defaulted to
"Digging Mode."
NOTE: For further details, see “Mode Selection” on
page 3-25.
Operating Controls
OP000528
2-38

3. Auto Idle Selector Button
When the auto idle system is activated, the engine will
automatically reduce speed to "IDLE" approximately four
seconds after all of the control levers are in the neutral
position. This system is designed to reduce fuel
consumption and noise.
AUTO
When the auto idle selector button is pushed to the "ON"
2
position, an indicator light above it turns "ON."
When the auto idle selector button is pushed again, it is
FG000065
turned "OFF" and the engine speed will return to the
Figure 81
setting of the engine speed dial and will remain at this
speed despite control lever position, until the engine speed
dial is moved.
4. Flow Control Button
When the button is pushed, you can control the hydraulic
oil flow rate.
The flow control button is used to set the flow rate of pump
to match the installed tool/attachment for optimal
performance, without damaging it.
6
NOTE: For further details, see
“Flow Control” on
page 2-49.
FG000066
Figure 82
Operating Controls
OP000528
2-39
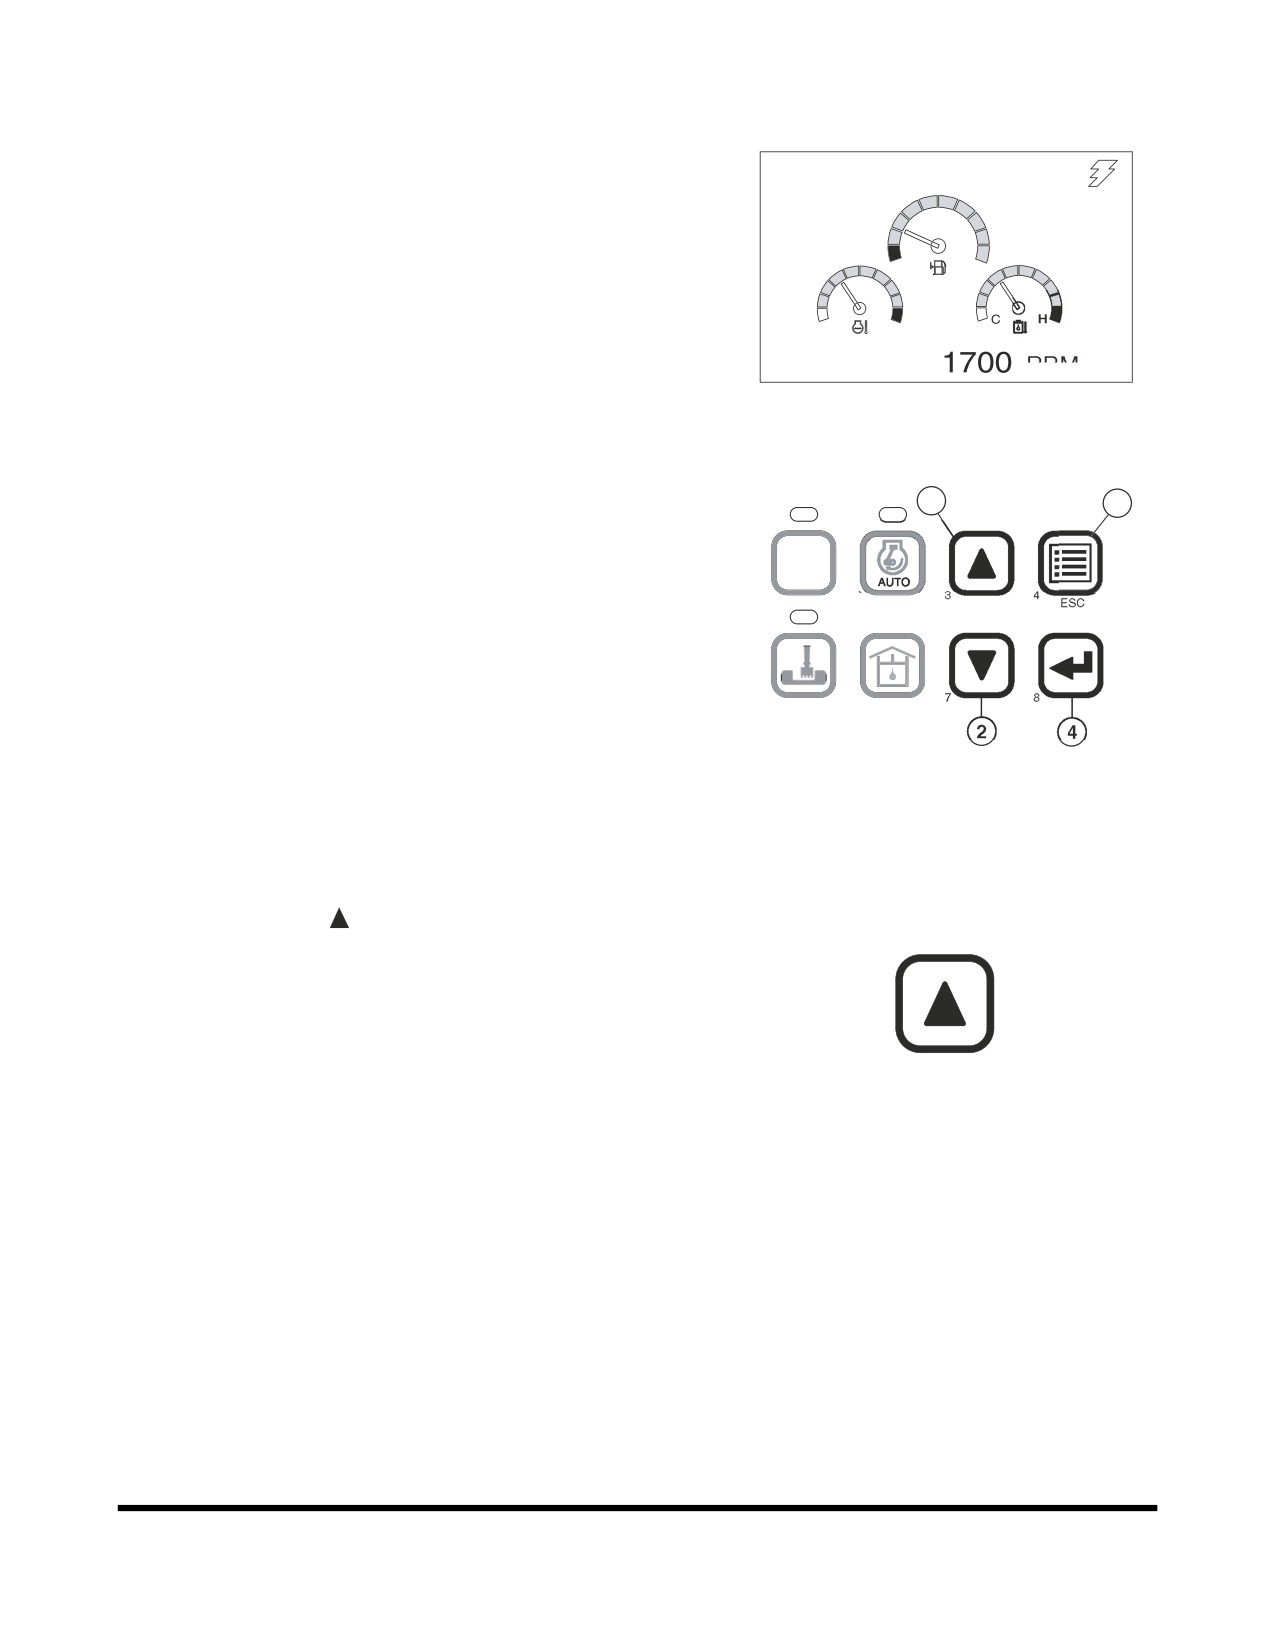
SETTING MAIN MENU
By using a combination of the selector buttons (Figure 84), you
can review and set the contents of the display screen. Items
02/05 [MO] 11:30
such as language, time and filter/oil information can be checked,
and if necessary, set with new information.
E
F
C
H
E/G SPEED
RPM
FG000043
Figure 83
1
3
POWER
1
2
5
6
FG001339
Figure 84
1. Up Arrow Button
Up arrow button (
), is used to move a menu item "Up" or
to the "Left."
3
FG000068
Figure 85
Operating Controls
OP000528
2-40
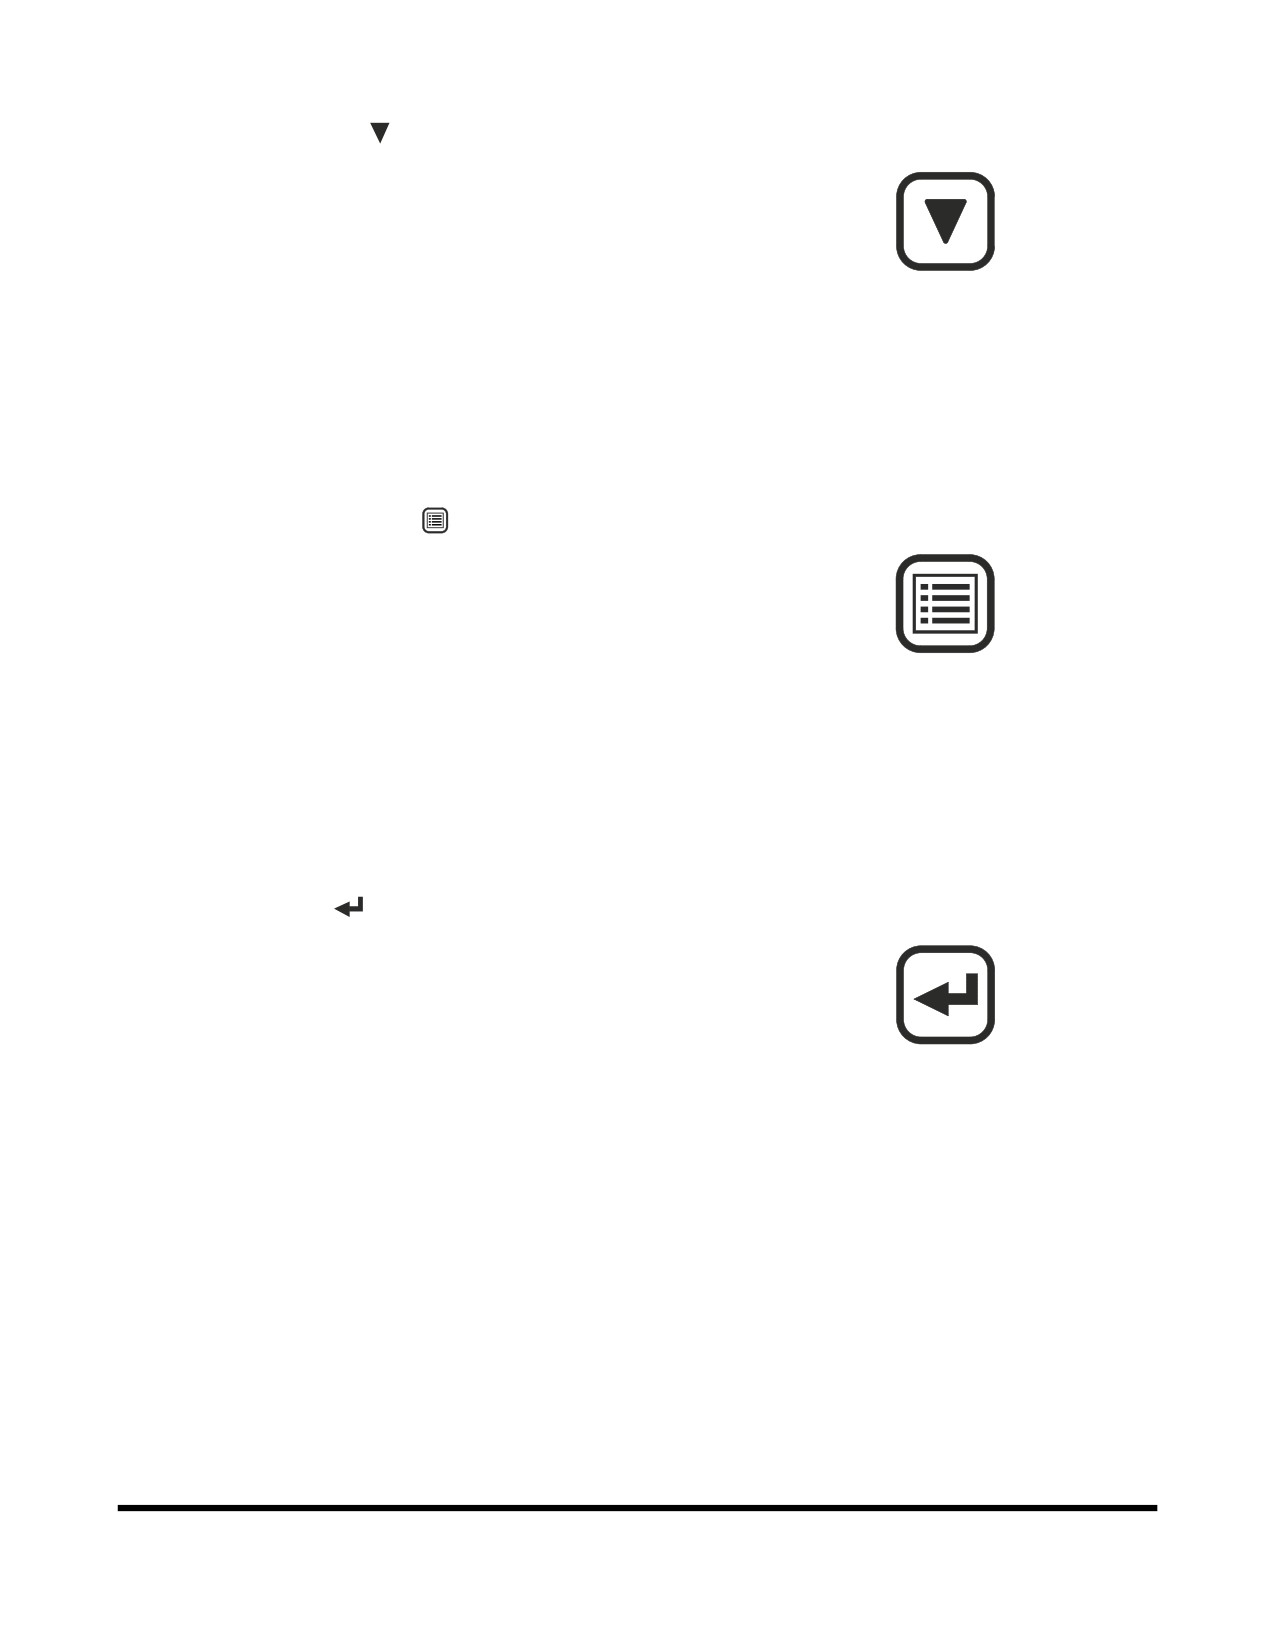
2. Down Arrow Button
Down arrow button (
), is used to move a menu item
"Down" or to the "Right."
7
FG000069
Figure 86
3. Display Selector Button (ESC - Escape)
Display selector button
(
), is used to change the
displayed information on the screen. Each time the display
selector button is pressed, the digital readout changes.
NOTE: When setting the main menu, this button is used
as the menu / exit button (ESC). To access the
4
menus the button must be pressed and held for
ESC
three seconds.
NOTE: When this button is used for menu / exit button,
FG000070
it is used to access to main menu or return to a
Figure 87
previous screen from each submenu.
4. Selection Button
Selection button (
), is used to set a menu or clear the
operating hour of filter/oil.
8
FG000071
Figure 88
Operating Controls
OP000528
2-41
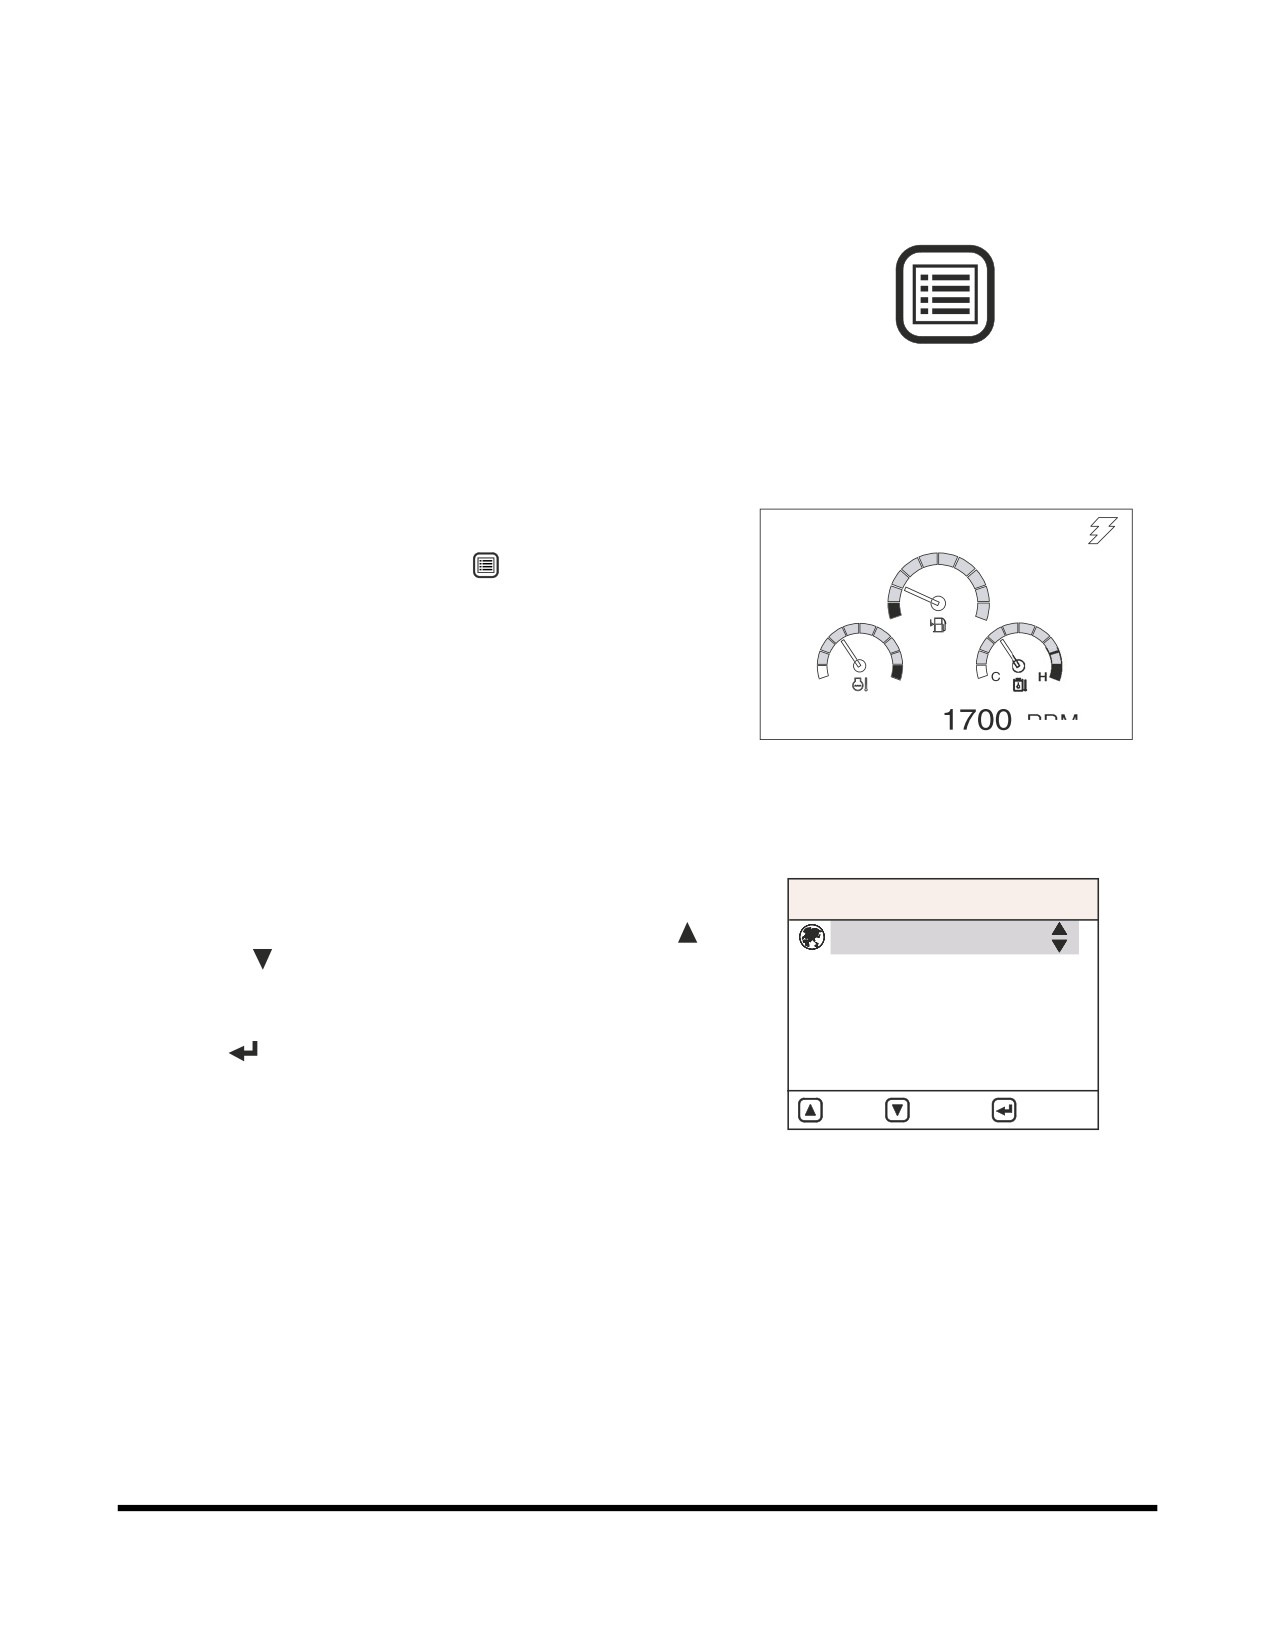
Display Selection and Escaping
Display Selection
When the display button (Figure 89) is pressed for more than
three seconds, the main menu screen (Figure 91) is displayed.
In the normal display screen, the engine speed (rpm), battery
voltage
(volt), front pump pressure
(bar), and rear pump
pressure (bar) can be displayed.
4
ESC
FG000070
Figure 89
ESC Button
The screen will return from the main menu to the normal display
02/05 [MO] 11:30
screen, by again pressing the "ESC" (
) button.
NOTE: If more than twenty seconds are spent in any menu,
E
F
without changing the screen, it will return to the
normal display screen.
C
H
E/G SPEED
RPM
FG000043
Figure 90
Main Menu
MAIN MENU
The menu selection can be changed by pressing the "UP" (
)
1. Language
or "DOWN" (
) buttons. The selected menu item will be
2. Set Clock
highlighted, and a cursor will appear by the menu item.
3. Filter / Oil Info
When the selected menu item is highlighted, press the
4. Adjust Display
"SELECT" (
) button to enter the next submenu.
5. Set Password
1.
“Language” on page 2-43.
: UP
: DOWN
: SELECT
2.
“Set Clock” on page 2-43.
FG000072
3.
“Filter / Oil Info” on page 2-44.
Figure 91
4.
“Adjust Display” on page 2-46
5.
“Set Password (Lock and Unlock)” on page 2-47
Operating Controls
OP000528
2-42
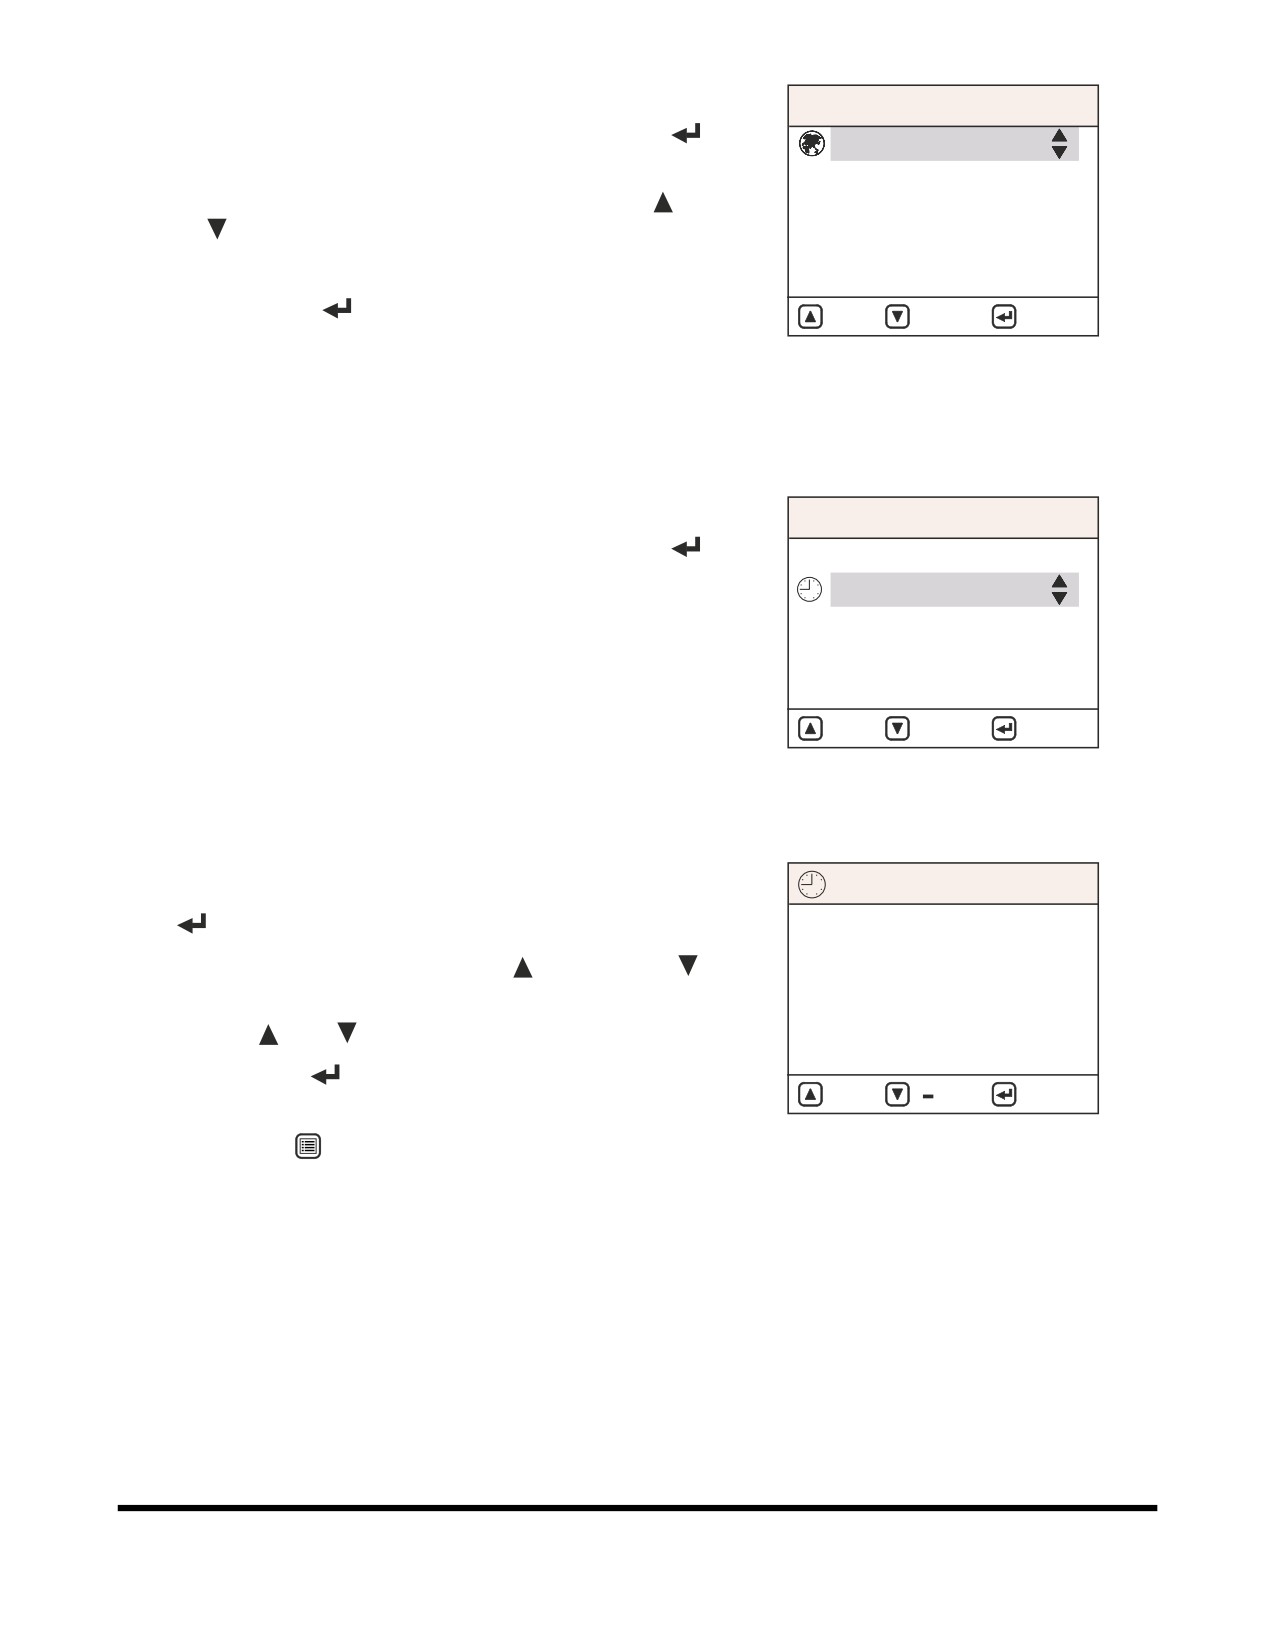
Language
MAIN MENU
When the cursor is on "Language," press the "SELECT" (
)
1. Language
button. The language submenu will appear.
2. Set Clock
The desired language can be selected by using the "UP" (
) or
3. Filter / Oil Info
"DOWN"(
) buttons.
4. Adjust Display
The display can be set for the desired language.
5. Set Password
Press the "SELECT" (
) button to set the selected language.
: UP
: DOWN
: SELECT
NOTE: If more than twenty seconds are spent in the menu,
FG000072
without changing the screen, it will return to the
Figure 92
normal display screen.
Set Clock
MAIN MENU
When the cursor is on "Set Clock," press the "SELECT" (
)
1. Language
button. The set clock submenu will appear.
2. Set Clock
NOTE: If more than twenty seconds are spent in the menu,
3. Filter / Oil Info
without changing the screen, it will return to the
normal display screen.
4. Adjust Display
5. Set Password
: UP
: DOWN
: SELECT
FG000075
Figure 93
Setting Method
SET CLOCK
1.
Move the cursor to desired number by using the "SELECT"
(
) button. When selected the number will flash.
2.
Set the time by using the "UP"
(
) or "DOWN"(
)
06:05
buttons.
2004 06/29
•
"+" (
), "-" (
): Increase or decrease number.
•
"MOVE" (
): Confirm and move the cursor to next
number.
: +
:
: MOVE
FG000076
•
"ESC" (
): Exit to the main menu.
Figure 94
Operating Controls
OP000528
2-43
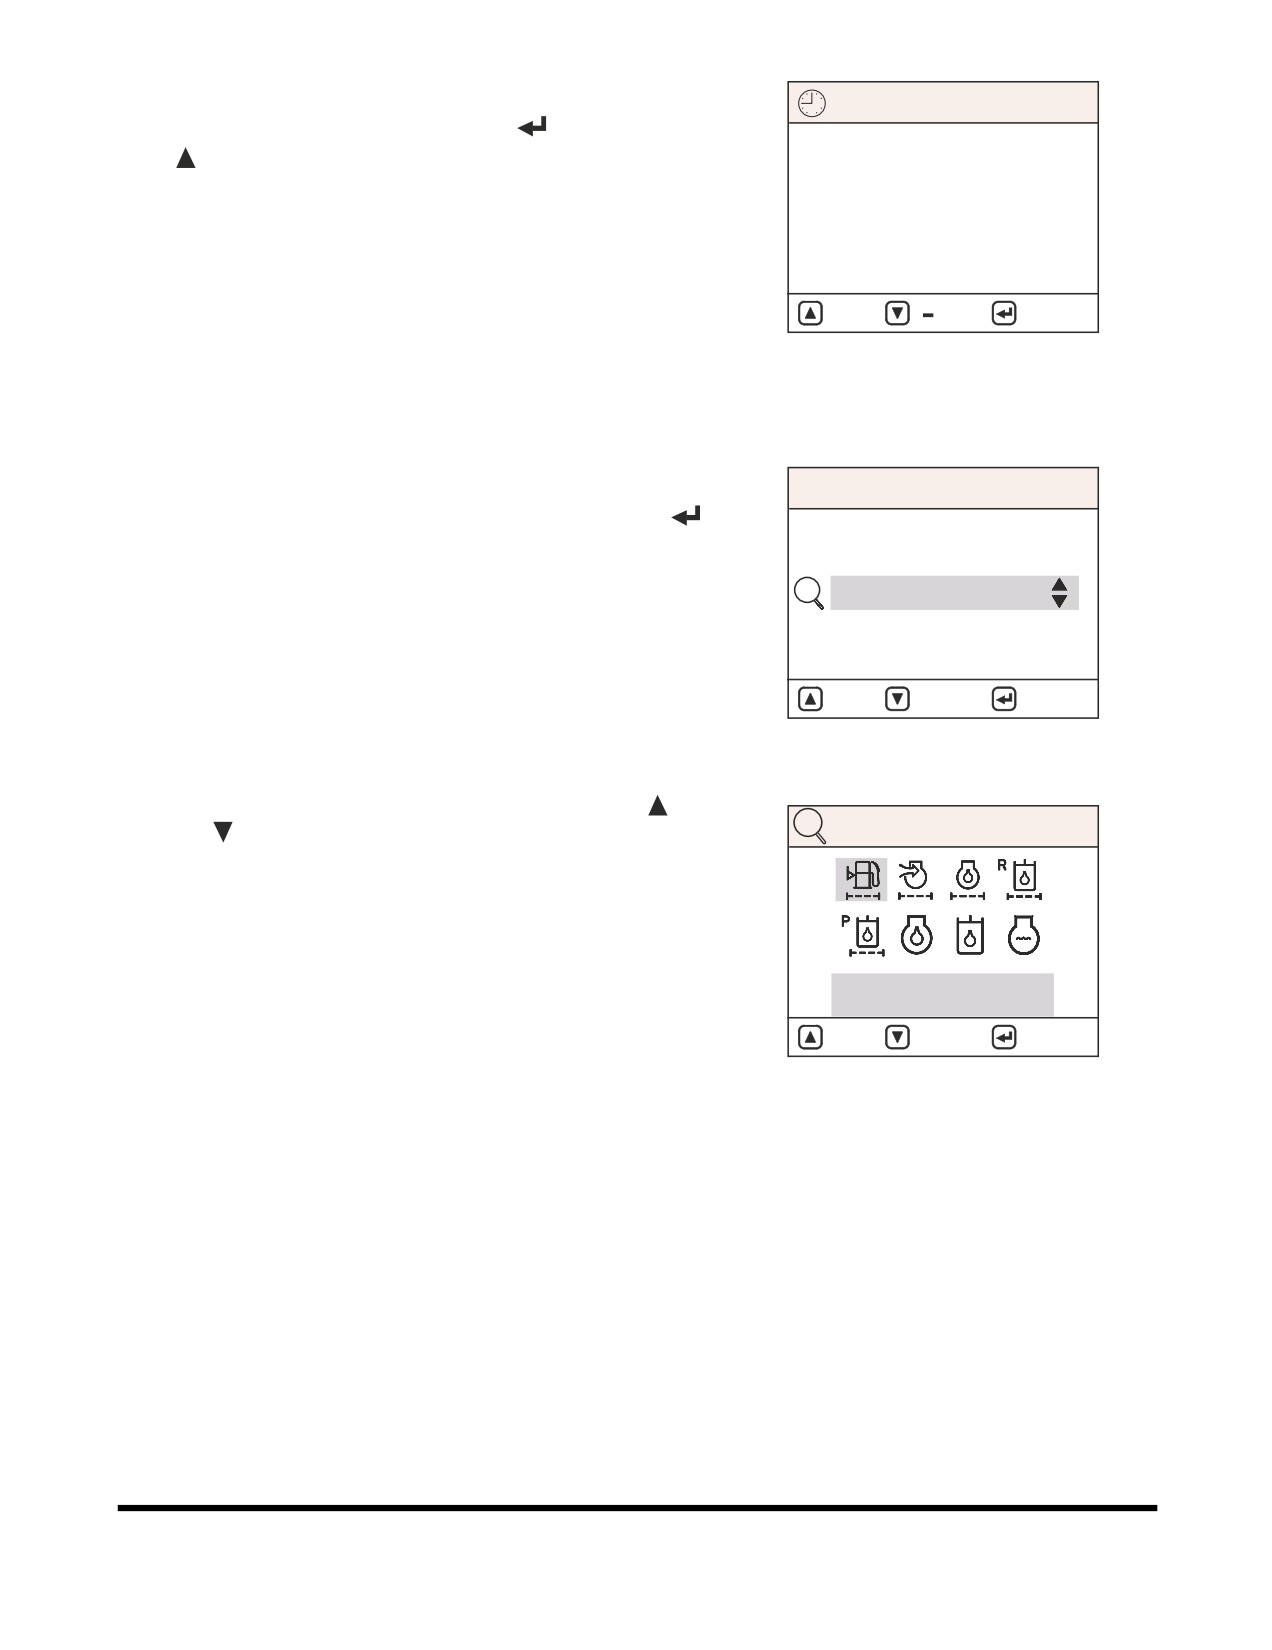
'00' Minute Setting
SET CLOCK
1.
Simultaneously press the "SELECT" (
) button and "UP"
(
) button.
2.
If the displayed time is 30 minutes or less, the clock will
06:05
display the preceding hour.
2004 06/29
3.
If the displayed time is more than 30 minutes, the clock will
display the succeeding hour.
4.
When the preceding hour is more than 23, the day will be
: +
:
: MOVE
increased.
FG000076
Figure 95
Filter / Oil Info
MAIN MENU
When the cursor is on "Filter/Oil Info," press the "SELECT" (
)
1. Language
button. The filter/oil information submenu will appear.
2. Set Clock
3. Filter / Oil Info
4. Adjust Display
5. Set Password
: UP
: DOWN
: SELECT
FG000077
Figure 96
Each symbol can be selected by pressing the "UP" (
) or
"DOWN" (
) buttons. At the bottom of the screen the operating
FILTER / OIL INFO
hour (Hrs) of each filter and/or oil is displayed.
1. Fuel Filter
Hrs : 0025
: UP
: DOWN
: RESET
FG000078
Figure 97
Operating Controls
OP000528
2-44
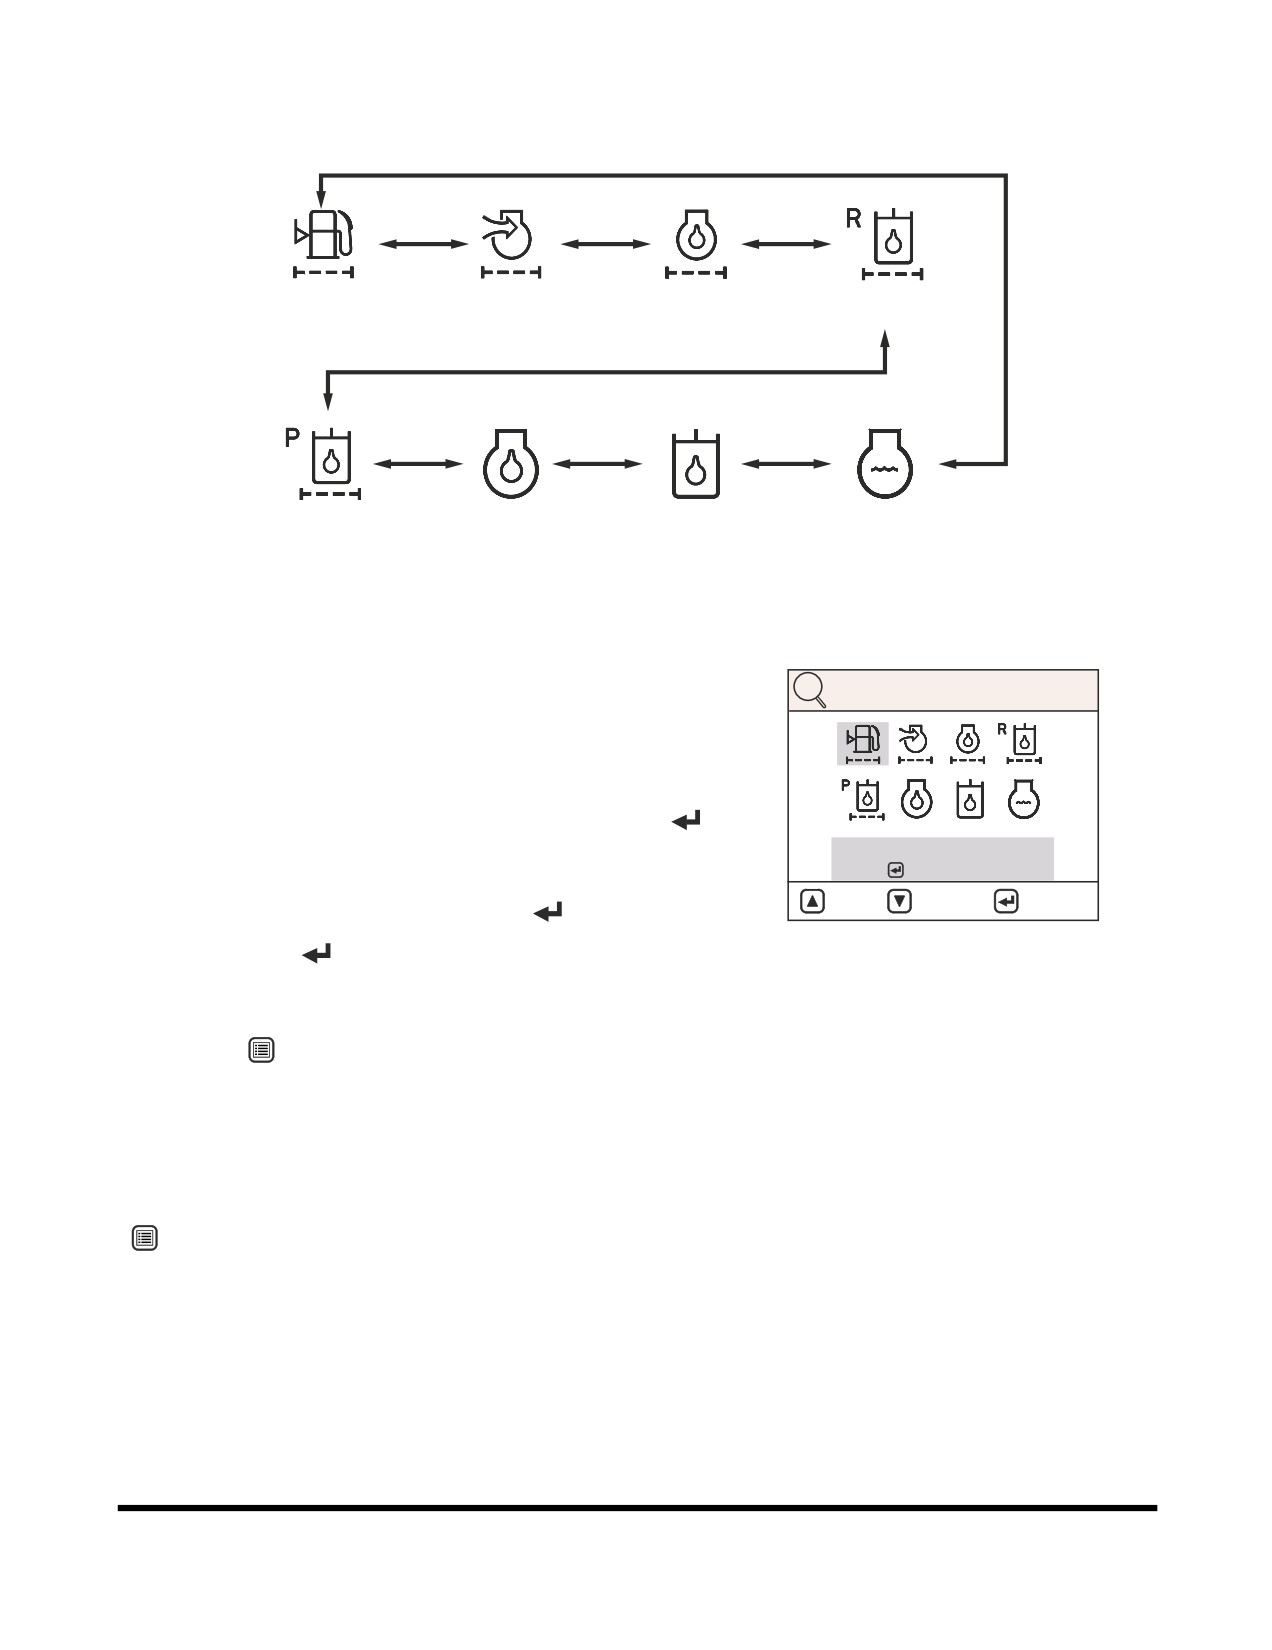
Menu Display Order and Icon Explanation
1. Fuel Filter
2. Air Cleaner
3. Engine Oil Filter
4. Hyd. Oil Filter
5. Pilot Filter
6. Engine Oil
7. Hydraulic Oil
8. Coolant Water
FG001358
Figure 98
Filter / Oils Operating Hour Reset
FILTER / OIL INFO
After changing a filter or oil, reset the operating hour to zero
(Hrs: 0000). The next replacement period can than be easily
checked. The operating hours are only accumulated while the
engine is running.
On the filter / oil information screen, press the "SELECT" (
)
button and then the reset screen will be displayed.
RESET?
YES :
NO : ESC
On the reset screen, the operating hour can be changed to zero
: UP
: DOWN
: RESET
hour (Hrs: 0000) by pressing the "SELECT" (
).
HAAE1960
If the "SELECT"
(
) button is pressed, the reset will be
Figure 99
completed. and the screen will be returned to the previous
menu.
If the "ESC" (
) button is pressed, the screen will be returned
to the previous menu without being reset.
NOTE: If more than twenty seconds are spent in the menu,
without changing the screen, it will return to the
normal display screen.
The screen is returned to the main menu by pressing the "ESC"
(
) button.
Operating Controls
OP000528
2-45
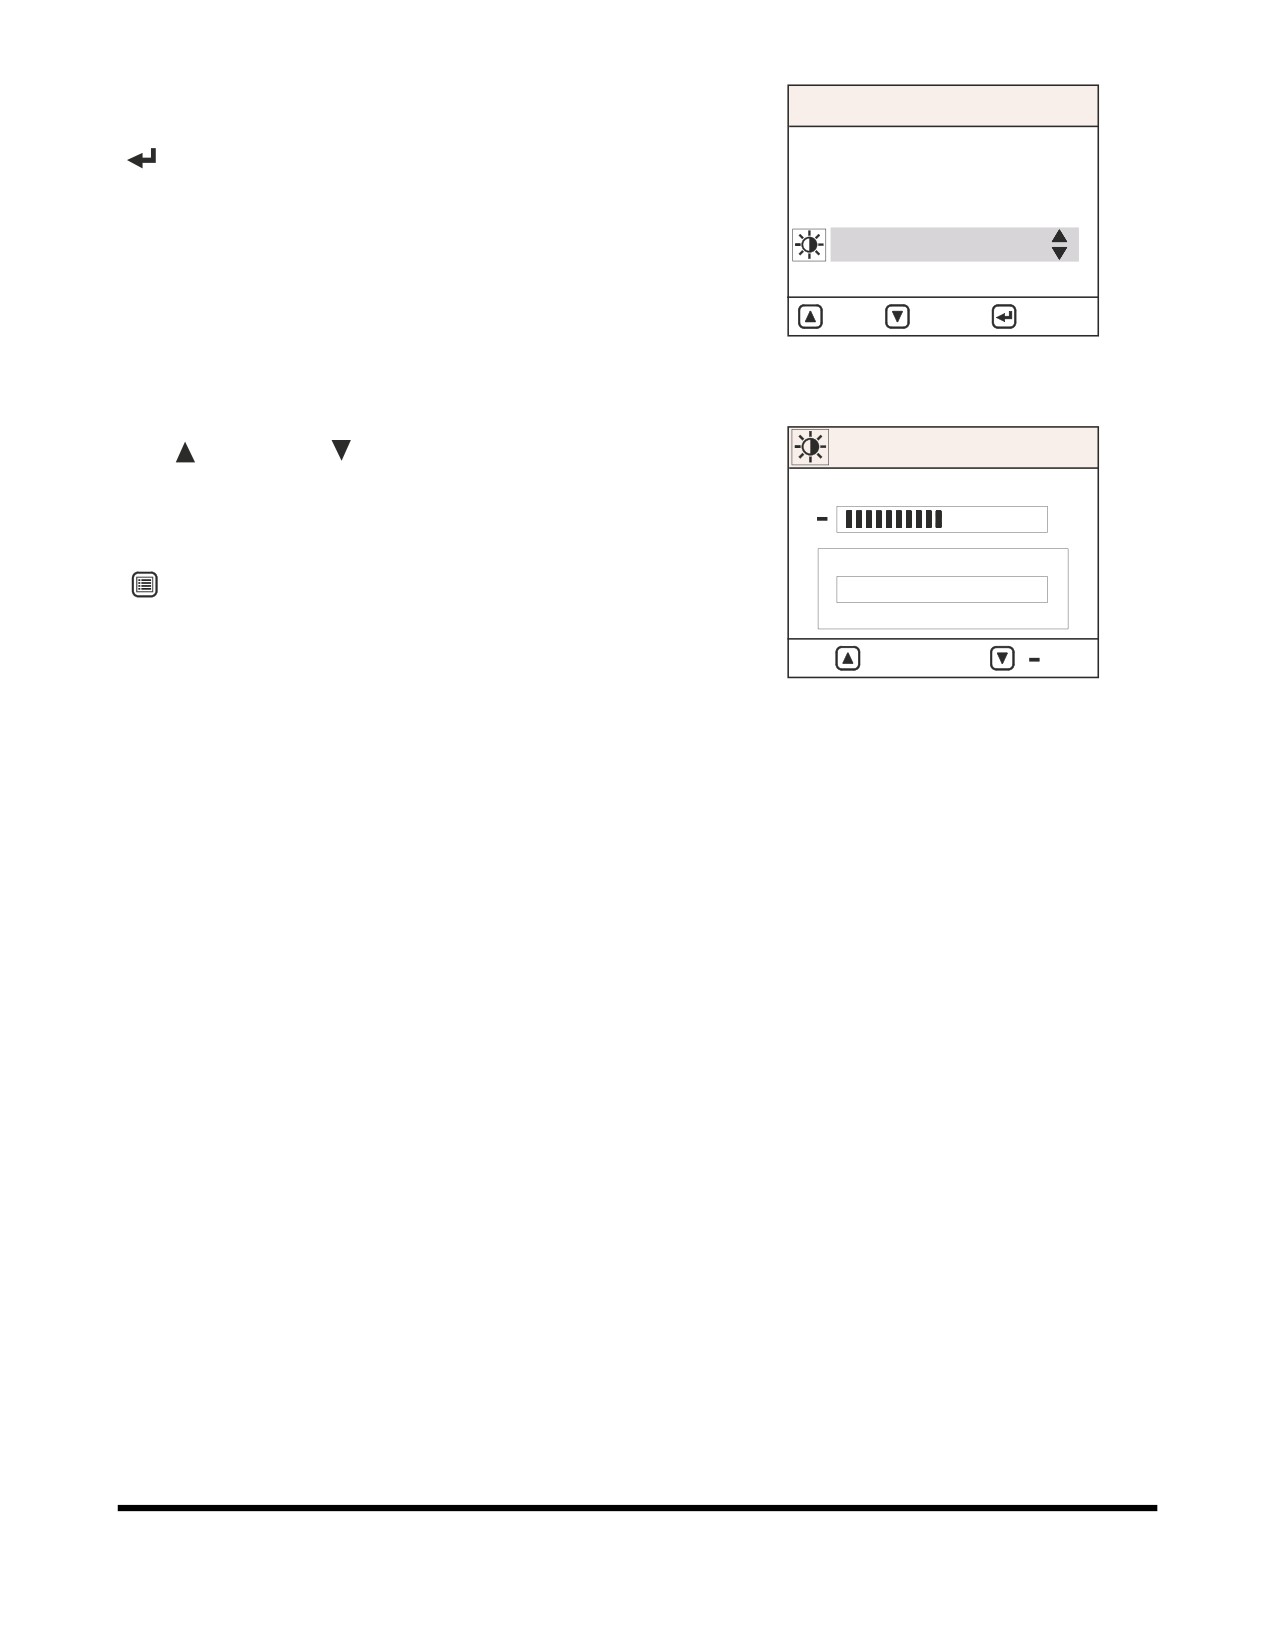
Adjust Display
MAIN MENU
When the cursor is on "Adjust Display," press the "SELECT"
1. Language
(
) button. The adjust display submenu will appear.
2. Set Clock
3. Filter / Oil Info
4. Adjust Display
5. Set Password
: UP
: DOWN
: SELECT
FG000080
Figure 100
The desired brightness adjustment can be selected by using
"UP" (
) or "DOWN" (
) buttons.
Adjust Display
NOTE: When the equipment shipped, the default brightness
50%
is set to 50%.
+
The screen is returned to the main menu by pressing the "ESC"
LCD TEST
(
) button. The display is then saved.
LCD TEST
LCD TEST
: +
:
FG000081
Figure 101
Operating Controls
OP000528
2-46
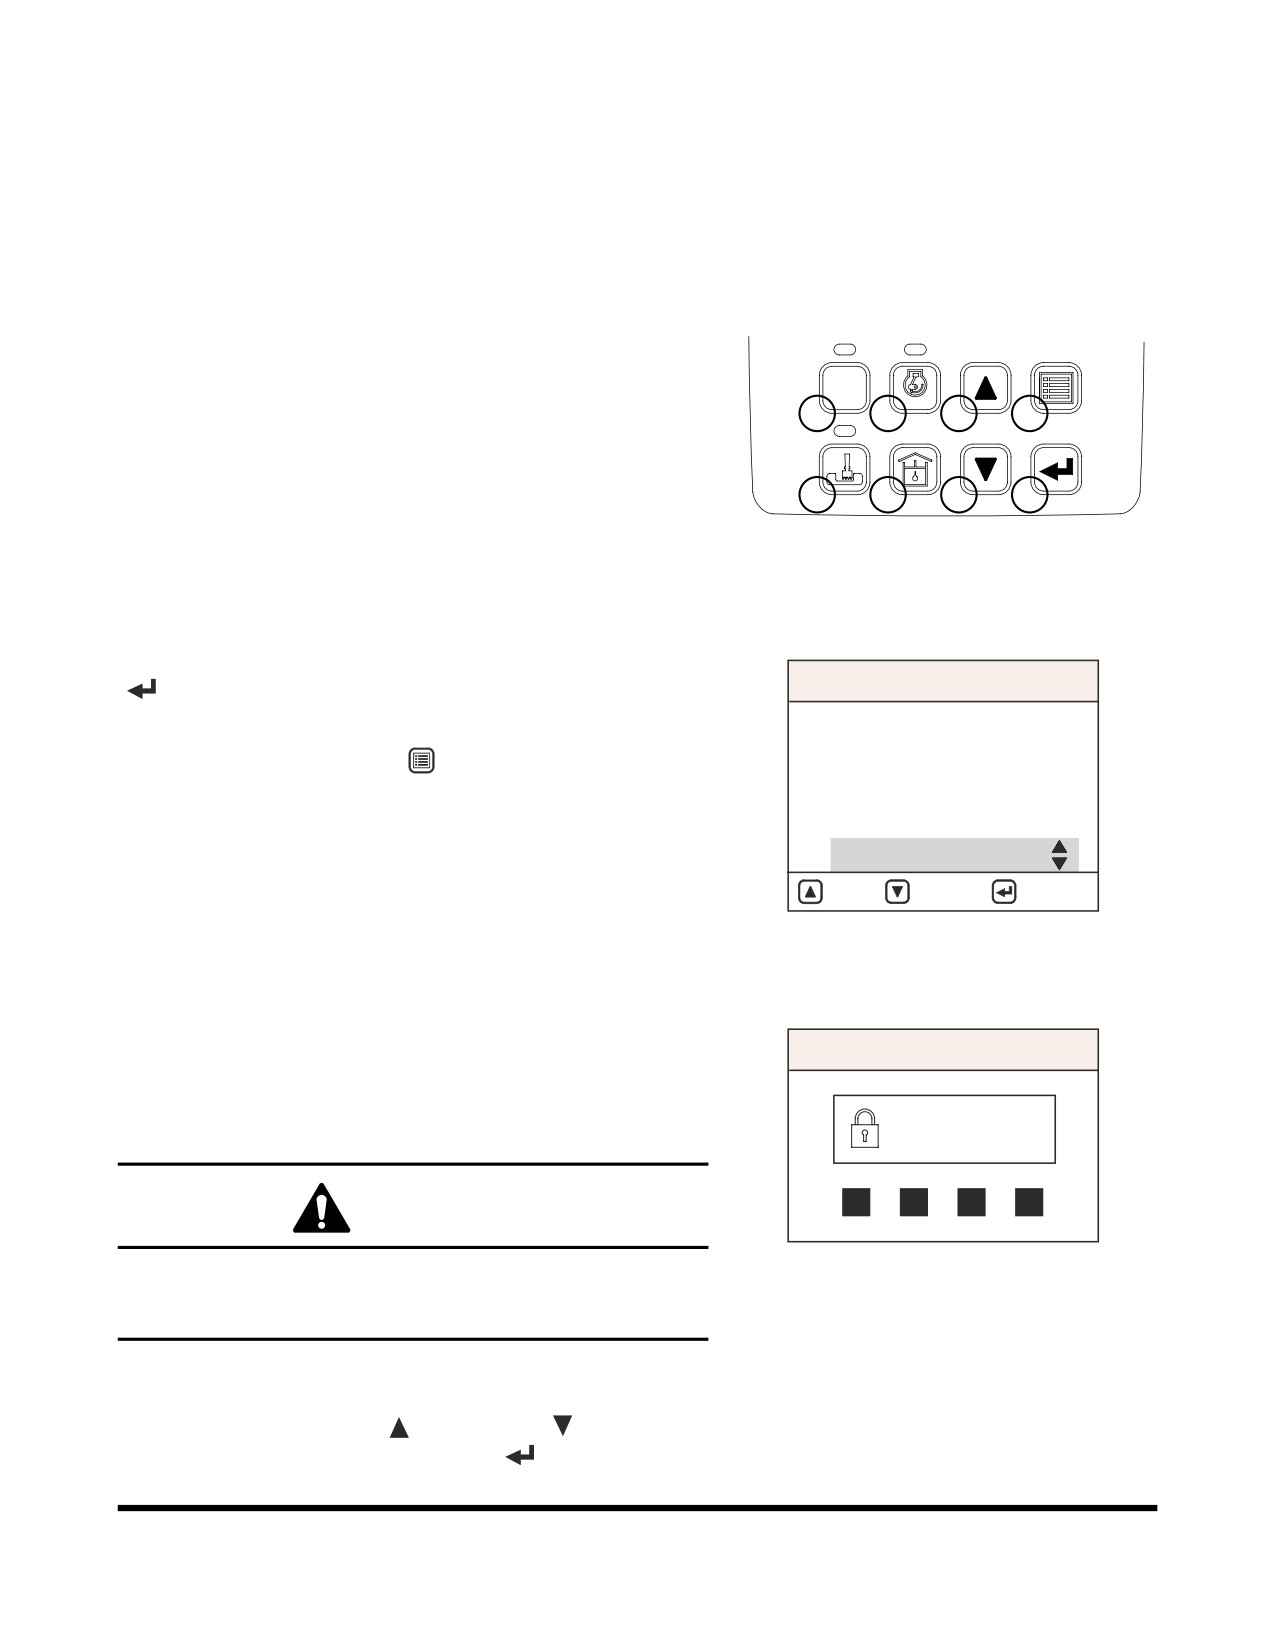
Set Password (Lock and Unlock)
Use extreme care when setting the password for starting the
engine. If a mistake is made when entering the number, and the
number is excepted by the system, as being correct, that
number will be the only one that will allow the security system to
be activated or deactivated.
Write your password down and keep it in a safe location.
Password numbers can only use numbers between 1 and 8. The
small number to the lower left of each button on the instrument
panel, indicates the number that will be entered when that button
is pressed. Numbers "0" and "9" are invalid choices.
POWER
AUTO
1
2
3
4
ESC
Example:
2785 is acceptable.
5
6
7
8
9024 is not acceptable.
HAAE2010
Figure 102
When the cursor is on "Set Password" press the "SELECT"
(
) button. The set password submenu will appear.
MAIN MENU
1. Language
NOTE: The screen can be returned to the main menu by
2. Set Clock
pressing the "ESC"(
) button (3, Figure 84).
3. Filter / Oil Info
4. Adjust Display
5. Set Password
: UP
: DOWN
: SELECT
FG000227
Figure 103
Password inquiry menu will be displayed.
NOTE: The initial password is "1111."
SET PASSWORD
The password can be changed within ten minutes while the
starter switch is in "I" (ON) position.
ENTER
After changing password, be sure to use the changed password.
PASSWORD
CAUTION!
Failure to enter correct password three times, will return
FG000228
Figure 104
normal display screen, and another attempt will not be
possible for ten minutes.
A three item menu will be displayed. The items are "LOCK,"
"UNLOCK," and "CHANGE PASSWORD." An item can be
selected by using the "UP" (
) or "DOWN" (
) buttons, and
then selected by pressing the "SELECT" (
) button.
Operating Controls
OP000528
2-47
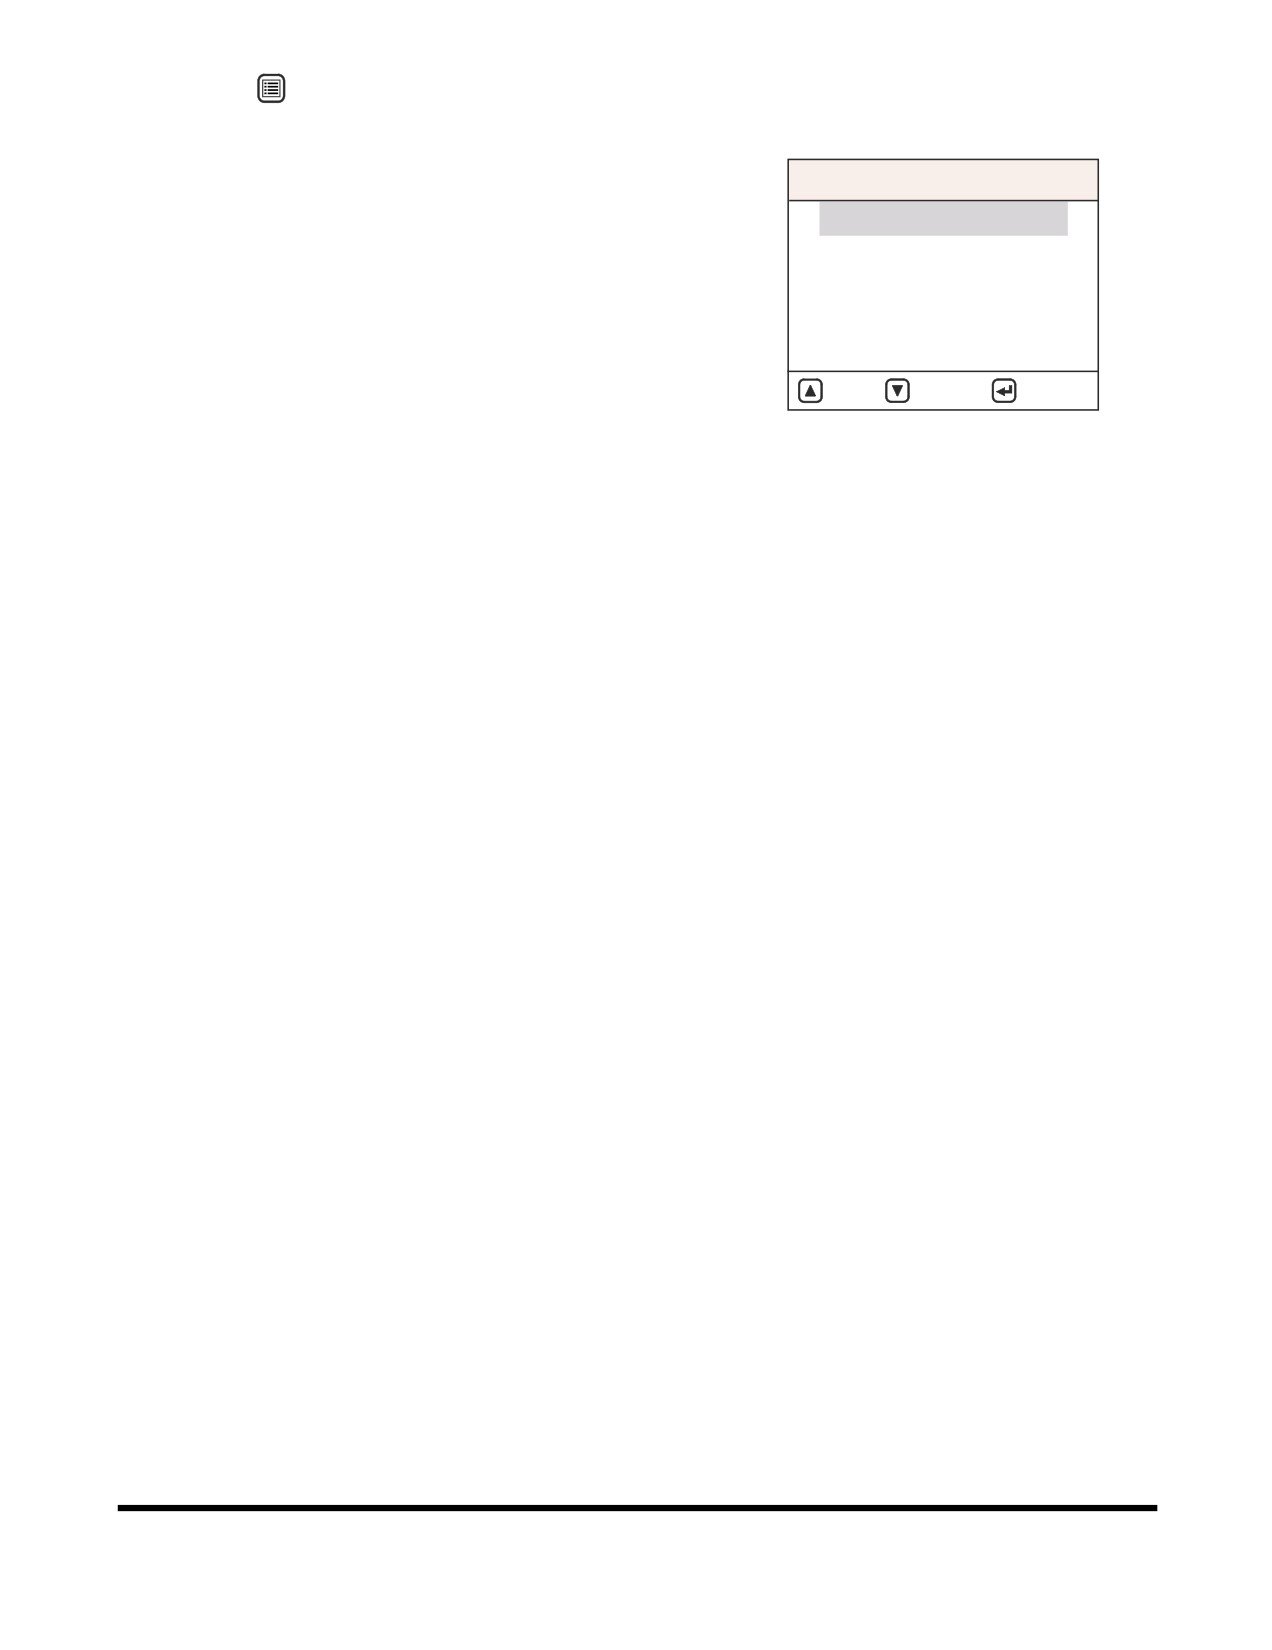
Press "ESC" (
) button (3,Figure 84) for 1 more second, it
returns to main menu.
According to the selection of adoption (lock) or nonadoption
(unlock), the password function will be in working or nonworking.
SET PASSWORD
When you want to change a password, follow below procedure.
Lock
1.
Move the cursor to "Change Password."
Unlock
2.
Input desired 4 digits password using selector buttons (at
Change Password
the first column). Input the same password one more time
(at the second column)
3.
Select adoption
(lock) or nonadoption
(unlock) at set
: UP
: DOWN
: SELECT
password menu.
FG000229
NOTE: Keep in mind never to forget password.
Figure 105
NOTE: Please contact a DOOSAN distributor, if you
forget your password.
Operating Controls
OP000528
2-48
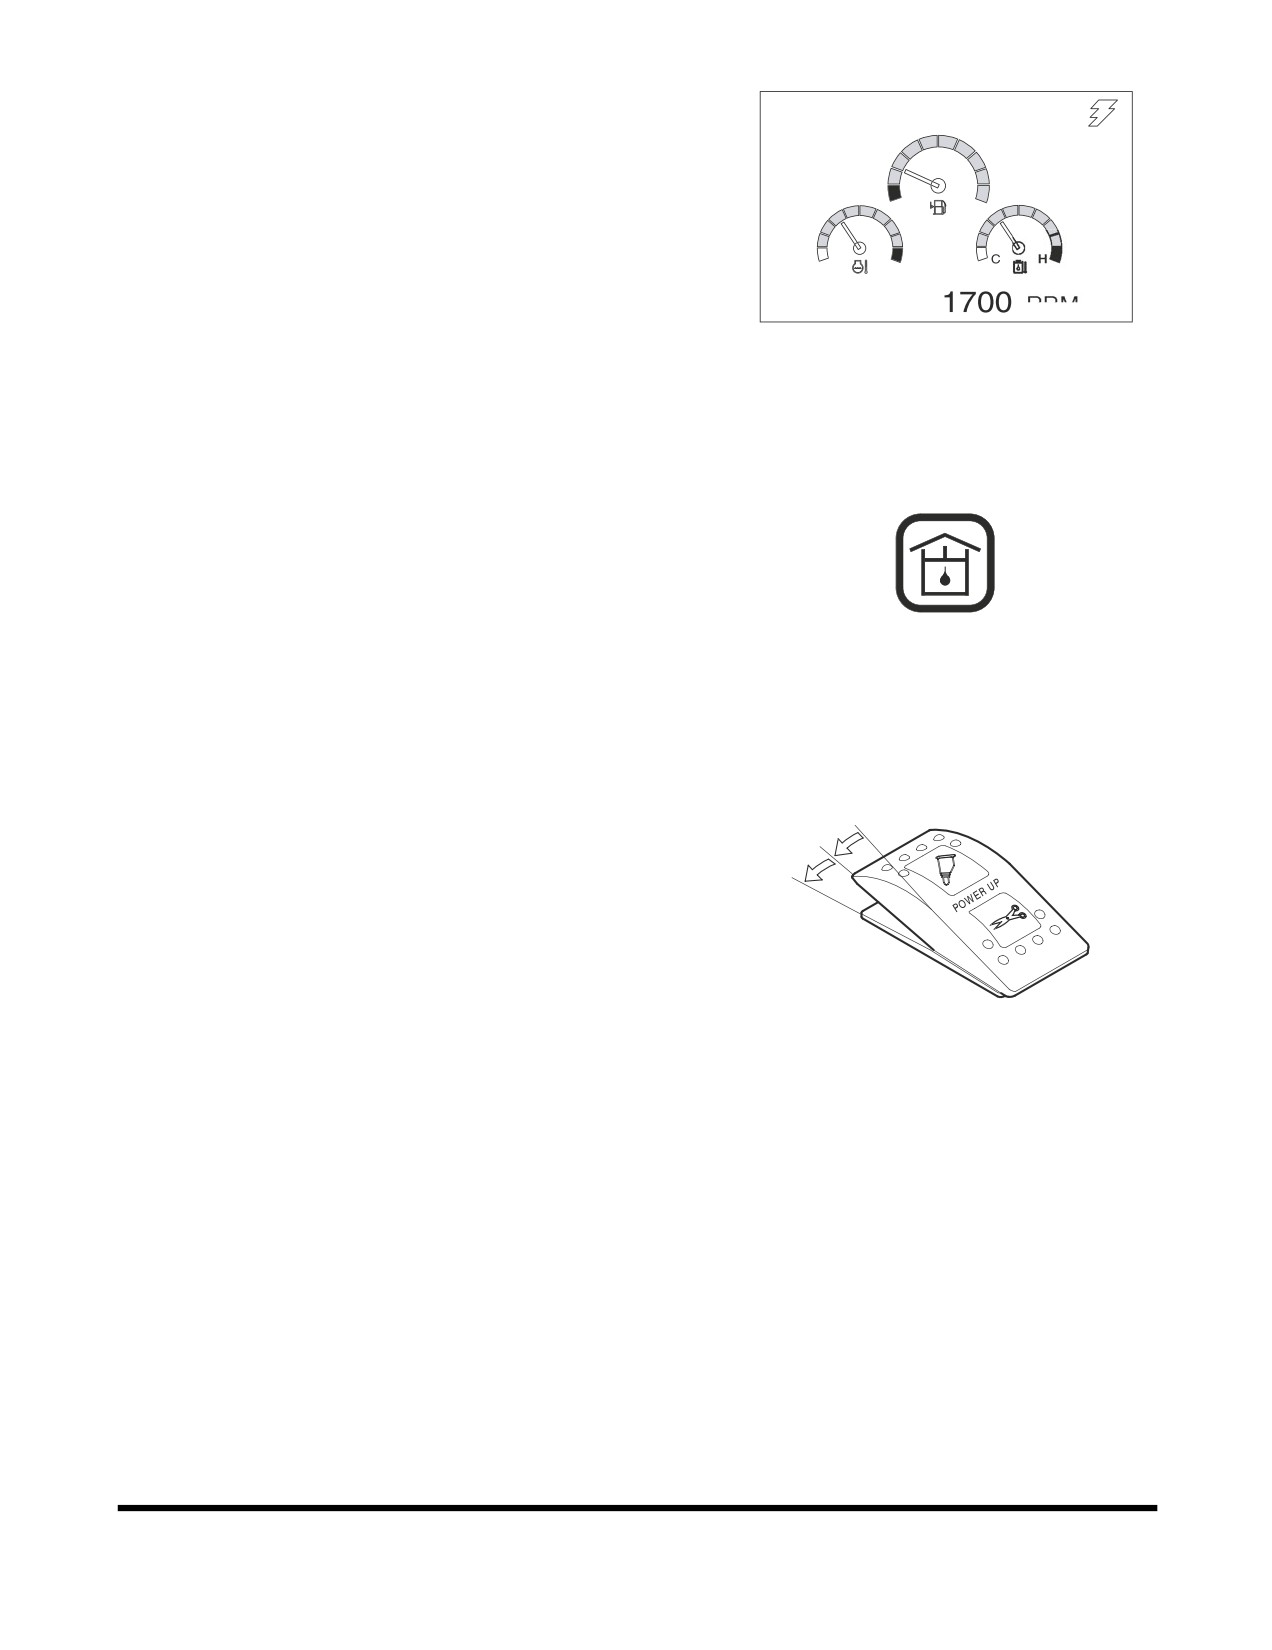
FLOW CONTROL
02/05 [MO] 11:30
The flow control is used to set the proper flow rate for an
optional attachment (If equipped). The flow control screen is
accessed directly from the normal display screen without going
E
F
through the main menu or any submenus.
C
H
E/G SPEED
RPM
FG000043
Figure 106
When the flow control button (Figure 82 and Figure 107) is
pressed at the normal display screen (Figure 106), the flow
control screen (Figure 109) will be displayed.
6
FG000066
Figure 107
Select a tool by using the breaker / boost / shear selector switch.
The symbol in the upper left corner of the display screen will
change according to the position that the selector switch is in.
I
Compare the symbols shown in (Figure 109 and Figure 110).
O
II
FG000025
Figure 108
Operating Controls
OP000528
2-49
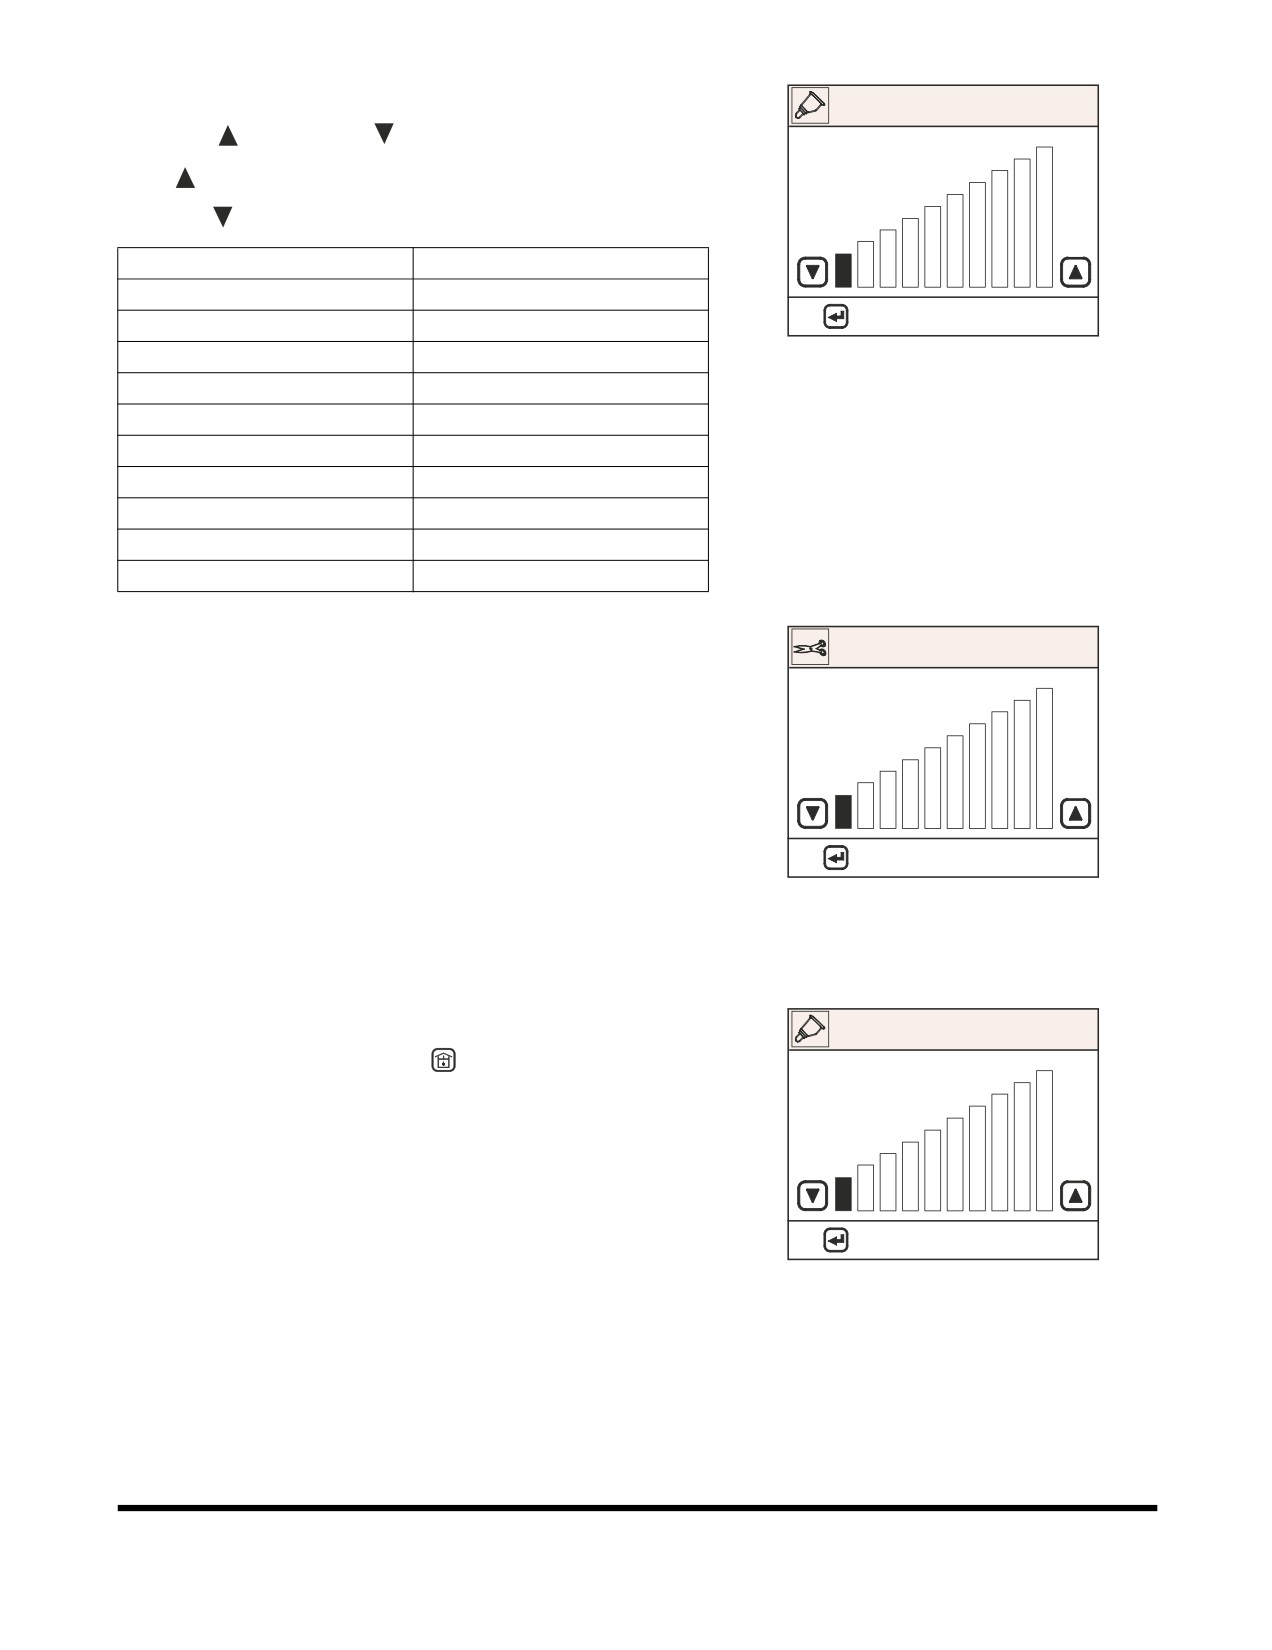
Adjusting Flow Rate
FLOW CONTROL
Use "UP" (
) or "DOWN" (
) buttons to adjust flow rate.
"UP" (
) button is used to increase a flow rate.
"DOWN" (
) button is used to decrease a flow rate.
Flow Control Step
Pump Flow Setting (l/min)
1
38
: APPLY
ESC: CANCEL
2
61
FG000254
3
80
Figure 109 Breaker
4
91
5
101
6
133
7
142
8
149
9
165
10
168
Pump flow setting is at rated engine speed, for only the output of
one pump.
FLOW CONTROL
Pump displacement will vary according to changes in engine
rpm.
: APPLY
ESC: CANCEL
FG000255
Figure 110 Shear
Escape
FLOW CONTROL
A. Press flow control button (
, Figure
107) to return to
normal display screen and save the flow rate setting.
B. If there is no adjustment for twenty seconds, the flow
control screen will return to the normal display screen.
: APPLY
ESC: CANCEL
FG000254
Figure 111
Operating Controls
OP000528
2-50
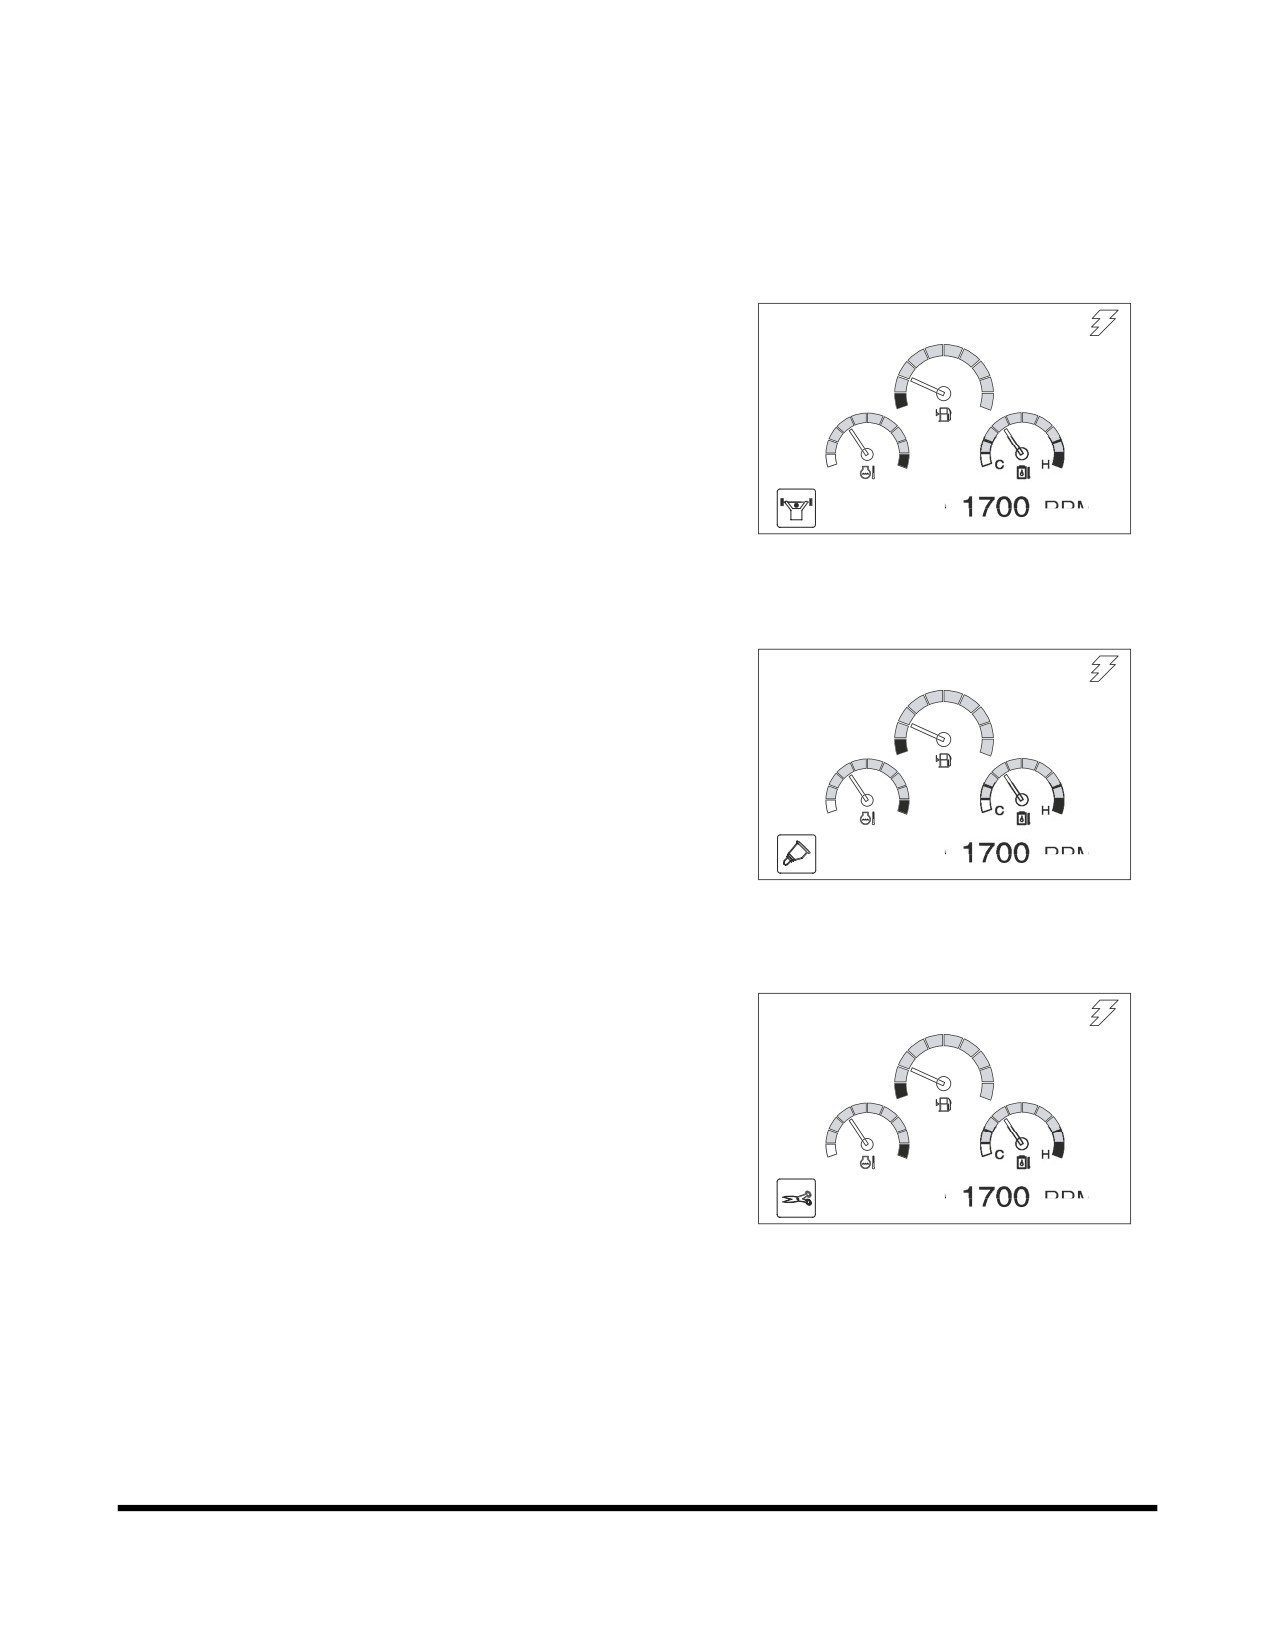
OPERATION SELECTION
DISPLAY
In the monitor you can see the application that is currently
selected.
Power Boost Selection
02/05 [MO] 11:30
E
F
C
H
E/G SPEED
RPM
FG000257
Figure 112
Breaker Selection
02/05 [MO] 11:30
E
F
C
H
E/G SPEED
RPM
FG000258
Figure 113
Shear Selection
02/05 [MO] 11:30
E
F
C
H
E/G SPEED
RPM
FG000259
Figure 114
Operating Controls
OP000528
2-51
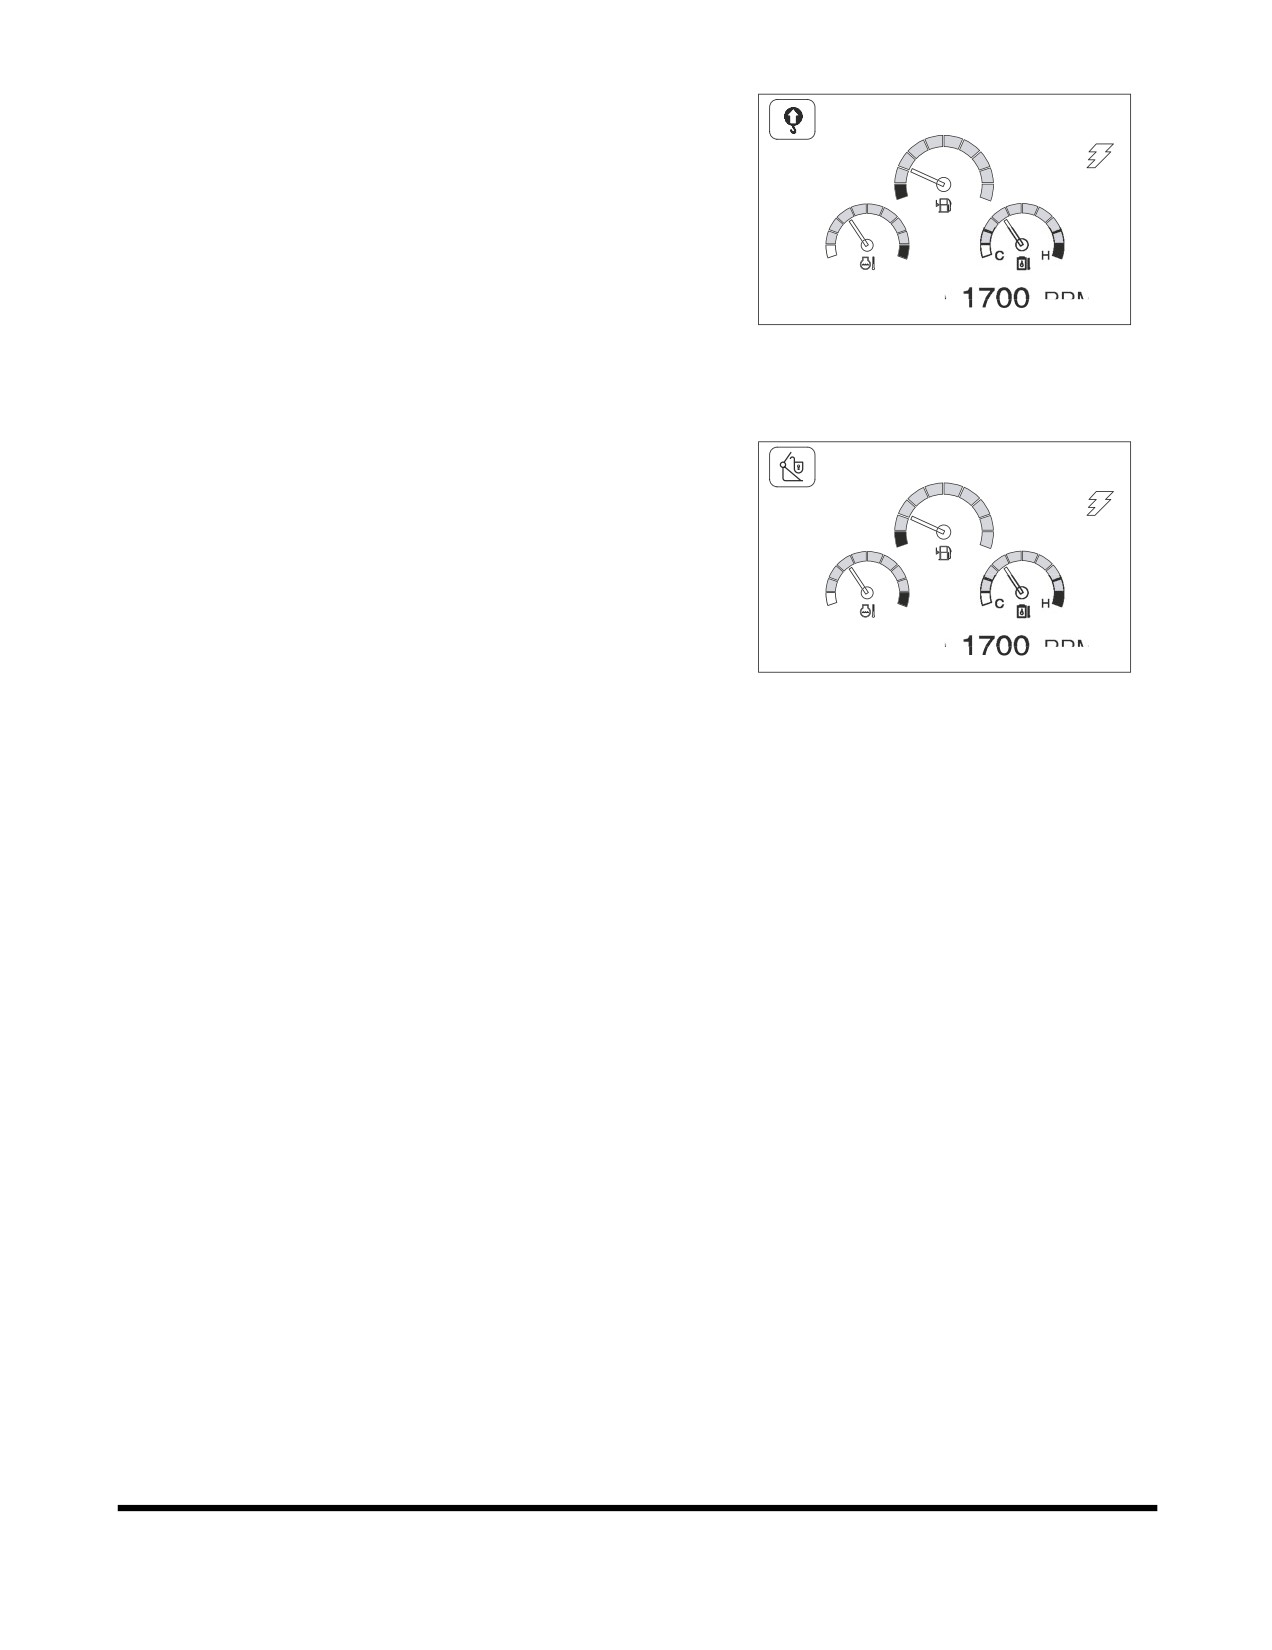
Overload Alarm Selection (Optional)
02/05 [MO] 11:30
E
F
C
H
E/G SPEED
RPM
FG000260
Figure 115
Quick Clamp Operation Selection
(Optional)
02/05 [MO] 11:30
E
F
C
H
E/G SPEED
RPM
FG000388
Figure 116
Operating Controls
OP000528
2-52
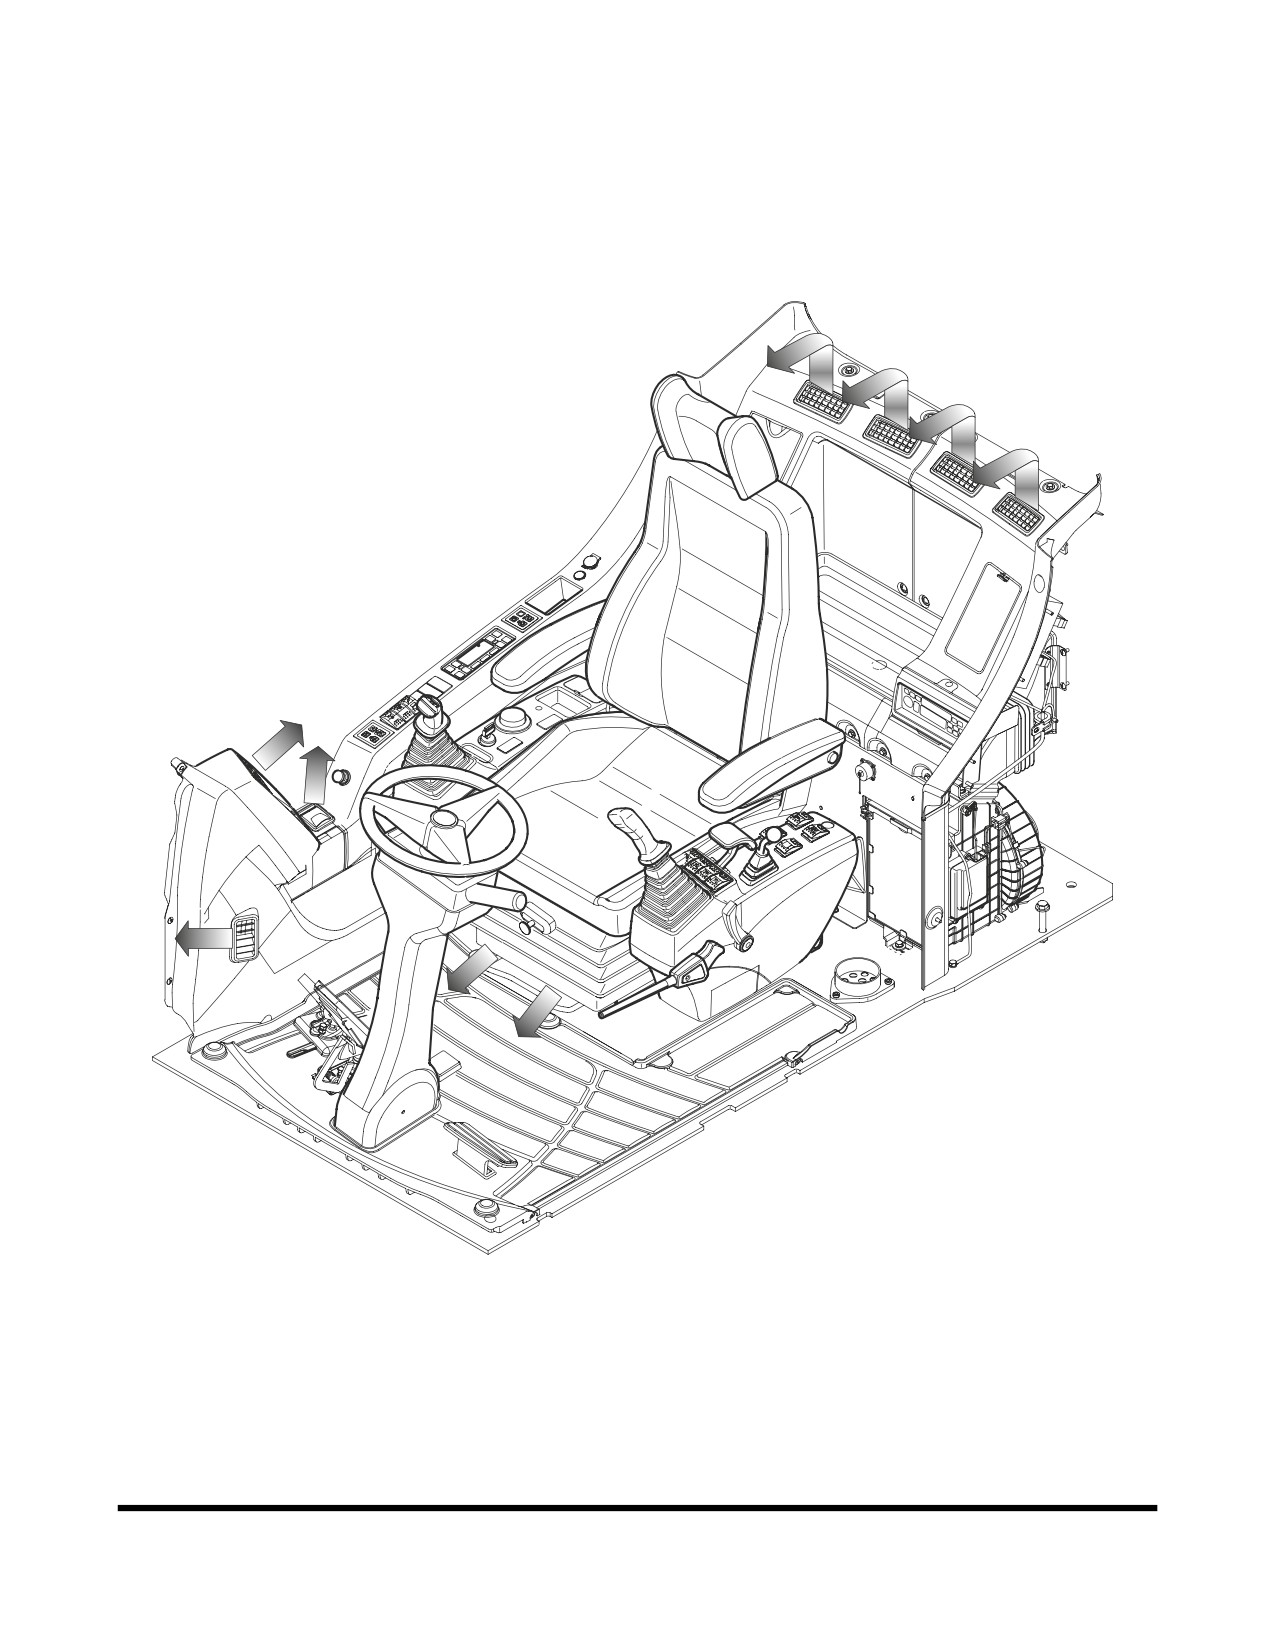
HEATER AND AIR CONDITIONER
CONTROL PANEL
Location of Controls and Vents
FG007166
Figure 117
The heater and air conditioner are combined into one unit in the
rear cover behind the operator's seat.
The operator can control cabin temperature using the control
panel installed in the switch panel.
Operating Controls
OP000528
2-53
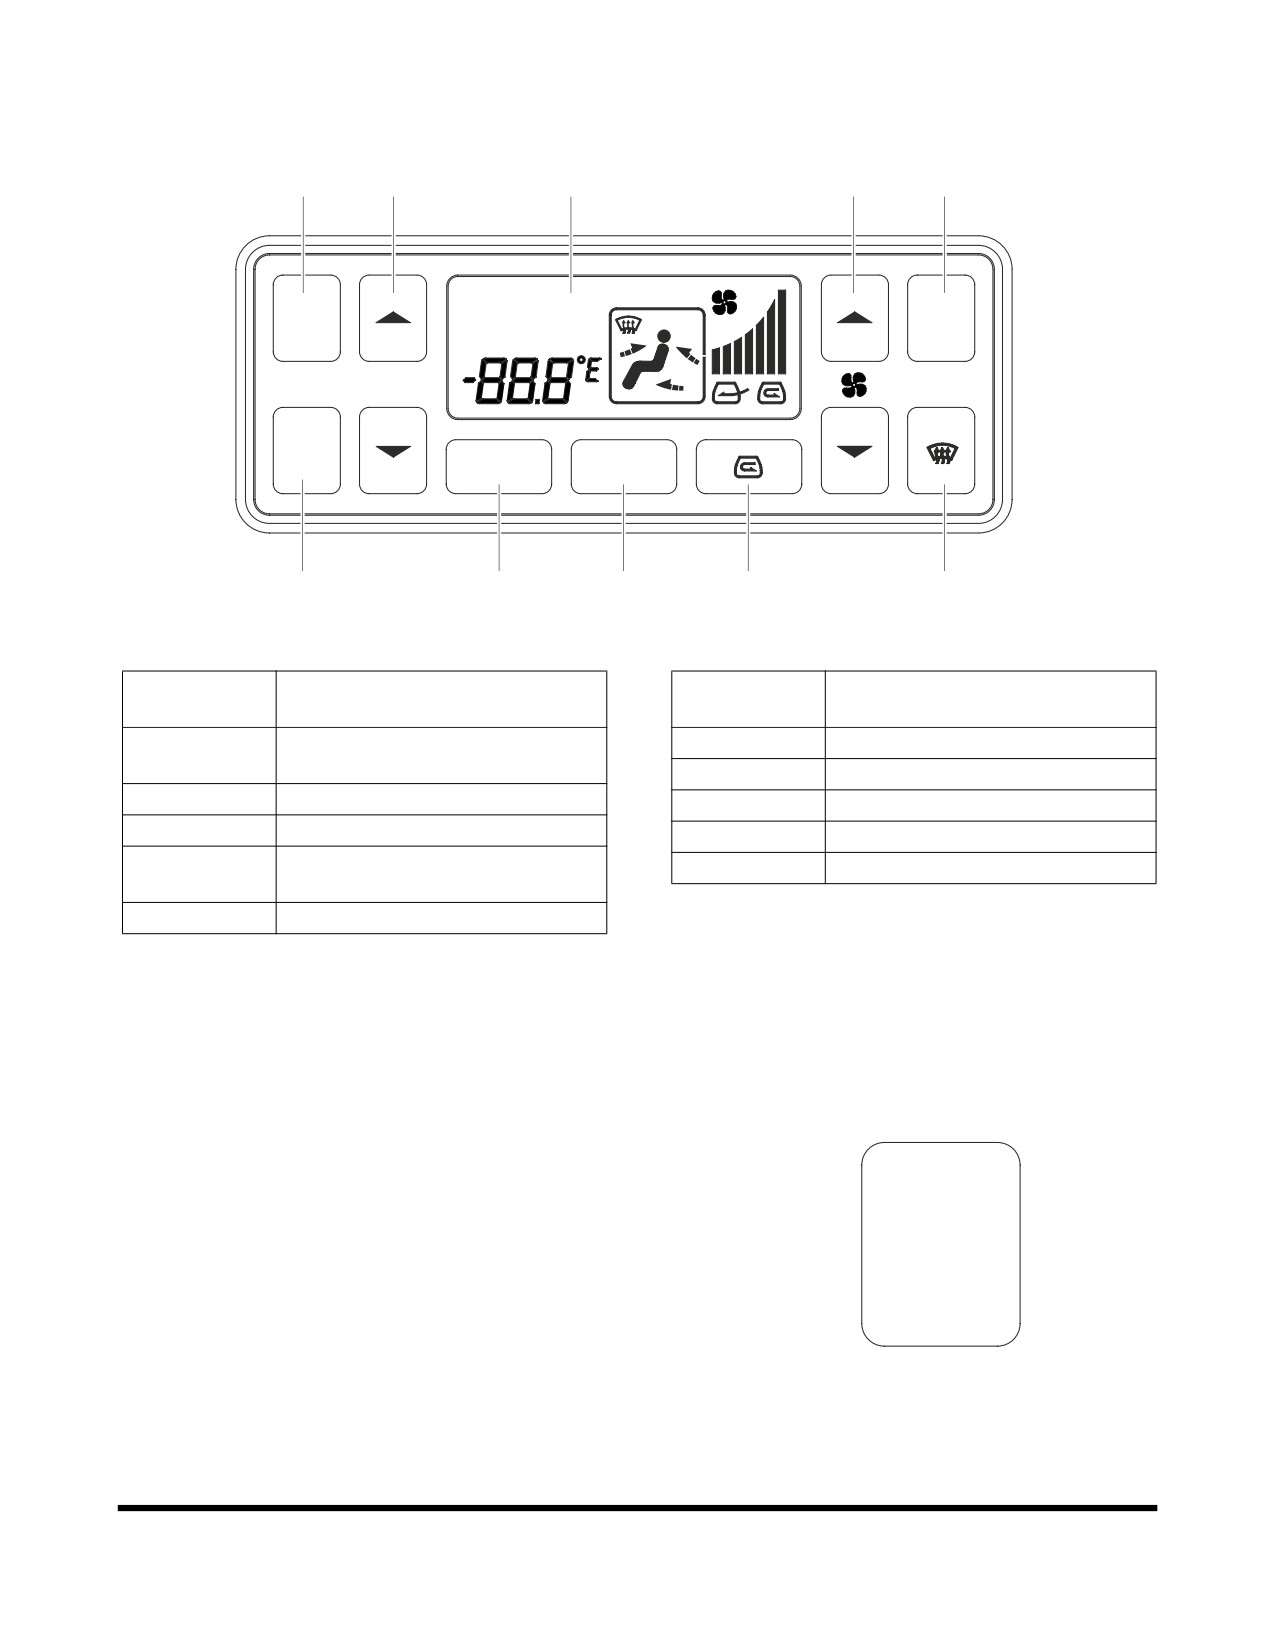
Control Panel
1
3
10
7
8
A/C
OUTSIDE
AUTO
A/C
AUTO
MAX
TEMP
OFF
SEL
MODE
2
4
5
6
9
FG000086
Figure 118
Reference
Reference
Description
Description
Number
Number
1
Automatic Temperature Control
6
Air Inlet Selector Button
Button
7
Fan Speed Selector Button
2
Off Button
8
Air Conditioner Button
3
Temperature Control Button
9
Defroster Button
4
Temperature Unit Selector
10
LCD Display
Button
5
Air Outlet Selector Button
NOTE: When the light switch is turned to "I" or "II" position,
the LED for illuminating in the control panel will turn
"ON."
1.
Automatic Temperature Control Button
This button is used to control the temperature level in the
cabin, according to the temperature setting of the operating
panel.
When the automatic temperature control function is
activated, the word "AUTO" will be displayed in the upper
AUTO
left of LCD display.
When the system is in "AUTO" mode, specifications can be
manually changed by pushing another button.
FG000088
If a function is manually changed, the word "AUTO" does
Figure 119
not appear in the LCD display, but the unchanged
functions will remain in "AUTO" mode.
Operating Controls
OP000528
2-54
2.
Off Button
This button is used to stop the fan and air conditioner.
OFF
FG000089
Figure 120
3.
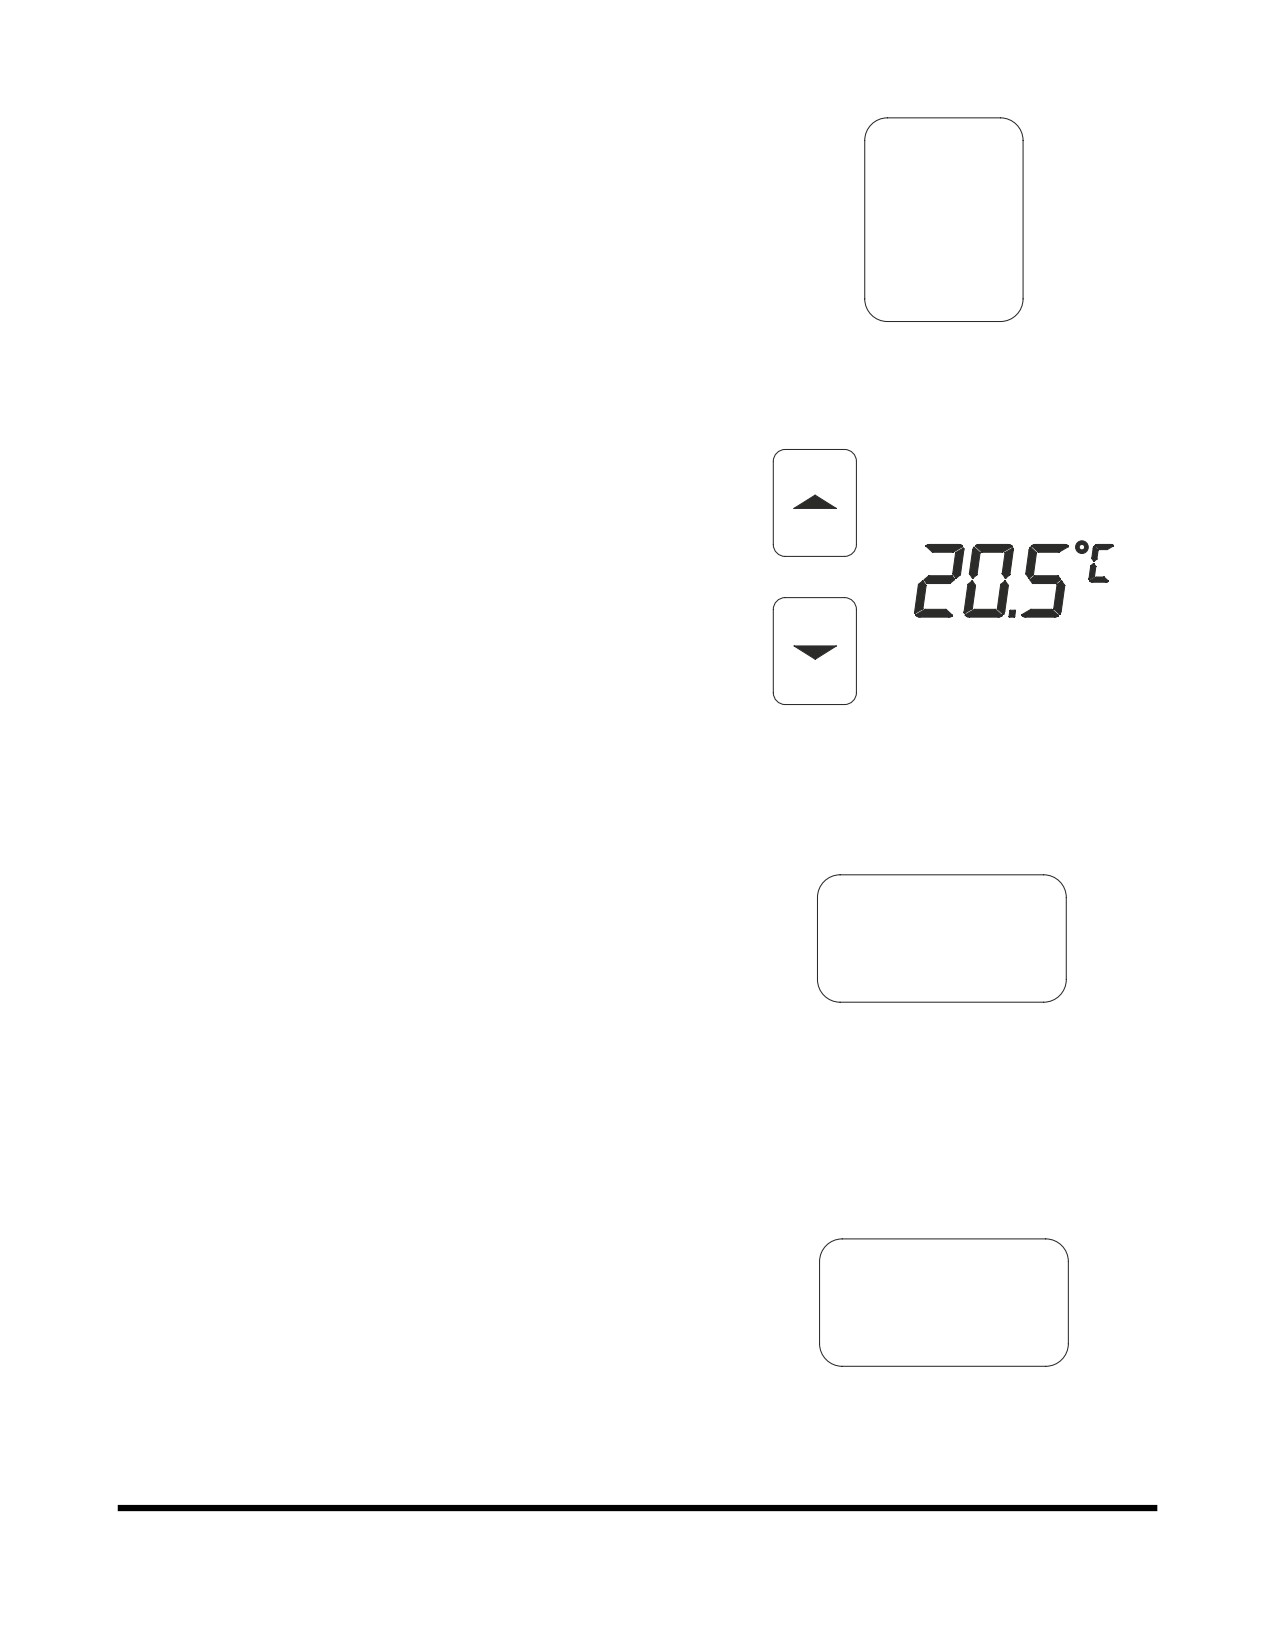
Temperature Control Button
These buttons are used to control the cabin temperature.
Temperature is adjustable from 17°C (62°F) to 32°C (90°F)
by 0.5°C (1°F) increments.
Temperature setting is displayed on the LCD.
TEMP
When the system is turned "ON," the previously set
temperature is used as a starting point.
FG000090
Figure 121
4.
Temperature Unit Selector Button
This button gives the choice to select either °C or °F.
SEL
FG000094
Figure 122
5.
Mode Selector Button
This button is used to select which combination air outlets
will be used.
MODE
FG000096
Figure 123
Operating Controls
OP000528
2-55
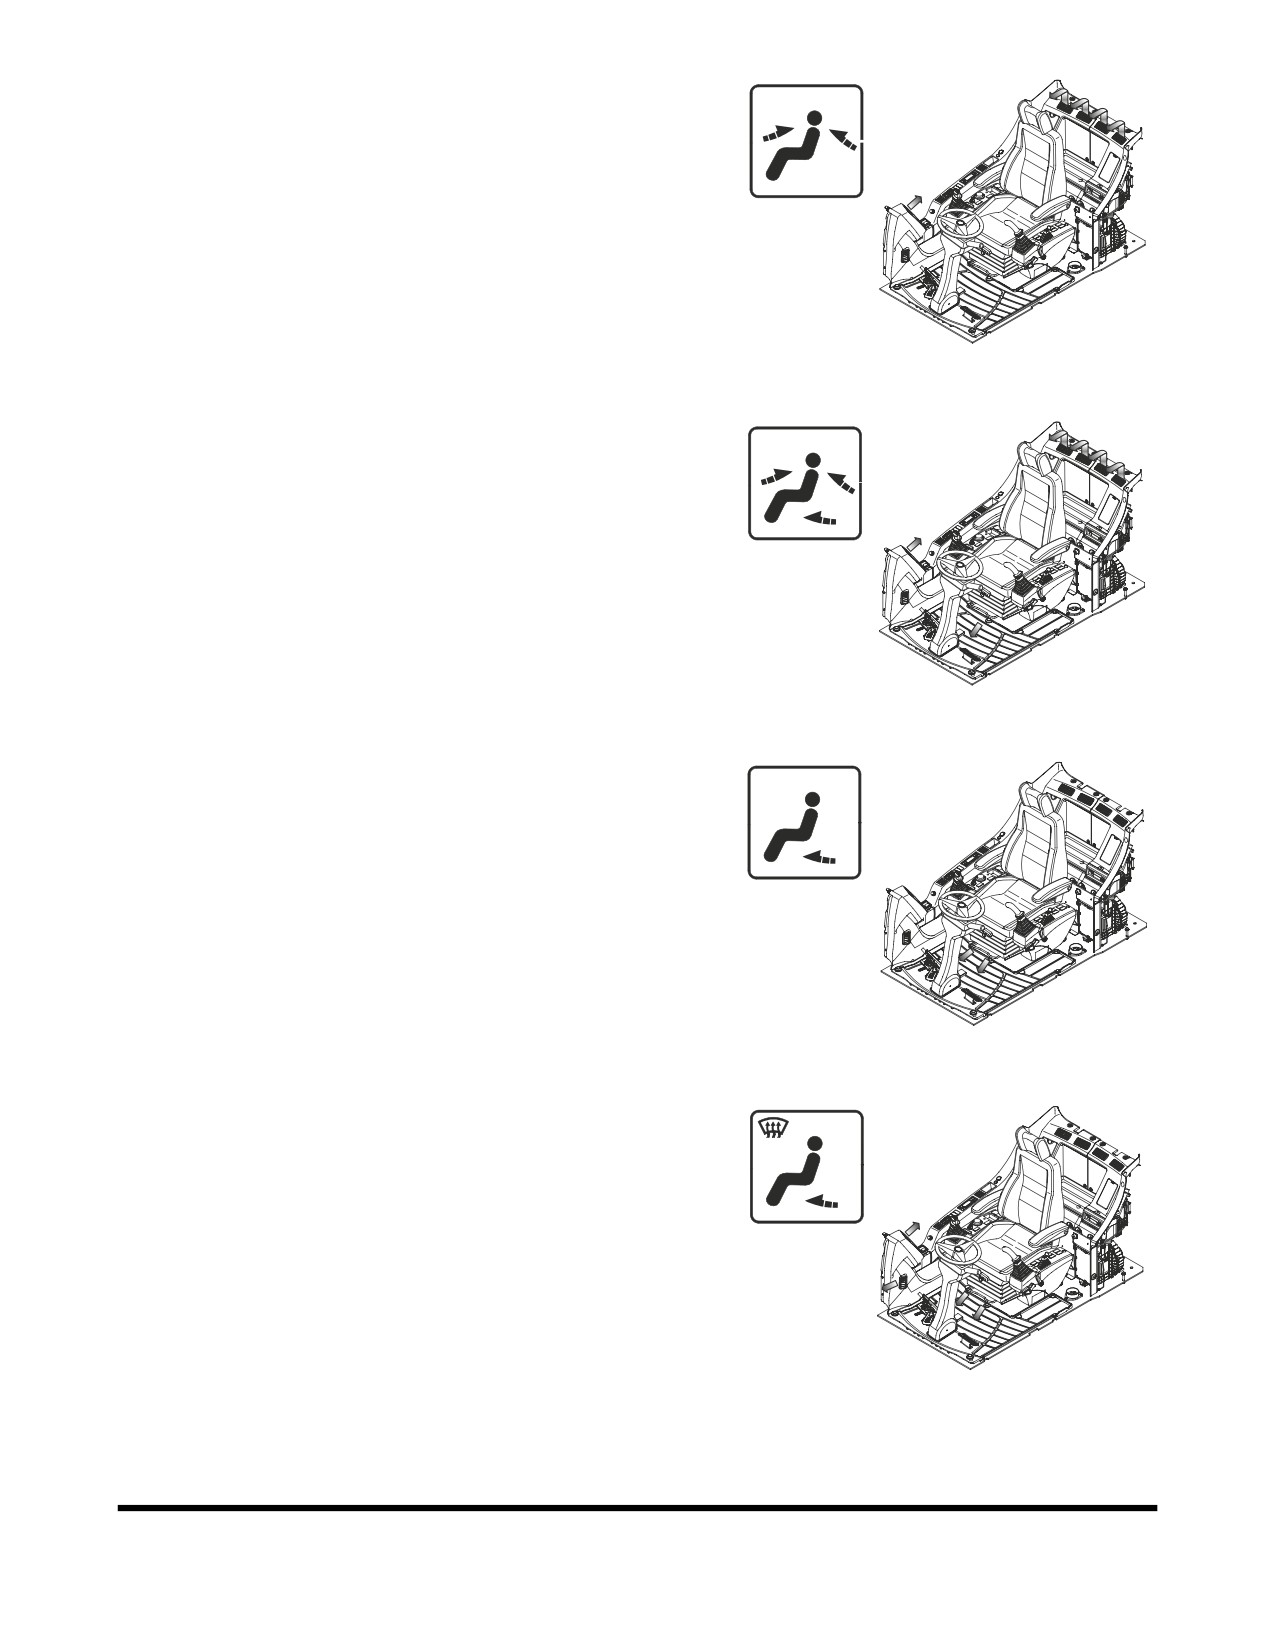
A. Used to direct air flow to upper portion of operator's
cabin from both the front and rear.
FG002198
Figure 124
B. Used to direct air flow to upper portion of operator's
cabin from both the front and rear. It will also deliver
air to the lower portion of operator's cabin from under
the operator's seat.
FG002199
Figure 125
C. Used to direct air flow to lower portion of operator's
cabin and feet.
This mode is mainly used for heating.
FG002200
Figure 126
D. Used to direct air flow to the front window and to
operator's feet.
FG002201
Figure 127
Operating Controls
OP000528
2-56
6.
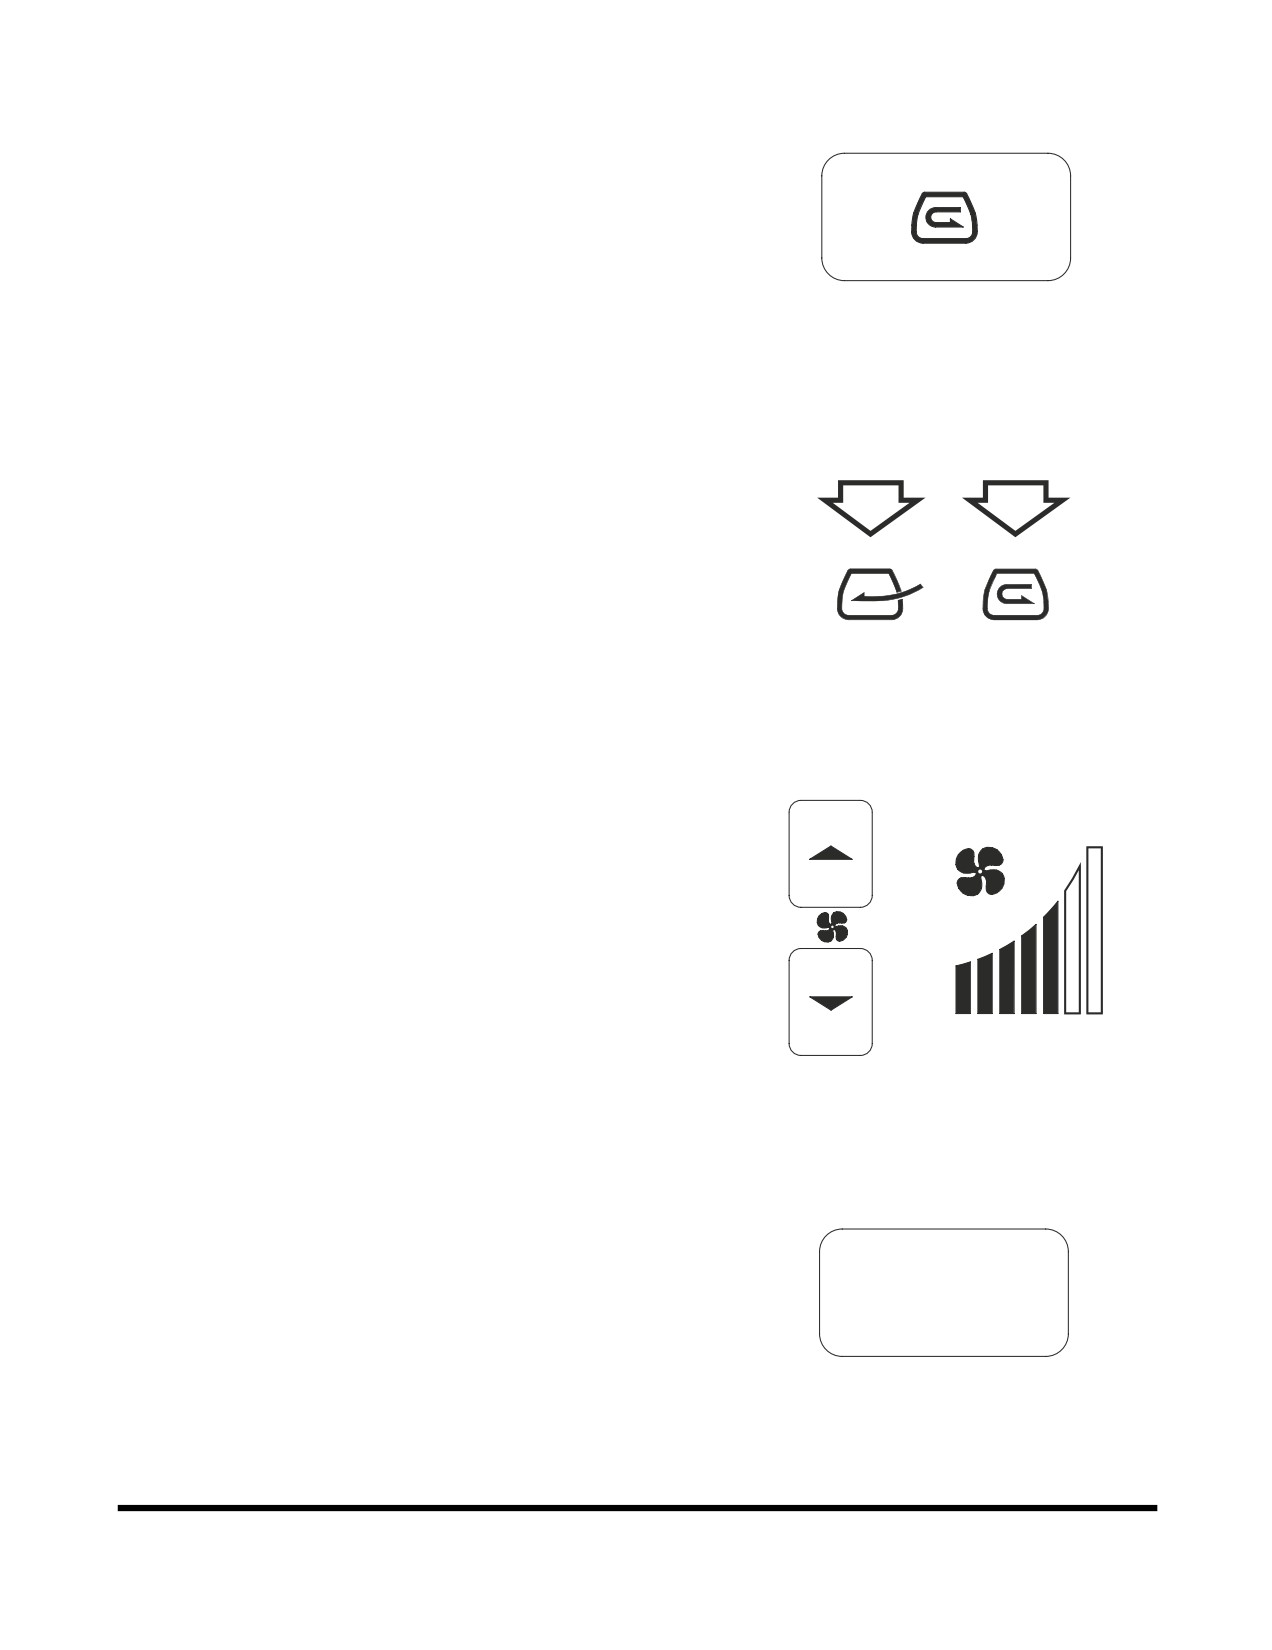
Air Inlet Selector Button
This button is used to select fresh air from outside the
cabin, or recirculate air within the cabin.
Pressing this switch enables the choice between fresh air
and recirculating air within the operator's compartment.
The select mode is displayed on the LCD.
FG000101
Figure 128
A. "A" Symbol
- Draws fresh air into operator's
compartment. Used to exchange air within the
operator's compartment with fresh air. Used to
remove condensation or ice on window (Winter /
A
B
Rainy Season).
B. "B" Symbol - Recirculates air within the operator's
compartment. Used to quickly warm or cool the
operator's cabin.
FG000102
Figure 129
7.
Fan Speed Selector Buttons
These buttons are used to control the speed of the blower
fan.
Momentarily, pressing a button, changes the speed one
stage.
Continuously pressing and holding a button, repeatedly
changes the speed.
FG000103
Figure 130
8.
Air Conditioner Button
This button is used to turn the air conditioner "ON" or
"OFF."
When this function is activated, an "A/C" is displayed in the
upper left corner of the LCD.
A/C
FG000105
Figure 131
Operating Controls
OP000528
2-57
9.
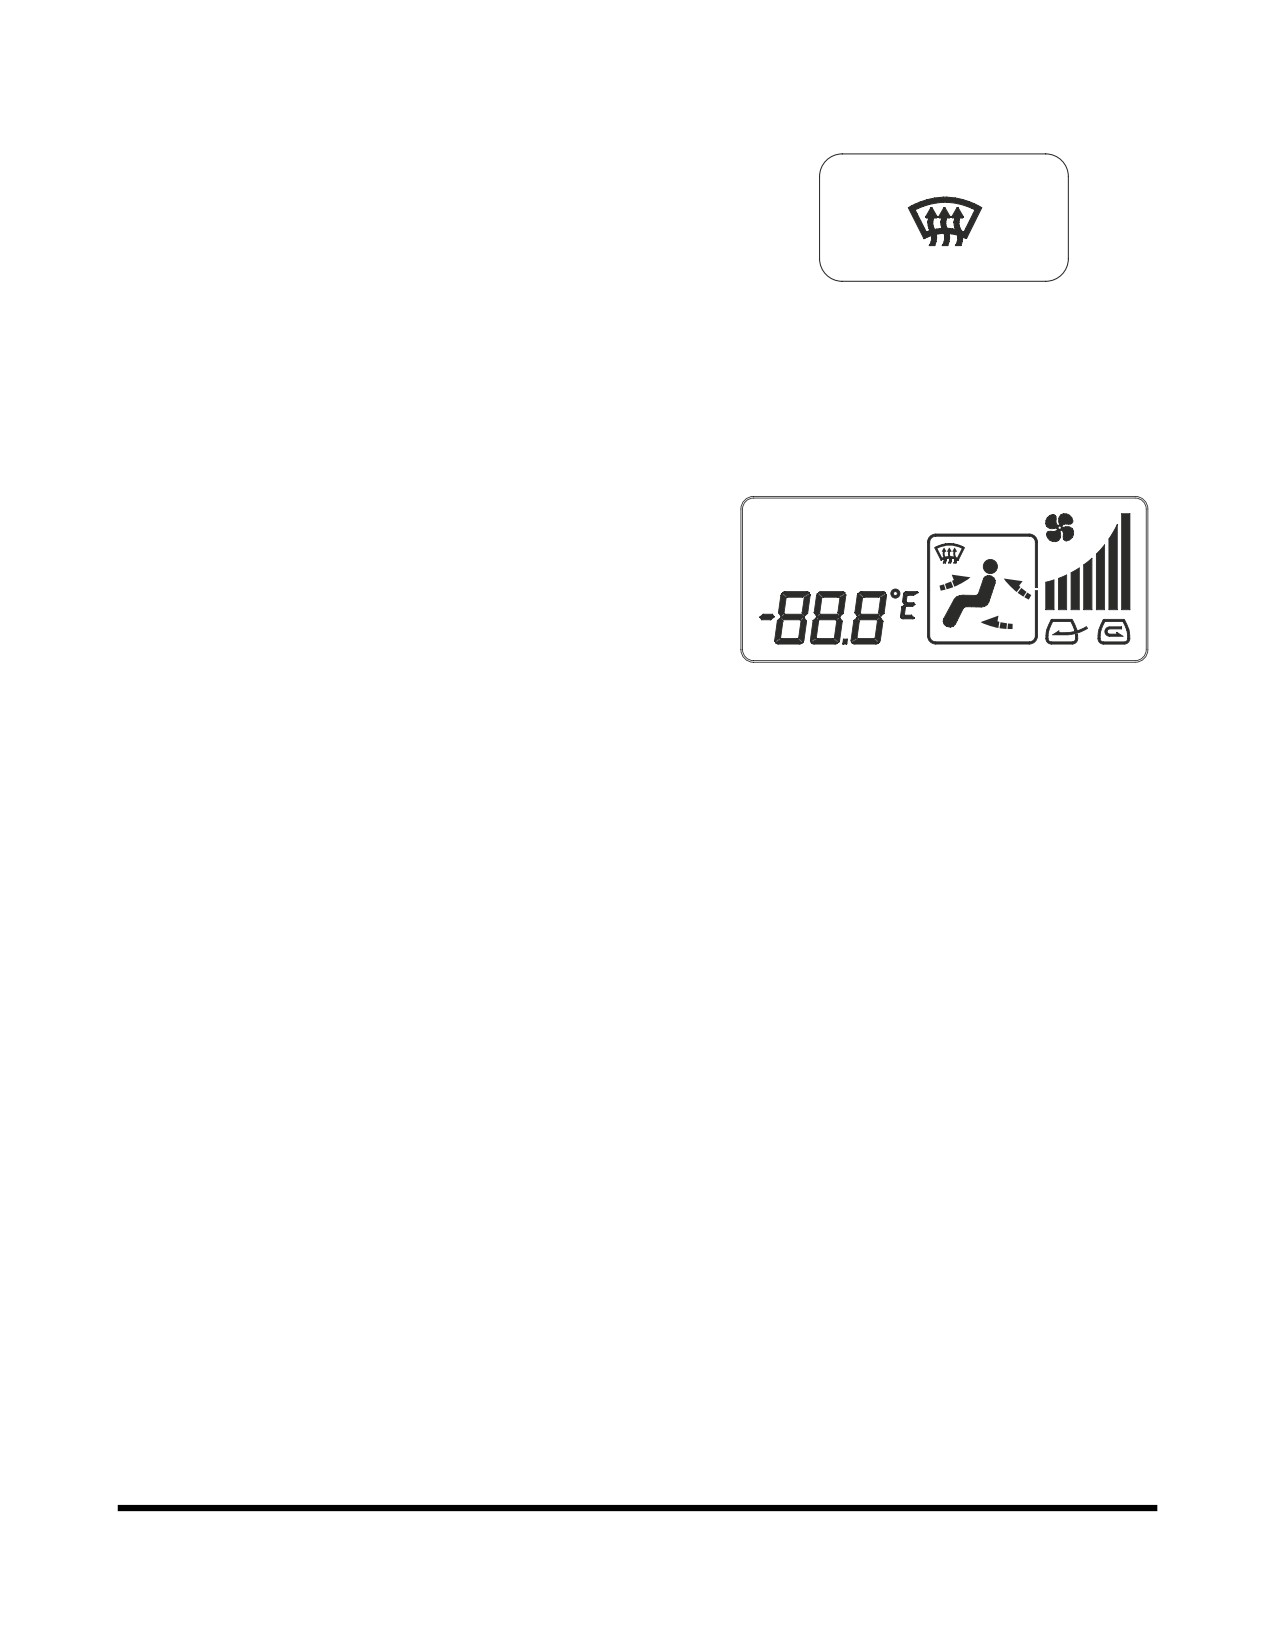
Defroster Button
Used to direct air flow to front window.
FG000106
Figure 132
10. LCD Display
This display shows the current setting.
A/C
OUTSIDE
AUTO
MAX
Memory Function
The air conditioner panel has a memory function. When the
starter switch is turned "OFF" the settings for the panel, will be
stored. When the excavator is started, the last stored setting will
be used.
FG000107
Figure 133
Additional Operating Instructions
A proper indoor temperature in summer is 5 - 6°C (10 - 12°F)
less than the outdoor temperature.
Operate the air conditioner for twenty - thirty minutes a week to
circulate the refrigerant in the system.
NOTE: The blower button should be on "Three Bars."
If operating the air conditioner or heater for a long time, operate
the air inlet selector button, and when smoking, vent the air to
the outside to prevent irritation to eyes.
Operating Controls
OP000528
2-58
STEREO
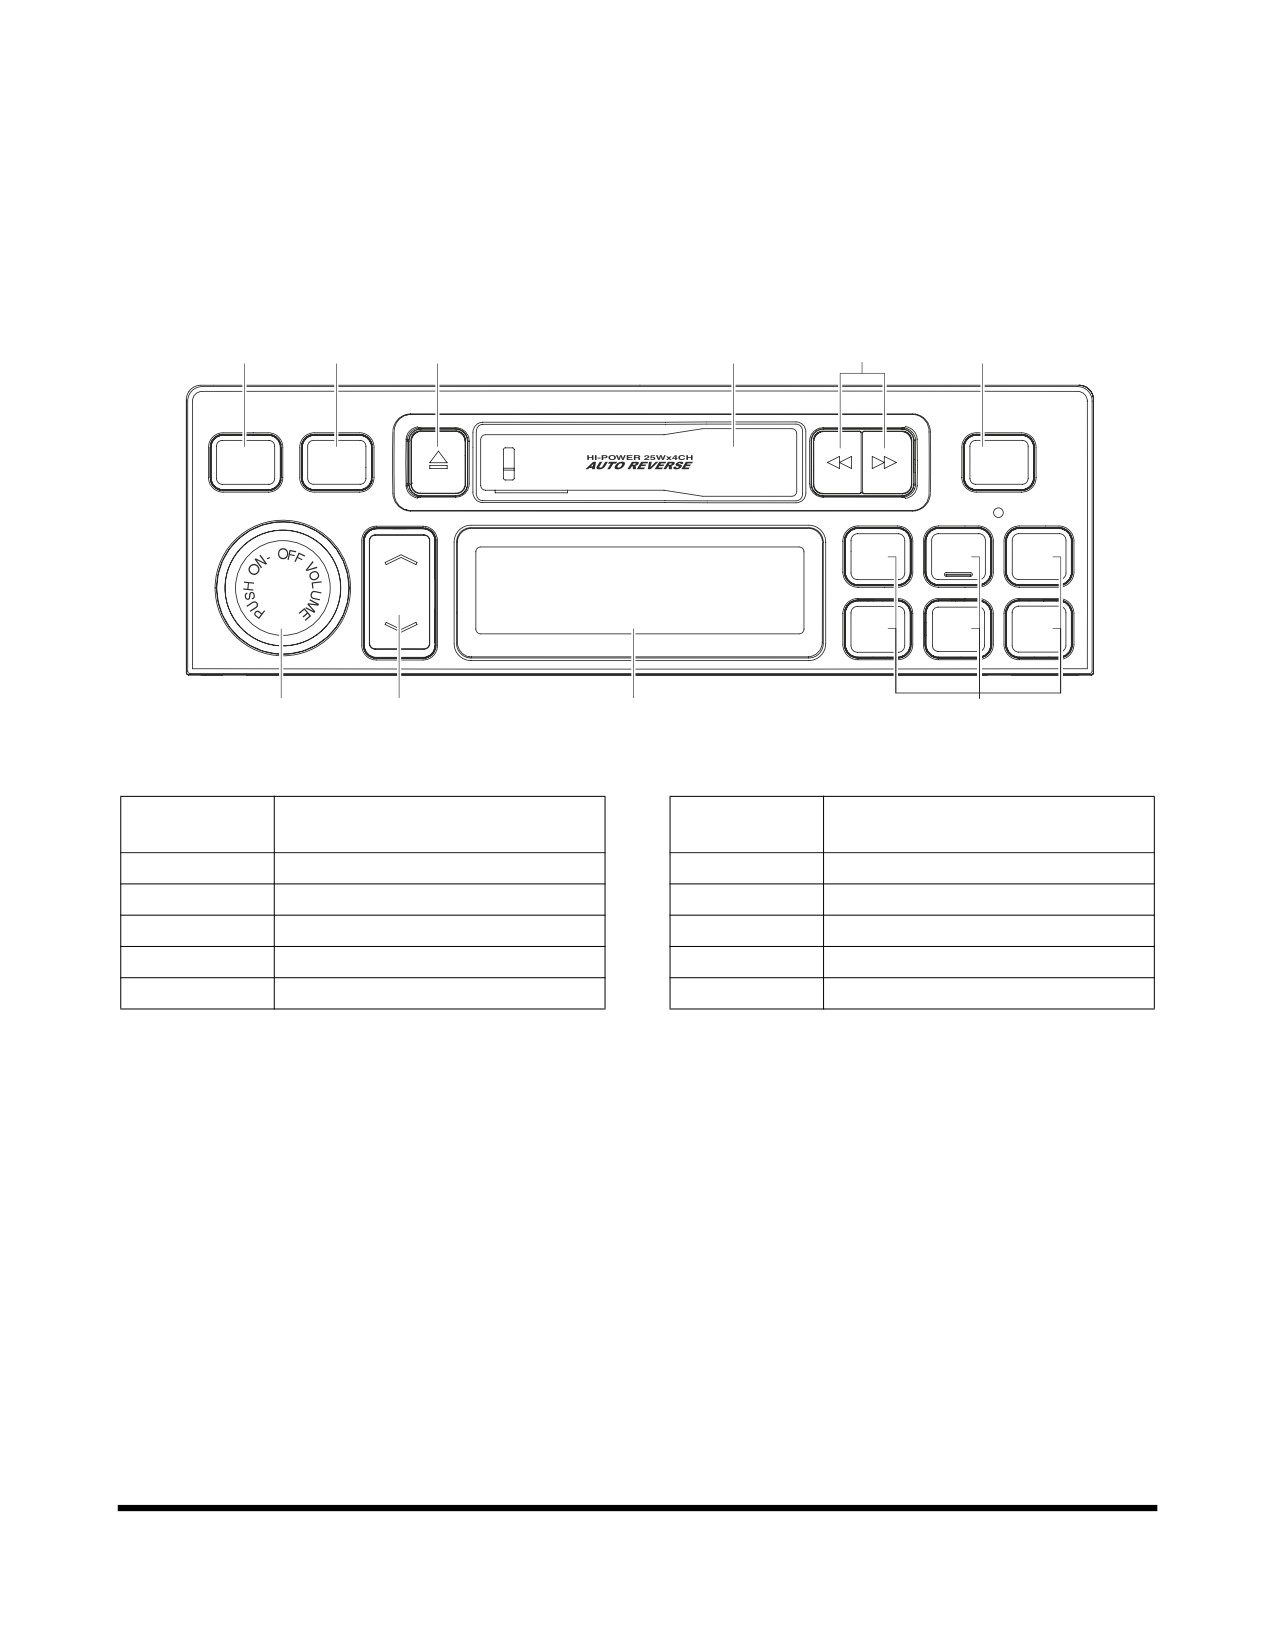
Before operating the stereo or CD player, read operation manual
enclosed with stereo.
Stereo
2
3
7
9
8
5
PROGRAM
AST
SOUND
AM/FM
SCAN
1
2
3
TUNE
4
5
6
1
4
10
6
FG000108
Figure 134
Reference
Reference
Description
Description
Number
Number
1
Power / Volume Control
6
Preset Station
2
Sound Mode Selector
7
Tape Ejection
3
Band Selection
8
Fast Forward / Rewind
4
Tuning Up / Down
9
Tape Loading Slot
5
Scan Function / Auto Store
10
LCD
Operating Controls
OP000528
2-59
CD Player (Optional)
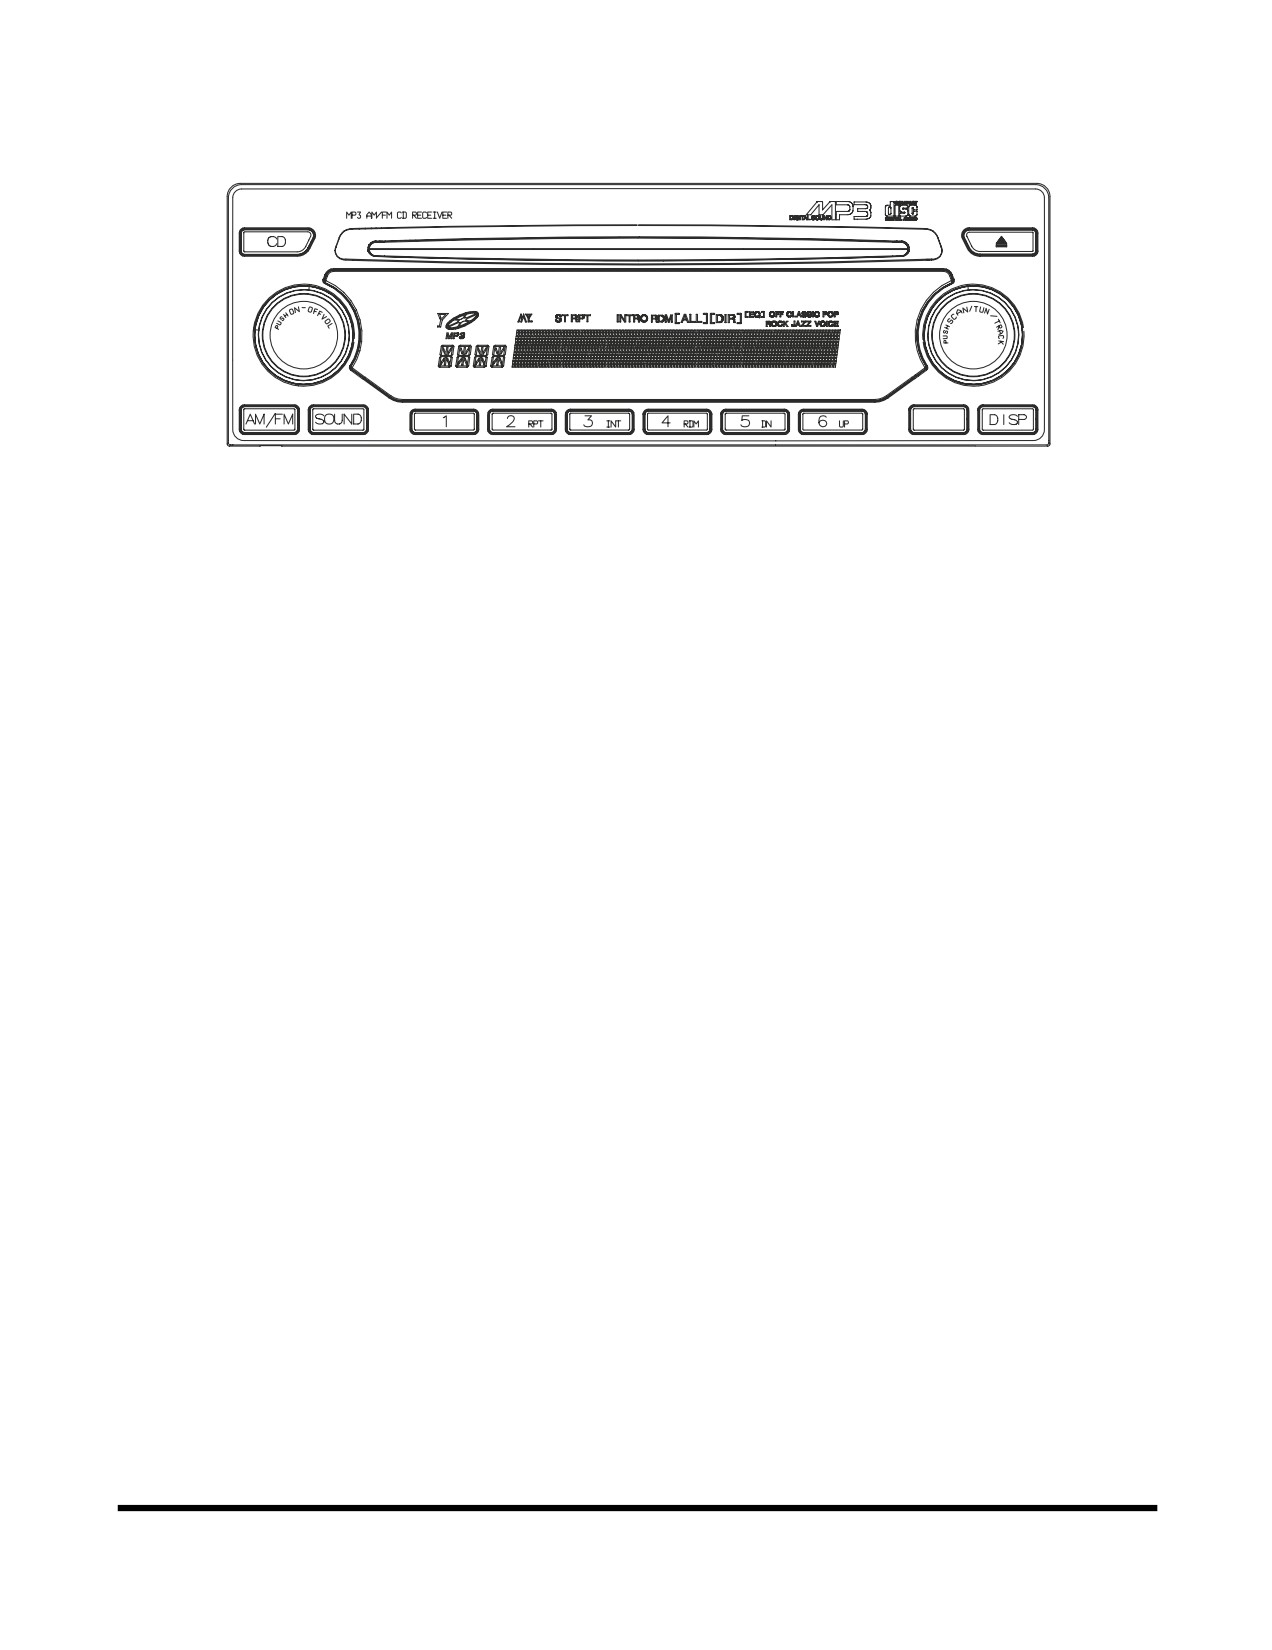
AST/DIR
FG000109
Figure 135
Operating Controls
OP000528
2-60
MISCELLANEOUS ELECTRICAL
DEVICES
Cabin Light
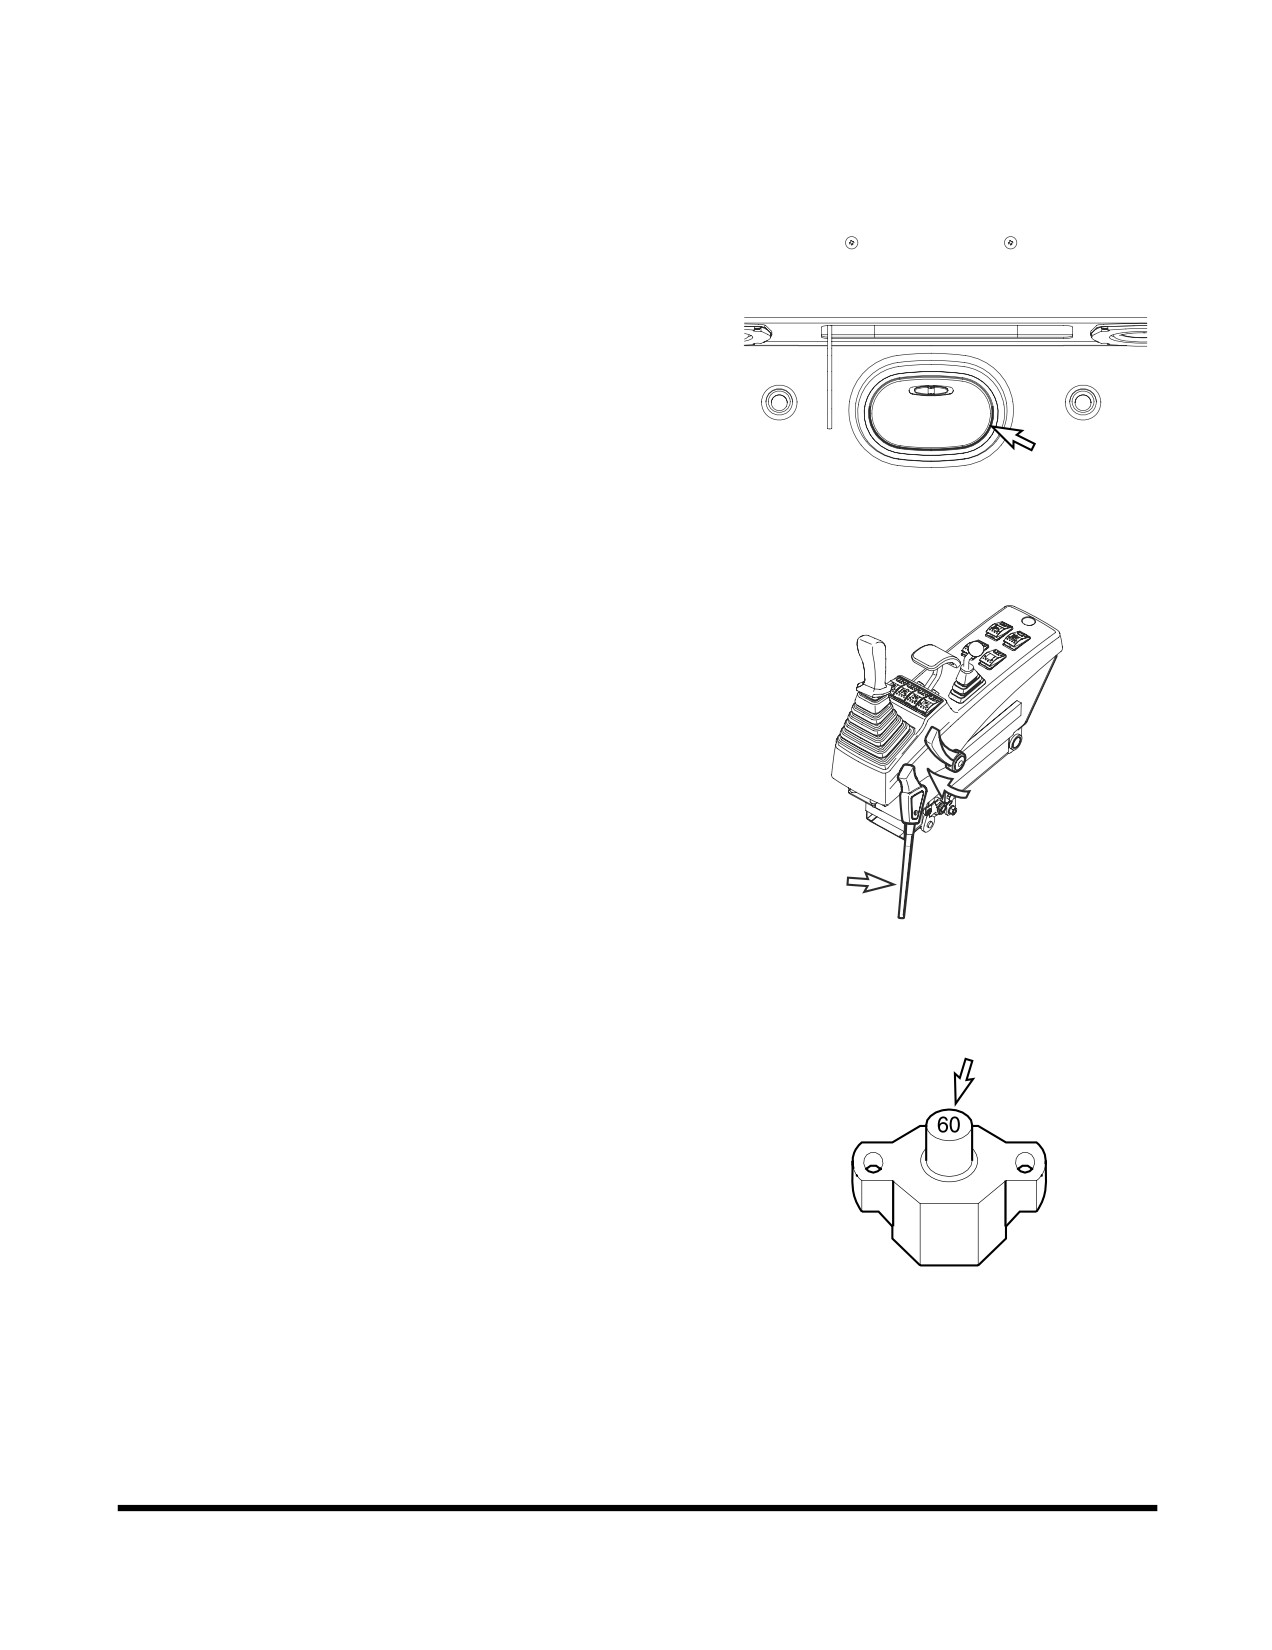
A light is installed on the top of the operator's compartment.
The light will work despite starter switch position.
NOTE: If light is left "ON" for a long time while the engine is
not running, the battery will be discharged.
FG000417
Figure 136
Pilot Cutoff Switch
When the safety lever is put into the "LOCK" position, the switch
deactivates the work levers. With the work levers deactivated,
no digging/operational work can be done.
FG006173
Figure 137
Circuit Breaker
A main circuit breaker is in the battery box. It will automatically
cut off in case of an electrical short circuit or overload. This will
prevent the electric wiring and components from being burned or
damaged.
If the circuit breaker is cut off, check all related circuits, this
means something is wrong in the electric circuit.
After maintenance, press the red button for normal operation of
circuit breaker.
HAAE2110
Figure 138
Operating Controls
OP000528
2-61
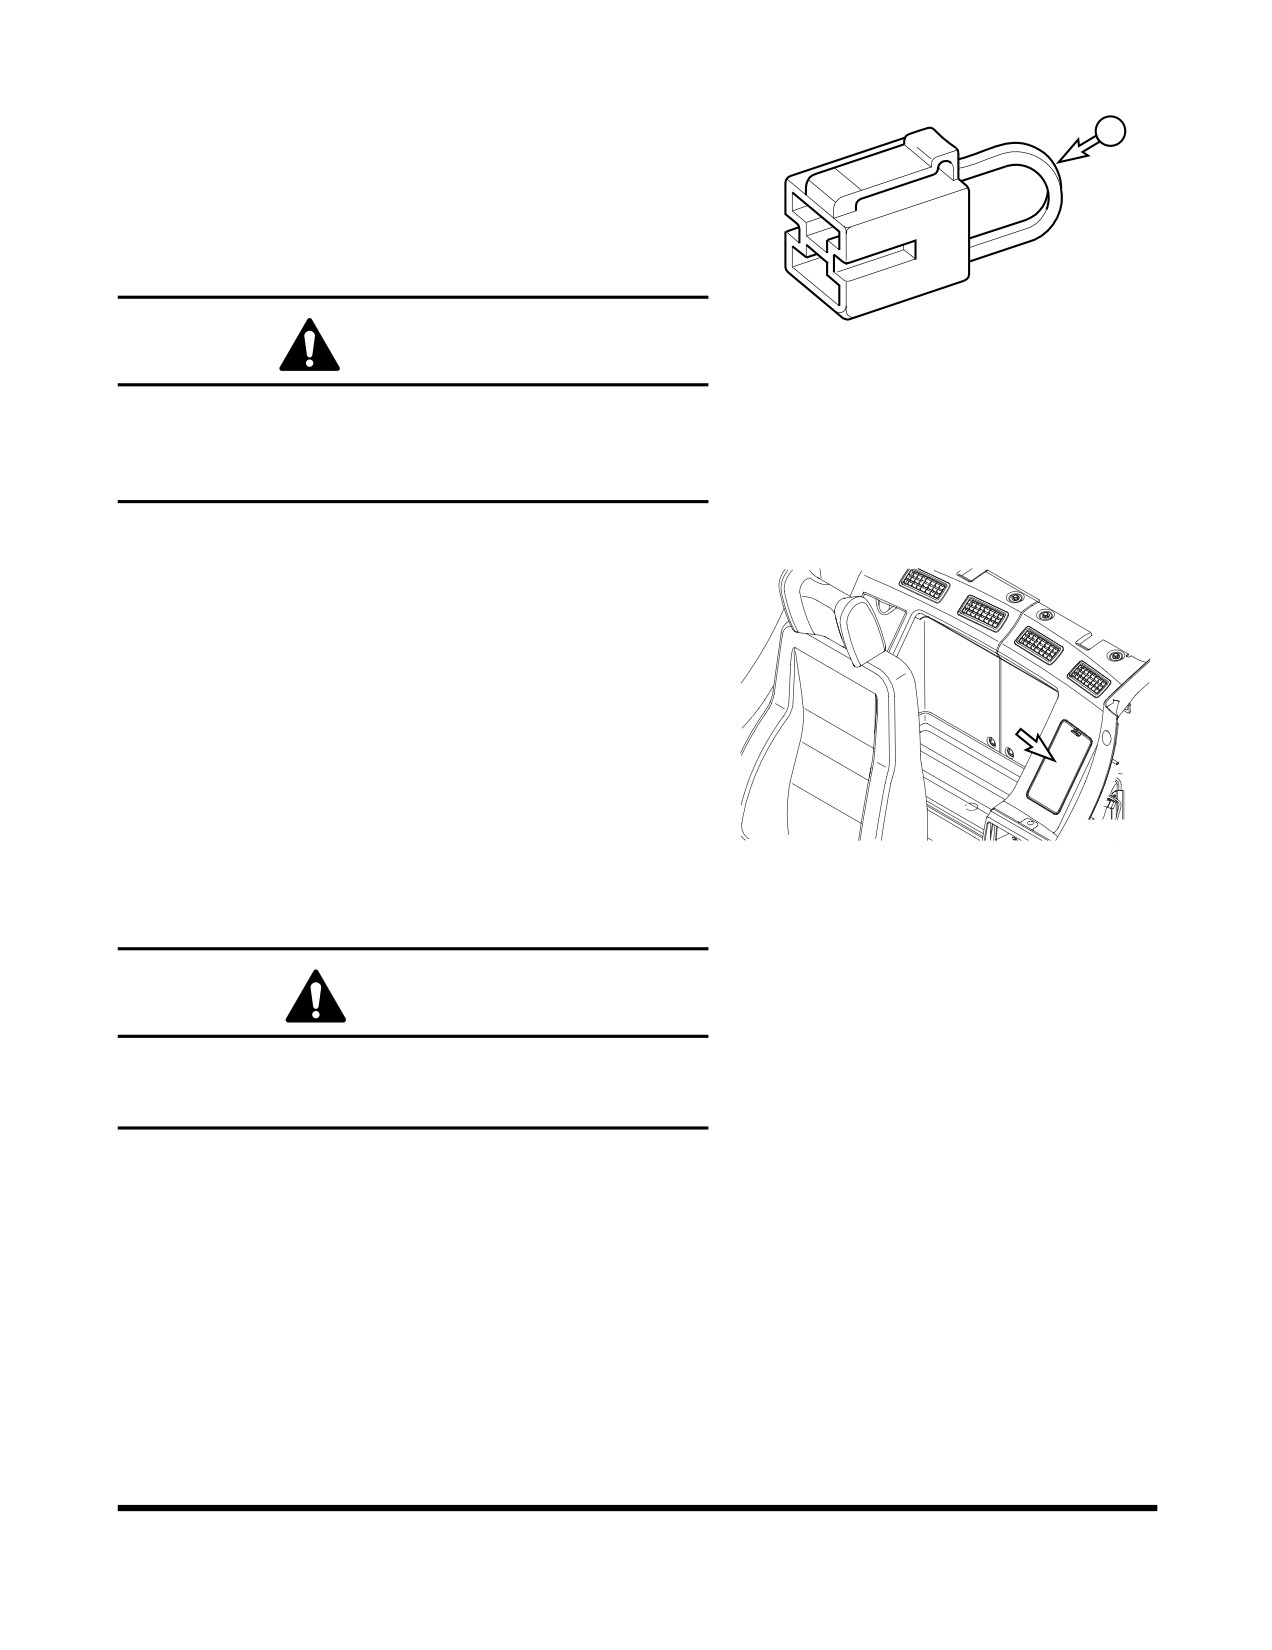
Fusible Link
A fusible link is in the battery box.
A
If the engine does not crank, first check that the starter switch is
turned "ON" and that no power is available (No indicator lights
will light.). Check that the "A" portion (Figure 139) of the fusible
link is not broken or burned through. Replace the fusible link if
damage and investigate cause.
HAAE2120
WARNING!
Figure 139
When changing the fusible link, replace the fusible link with
the same capacity part. Otherwise, a fire could break out in
the wiring harness and/or other components of the circuit.
Always use original DOOSAN parts.
Fuse Boxes
There are two fuse boxes (Figure 140) on the left side of the
heater box. The fuses prevent electrical devices from
overloading or shorting.
A decal attached to the inside of the fuse box access cover
indicates the function and amperage of each fuse.
NOTE: For a further explanation see
“Fuse Boxes” on
page 4-77.
Spare fuses are mounted on the inside of fuse box access
FG000110
cover.
Figure 140
Change a fuse if the element separates. If the element of a new
fuse separates, check the circuit and repair the circuit.
CAUTION!
Always replace fuses with the same type and capacity fuse
that was removed. Otherwise, electrical damage could
result.
Operating Controls
OP000528
2-62
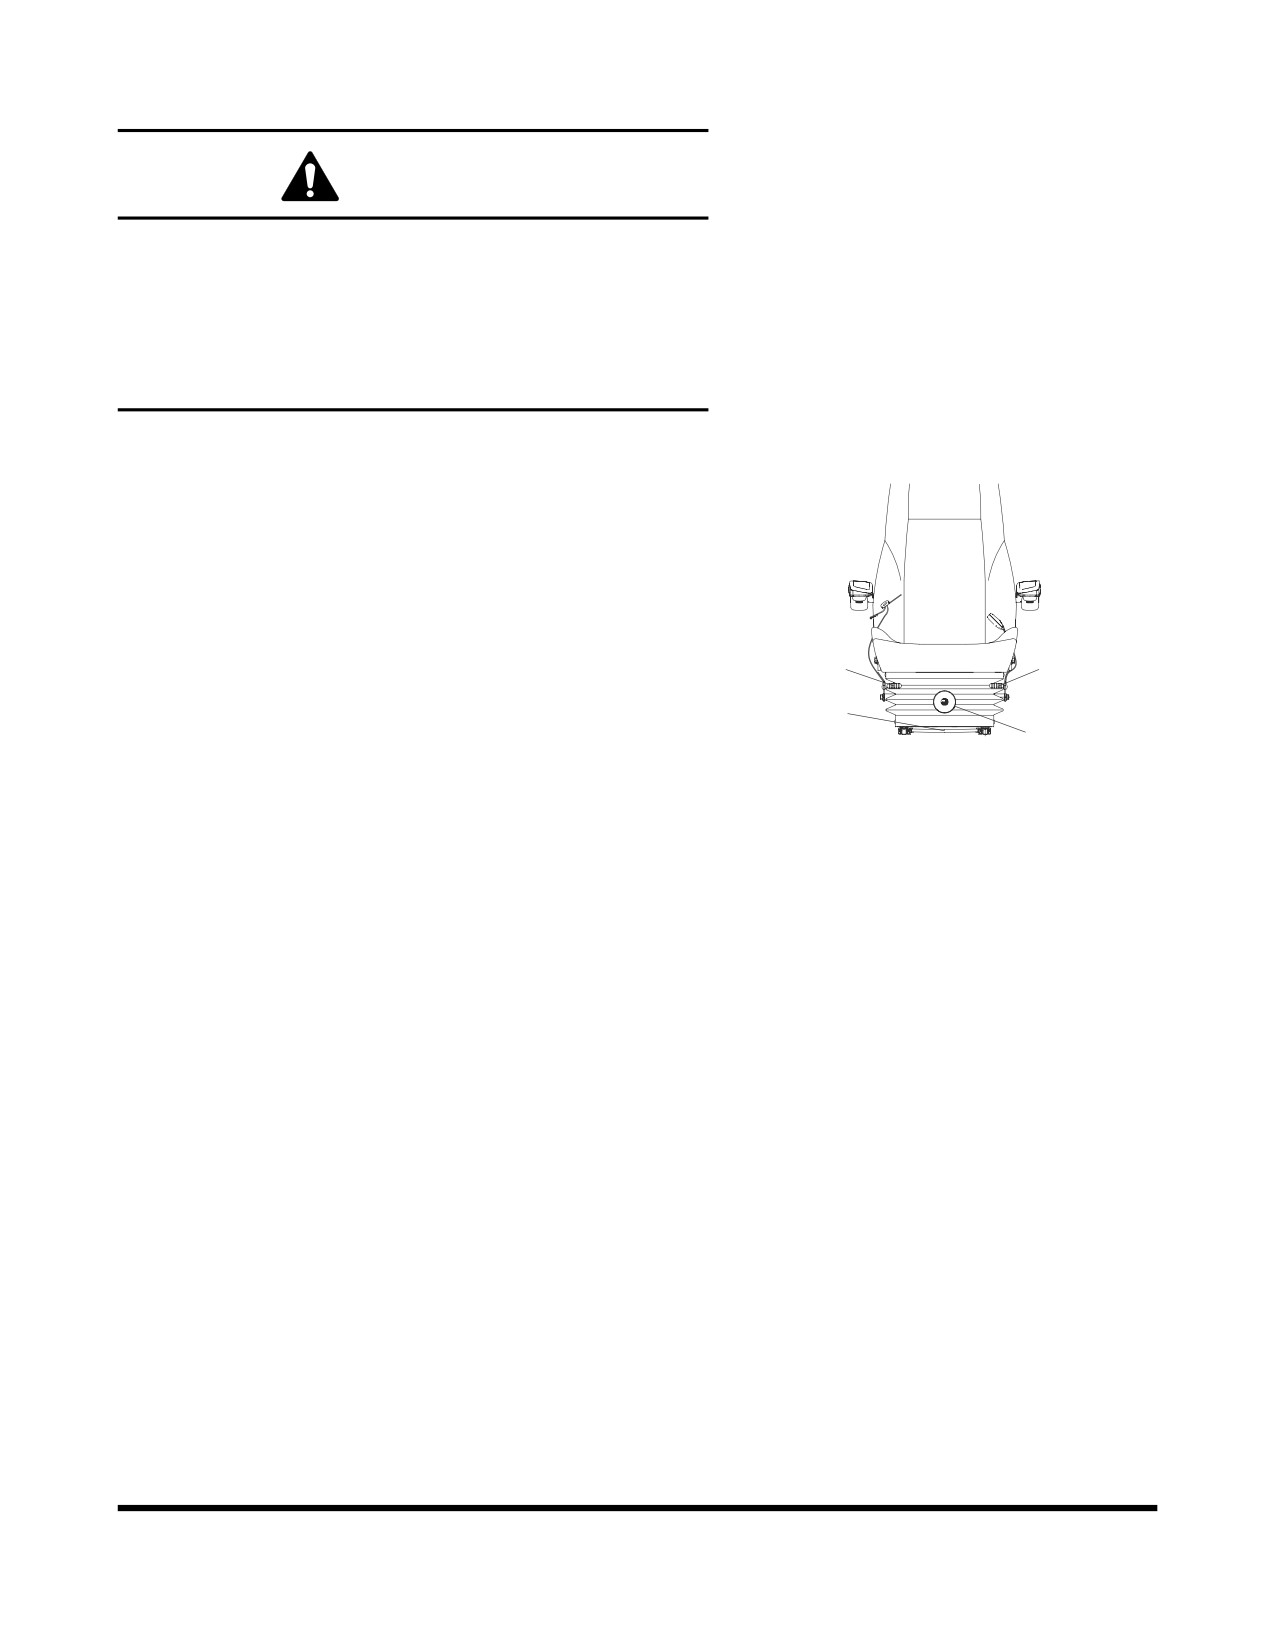
SEAT ADJUSTMENT
WARNING!
Adjust the seat position before starting operations or after
changing the operator.
Always fasten your seat belt while operating machine.
Adjust the seat so that the control levers and pedals can be
operated freely and easily with the operator back against
the backrest.
1. Forward / Backward Adjustment
Holding lever (1, Figure 141), raise it up, move the seat to
the desired position. Release lever to lock the seat in the
selected position. Adjustment range is 200 mm (7.9 in).
2. Seat Tilt and Height Adjustment
4
2
1
Forward Tilt
3
FG000183
Push lever (2, Figure 141) down to adjust the angle of the
Figure 141
front of the seat. There are four positions that it can be set
at.
Rear Tilt
Pull lever (2, Figure 141) up to adjust the angle of the rear
of the seat. There are four positions that it can be set at.
Seat Height
It is possible to move the seat up or down by combining
adjustments forward and rear tilt. Adjust the seat according
to operator's size and work conditions. Height adjustment
is 60 mm (2.4 in).
3. Suspension Adjustment
Turning knob
(3, Figure
141) to right makes the
suspension harder. Turning knob to left makes the
suspension softer. Adjust according to operator's weight by
checking the weight indicator dial. Adjustment range is
from 50 - 120 kg (110 - 265 lb).
Operating Controls
OP000528
2-63
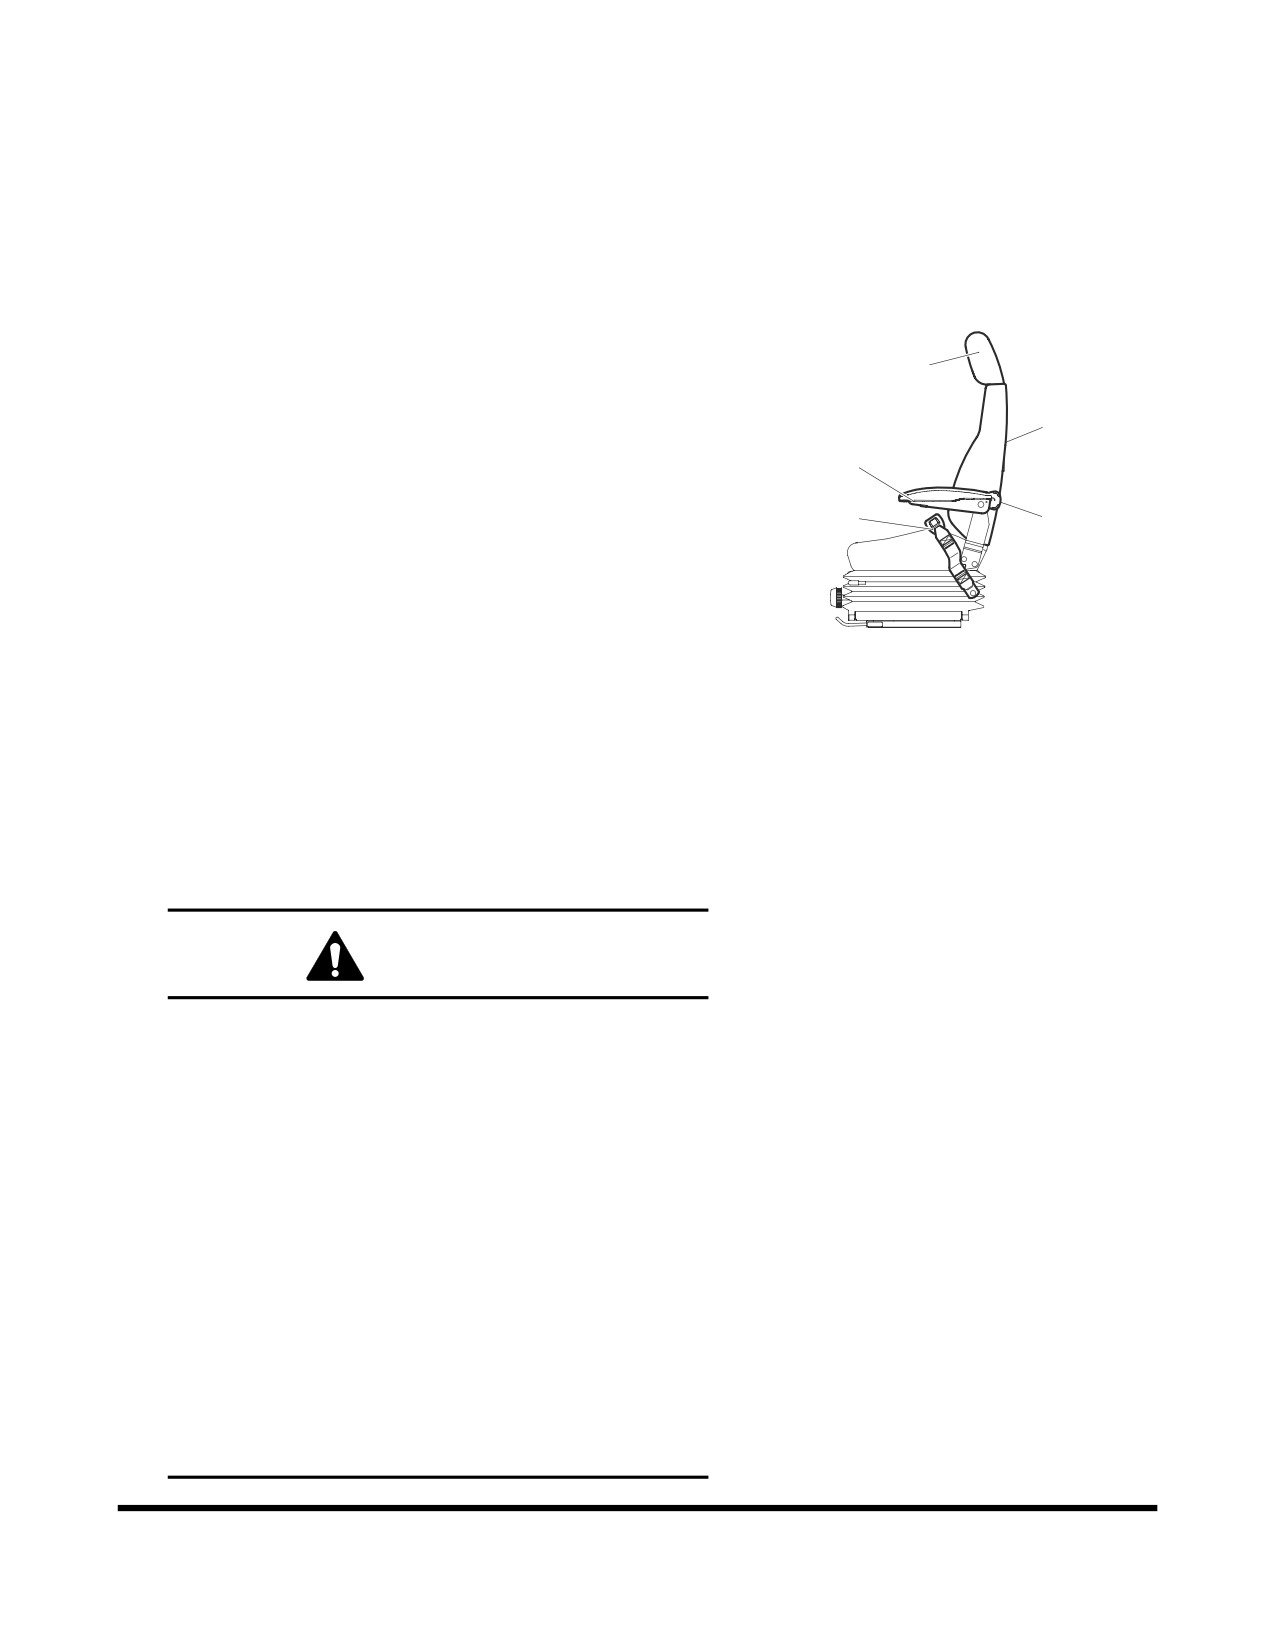
4. Reclining Position Adjustment
Pulling up the right lever (4,Figure 141) allows the seat
backrest to be moved forward or backward.
Sit with your back against the seat back when adjusting it.
If your back is not touching the seat back, the seat back
may suddenly move forward.
5. Armrest Angle Adjustment
The angle of each armrest can be adjusted by turning a
7
dial (5, Figure 142) on bottom of armrest. When adjusting
the angle, manually raise the armrest before turning the
9
dial.
5
8
6
6. Lumbar Support Adjustment
A lumbar support is located in the seat back.
Turn the dial (6, Figure 142) counterclockwise to increase
FG000778
the force of the lumbar support
Figure 142
7. Headrest
The headrest (7, Figure 142) can be adjusted forward/
backward and up/down. Move it by holding both sides.
8. Seat Belt
WARNING!
The seat belt is for the operator's safety and should
always be worn. Before driving the machine, adjust the
seat to the desired position for maximum comfort and
machine control, then fasten the seat belt. Seat belts
must be worn across the pelvic region and adjusted
snugly to lessen the chance and severity of injury in
case of an accident. Never fasten a seat belt across the
abdomen.
Under no circumstances should the operator be
standing in the cabin when operating the excavator.
Do not adjust the seat position while the vehicle is
moving because a loss of control may result. Stop the
machine, apply the parking brake, and then adjust the
seat.
Always, check the condition of seat belt and belt
bracket before fastening it. Do not use it with twists in
it. Replace belt or bracket if damaged or worn.
Operating Controls
OP000528
2-64
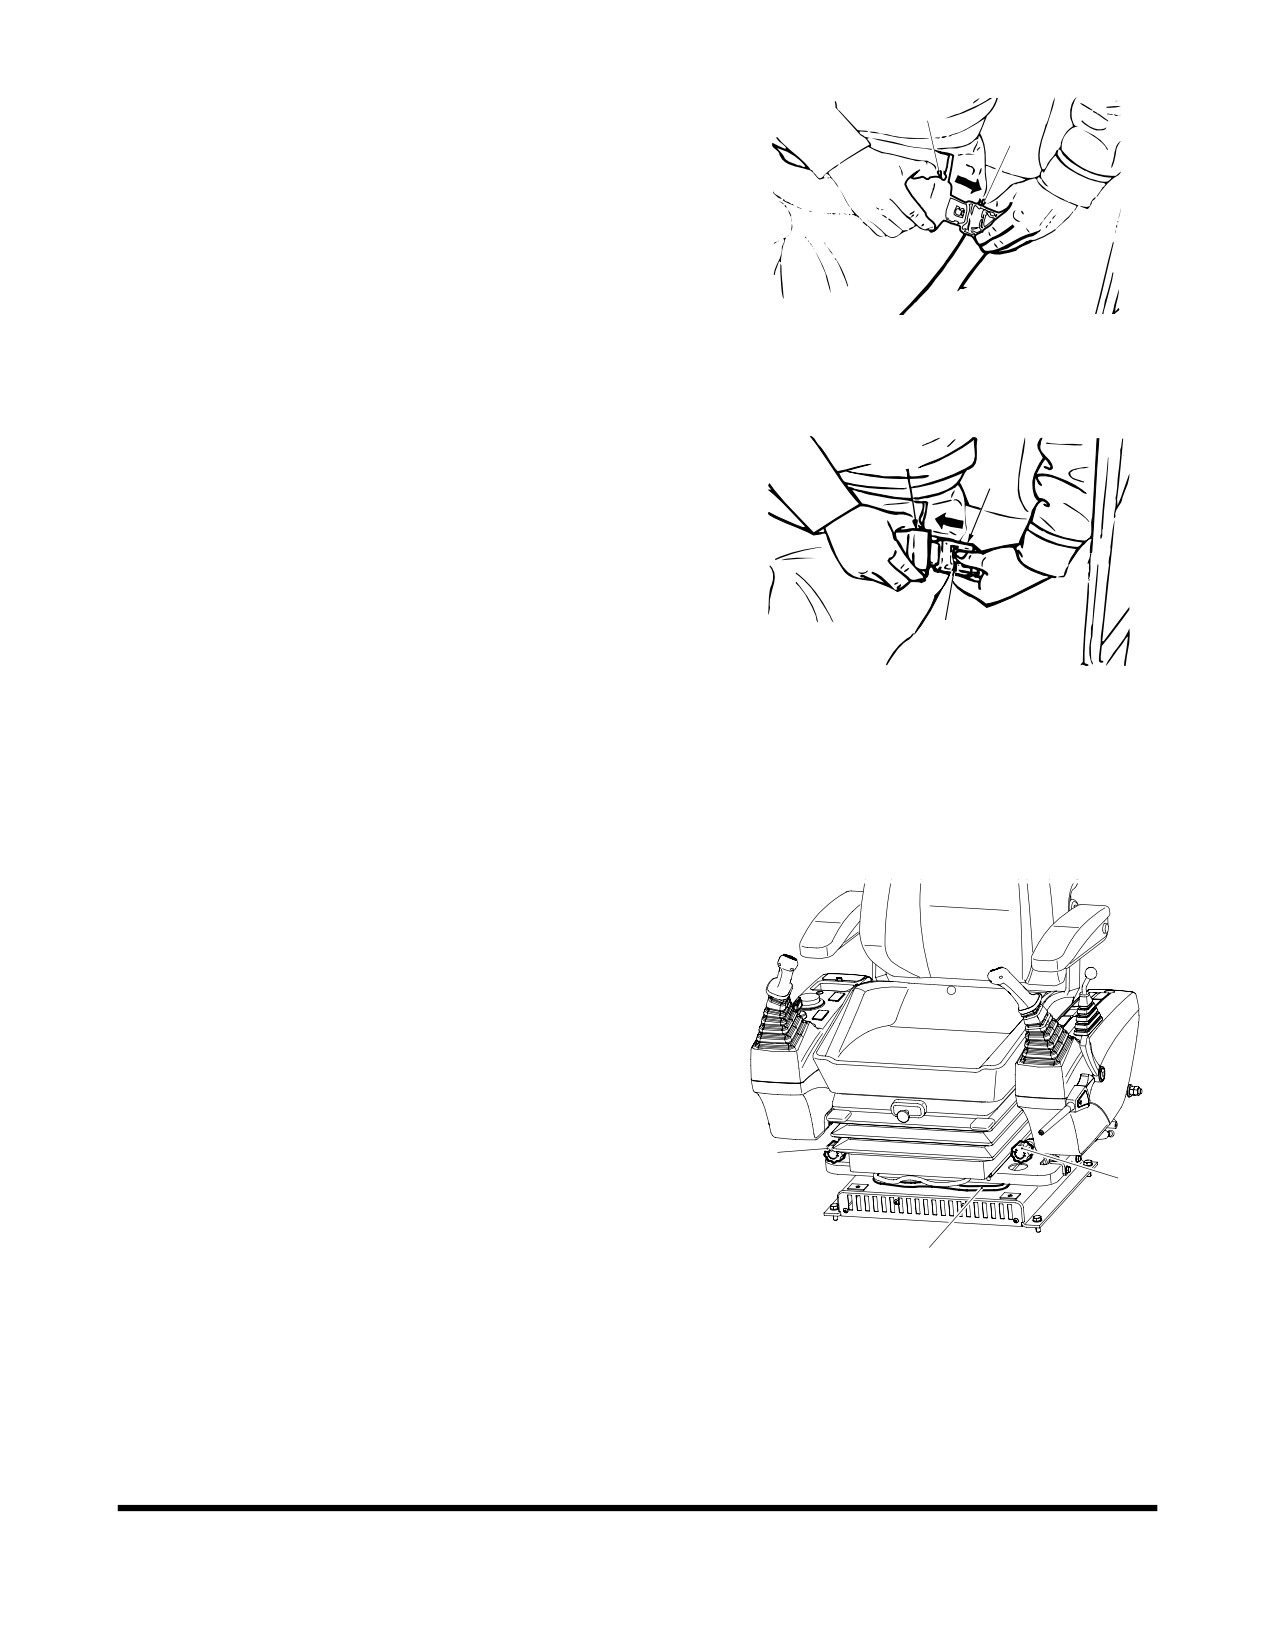
Seat Belt Locking and Unlocking
1
Insert belt end (1, Figure 143) into the buckle (2). Pull the
2
belt to check that belt end is locked into buckle.
Adjust belt length so that it comfortably tight against the
operator's pelvic region (hipbone).
HAOB140L
Figure 143
Press the button (3, Figure 144) in the center of buckle (2)
and pull out belt (1) to unlock.
1
2
3
HAOB150L
Figure 144
9.
Seat Back-pocket
The seat has a seat back pocket. It is used for storing the
operation and maintenance manual.
10. Left and Right Control Stand
Adjustment
For operator's convenience, the right and left control
stands and seat can slide together, within a
160 mm
(6.3 in) forward or backward travel distance.
Holding lever (10, Figure 145), raise it up, set the seat to
desired position. Release lever to lock the seat in the
selected position.
11
11
11. Left and Right Control Stand Height
Adjustment
10
The left and right dials (11, Figure 145) at the lower part of
FG002242
the seat can be turned to adjust the elevation height of
Figure 145
each control stand.
It can be used to adjust the height of the control joystick.
Operating Controls
OP000528
2-65
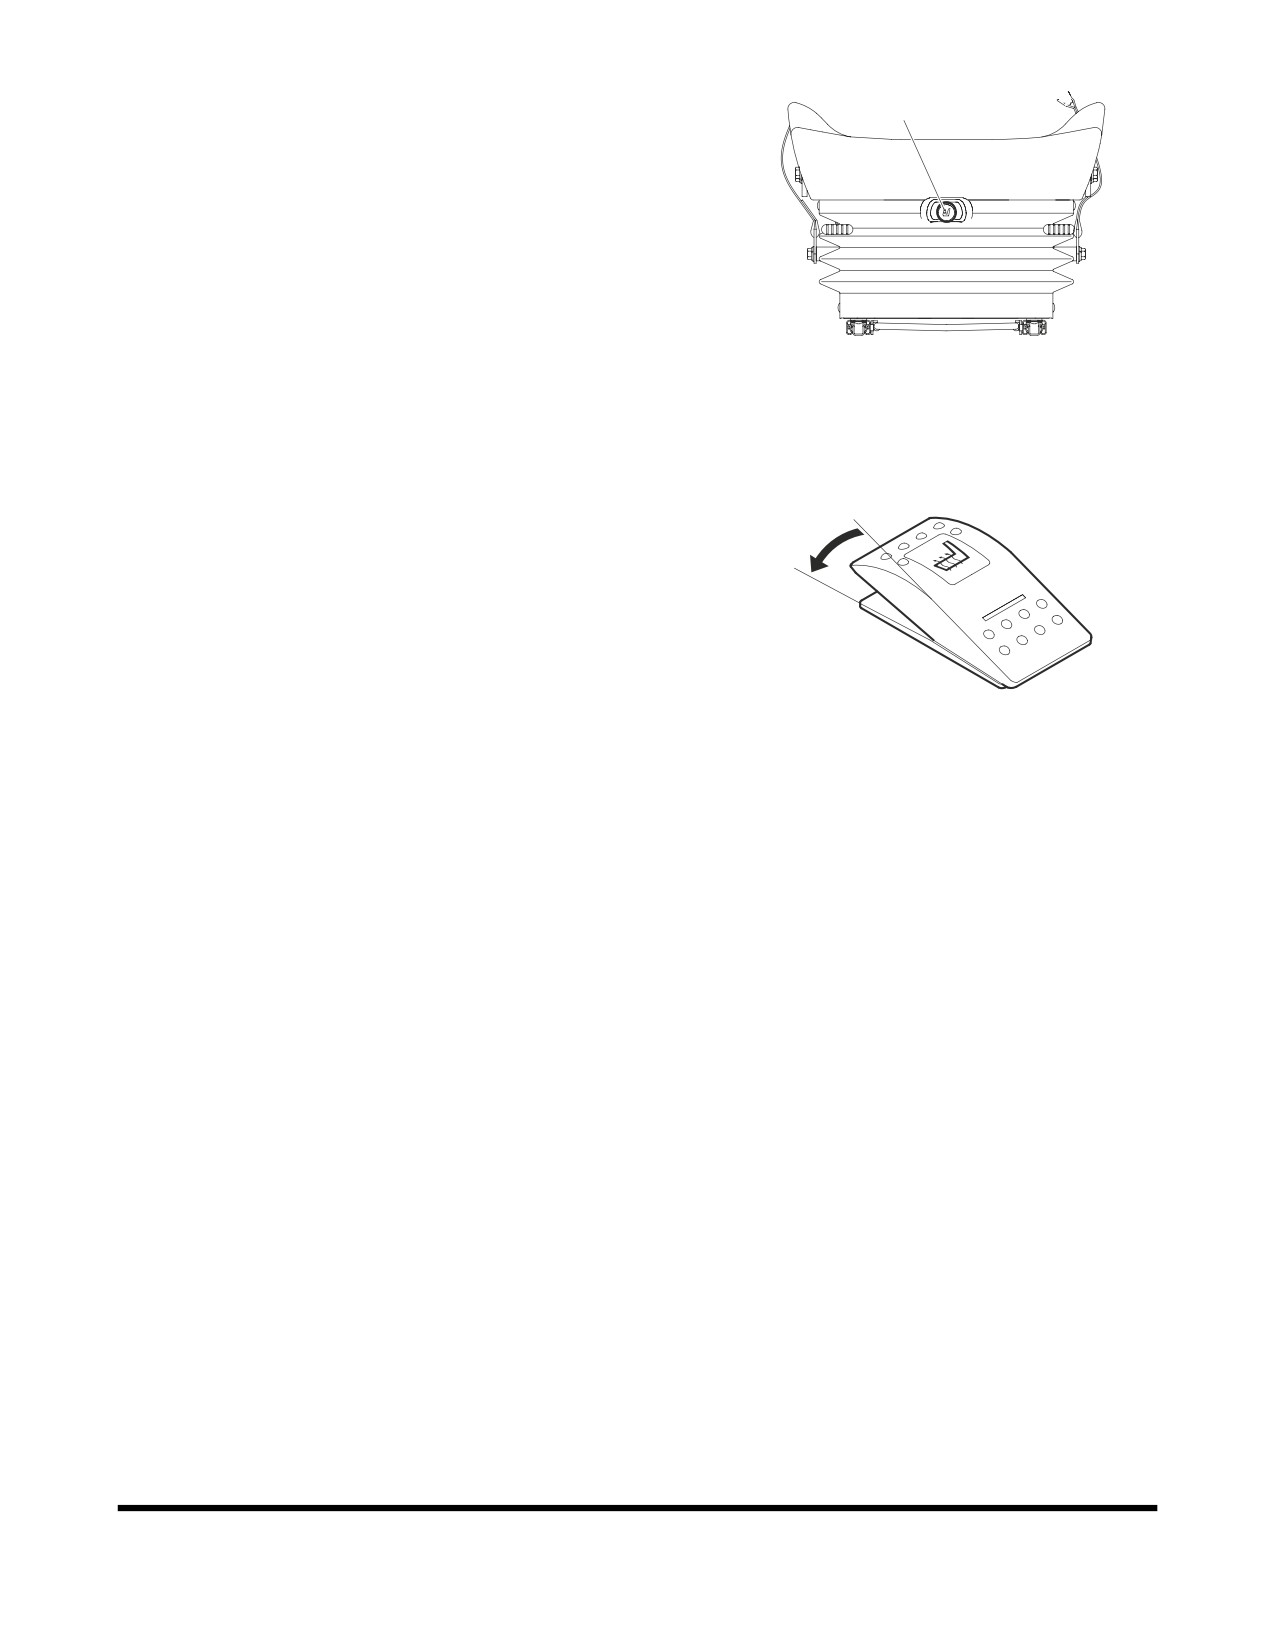
12. Air Suspension Seat (Optional)
12
The operator seat is also available with air suspension for
even better comfort. The switch (12, Figure 146) in the
middle of the seat can be used to adjust the air cushion. If
the switch is pressed, the seat become harder, and pulling
it out makes the seat softer, when the air is bleed out.
FG000187
Figure 146
13. Heating the Operator's Seat (Optional)
The air suspension seat can be heated. The switch on the
O
left control stand is used to warm the seat. When heating is
not needed or seat is warmed, turn the switch to "OFF"
I
position.
FG000034
Figure 147
Operating Controls
OP000528
2-66
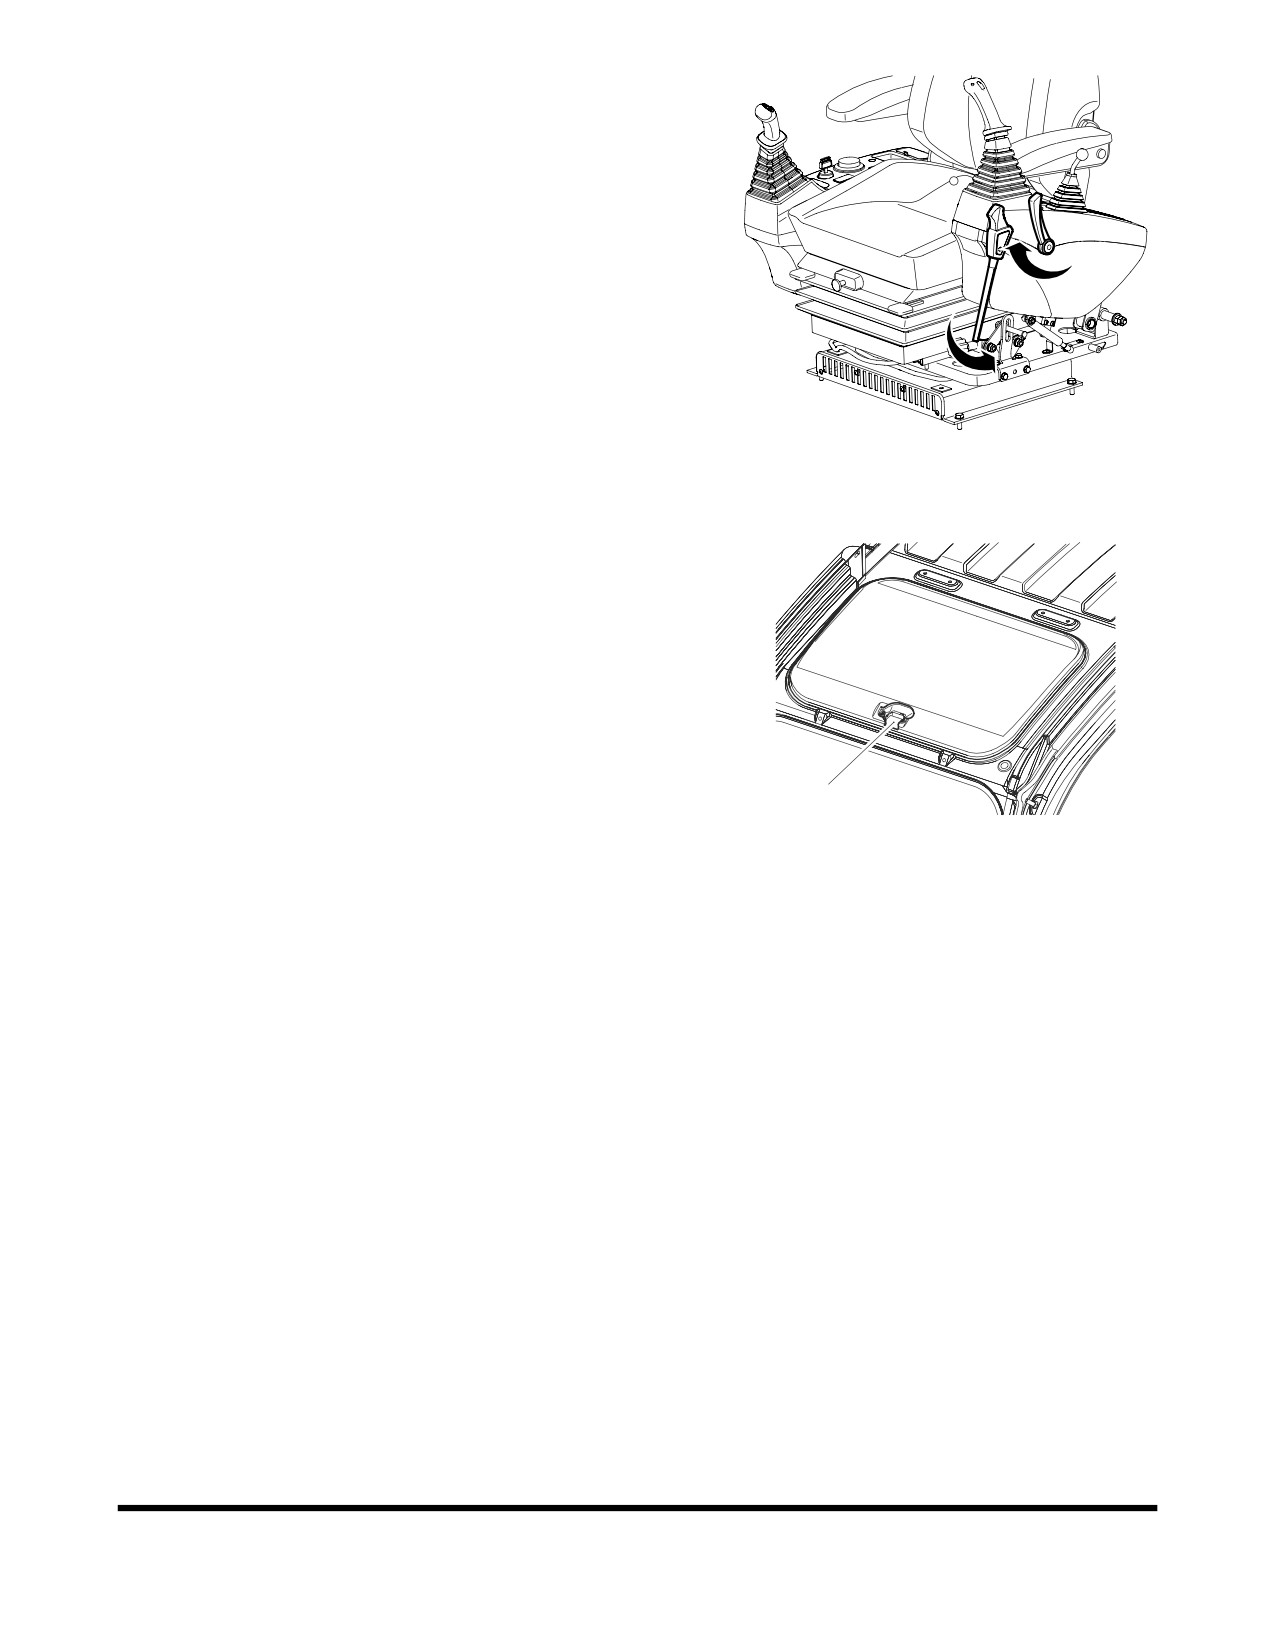
CEILING COVER
NOTE: If the machine is equipped with the optional
transparent ceiling cover never use any chemical
cleaners on its surface. Only use warm water to wash
dust and dirt from its surfaces, and after that, dry it
with a soft fabric towel.
Opening the Ceiling Cover
1.
Lower bucket to ground.
2.
Set safety lever (Figure 148) on "LOCK."
FG002254
3.
Pull the lock (1, Figure 149) in front center of ceiling cover
Figure 148
and push it up with handle.
Closing the Ceiling Cover
1.
Lower bucket to ground.
2.
Set safety lever (Figure 148) on "LOCK."
3.
Pull down cover with the handle (Figure 149) so that the
lock (1) can be locked in the bracket in the ceiling frame.
1
FG000190
Figure 149
Operating Controls
OP000528
2-67
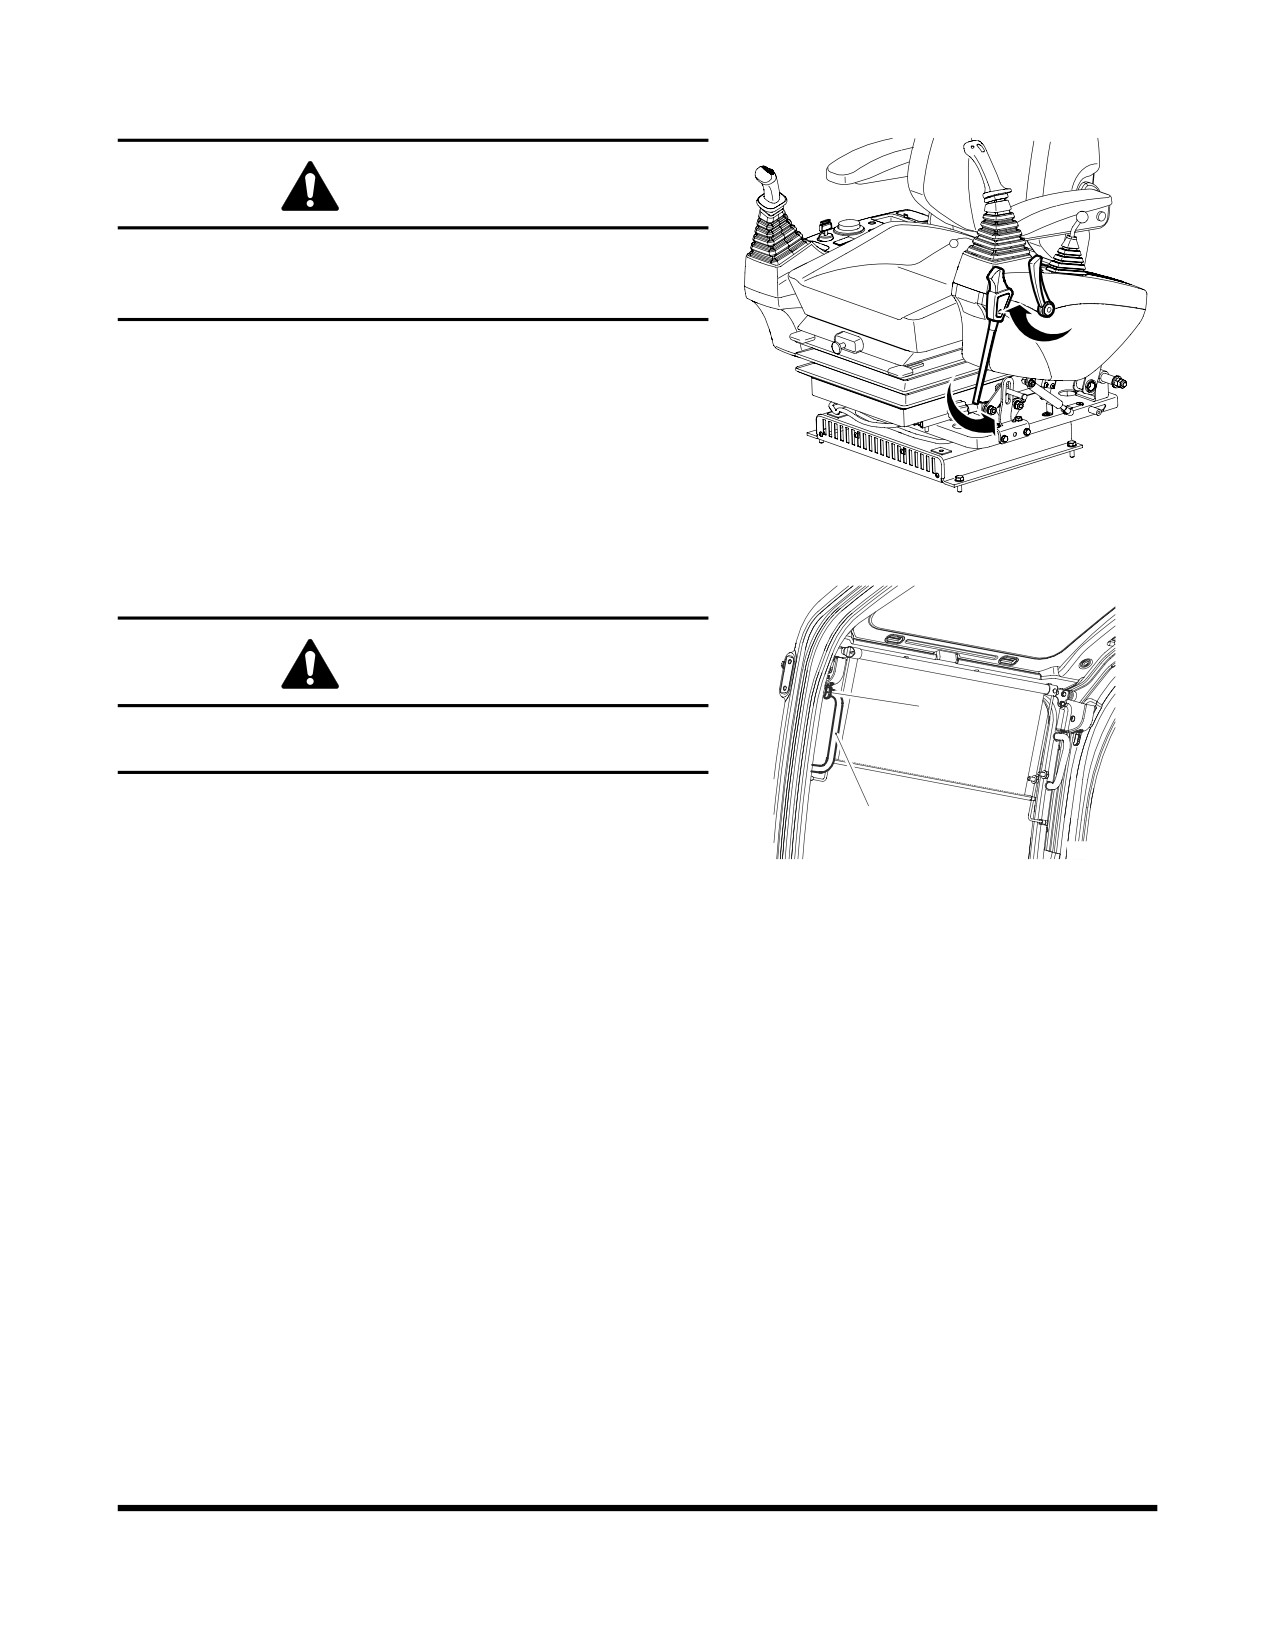
FRONT WINDOWS
WARNING!
When leaving operator's seat, set the safety lever to
"LOCK" position (Figure 150), if not a serious accident
could occur by accidentally moving the work levers.
Front Upper Window
The front upper window can be housed in the cabin's ceiling.
FG002254
Figure 150
Opening the Window
WARNING!
2
When stowing front window in the cabin roof, make sure
both release levers (1, Figure 151) are latched.
1.
Lower bucket to ground.
1
2.
Set safety lever (Figure 150) on "LOCK."
FG000192
3.
Set engine speed control dial to "LOW IDLE." Allow engine
Figure 151
to idle for three - five minutes.
4.
Shut down engine by turning key to "O" (OFF) position.
5.
Hold the window handles (1, Figure 151), then pull the lock
levers (2) to release the lock. The top of the front window
will come out.
6.
Pull window up, and push it against lock pin at the rear of
the cabin. Make sure that it is securely latched.
7.
Check that lock levers are securely latched in the lock
position.
NOTE: When the front upper window is open, never
extend your head or body through the window
frame.
NOTE: If the window happens to fall with a strong
impact against the machine, while some part of
your body is extended out of the cabin, it may
result in bodily injury.
Operating Controls
OP000528
2-68
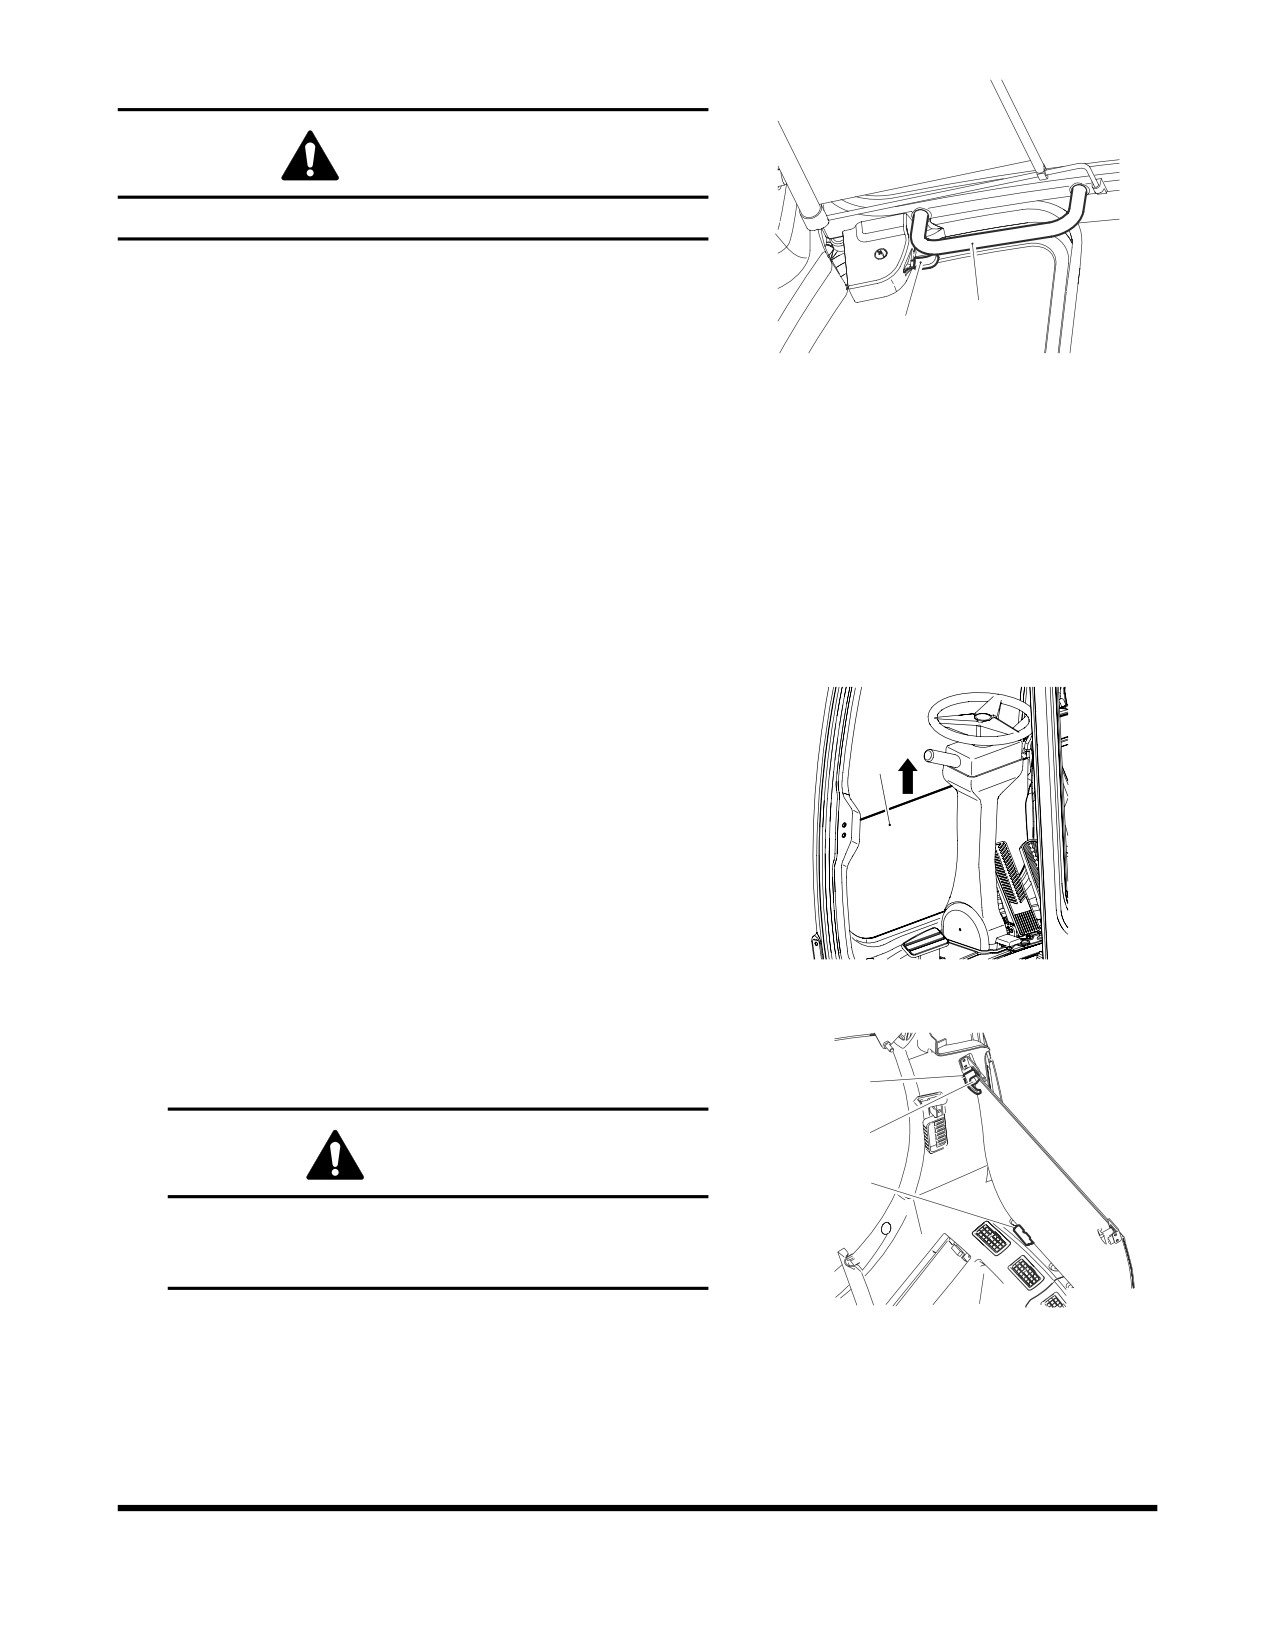
Closing the Window
WARNING!
Be careful that your hands are not caught in window frame.
1.
Lower bucket to ground.
2.
Set safety lever (Figure 150) on "LOCK," and shut down
1
2
engine.
FG000193
3.
Holding upper handles (1, Figure 152) of front window with
Figure 152
left and right-hand, pull lock levers
(2, Figure
152) to
release the lock.
4.
Push window forward, and lower it slowly.
5.
When the bottom of the window, reaches the top of the
front bottom window, push the front window to engage the
lock (2, Figure 151).
6.
Check that lock levers are securely latched in the lock
position.
Front Bottom Window
The front bottom window can be removed and stored in the rear
of the cabin.
1
1.
After stowing the front upper window in the cabin ceiling,
remove bottom window (1, Figure 153) from cabin in
direction of the arrow.
FG002255
Figure 153
2.
Set bottom window in rubber holders
(2, Figure
154)
behind operator's seat. Secure window with left and right
knobs (3) with push button (4).
3
4
WARNING!
2
Never have wet hands when handling a window. Never
drop window or let it come into contact with other
parts of the machine.
FG001345
Figure 154
Operating Controls
OP000528
2-69
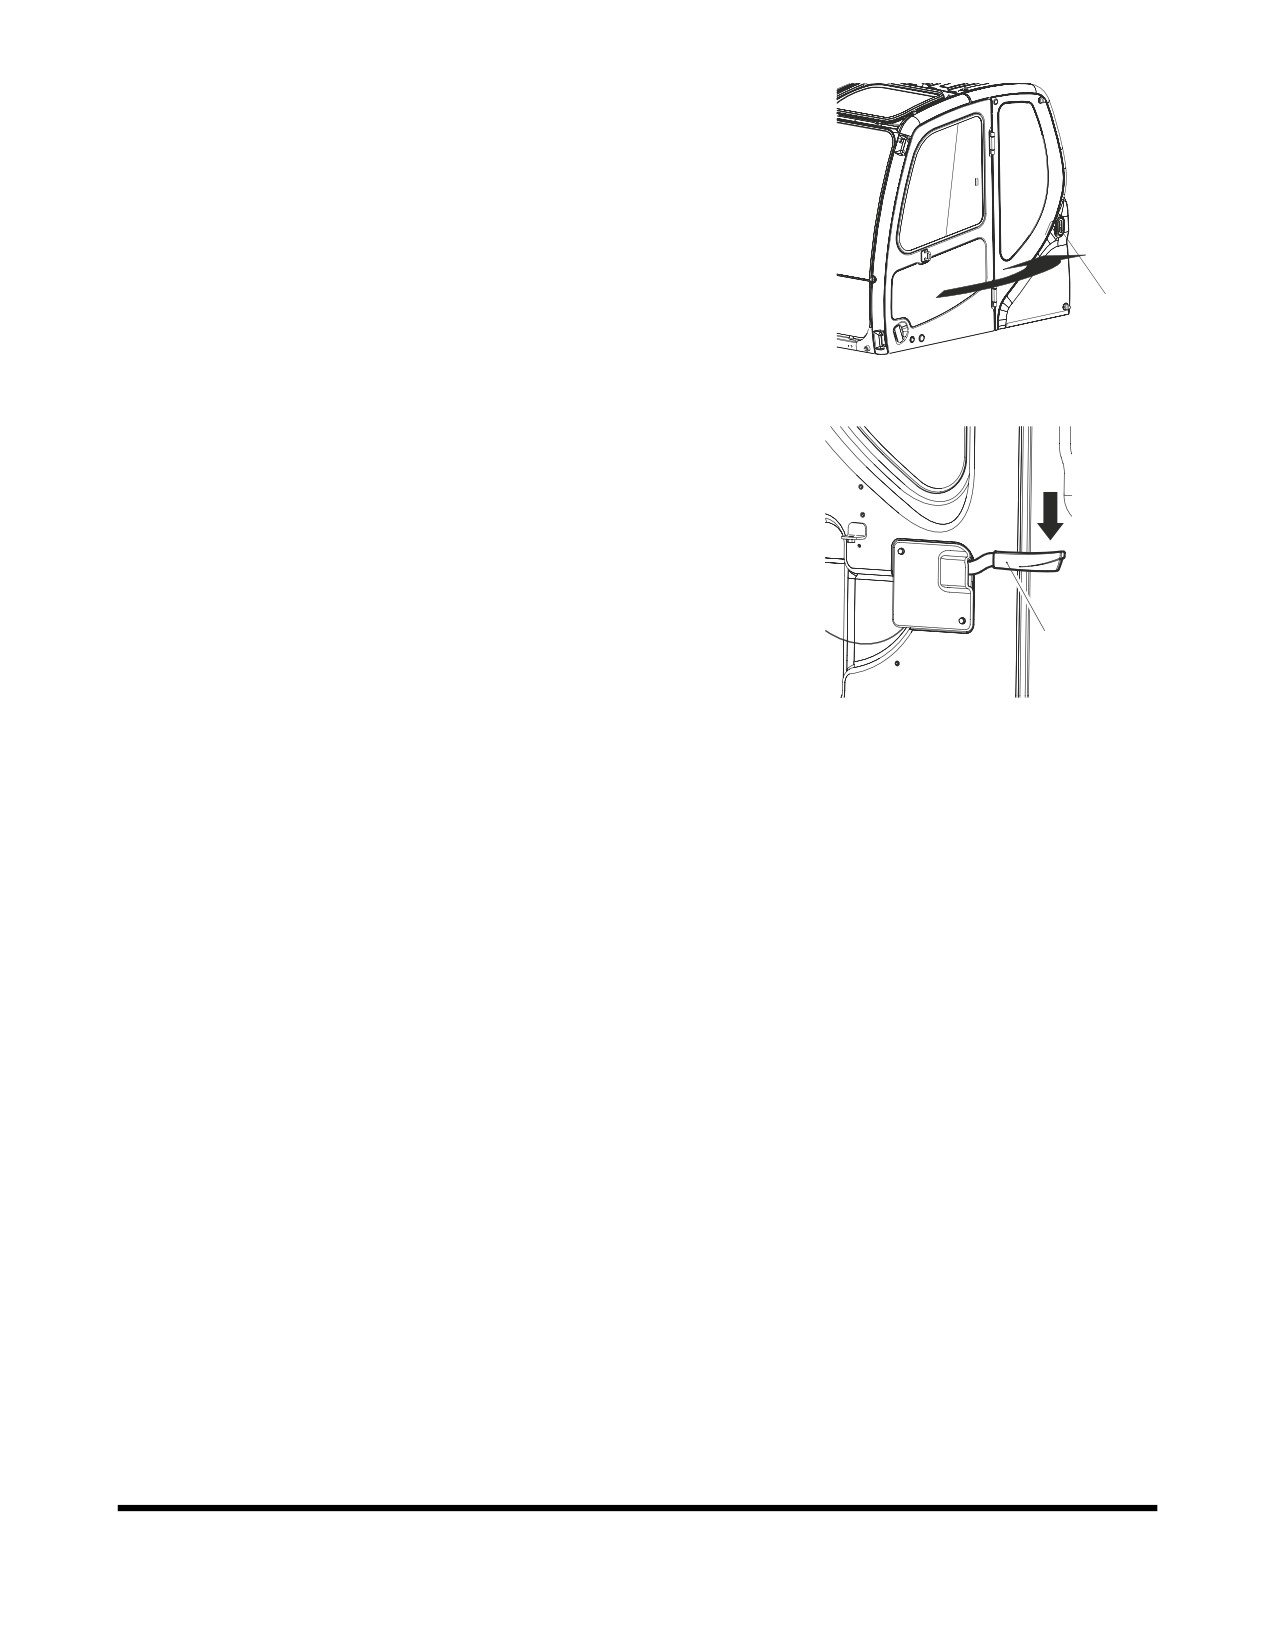
DOOR SIDE LATCH
1.
The door side latch (1, Figure 155) is used to secured the
door to the side of the cabin when it is opened.
NOTE: Keep the door closed and locked when machine
is not in use.
1
FG000196
Figure 155
2.
To release door from side of cabin, push the latch lever (2,
Figure 156) down. The latch lever is to the left of the
operator's seat.
2
FG000673
Figure 156
Operating Controls
OP000528
2-70
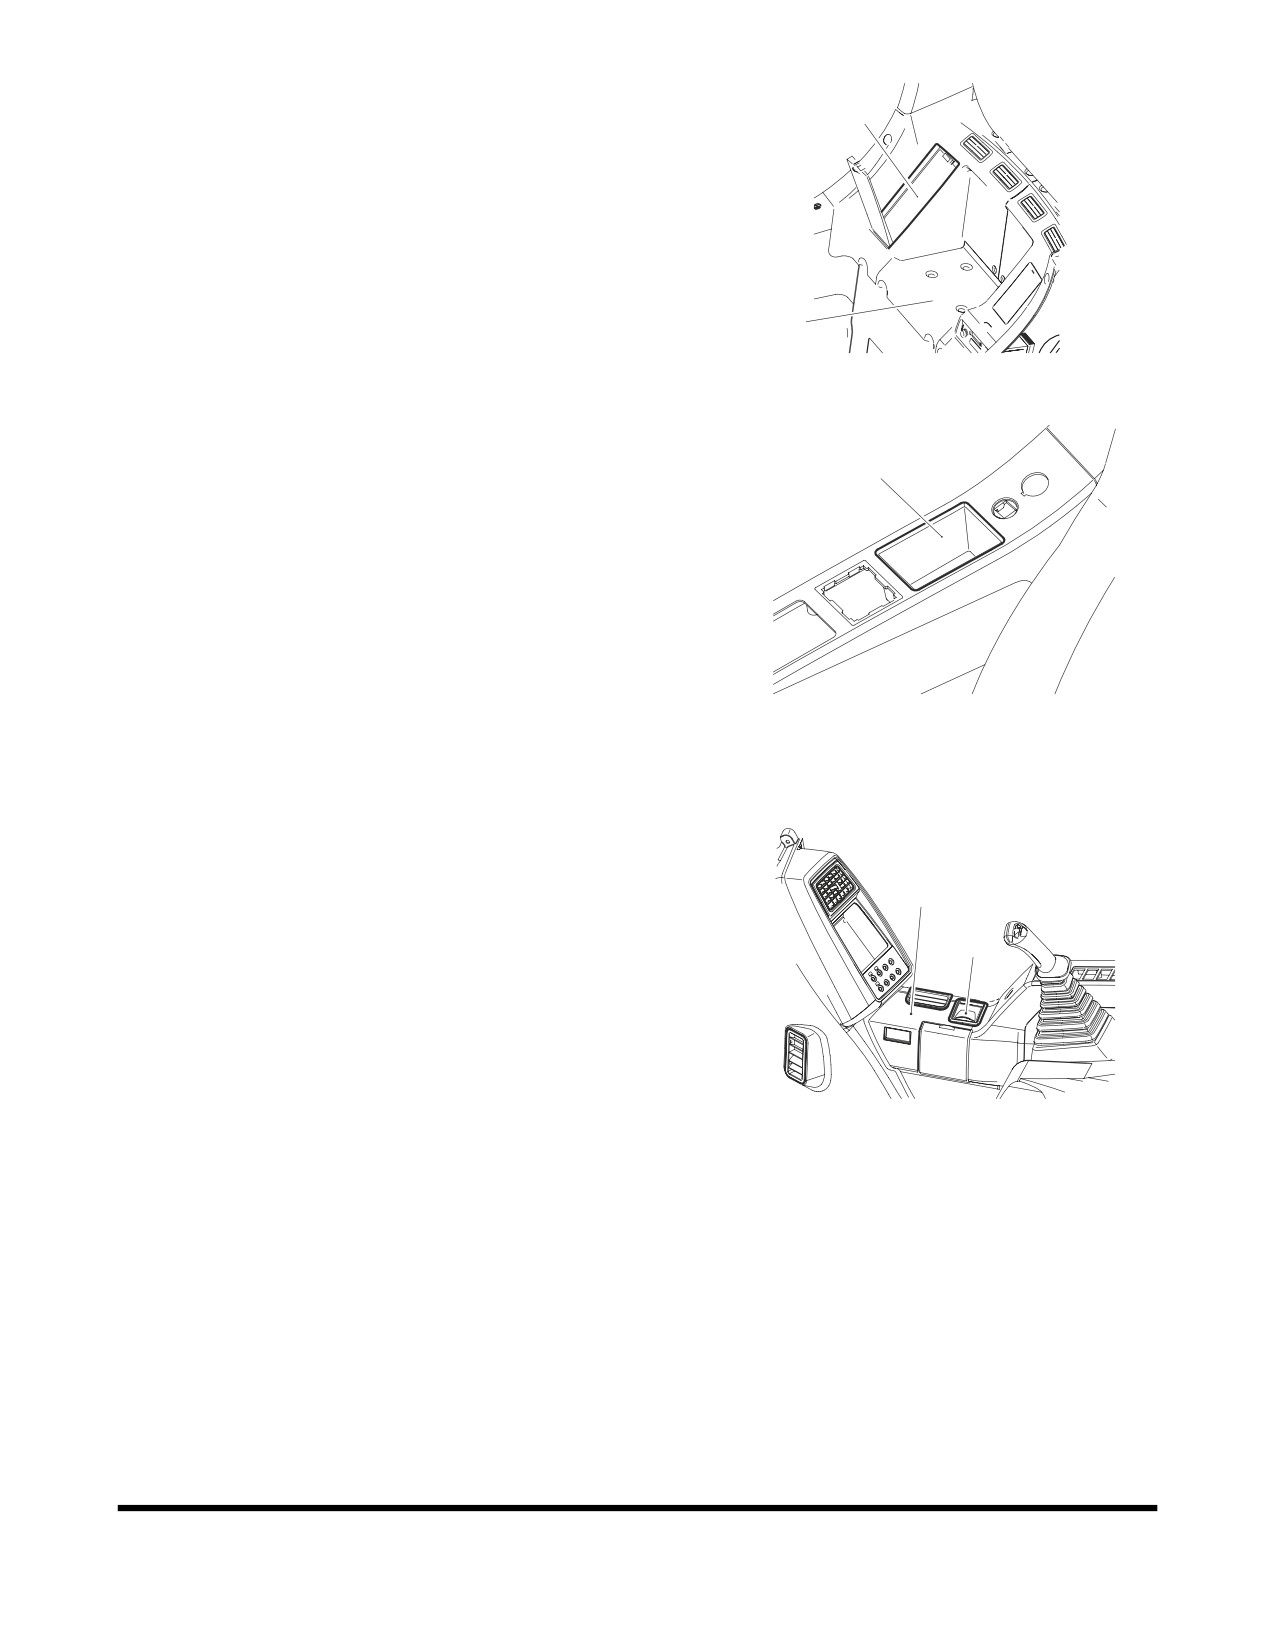
CABIN STORAGE
2
COMPARTMENTS
There are two storage compartments behind the operator's seat.
The large compartment
(1, Figure
157) is for storing
nonperishable items.
The covered other one (2, Figure 157) is interconnected with the
air conditioner. So, it can be supplied with either warm or cool air
1
when air conditioner is turned "ON."
FG000209
Figure 157
There is a separate small tray (3, Figure 158) on the right side of
operator's seat.
3
FG000675
Figure 158
ASHTRAY
An ashtray (1, Figure 159) is to the right side of the operator's
2
seat on the side of the cabin. Always close ashtray after putting
out a cigarette.
1
FG000200
Figure 159
Operating Controls
OP000528
2-71
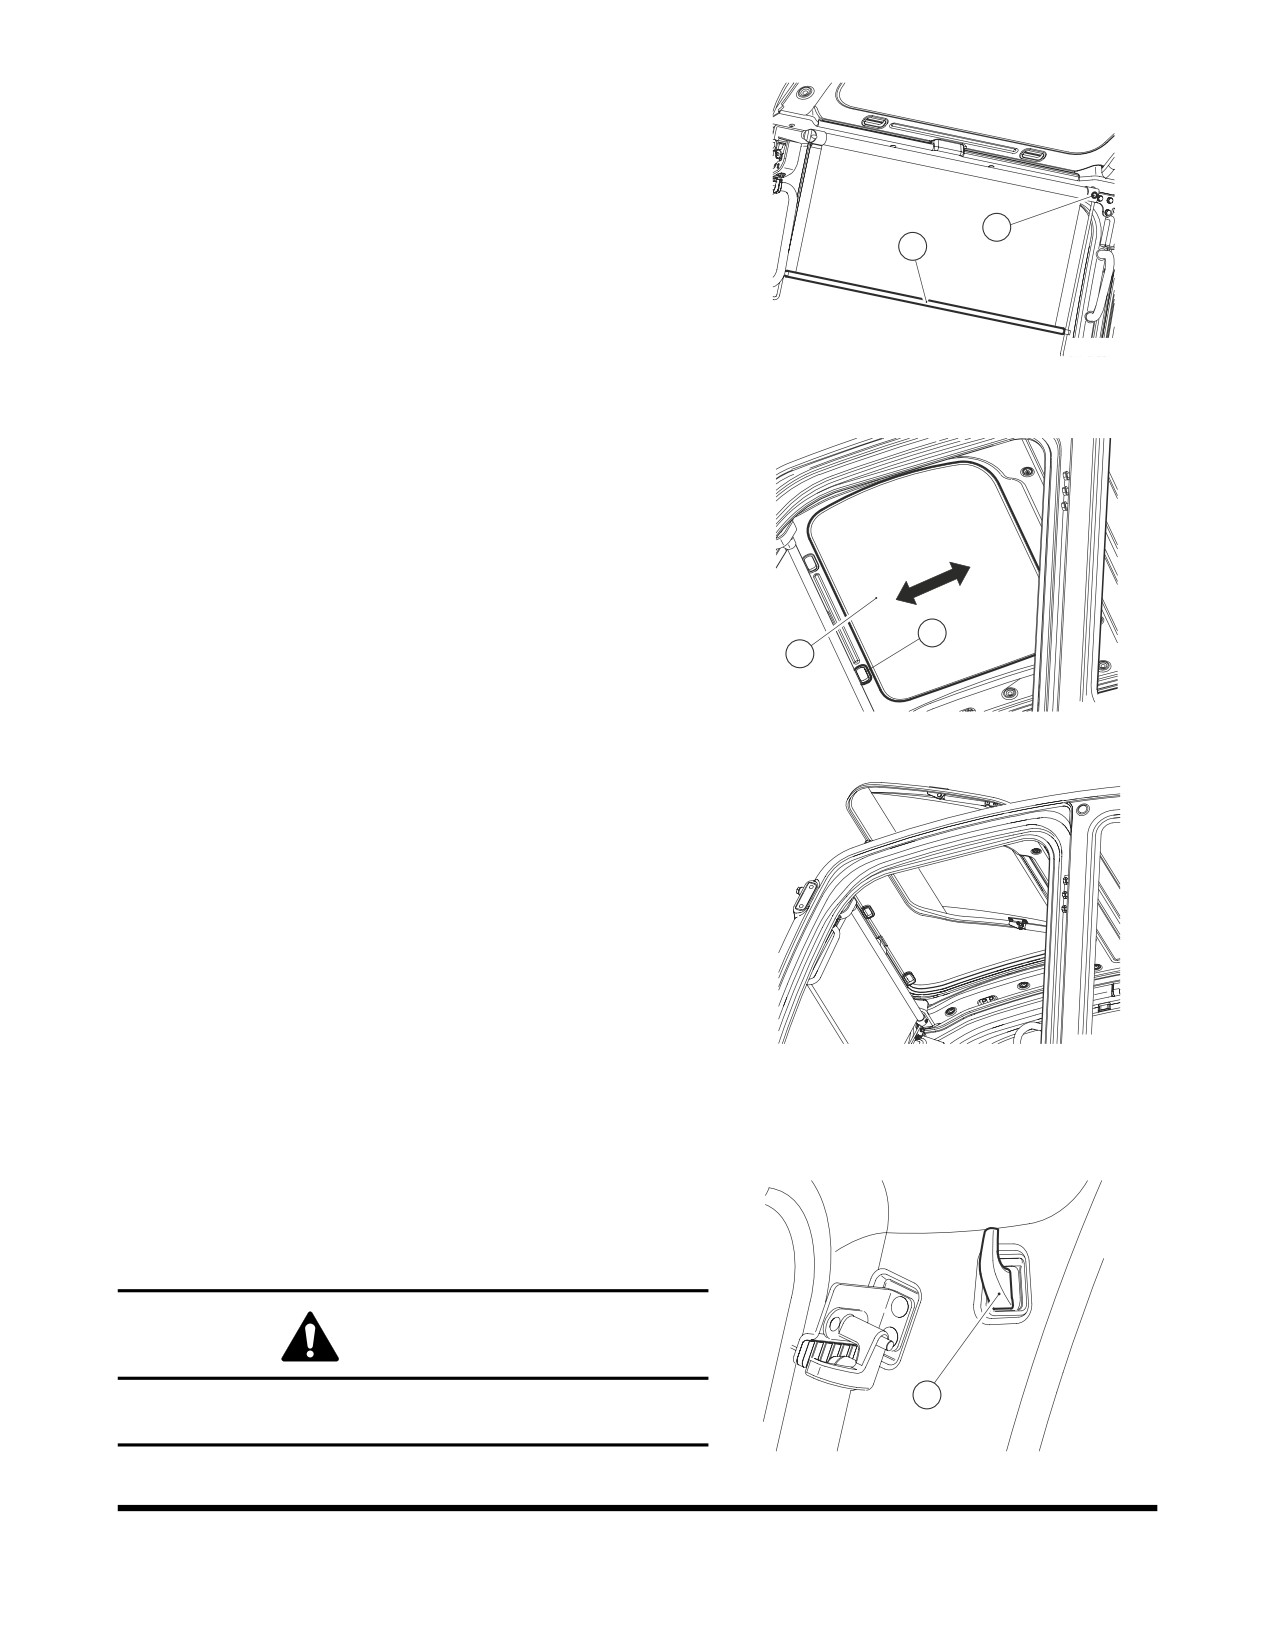
SUN VISOR
The sun visor can be used to reduce the amount of sunlight
coming through the front window and ceiling.
When wanting to reduce the amount of sunlight coming in the
front window, pull bar (1, Figure 160) down.
2
1
When not wanting protection, hold the bar with left-hand and
push the release button (2, Figure 160) with right-hand. This will
allow the visor to retract.
NOTE: Do not allow the visor to roll back up without holding
FG000201
Figure 160
it. Not holding it may result in damage to the visor and
retract mechanism.
Ceiling sun visor
(3, Figure
161) slides forward and
backwards.Move it with handle (4) on each side.
4
3
FG000676
Figure 161
When opening the ceiling cover (if equipped), push the sun visor
into its compartment (Figure 162).
FG000204
Figure 162
HANGER
A hanger (1, Figure 163) is located on the upper left side of the
operator's compartment.
WARNING!
Do not hang anything that will easily fall down, or will
1
impair your view out of the cabin.
FG000210
Figure 163
Operating Controls
OP000528
2-72