Diesel engine 12V 4000 G73, 16V 4000 G73. Manual - part 27
 

  Index      Engines     Diesel engine 12V 4000 G73, 16V 4000 G73. Application group 3B - service manual


Search            


Content   ..  25  26  27  28   ..


Diesel engine 12V 4000 G73, 16V 4000 G73. Manual - part 27


3.

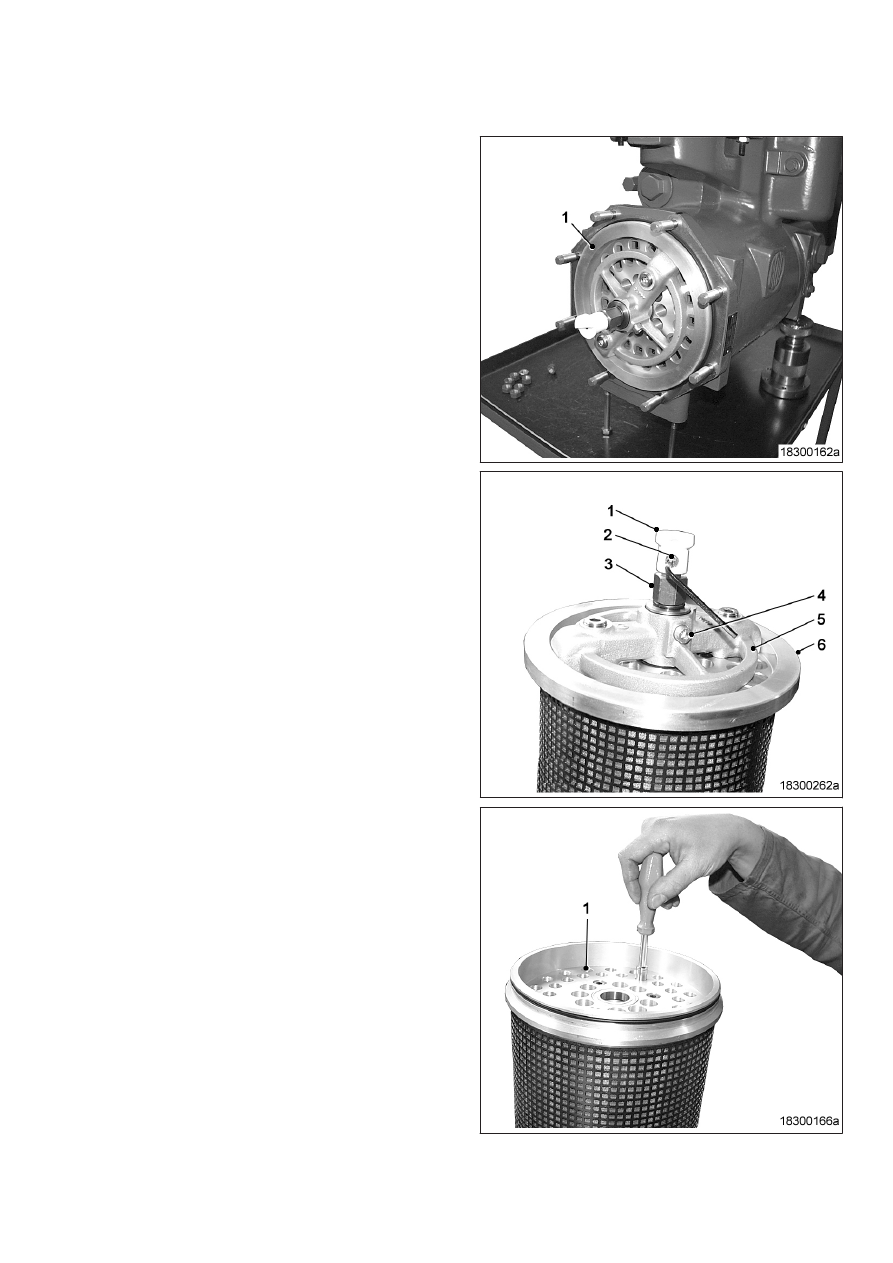
Withdraw filter insert (1).

4.

Remove O-ring.

5.

Remove screw (2).

6.

Withdraw spinner (1) with spring.

7.

Remove nut (3).

8.

Take off spring washer and washer.

9.

Remove screw (4).

10.

Remove flushing arm (5) from screen

plate (6).

11.

Turn filter insert upside down and use ap‐

propriate tool to push out filter candles (1).

12.

Turn filter insert by 180° and insert new fil‐

ter candles (1) with chamfer facing down‐

wards.

Oil filter candles – Installation

1.

For installation follow reverse sequence of working steps.

2.

In addition, the following work must be performed:

• Replace all sealing elements with new parts.

• Coat O-rings with grease.

• Insert O-rings in grooves.

• Pay attention to installation position of fillister-head screw to slot in shaft.

TIM-ID: 0000006401 - 003

7.14.3 Oil indicator filter – Check

Preconditions

☑ Engine is stopped and starting disabled.

Special tools, Material, Spare parts

Designation / Use

Part No.

Qty.

Strainer

(→ Spare Parts Catalog)

Square-section ring

(→ Spare Parts Catalog)

O-ring

(→ Spare Parts Catalog)

WARNING

Hot oil.

Oil can contain combustion residues which are harmful to health.

Risk of injury and poisoning!

• Wear protective clothing, gloves, and goggles / safety mask.

• Avoid contact with skin.

• Do not inhale oil vapor.

WARNING

Compressed air

Risk of injury!

• Do not direct compressed-air jet at persons.

• Wear protective goggles / safety mask and ear protectors.

CAUTION

Unsuitable cleaning tool.

Damage to component!

• Observe manufacturer's instructions.

• Use appropriate cleaning tool.

Removing strainer

1.

Clean oil indicator filter before disassem‐

bling it.

2.

Remove screws (1).

3.

Take off cover (2) with O–ring (3).

4.

Take strainer (5) from filter housing.

Checking strainer

Item

Findings

Task

Strainer

Metallic residues

• Clean

• Monitor engine operation

• Check strainer daily

• Contact Service.

Strainer

Damaged

Replace

Square-section ring

Damaged

Replace

O-ring

Damaged

Replace

Cleaning strainer

1.

Wash strainer (5) with cleaner.

2.

Remove stubborn deposits with soft brush.

3.

Blow out strainer (5) with compressed air from inside.

Installing strainer

1.

Coat square-section ring (4) on strainer (5) with engine oil and install strainer (5).

2.

Coat O–ring (3) with engine oil and fit in filter housing.

3.

Fit cover (2) and secure with screws (1) and washers.

TIM-ID: 0000006402 - 001


Content   ..  25  26  27  28   ..