YANMAR Diesel Engine 1GM, 2GM, 3GMD, 3HM. Manual - part 11
 

  Index      Engines     YANMAR Diesel Engine 1GM, 2GM, 3GMD, 3HM - service manual


Search            


Content   ..  9  10  11  12   ..


YANMAR Diesel Engine 1GM, 2GM, 3GMD, 3HM. Manual - part 11


Check the fuel injection equipment in the following procedure.

3-a)
Remove the starter motor to check the fuel injection timing mark.

Note
"IT" shows No. 1 cylinder which is the cylinder on the flywheel side and not the timing gear
case side.

3-b)
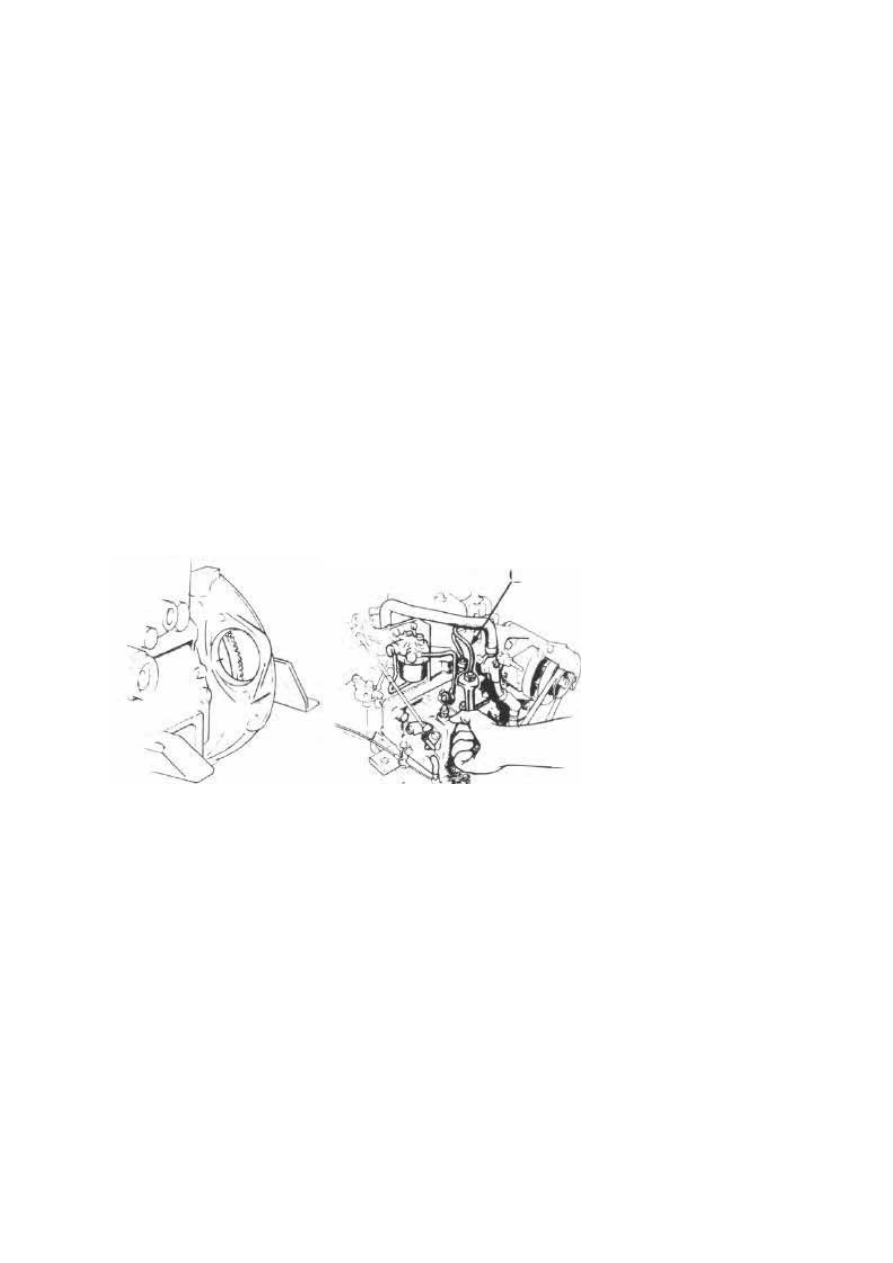
Remove the high pressure pipe from the fuel injection pump.

3-c)
Pull the engine warm up knob out and place the control lever in the "half speed" position.

3-d)
Rotate the engine to check the fuel injection timing. At the same time the arrow timing mark
on the cylinder block and flywheel should line-up, and fuel should bubble out of the delivery
valve of the fuel injection pump.

High Pressure Pipe

Note

Cranking for 3HM model, attach two M8 bolts at the crankshaft pulley as the figure below.

3-e)
Check the fuel injection timing for all of the cylinders.

Proper injection timing

Degree (BTDC) 

1GM 

2GM 

3GMD 

3HM

15±1

18±1

21±1

For 1GM/2GM/3GMD

Injection timing mark on flywheel (1T, 2T. 3T)

1. Cylinder block side timing mark
2. Flywheel

3. Crankshaft pulley
4. M8 bolt

3-f)
Remove the fuel injection nozzle and check the injection spray condition. Cone-shaped
condition is proper.

If the spray is not cone-shaped, check the
following point.

3-f)-1.
The injection pressure may be low;

3-f)-2. The fuel may be bad;

Important

For the disassembly, adjustment and inspection of the fuel injection pump
and fuel injection valve, consult the nearest Yanmar dealer.

Note
It is convenient to check simultaneously the
exhaust/intake value clearance when removing the
starter motor.

4) Washing and replacement of the fuel filter element.

Remove the lower cover of the fuel filter and wash or
replace the element.

1. Fuel Filter

The proper method to remove the element is shown in the figure
below. When you start the new engine for the first time or after long
storage, clean the filter element after 50 hours of operation. After
that replace the element every 250 hours of operation.

2. Air breathing bolt
3. Filter element
4. Filter bowl
5. Tightening screws

[9-2.] Lubricating oil system

1) Engine lube oil

1. Engine oil evacuation port

1-a)
Check the oil level before every operation.

1-b)
Replace the oil after 50 hours of operation (for the
first time, after long storage) and every 100 hours of
operation.
Lube oil changes can be performed most effectively
while the engine is still warm. The oil will flow easily
and can be thoroughly drained.
The oil should be drained from the crankcase by
moving the handle of the oil evacuation pump forward
and backward.

2. Oil Evacuation pump (optional)

1-c) Replace the lube oil filter Replace the lube oil filter every 300 hours of operation.

1-c)-1. Unscrew canister by hand or filter replacer tool.

1-c)-2. Check that threaded adaptor is secure in headcasting.

1-c)-3. Discard used canister.

1-c)-4. Coat the top of the seal of the new canister with new
lube oil.

1-c)-5. Screw new canister on to filter headcasting until
canister seal just touches headcasting and then tighten by hand
a further half turn.

1. Used Cannister


Content   ..  9  10  11  12   ..