BBM MZ SERIES ZERO-TURN MOWER. Manual - part 8
 

  Index      Engines     BBM MZ SERIES ZERO-TURN MOWER - service manual


Search            


Content   ..  6  7  8  9   ..


BBM MZ SERIES ZERO-TURN MOWER. Manual - part 8


PAGE 

30

SECTION 4: ELECTRICAL SYSTEM

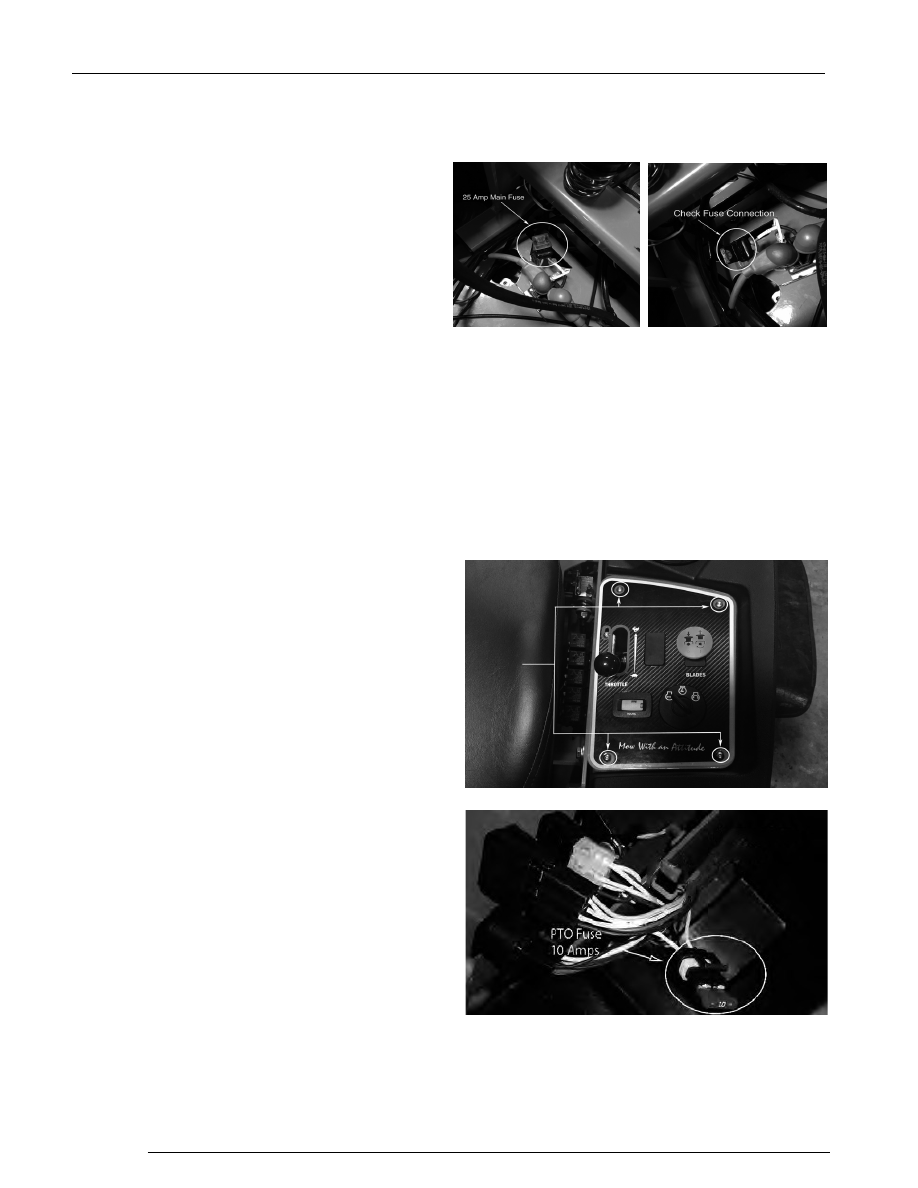
This mower is equipped with two protective fuses: a 25 
amp main fuse (pictured to the right) and a 10 amp clutch 
(blade engagement). The main fuse is located on the left 
side of the unit; towards the front of the engine. The 
Clutch fuse is located just underneath the control panel.

Use a 
3mm 
Wrench
to 
Remove
4 Screws

In order to access the clutch fuse and the relays you 
will need to take off the control panel by removing four 
socket head screws using a 1/8" hex wrench. This can 
be seen in the images on the right. Once you remove 
the screws remove the control panel and you can 
access the clutch fuse and the relay bank.

A blown fuse usually indicates a problem within the 
electrical system or an electrical component. Never 
replace a fuse with one of a higher amperage rating or 
"by pass" a fuse in any way. Doing so creates a 
significant fire hazard and can cause severe damage 
to the mower's electrical components. If a fuse is 
repeatedly blowing, contact your Bad Boy dealer.

PAGE 

31

On most models, the red wire coming out 
of the engine is the charging wire from the 
alternator. Check for 13.6 - 14.2 volts dc at 
this wire with engine at full throttle.

Check the condition and connection of the 
relays located under the control panel. 
Ensure that they are clean and connected. 
Make sure that wire terminal ends have 
not been pushed out of the relay block. 

If you are having issues starting your 
mower ensure the signal wire is connected 
to your starter solenoid.

Parking Brake Relay

Seat Relay

Starter Relay

Engine Charge Relay

Drive Arms Relay

PAGE 3

2

PAGE 

33

SECTION  5:   FRAME


The front fork nuts require a torque of 40ft-lbs. While 

applying this torque, turn the fork itself to ensure no 

damage is done to the bearing. This operation is only 

necessary if a repair requires it.  To access the recessed 

front fork nuts, remove the dust cap by prying gently using 

a flat-head screwdriver.  Once cap is removed, a 36mm 

socket will be needed for top nut.  You will need to secure 

the bottom nut with a 1 1/2". wrench.  Once you have 

torqued the nuts to 40 ft.-lbs., reapply the dust cap by 

gently tapping around its edges. Do NOT hit center of cap.

T

orque rear wheel lugs to 65-75ft. lbs. Re-torque at 

every oil change and check every morning.

The pump belt tensioner is located under the engine 
and  has  a  grease  fitting  at  its  pivot  point. Grease at 
every engine oil change.

The  deck  belt  tensioner  is  located  at  the  rear  of 
the  deck  and  has  a  grease  fitting  on  its  pivot 

The control arm blocks have grease fittings located on 
the top of each block. Grease one time a year.

Drive Arm Grease Zerk

40 ft lbs.


Content   ..  6  7  8  9   ..