DB2 Server for VSE. Operations Guide / Handbooks (2004-2007) - page 8
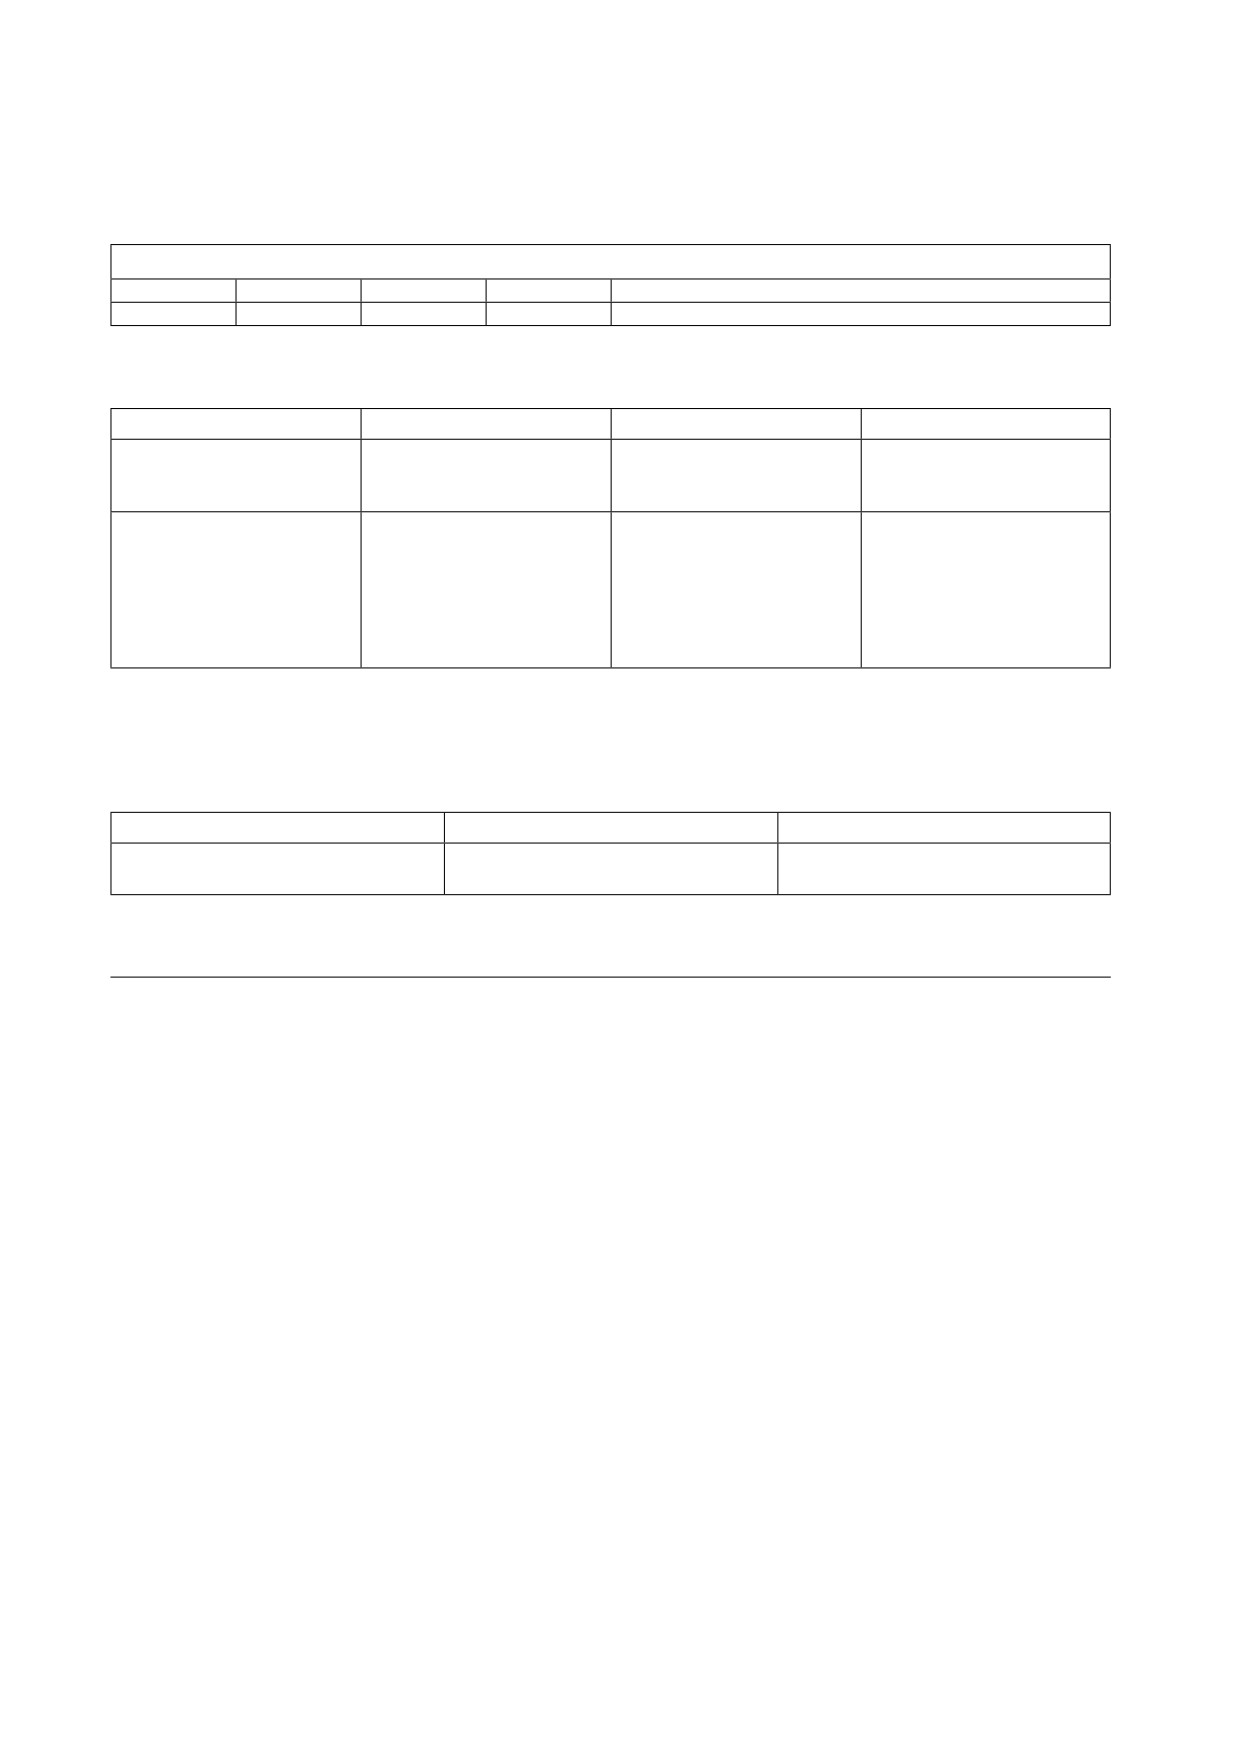
Figure 57 (Page 2 of 2). Steps to Migrate an Existing Database to Version 7 Release 5
18
Mandatory
Automated
Automated
Create CCSID-Related Phases
19
Mandatory
Manual
Manual
System Customization Activities
Note 1: If you are migrating a database from SQL/DS Vs 3.1 or Vs 3.2, you should run this step
Parameter Name
Default value
Description
Used in member:
PROC1
ARIS61DB
This is the procedure which
All
contains disk labels for the
existing database.
CONF
PRD2.DB2750
Library where to store data-
All
base specific configuration
members, such as source
dbname directory, dbname
phases ARISXXDB.PROC,
and database start-up
parameter file, etc.
Figure 58. Description of Global Parameters.
Every Migration Step runs job ARIS75SL and parameters for this job are:
Parameter Name
Default value
Description
CLIB
PRD2.DB2750
Library where you want to catalog any
member
Figure 59. Job ARIS75SL (DB2 Server Library Definitions)
4.1
Migration Step 1: Space Verification and DATE/TIME Option
Verification
This step is mandatory.
4.1.1
Directory Space
This step is mandatory.
Before you can migrate you should have at least 4 dbspace blocks available in the DB2 Server for VSE
directory.
To verify this, start the application server and enter the operator command:
SHOW DBCONFIG
If the number of "DBSPACE BLOCKS LEFT" is:
Four or more, proceed to "Storage Pool Space" below.
56
DB2 for VSE Program Directory
¹
Less than four, increase the number of available dbspace blocks by reducing the number of internal
dbspaces. Refer to the DB2 Server for VSE System Administration manual for instructions on adding
dbspaces to a database.
If you are migrating, you can also increase the number of available dbspace blocks, by expanding your
directory. Refer to the DB2 Server for VSE System Administration manual for instructions on how to do
this.
Then reissue the SHOW DBCONFIG command, and make sure you have enough dbspace blocks avail-
able.
For more information on the SHOW DBCONFIG command, refer to the DB2 Server for VSE & VM Opera-
tion.
4.1.2
Storage Pool Space
Before you migrate, we recommend that each storage pool in your database be less than 90% used and
each pool must have at least 30 free pages. To determine the state of your storage pools, start the appli-
cation server in multiple user mode and enter the operator command:
SHOW POOL SUMMARY
For more information on the SHOW POOL command, refer to the DB2 Server for VSE & VM Operation.
If you find a pool above 90% used, you should add one or more dbextents to it. If this is inconvenient, you
can avoid the problem until you have completed migration by specifying an SOSLEVEL other than the
default when you run job ARIS75PD. Job ARIS753D is discussed in "Migration Step 6: Update the DB2
Server for VSE Catalog to the 7.5 Level". Refer to the DB2 Server for VSE System Administration manual
for instructions on adding dbextents.
4.1.3
DATE/TIME Options
Check the values associated with DATE and TIME in SYSTEM.SYSOPTIONS by issuing the following
command from ISQL:
SELECT * FROM SYSTEM.SYSOPTIONS
If VALUE is set to LOCAL and the local date/time exits do not recognize ISO format, VALUE should be set
to ISO for the duration of the migration. When you use date/time exits that do not recognize ISO format,
SQLCODE -180 is issued when reloading the English Help text. SQLCODE -180 may also occur in later
stages of the migration.
4.2
Migration Step 2: Archiving a Database
This step is mandatory.
Archive your database by typing:
SQLEND ARCHIVE
For more information on the SQLEND command, refer to the DB2 Server for VSE & VM Operation.
Chapter 4. Migrating an Existing Database
57

4.3
Migration Step 3: Prepare the Database for Migration
Job name is ARIS75ND.
This step is mandatory.
Before submitting ARISIMGJ to start the Job Manager, you must
¹
Recatalog the procedure with existing Database identification labels (default value for 6.1 is ARIS61DB) into the Installation library (default value is PRD2.DB2750) -
See Figure 83 on page 86.
This procedure is used in all migration jobs - see Figure 58 on page 56.
¹
Recatalog the procedure which includes library search path for an existing database (default value is ARIS61SL) into the Installation library (default value is
PRD2.DB2750) - See Figure 83 on page 86.
This procedure is used in ARIS75ND Z-type member - see Figure 60.
¹
If you plan to reload non-English version of HELP Text into a database, you must manually modify and recatalog ARIS062D PROC-type member. See "Migration Step
10: Reload English HELP Text into a Database."
Start Job Manager - see Figure 82 on page 85.
The ARIS75ND job is shown in Figure 60. This job will:
¹
Reset the logmode to Y.
¹
Reset the password for SQLDBA to SQLDBAPW, for all remaining steps in this chapter assume that
SQLDBA’s password is SQLDBAPW.
The parameters for ARIS75ND are:
Parameter Name
Default value
Description
PROC2
ARIS61SL
Library search path for the existing
database.
ALTLOG
Y
The ALTLOG parameter defines
whether an inactive log is available in
he system. If LOGMODE=L, the inac-
tive log will be used once the
ARCHPCT value is reached. Set this to
N if an inactive log is not used.
DUALLOG
Y
The DUALLOG parameter defines
whether dual logging is used in the
system. Set this to N if dual logging is
not used.
OLDPW
SQLDBAPW
Supply current password for SQLDBA.
Figure 60. Job ARIS75ND (Prepare the Database for Migration)
Expected return code is 0.
If you are migrating from releases prior to Version 3.5 you must update ARIS75ND manually to alter the
SHAREOPTIONS of the DB2 Server for VSE VSAM Clusters to '4'. See Figure 61 on page 59
58
DB2 for VSE Program Directory

* Step 3 - ALTER DB2 Server for VSAM Clusters SHAREOPTIONS
// EXEC PGM=IDCAMS,SIZE=AUTO
ALTER SQL.BDISK.STARTER.DB.DATA -
SHAREOPTIONS(4) -
CATALOG(SQLCAT)
ALTER SQL.LOGDSK1.STARTER.DB.DATA -
SHAREOPTIONS(4) -
CATALOG(SQLCAT)
ALTER SQL.DDSK1.STARTER.DB.DATA -
SHAREOPTIONS(4) -
CATALOG(SQLCAT)
Figure 61. Alter DB2 Server VSAM Clusters Shareoptions
Please change SQLCAT to the usercatalog where your dataset was defined.
4.4
Migration Step 4: Migrate the DBNAME Directory
Job name ARISBDID.
This step is mandatory.
ARISBDID (See Figure 35 on page 37) executes VSE/REXX exec ARICCDID, which migrates previous
versions (R350, R510 & R610) of the Dbname Directory source file (originally 'ARISDIRD.A') to the
restructured Directory source format.
The output from this Procedure can then be used as input to the new ARICBDID Procedure to create the
Dbname Directory Phases(ARICDIRD.PHASE and ARICDBND.PHASE). Both the generated dbname
directory source member and the ARICDIRD.PHASE will be stored in the library specified by the global
parameter CONF.
Parameter Name
Default value
Description
MIGRATION
YES
This is a migration process
INPUT
mem_name.type
This is the old version Directory Source
member to be migrated.
OUTPUTA
mem_name.type
This is the new DBNAME member
name
Note: There is NO default for either
member name.
OUTPUTB
ARISDIRD.A
Member containing defaults for
DBNAME
LIB1
PRD2.DB2750
Installation Library, where OUTPUTA
will be stored
PLIB
PRD2.DB2xxx
Existing library for old version of
DBNAME
COMPILELIB
PRD2.DB2750
Library where PHASE type members
cataloged
Figure 62. The parameters for ARISBDID
Expected return code is 0.
Chapter 4. Migrating an Existing Database
59

4.5
Migration Step 5: Format the DB2 Server for VSE Logs
Job name is ARIS75OD.
This step is mandatory.
To migrate an existing database to Version 7 Release 5, format the DB2 Server for VSE logs.
Parameter Name
Default value
Description
ALTLOG
Y
The ALTLOG parameter defines
whether an inactive log is available in
he system. If LOGMODE=L, the inac-
tive log will be used once the
ARCHPCT value is reached. Set this to
N if an inactive log is not used.
DUALLOG
Y
The DUALLOG parameter defines
whether dual logging is used in the
system. Set this to N if dual logging is
not used.
Figure 63. The parameters for ARIS75OD
It is very important that you run ARIS75OD. Otherwise, you may have problems later when you restore
database archives.
If you receive warning message ARI2010, you can ignore this message and continue to the next step.
Refer to VSE System Administration manual for installation on logging.
Expected return code is 0.
4.6
Migration Step 6: Update the DB2 Server for VSE Catalog to the
7.5 Level
Job name is ARIS75PD.
This step is mandatory if you are migrating a database from
Version 5.1 or prior to Version 5.1. Do not execute this step if you are migrating a database from Version
6.1 or later.
ARIS75PD updates the system catalog.
60
DB2 for VSE Program Directory

Parameter Name
Default value
Description
LOGMOD
Y
Specifying a LOGMODE of N has the benefit of avoiding
logging. However, not that checkpoints are not triggered for
a storage pool full condition with this LOGMODE, so this
value should only be used when your storage pools contain a
sufficient number of free pages to shadow the work done by
migration
A LOGMODE of Y or A can be specified so that checkpoints
will be triggered during migration, thus releasing shadow
pages back to the storage pool for reuse and avoiding the
occurrence of a storage pool full condition.
SOSLEVEL
{empty}
If storage pool is more than 90% full, specify an SOSLEVEL
according to the percentages of free pages in the storage
pools. You must ensure that the SOSLEVEL you choose is
lower than or equal to the percentage free in the pool with the
least space. For example, if storage pool 1 is 93% used and
storage pool 2 is 91% used, a SOSLEVEL of 7 or lower
allows a checkpoint to be triggered no matter which storage
pool reaches the checkpoint first.
Figure 64. The parameters for ARIS75PD
Note: To determine if any storage pool is over 90% issue the SHOW DBEXTENT prior to migration.
ATTENTION: If any storage pool is above 95% full, it is strongly recommended that one or more
dbextents be added rather than specifying a smaller SOSLEVEL. Just specifying a lower SOSLEVEL
cannot eliminate the possibiliry of having a storage pool full condition from occurring, especially when
storage pools are approaching 100% full.
Expected return code is 0.
4.7
Migration Step 7: Reload the DBS Utility Package
Job name is ARIS75QD.
This step is mandatory.
Create the DB2 Server for VSE Version 7 Release 5 of the DBS utility package in the database by exe-
cuting ARIS75QD job.
A return code of 4 is acceptable from procedure ARIS040D and can be ignored. Procedure ARIS040D
executes ARISQLDS which in turn runs the application server in single user mode. It creates the package
SQLDBA.ARIDSQL in the database.
Accepted return code is 8, if it results from SQL 'DROP' statement. Otherwise return code should be 4.
Chapter 4. Migrating an Existing Database
61
4.8
Migration Step 8: Update the DB2 Server for VSE Database
Job name is ARIS75RD.
This step is mandatory.
The ARIS75RD job does the following:
¹
Grants SELECT authority for the system catalog to PUBLIC.
¹
Grants CONNECT authority to ALLUSERS. You can revoke this authority later by performing
"Migration Step 15: Revoke CONNECT Authority from ALLUSERS".
¹
Updates SYSTEM.SYSOPTIONS, ensuring that a row exists in SYSTEM.SYSOPTIONS for each
option. If no row exists for a specific option, a new row is inserted, and the default value is used. If a
row does exist, the values for that row are not modified.
For every row that exists, you receive a -803 SQLCODE. You can ignore these messages.
While running this job, you may receive informational messages indicating that options are not set up
correctly in SYSTEM.SYSOPTIONS. ARIS070D sets up the correct system options, and these messages
should no longer occur after it has successfully completed. Refer to the DB2 Server for VSE & VM SQL
Referencefor a description of the valid SYSOPTIONs entries.
¹
Loads tables for CCSID support.
¹
Runs the UPDATE STATISTICS command for the SYS0001 dbspace.
¹
Builds the following sample tables:
- DEPARTMENT
- EMPLOYEE
- PROJECT
- ACTIVITY
- EMP_ACT
- PROJ_ACT
- INVENTORY
- SUPPLIERS
- QUOTATIONS
- PROJECTS
- OPERATION.
Prepare and execute the ARIS75RD job to update the database. A return code of 6 from procedures
ARIS070D and ARIS075D is acceptable and can be ignored.
Note:
- Procedure ARIS075D runs three DBS utility jobs. The first one drops the VIEWS
SQLDBA.VEMPLP and SQLDBA.VPHONE, the SYNONYMS SQLDBA.INV and
62
DB2 for VSE Program Directory
SQLDBA.QUO, and all the sample tables if they already exist in the database. The second
and third jobs create and load all the sample tables.
You can verify the migrated database by running the supplied sample application programs that use the
sample tables. For more information, refer to "Installation Step 10: Run the Sample Programs to Verify
Installation".
Expected return code is 6.
4.9
Migration Step 9: Migrate the HELP Text Tables
Job name is ARIS75SD.
This step is mandatory.
ARIS75SD migrates existing HELP Text tables from a previous SQL/DS version to DB2 Server for VSE
Version 7 Release 5. It also drops the SQLDBA.SYSLANGUAGE table, and recreates it in the
PUBLIC.SYS0001 dbspace. Any entries in SQLDBA.SYSLANGUAGE are lost; when it is recreated, it con-
tains only an entry for mixed case American English.
A DBS utility return code of 6 or lower is acceptable.
This step removes any existing IBM-supplied HELP Text from the database. Any user-supplied HELP Text
remains, but you have to restore the appropriate HELP Text language key in order to use it. Refer to the
DB2 Server for VSE System Administration and manuals for information.
Acceptable return code is 6.
4.10
Migration Step 10: Reload English HELP Text into a Database
Job name is ARIS75TD.
This step is optional.
If you do not want to load the DB2 Server for VSE HELP Text, skip this step.
You can reload the default version (American English) of the Version 7 Release 5 HELP Text into a data-
base by running the ARIS75TD job.
For the parameters required see "Installation Step 6: Selecting National Language Support, Install Lan-
guage".
Acceptable return code is 6.
Chapter 4. Migrating an Existing Database
63
4.10.1
Install Language.
Job name is ARIS75JZ.
See "Installation Step 5 - Install Language".
4.11
Migration Step 11: Reload ISQL into a Database
Job name is ARIS75LZ.
This step is optional.
If the database does not contain the ISQL facility, skip this step.
You can Reload ISQL by running ARIS75LZ job.
All steps should end with a return code of 0 through 4.
Note:
- Procedure ARIS120D reloads the ISQL package in the database by running the application
server in single user mode against that database.
Expected return code is 0.
4.12
Migration Step 12: Reload CCSID-Related Phases Package
Job name is ARIS75WD.
This step is mandatory.
ARIS75WD contains the job control statements to load the CCSID-related phases package into the data-
base.
Note:
- Procedure ARIS175D reloads the CCSID-related phases package in the database by
running the application server in single user mode against that database.
Parameter Name
Default value
Description
SUM
Y
Load CCSID-Related Package in
Single User Mode. Code N to use Mul-
tiple User Mode.
DBNAME
SQLDS
Database to load the CCSID-Related
Package to in Multiple User Mode.
Figure 65. The parameters for ARIS75WD
Acceptable return code is 4.
64
DB2 for VSE Program Directory
4.13
Migration Step 13: Load FIPS Flagger into a Database
Job name is ARIS75KZ.
This step is optional.
Note:
¹
Procedure ARIS360D loads the FIPS flagger package in the database by running the applica-
tion server in single user mode against that database
Acceptable return code is 4.
4.14
Migration Step 14: Determine the Primary Keys to be Recreated
Job name is ARIS751D.
This step is optional.
If you are migrating a database from SQL/DS Version 3 Release 1 or Version 3 Release 2, you should run
this step.
This step uses job ARIS751D to list all the primary keys created in SQL/DS Version 3 Release 1 and
Version 3 Release 2 which should be dropped and recreated after migrating to Version 7 Release 5.
Dropping and recreating these primary keys ensures that the correct CCSID is used for these keys.
DB2 Server for VSE 7.5.0 supports a column CCSID attribute. For primary keys created in earlier SQL/DS
Version 3 releases, the value of the CCSID attribute in SYSTEM.SYSKEYCOLS is null. In versions
Version 3 Release 4 and later, this null CCSID value is assumed to be the database default for SBCS
data. If the column on which the primary key is defined has been defined as FOR MIXED DATA (that is,
the subtype is "M"), the CCSID assumed for the primary key will be incorrect. By dropping and recreating
the primary key, the actual nonnull CCSID value is placed in SYSTEM.SYSKEYCOLS and no CCSID
value must be assumed. Note that the CCSID value in SYSTEM.SYSKEYCOLS is only used by the
system when the primary key column has a field procedure defined on it.
Note:
- Procedure ARIS370D runs two DBS utility jobs. The first job issues a CONNECT
command, and the second job lists the primary keys which should be dropped and recre-
ated. The output of the job goes to SYSLST, so be sure your permanent assignments are
set as needed.
- Procedure ARIS370D invokes the ARISFKPY macro, which performs the query. The output
from the query is a list of all primary keys which satisfy the following criteria:
- The key is a primary key.
- A field procedure is defined on the key.
- The subtype of the column on which the key is defined is "M" (FOR MIXED DATA).
Chapter 4. Migrating an Existing Database
65

- This list is in order by the creator of the key and then the table on which the key is
created. To ensure the correct CCSID is used, drop and recreate the primary keys using
the ALTER TABLE statement.
Expected return code is 0.
4.15
Migration Step 15: Revoke CONNECT Authority from ALLUSERS
Job name is ARIS75MZ.
This step is optional.
In "Migration Step 8: Update the DB2 Server for VSE Database", member ARISCTM granted CONNECT
authority to ALLUSERS, which allows the DB2 Server for VSE online support to implicitly connect users.
(See the Database Administration manual for more information on implicit CONNECT.) To revoke
CONNECT authority from ALLUSERS, prepare and execute the job ARIS75MZ.
Note:
- Procedure ARISDBSD runs the application server in single user mode against the identi-
fied database.
Acceptable return code is 0.
4.16
Migration Step 16: Reset the Password for User SQLDBA
Job name is ARIS75NZ.
This step is mandatory.
Parameter Name
Default value
Description
NEWPW
NEWPW
The new password for user SQLDBA.
Figure 66. The parameters for ARIS75NZ
Note:
- Procedure ARISDBSD runs the application server in single user mode against the identi-
fied database.
Expected return code is 0.
66
DB2 for VSE Program Directory
4.17
Migration Step 17: Start the Application Server in multiple user
mode
Job name is ARIS75GZ.
This step is mandatory.
See "Installation Step 8: Start the Application Server in Multiple User Mode" for more information.
Expected return code is 0.
4.18
Migration Step 18: Create CCSID-Related Phases
Job name is ARISCNVD.
This step is mandatory and must be executed while the database server is active (See "Migration Step 17:
Start the Application Server in multiple user mode").
For ARISCNVD parameters see Installation step 9.
Expected return code is 0.
4.19
Migration Step 19: System Customization Activities
This step lists further administration and customization activities you should consider at this time. These
are:
¹
Rebind your application program packages using the REBIND PACKAGE DBS utility command. If you
do not do this, all your application programs will be dynamically preprocessed again at runtime.
Dynamic bind preprocessing is only done once. Refer to the DB2 Server for VSE & VM Database
Services Utility manual for more information.
¹
Change the setting of the CHARNAME parameter for the database and initialize the user partition
since the default after migration is ENGLISH. The CCSID defaults for the application server are deter-
mined when a CHARNAME is chosen.
¹
Set database CCSID support for user tables that existed prior to migration.
¹
Set database options, such as double-byte character set (DBCS) support and character subtype.
¹
Drop and recreate any EXPLAIN tables that were created in a previous release. You can use the
A-type source member ARISEXP to help you do this.
¹
Set up the schema stored procedures and load the packages for the schema stored procedures if you
plan to use DB2 Server for VM database as a server that can be accessed by JDBC /CLI clients using
DB2 UDB v8 or later See Appendix F, "Preparing the Schema Stored Procedures for JDBC/CLI
Clients " in the DB2 Server for VSE & VM Database Administration manual for details.
Users of local date/time exits should reset the values for DATE and TIME in SYSTEM.SYSOPTIONS to
LOCAL if they were changed in "Migration Step 1: Space Verification and DATE/TIME Option Verification".
Chapter 4. Migrating an Existing Database
67
¹
Set up Stored Procedures to define PSERVERS and cataloging procedures.
Note. The JCL used to start up the database with Stored Procedure Support must contain a state-
ment that defines the logical device 097 to enable POWER to find and execute the JCL that starts the
stored procedure handler. An example is illustrated below:
// ASSGN SYS097,SYSPCH
Refer to the DB2 Server for VSE System Administration manual for information to help you define proce-
dures for operating DB2 Server for VSE and for the information you need to perform the activities listed
above.
68
DB2 for VSE Program Directory
5.0
Chapter 5. Maintenance Activities
DB2 Server for VSE maintenance includes adding new components (because they were not installed ini-
tially) and replacing existing ones (because of service updates). Both types of activities are discussed
below. The actions described in this chapter require that DB2 Server for VSE has been installed and that
a database has been generated.
The IBM-supplied procedures and source members for installing DB2 Server for VSE components assume
that the user ID is SQLDBA, and that the password is SQLDBAPW. If the password has been changed, it
should be reassigned before the reinstallation activity. The technique for changing the password is shown
when needed in each description below.
Note:
The processing described in this chapter invokes the application server in single user mode with
LOGMODE=Y. If the database was last accessed with LOGMODE=A (DB2 Server for VSE
archiving on), do an archive and a COLDLOG for the database before procee
5.1
DBS Utility Maintenance
5.1.1
Reloading the DBS Utility Package (SQLDBA.ARIDSQL)
The DBS utility package must be reloaded in all databases if there is a service update to the A-type
source member ARIDSQLP. To reload it, prepare and run the job control statements shown in Figure 67.
Refer to the information supplied with each DB2 Server for VSE service update to see if you should take
this action.
// JOB RELOAD DBS UTILITY
// LIBDEF PROC,SEARCH=(PRD2.DB2750)
// EXEC PROC=ARIS75SL
*-- DB2 Server LIBRARY DEFINITION
(1)
// EXEC PROC=ARIS75DB
*-- CURRENT DATABASE IDENTIFICATION
(2)
// EXEC PROC=ARISDBSD
*-- RUN DB2 Server IN SINGLE USER MODE (3)
CONNECT SQLDBA IDENTIFIED BY currentpw;
GRANT CONNECT TO SQLDBA IDENTIFIED BY SQLDBAPW;
/*
// EXEC PROC=ARIS040D
*-- CREATE DBS UTILITY PACKAGE
(4)
// EXEC PROC=ARISDBSD
*-- RUN DB2 Server IN SINGLE USER MODE (5)
CONNECT SQLDBA IDENTIFIED BY SQLDBAPW;
GRANT CONNECT TO SQLDBA IDENTIFIED BY newpw;
/*
/&
Figure 67. Reloading the DBS Utility Package
Notes for Figure 67:
¹
Procedures ARISDBSD and ARIS040D run the application server in single user mode against the
identified database.
(1)
Procedure ARIS75SL identifies the DB2 Server for VSE sublibraries.
Copyright IBM Corp. 1981, 2007
69
(2)
Procedure ARIS75DB identifies the starter database. You can substitute the procedures or
job control statements that identify the database being updated.
(3)
Reset the password for the user ID SQLDBA to SQLDBAPW before executing procedure
ARIS040D. The first execution of procedure A RISDBSD changes the password for the
user SQLDBA to SQLDBAPW. Supply the current password currentpw in the SQL
CONNECT command.
(4)
Procedure ARIS040D creates the package SQLDBA.ARIDSQL in the database from the
DB2 Server for VSE A-type source member ARIDSQL P. The user ID SQLDBA must
execute this step.
If the database view SQLDBA.SYSUSERLIST exists when you run this step, the step ends
with a return code of 0. If this view does not exist, this step ends with a return code of 4.
(5)
After procedure ARIS040D is executed, you should reset the password for the user
SQLDBA to a password of your choice. The second execution of the procedure
ARISDBSD changes the password for the user SQLDBA. Supply the password of your
choice (newpw ) in the SQL GRANT command.
5.2
Messages and HELP Text Maintenance
5.2.1
Installing the HELP Text after DB2 Server for VSE Installation
If you have already generated a database without the American English HELP Text, you can add it later.
To install or reinstall the HELP Text into an existing database, prepare and run the job control statements
shown below.
// JOB REINSTALL HELP TEXT
// LIBDEF PROC,SEARCH=(PRD2.DB2750)
// EXEC PROC=ARIS75SL
*-- DB2 Server LIBRARY DEFINITION
(1)
// EXEC PROC=ARIS75DB
*-- STARTER DATABASE IDENTIFICATION (2)
// EXEC PROC=ARISDBSD
*-- RUN DB2 Server IN SINGLE USER MODE (3)
CONNECT SQLDBA IDENTIFIED BY currentpw;
GRANT CONNECT TO SQLDBA IDENTIFIED BY SQLDBAPW;
/*
// EXEC PROC=ARIS059D
*-- ACTIVATE MESSAGES
(4)
// EXEC PROC=ARIS380D,LANG=AME,HELP=ONLY,CUU=
(5)(6)
// EXEC PROC=ARISDBSD
*-- RUN DB2 Server IN SINGLE USER MODE (7)
CONNECT SQLDBA IDENTIFIED BY SQLDBAPW;
GRANT CONNECT TO SQLDBA IDENTIFIED BY newpw;
/*
/&
Figure 68. Reinstalling the HELP Text into the Database
Notes for Figure 68:
¹
Procedures ARISDBSD, ARIS059D, and ARIS060D run the application server in single user mode
against the identified database.
(1)
Procedure ARIS75SL identifies the DB2 Server for VSE sublibraries.
(2)
Procedure ARIS75DB identifies the starter database. You can substitute the procedure or
job control statements that identify the database being updated.
70
DB2 for VSE Program Directory
(3)
Reset the password for the user SQLDBA to SQLDBAPW before executing procedures
ARIS059D and ARIS060D. The first execution of procedure ARISDBSD changes the pass-
word for the user SQLDBA to SQLDBAPW. Supply the current password (currentpw) in
the SQL CONNECT command.
(4)
Procedure ARIS059D adds a language entry to the SQLDBA.SYSLANGUAGE table. This
step must be executed. A return code of 6 is acceptable and can be ignored.
(5)
Procedure ARIS380D reloads the DB2 Server for VSE ISQL HELP Text into the database.
This step must be executed by the user SQLDBA. The source members it reads assume
that the password is SQLDBAPW.
The DB2 Server for VSE HELP Text tables SQLDBA.SYSTEXT1, SQLDBA.SYSTEXT2,
and SQLDBA.SYSLANGUAGE must exist in the database when you run this procedure.
(6)
Mount the Help Text tape from the Distribution Material. Code the CUU= with the value of
the tape drive address.
(7)
After procedure ARIS380D is executed, you should reset the password for the user
SQLDBA to a password of your choice. The second execution of procedure ARISDBSD
changes the password for the user SQLDBA. Supply the password of your choice
(newpw) in the SQL GRANT command.
5.2.2
Removing Messages and HELP Text from Your DB2 Server for
VSE System
To remove the messages and/or the HELP Text after the initial installation, prepare and run the job control
statements shown Figure 69
Attention:
¹
Procedure ARIS062D deletes all ISQL HELP next for a specified language, including topics provided
by the database administrator.
¹
Procedure ARIS063D deletes all ISQL HELP Text for ALL languages, including topics provided by the
database administrator.
// JOB REMOVE HELP TEXT
// LIBDEF PROC,SEARCH=(PRD2.DB2750)
// EXEC PROC=ARIS75SL
*-- DB2 Server LIBRARY DEFINITION
(1)
// EXEC PROC=ARIS75DB
*-- STARTER DATABASE IDENTIFICATION
(2)
// EXEC PROC=ARISDBSD
*-- RUN DB2 Server IN SINGLE USER MODE (3)
CONNECT SQLDBA IDENTIFIED BY currentpw;
GRANT CONNECT TO SQLDBA IDENTIFIED BY SQLDBAPW;
/*
* Use one or the other of the next two statements, but not both.
* See notes 4 and 5 for a brief description.
// EXEC PROC=ARIS062D
*-- REMOVE MESSAGES AND/OR HELP TEXT
(4)
// EXEC PROC=ARIS063D
*-- DELETE ALL HELP TEXT (5)
// EXEC PROC=ARISDBSD
*-- RUN DB2 Server IN SINGLE USER MODE (6)
CONNECT SQLDBA IDENTIFIED BY SQLDBAPW;
GRANT CONNECT TO SQLDBA IDENTIFIED BY newpw;
/*
/&
Figure 69. Removing ISQL HELP Text and Messages from the Database
Chapter 5. Maintenance Activities
71
Notes for Figure 69:
¹
Procedures ARISDBSD, ARIS062D, and ARIS063D run the application server in single user mode
against the identified database.
(1)
Procedure ARIS75SL identifies the DB2 Server for VSE service and production libraries.
(2)
Procedure ARIS75DB identifies the starter database. You can substitute the procedure or
job control statements that identify the database being updated.
(3)
Reset the password for the user SQLDBA to SQLDBAPW before executing procedure
ARIS062D or ARIS063D. The first execution of procedure ARISDBSD changes the pass-
word for the user SQLDBA to SQLDBAPW. Supply the current password (currentpw) in
the SQL CONNECT command.
(4)
Procedure ARIS062D removes the DB2 Server for VSE messages and/or ISQL Help Text
from the database. This step must be executed by the user SQLDBA. The source
members it reads assume that the password for user ID SQLDBA is SQLDBAPW.
Change ARIS062D before running it to specify which languages you want to delete, and
whether the messages are to be deleted too, or just the HELP Text.
Note: The messages for one language must remain.
The DB2 Server for VSE HELP Text tables SQLDBA.SYSTEXT1, SQLDBA.SYSTEXT2,
and SQLDBA.SYSLANGUAGE must exist in the database when you run this procedure.
(5)
ARIS063D deletes all the HELP Text for all languages.
(6)
After procedure ARIS062D (or ARIS063D) is executed, you should reset the password for
the user SQLDBA to a password of your choice. The second execution of procedure
ARISDBSD changes the password for the user SQLDBA. Supply the password of your
choice (newpw ) in the SQL GRANT command.
5.3
Online Resource Adapter Control Maintenance
5.3.1
Installing Online Resource Adapter Control after DB2 Server for
VSE Installation
If you have already generated a database without online resource adapter control, you can add it later as
follows:
1. Link-edit the online support as described below.
2. Run procedure ARIS080D to grant CONNECT authority to PUBLIC and SCHEDULE authority to the
CICS system.
3. Review "Installation Step 6: Grant SCHEDULE Authority" to determine if procedure ARIS080D granted
SCHEDULE authority to the correct user ID.
The procedures for installing these tables are found in "Preparation Step 5: Prepare the CICS System for
DB2 Server for VSE".
72
DB2 for VSE Program Directory
5.3.2
Re-Link-Editing Online Resource Adapter Control
If you must re-link-edit online resource adapter control after the initial installation of DB2 Server for VSE,
prepare and run the job control statements shown in Figure 70 on page 73
Refer to the information supplied with each DB2 Server for VSE service update to see if you should take
this action.
// JOB RELINK ONLINE RESOURCE ADAPTER CONTROL
// LIBDEF *,SEARCH=(PRD2.DB2750,PRD1.BASE,PRD2.CONFIG),
X
CATALOG=PRD2.DB2750
(1)
// EXEC PROC=ARIS090D
*-- LINK-EDIT ONLINE RESOURCE ADAPTER CONTROL (2)
/*
/&
Figure 70. Re-Link-Editing Online Resource Adapter Control
Notes:
¹
This job specifies the standard CICS libraries in the LIBDEF search path. If required, modify the job to
search your own CICS libraries.
(1)
This job requires that you specify the DB2 Server for VSE sublibrary into which the linkage
editor output is cataloged; in this job, the output is cataloged in the PRD2.DB2750 subli-
brary. Specify your own if it has a different name. If you have installed a National Lan-
guage, then specify the sublibrary into which the language was installed in the LIBDEF
SEARCH chain (before PRD2.DB2750), and also as the value for the LIBDEF CATALOG
parameter.
(2)
Procedure ARIS090D link-edits the DB2 Server for VSE online resource adapter control
into the DB2 Server for VSE sublibrary. It must not be changed. This link-edit job will
include the CICS interface modules DFHEAI and DFHEAI0 found in the CICS PRD1.BASE
sublibrary, or your own CICS libraries.
Restart the CICS system after the link-edit is successfully completed. For information, refer to Preparation
Step 5: Prepare the CICS System for DB2 Server for VSE
5.4
ISQL Maintenance
5.4.1
Installing ISQL after DB2 Server for VSE Installation
If you have already generated a database without ISQL, you can add it later as follows:
1. Reload the ISQL package (SQLDBA.ARIISQL).
2. Re-link-edit ISQL.
3. Re-link-edit the ISQL ITRM terminal transaction.
4. Re-link-edit the ISQL ITRX terminal extension.
Instructions for each of these tasks follow immediately.
Chapter 5. Maintenance Activities
73
5.4.2
Reloading the ISQL Package (SQLDBA.ARIISQL)
If you reload the ISQL package SQLDBA.ARIISQL after the initial DB2 Server for VSE installation, prepare
and execute the job control statements shown in Figure 71 on page 74. The package must be reloaded in
all applicable databases if there is a service update to A-type source member ARIISQLM.
Refer to the information supplied with each DB2 Server for VSE service update to see if you should take
this action.
// JOB RELOAD ISQL
// LIBDEF PROC,SEARCH=(PRD2.DB2750)
// EXEC PROC=ARIS75SL
*-- DB2 Server LIBRARY DEFINITION
(1)
// EXEC PROC=ARIS75DB
*-- STARTER DATABASE IDENTIFICATION
(2)
// EXEC PROC=ARISDBSD
*-- RUN DB2 Server IN SINGLE USER MODE (3)
CONNECT SQLDBA IDENTIFIED BY currentpw;
GRANT CONNECT TO SQLDBA IDENTIFIED BY SQLDBAPW;
/*
// EXEC PROC=ARIS120D
*-- RELOAD THE ISQL PACKAGE
(4)
// EXEC PROC=ARISDBSD
*-- RUN DB2 Server IN SINGLE USER MODE (3)
CONNECT SQLDBA IDENTIFIED BY SQLDBAPW;
GRANT CONNECT TO SQLDBA IDENTIFIED BY newpw;
/*
/&
Figure 71. Reloading the ISQL Package
Notes for Figure 71:
¹
The steps executed by procedures ARISDBSD and ARIS120D run the application server in single user
mode against the identified database.
(1)
Procedure ARIS75SL identifies the DB2 Server for VSE sublibraries.
(2)
Procedure ARIS75DB identifies the starter database. You can substitute the procedure or
job control statements that identify the database being updated.
(3)
The password for the user SQLDBA must be reset to SQLDBAPW before procedure
ARIS120D is executed. The first execution of procedure ARISDBSD changes the password
for the user SQLDBA to SQLDBAPW. Supply the current password (currentpw) in the
SQL CONNECT command. After procedure ARIS120D is executed, the password for the
user SQLDBA should be reset to a password of your choice. The second execution of
procedure ARISDBSD changes the password for the user SQLDBA. Supply the password
of your choice (newpw) in the SQL GRANT command.
(4)
Procedure ARIS120D reloads the package SQLDBA.ARIISQL into the database from the
DB2 Server for VSEA-type source member ARIISQLM. This step must be executed by the
user SQLDBA.
This step successfully completes with a return code of 0 through 4.
74
DB2 for VSE Program Directory
5.4.3
Re-Link-Editing ISQL
To re-link-edit ISQL after initial installation, prepare and execute the job control statements shown in
Figure 72 on page 75
Refer to the information supplied with each DB2 Server for VSE service update to see if you should take
this action.
// JOB RELINK ISQL
// LIBDEF *,SEARCH=(PRD2.DB2750,PRD1.BASE,PRD2.CONFIG),
X
CATALOG=PRD2.DB2750
(1)
// EXEC PROC=ARIS140D
*-- LINK-EDIT ISQL
(2)
/*
/&
Figure 72. Re-Link-Editing ISQL
Notes for Figure 72:
¹
This job specifies the standard CICS libraries in the LIBDEF search path. If required, modify the job to
search your own CICS libraries.
(1)
This job requires that you specify the DB2 Server for VSE sublibrary into which the linkage
editor output is cataloged; in this job, the output is cataloged in the PRD2.DB2750 subli-
brary. Specify your own if it has a different name. If you have installed a National Lan-
guage, then specify the sublibrary into which the language was installed in the LIBDEF
SEARCH chain (before PRD2.DB2750), and also as the value for the LIBDEF CATALOG
parameter.
(2)
Procedure ARIS140D link-edits the DB2 Server for VSE ISQL facility into the DB2 Server
for VSE library. It must not be changed. This link-edit job will include the CICS interface
modules DFHEAI and DFHEAI0 found in the CICS PRD1.BASE sublibrary, or your own
CICS libraries.
The CICS system must be restarted after the link-edit is successfully completed. See "Preparation Step 5:
Prepare the CICS System for DB2 Server for VSE". Alternatively, you can access the new phase by
executing the CICS CEMT master command after the link-edit is successfully completed. Refer to the
CICS manuals for information on this command.
5.4.4
Re-Link-Editing the ISQL ITRM Terminal Transaction
To re-link-edit the ISQL ITRM terminal transaction after initial installation, prepare and execute the job
control statements shown in Figure 73 on page 76. This is required by a service update to the ISQL ITRM
terminal transaction program module.
Refer to the information supplied with each DB2 Server for VSE service update to see if you should take
this action.
Chapter 5. Maintenance Activities
75
// JOB RELINK ISQL ITRM TERMINAL TRANSACTION PROGRAM
// LIBDEF *,SEARCH=(PRD2.DB2750,PRD1.BASE,PRD2.CONFIG),
X
CATALOG=PRD2.DB2750
(1)
// EXEC PROC=ARIS150D
*-- LINK-EDIT ITRM TERMINAL TRANSACTION
(2)
/*
/&
Figure 73. Re-Link-Editing the ISQL ITRM Terminal Transaction
Notes for Figure 73:
¹
This job specifies the standard CICS libraries in the LIBDEF search path. If required, modify the job to
search your own CICS libraries.
(1)
This job requires that you specify the DB2 Server for VSE sublibrary into which the linkage
editor output is cataloged; in this job, the output is cataloged in the PRD2.DB2750 subli-
brary. Specify your own if it has a different name. If you have installed a National Lan-
guage, then specify the sublibrary into which the language was installed in the LIBDEF
SEARCH chain (before PRD2.DB2750), and also as the value for the LIBDEF CATALOG
parameter.
(2)
Procedure ARIS150D link-edits the DB2 Server for VSE ISQL facility ITRM terminal trans-
action module into the DB2 Server for VSE library. It must not be changed. This link-edit
job will include the CICS interface modules DFHEAI and DFHEAI0 found in the CICS
PRD1.BASE sublibrary, or your own CICS libraries.
The CICS system must be restarted after the link-edit is successfully completed. See "Preparation Step 5:
Prepare the CICS System for DB2 Server for VSE". Alternatively, you can access the new phase by
executing the CICS CEMT master command after the link-edit is successfully completed. Refer to the
CICS manuals for information on this command.
5.4.5
Re-Link-Editing the ISQL ITRM Terminal Extension Program
To re-link-edit the ISQL ITRM terminal extension program after initial installation, prepare and execute the
job control statements shown in Figure 74. This is required by a service up date to the ISQL ITRM ter-
minal extension program module.
Refer to the information supplied with each DB2 Server for VSE service update to see if you should take
this action.
// JOB RELINK ISQL ITRM TERMINAL EXTENSION PROGRAM
// LIBDEF *,SEARCH=(PRD2.DB2750,PRD1.BASE,PRD2.CONFIG),
X
CATALOG=PRD2.DB2750
(1)
// EXEC PROC=ARIS160D
*-- LINK-EDIT ITRM TERMINAL EXTENSION
(2)
/*
/&
Figure 74. Re-Link-Editing the ISQL ITRM Terminal Extension Program
Notes for Figure 74:
¹
This job specifies the standard CICS libraries in the LIBDEF search path. If required, modify the job to
search your own CICS libraries.
76
DB2 for VSE Program Directory
(1)
This job requires that you specify the DB2 Server for VSE sublibrary into which the linkage
editor output is cataloged; in this job, the output is cataloged in the PRD2.DB2750 subli-
brary. Specify your own if it has a different name. If you have installed a National Lan-
guage, then specify the sublibrary into which the language was installed in the LIBDEF
SEARCH chain (before PRD2.DB2750), and also as the value for the LIBDEF CATALOG
parameter.
(2)
Procedure ARIS160D link-edits the DB2 Server for VSE ISQL facility ITRM terminal exten-
sion program module into the DB2 Server for VSE library, and must not be changed. This
link-edit job will include the CICS interface modules DFHEAI and DFHEAI0 found in the
CICS PRD1.BASE sublibrary, or your own CICS libraries.
The CICS system must be restarted after the link-edit is successfully completed. See "Preparation Step 5:
Prepare the CICS System for DB2 Server for VSE". Alternatively, you can access the new phase by
executing the CICS CEMT master command after the link-edit is successfully completed. Refer to the
CICS manuals for information on this command.
You can use operator commands to search the file for a new copy. See the appropriate CICS manual for
details.
5.5
CCSID-Related Phases Maintenance
5.5.1
Reloading the CCSID-Related Phases Package
(SQLDBA.ARIRSQR)
The CCSID-related phases package must be reloaded in all applicable databases if there is a service
update to A-type source member ARIRSQRM. To reload it, run job control member ARIS75WD shown in
Figure 75.
Refer to the information supplied with each DB2 Server for VSE service update to see if you should take
this action.
// JOB ARIS75WD
RELOAD CCSID-RELATED PHASES PACKAGE
// LIBDEF PROC,SEARCH=(PRD2.DB2750)
// EXEC PROC=ARIS75SL
*-- DB2 Server LIBRARY DEFINITION
// EXEC PROC=ARIS75DB
*-- STARTER DATABASE IDENTIFICATION
// EXEC PROC=ARIS175D
*-- RELOAD CCSID-RELATED PHASES PACKAGE
/*
/&
Figure 75. Reloading the CCSID-Related Phases Package
Notes for Figure 75:
¹
For procedures ARIS61DB and ARIS61SL, substitute your own procedures or job control statements
that identify your current database and the DB2 Server for VSE Version 7 Release 5 sublibrary.
¹
Procedure ARIS175D reloads the CCSID-related phases package in the database by running the
application server in single user mode against that database.
Chapter 5. Maintenance Activities
77
5.5.2
Recreating the CCSID-Related Phases
To recreate the CCSID-related phases after initial installation, execute job ARISCNVD (supplied as a
Z-type job control member). You must recreate the CCSID-related phases after any updates are made to
the SYSTEM.SYSCCSIDS, SYSTEM.SYSCHARSETS, or SYSTEM.SYSSTRINGS system catalog tables.
Refer to "Migration Step 16: Create CCSID-Related Phases" for details.
5.6
FIPS Flagger Maintenance
5.6.1
Reloading the FIPS Flagger Package (SQLDBA.ARIFCRD)
The FIPS flagger package must be reloaded in all applicable databases if there is a service update to
A-type source member ARIFCRDM. To reload it, prepare and run the job control statements shown in
Figure 76
Refer to the information supplied with each DB2 Server for VSE service update to see if you should take
this action.
// JOB RELOAD FIPS FLAGGER
// LIBDEF PROC,SEARCH=(PRD2.DB2750)
// EXEC PROC=ARIS75SL
*-- DB2 Server LIBRARY DEFINITION
(1)
// EXEC PROC=ARIS75DB
*-- STARTER DATABASE IDENTIFICATION
(2)
// EXEC PROC=ARISDBSD
*-- RUN DB2 Server IN SINGLE USER MODE (3)
CONNECT SQLDBA IDENTIFIED BY currentpw
GRANT CONNECT TO SQLDBA IDENTIFIED BY SQLDBAPW
/*
// EXEC PROC=ARIS360D
*-- RELOAD THE FIPS FLAGGER
(4)
// EXEC PROC=ARISDBSD
*-- RUN DB2 Server IN SINGLE USER MODE (3)
CONNECT SQLDBA IDENTIFIED BY SQLDBAPW
GRANT CONNECT TO SQLDBA IDENTIFIED BY newpw
/*
/&
Figure 76. Reloading the FIPS Flagger Package
Notes for Figure 76:
¹
The steps executed by procedure ARISDBSD and procedure ARIS360D run the application server in
single user mode against the identified database.
(1)
Procedure ARIS75SL identifies the DB2 Server for VSE sublibraries.
(2)
Procedure ARIS75DB identifies the starter database. For procedure ARIS34DB, you can
substitute the procedure or job control statements that identify the database being updated.
(3)
The password for the user SQLDBA must be reset to SQLDBAPW before procedure
ARIS360D is executed. The first execution of procedure ARISDBSD changes the password
for the user SQLDBA to SQLDBAPW. You must supply the current password (currentpw)
for the user SQLDBA in the SQL CONNECT command shown. After procedure ARIS360D
is executed, the password for the user SQLDBA should be reset to a password of your
choice. The second execution of the procedure ARISDBSD changes the password for the
78
DB2 for VSE Program Directory
user SQLDBA. Supply the password of your choice (newpw) for the user SQLDBA in the
SQL GRANT command.
(4)
The step executed by procedure ARIS360D reloads the package SQLDBA.ARIFCRD into
the database from the DB2 Server for VSE A-type source member ARIFCRDM. The step
must be executed by the user SQLDBA.
This step is successfully completed with a return code of 0 through 4.
5.7
DB2 Server for VSE Library Maintenance
In a VSE environment, a production sublibrary is required for DB2 Server for VSE.
5.7.1
Replacing DB2 Server for VSE
To replace DB2 Server for VSE:
1. Purge the existing sublibrary as described below.
2. Restore DB2 Server for VSE through MSHP by following "Preparation Step 4: Restore the DB2 Server
for VSE Distribution Library".
3. Perform the link-edits in "Installation Step 1: Link-Edit the DB2 Server for VSE 7.5 Online Support
Components".
5.7.2
Purging DB2 Server for VSE Libraries
To purge existing sublibraries of all entries relating to DB2 Server for VSE, prepare and execute the job
control statements shown in Figure 77
// JOB PURGE DB2 Server VSE VERSION 7.5 LIBRARIES
// EXEC LIBR,PARM='MSHP'
ACCESS SUBLIB=PRD2.DB2750
(1)
DELETE ARI*.*
/*
/&
Figure 77. Purging DB2 Server for VSE Libraries
Note for Figure 77:
(1)
The ACCESS statement must contain the name of the sublibrary that contains DB2 Server
for VSE. Change this name as required.
5.8
DB2 Server for VSE Link Books
Table 2 shows the relationships between DB2 Server for VSE components, link books, and phase names.
Refer to it when re-link-editing DB2 Server for VSE phases.
Note:
1. Only the following DB2 Server for VSE phases are eligible for the VSE shared virtual area
(SVA):
Chapter 5. Maintenance Activities
79
ARICDIRD
ARIDBS
ARIPRPA
ARIPRPC
ARIPRPF
ARIPRPP
ARIRBARM
ARISQLDS
ARIXRDS
If you install all of the phases eligible for SVA into the VSE shared virtual area, allocate an addi-
tional 4.1 megabytes of storage to the SVA.
Currently there is a problem loading these phases in SVA. APAR PQ53159 has been opened to
address this issue.
Table 2. Link Books for the DB2 Server for VSE Components
Figure 78 (Page 1 of 2). Link Books for the DB2
Server for VSE Components
Component
Link Book
Phases
DB2 Server for VSE Copyright
None
$$$COSQL
DBSS / DSC
ARISLKDD
ARISQLDS
ARISLKMD
ARICMOD
VSE Dependent Functions
ARISLKED
ARISD00D ARISD01D
ARISD10D
ARISD11D ARISD12D
ARISD13D
ARISD14D ARISD15D
ARISD16D
ARISD20D ARISD21D
ARISD22D
ARISD23D ARISD24D
ARISD25D
ARISD26D ARISD30D
ARISD31D
ARISD32D ARISD33D
ARISD34D
RDS with DRDA
ARISLKRA
ARIXRDS
RDS without DRDA
ARISLKRD
ARIXRDS
User Exit Router
ARISLKXD
ARIXSXR
DBMS
ARISLK1D
ARISDBMS
Assembler Preprocessor
ARISLKAD
ARIPRPA
Flagger Semantic Routines
ARISLK4D
ARIFFVL
Flagger View Analysis Routines
ARISLK5D
ARIFBVL
Flagger LGP tables modules
ARISLK7D
ARIFF00 ARIFS00
ARIFB00
C Preprocessor
ARISLK6D
ARIPRPB
COBOL Preprocessor
ARISLKCD
ARIPRPC
PL/I Preprocessor
ARISLKPD
ARIPRPP
FORTRAN Preprocessor
ARISLKTD
ARIPRPF
DBS Utility
ARISLKUD
ARIDBS
Batch Resource Adapter
ARISLKBD
ARIRBARM
Online Resource Adapter
ARISLKZD
ARI0OLRM
DBNAME Directory Generator
ARISLK8D
ARICBDID
DBNAME Directory Services
ARISLKDA
ARICDIRD
APPC-to-XPCC Exchange Transaction
ARISLK9D
ARICAXED
Trace Formatter
ARISLKFD
ARIMTRA
Directory Expander
ARISLKQD
ARIMEXBD
Online Resource Adapter Control
ARISLKYD
ARIRCONT
(ENABLE/DISABLE CICS Resource Adapter)
ISQL Mainline Transaction
ARISLKID
ARIISQL
ITRM Terminal Transaction program
ARISLKJD
ARIITRM
ITRM Terminal Extension Program
ARISLKLD
ARIITRX
Abend Checking Support for LE/VSE
None
ARICABC
Message Repository (American English)
None
ARIMS001
DRDA2 Support
ARISLKVD
ARICDEBD
ARISLKOD
ARICDRAD
ARISLKND
ARICDAXD
ARISLKWD
ARICDR2
COBOL Dynamic Support
None
ARIPADR4 ARIPADR5
ARIPRDI
ARISSMA
Note: Note: You can use Z-type source member
ARIS51LP to create these Phases.
80
DB2 for VSE Program Directory

Figure 78 (Page 2 of 2). Link Books for the DB2
Server for VSE Components
CCSID-Related Phases
ARISLKQZ
ARIRRFCD
ARISLKRZ
ARIRRFRD
ARISLKSZ
ARIRRFSD
CBND Mainline Transaction
ARISLKBA
ARIPCBND
CBND sub-transaction
ARISLKCA
ARIPCB2D
SQLGLOB File Default Setting Program
ARISLKGZ
ARICGDEF
ISQL Package Conversion Program
ARISLKBZ
ARICIQBD
Password encryption routine for online resource
ARISLKSV
ARICSCC
adapter
Password encryption routine for batch resource
ARISLKSE
ARICSEC
adapter and server
TCP/IP online resource adapter
ARISLKTV
ARICTCC
TCP/IP batch resource adapter
ARISLKTE
ARICTCP
Batch Resource Adapter with DRDA for TCP/IP
ARISLKB1
ARIRBARM
Assembler Interface
Batch Resource Adapter with DRDA for TCP/IP
ARISLKB2
ARIRBARM
EZASMI Interface
Online Resource Adapter DRDA Router for TCP/IP
ARISLKZ1
ARI0RTRM
Assembler Interface
Online Resource Adapter with DRDA for TCP/IP
ARISLKZ2
ARI0OLRM
Assembler Interface
Online Resource Adapter with DRDA for TCP/IP
ARISLKZ3
ARI0OLRM
EZASMI Interface
Online Resource Adapter DRDA Router for TCP/IP
ARISLKZ4
ARI0RTRM
EZASMI Interface
DBSS for TCP/IP EZASMI Interface
ARISLKD1
ARISQLDS
RDS for TCP/IP EZASMI Interface
ARISLKR1
ARIXRDS
RA Control for TCP/IP Assembler Interface
ARISLKY1
ARIRCONT
RA Control for TCP/IP EZASMI Interface
ARISLKY2
ARIRCONT
Batch Binder
ARISLKBB
ARIPBIN
SQLDBDEF Utility
ARISLKRF
ARIDBDF
Chapter 5. Maintenance Activities
81

6.0
Appendix A. How to Use the Job Manager
IMPORTANT: READ THIS APPENDIX BEFORE STARTING THE INSTALLATION.
6.1
Overview of Installation and Migration
This section is an introduction to the installation of DB2 Server for VSE Version 7 Release 5 (7.5) and the
migration of existing databases to 7.5. At the beginning of chapters 2 through 4, you can find an outline of
the preparation, installation and migration steps in each chapter.
An installation aid is supplied to help with the installation and migration processes. Some steps in Chap-
ters 2 through 4 utilize this aid, and some are performed manually.
6.2
Installation
If you are installing DB2 Server in a VSE system for the first time, follow the steps in Chapter 2, Preparing
to install DB2 Server for VSE 7.5, and Chapter 3, Installing DB2 Server for VSE. You do not perform any
of the steps in Chapter 4, Migrating an Existing Database.
6.3
Migration
If you are migrating from a previous release, follow the relevant steps in Chapter 2 on Preparation, and
the Migration steps in Chapter 4. Of course, you might follow the installation process to build a starter
database for initial application testing, and then perform the migration process for your existing databases.
As part of your preparation to migrate your existing database to the DB2 Server for VSE Version 7
Release 5, you should review the Appendix in the DB2 Server for VSE System Administration manual that
discusses the differences between your existing system, and Version 7 Release 4.
6.4
Optional Steps
Not all of the steps in the installation and migration processes are mandatory. Depending on how you
want to install DB2 Server for VSE, you may decide to not perform some optional steps. Also, depending
on how you want to migrate any existing databases, you may choose to omit certain optional steps.
82
Copyright IBM Corp. 1981, 2007

6.5
The Job Manager
The Job Manager is a set of REXX Exec, Job Control members, and parameter tables, to assist in the
DB2 Server for VSE Installation and Migration processes. REXX program ARISIMGR controls the overall
job flow, based on the contents of the job list control tables(supplied as Z-type members). There are job
lists for Preparation steps(ARISITBP), for Installation steps(ARISITBI), and for Migration steps(ARISITBM).
The Job Manager selects the job control member from the job list, extracts the member from the library,
modifies the JCL, submits the job, evaluates the execution, posts the results, and then repeats the
process. Modifications to the job control members are based on substituting variables in the JCL, using
the parameters in ARISIVAR(a Z-type member).
6.5.1
How Parameter Substitution Works
The Job Manager reads variables stored in ARISIVAR (a Z-type member).
Before starting the Job Manager:
1. Punch and modify the sample ARISIVAR from your installation library.
2. Re-catalog ARISIVAR to your installation library.
Note:
¹
Make sure to preserve the structure of ARISIVAR member.
¹
You do not need to update parameters for a step, you are not planning to execute.
The parameter table (see ARISIVAR a Z-type member) has one line for each parameter for each job. The
lines of the parameter table are in the following format:
Job name
The job name that requires Parameter(s)
Parameter name
The variable name in the job JCL
Value of the parameter
The value of the parameter that can be changed
Figure 79. The description of parameters in ARISIVAR
The parameter table also has one line for each global parameter. These parameters are used in more
than one job, but apply only within the start/end group being processed.
Parameter name
GLOBAL (constant keyword)
Parameter name
This name appears in a JCL for the job
Value of the parameter
This is actual value of the global parameter, which can be
changed
Figure 80. The description of Global parameters in the ARISIVAR
Appendix A. How to Use the Job Manager
83

6.5.2
How Job List Works
The job list is used by the Job Manager to determine the jobs required by each step (Preparation/ Installa-
tion or Migration).
Job's name
Name of member in the distribution library
Job's type
Type of member in the distribution library
Return code
¹
RC = 'X' - job did not complete successfully or has not run before.
¹
RC=number, job has run and RC contains the return code of the job.
MAXRC
MAXRC maximum return code allowed for this job to continue the installation
process.
Is job Optional?
O - Optional, M - Mandatory (for Installation part)
Is job Optional?
O - Optional, M - Mandatory (for Migration part)
Is input required?
¹
YES - input required (get variables from ARISIVAR)
¹
NO - input is not required.
Note: If the only required parameter is installation library name or a global var-
iable, then input marked as 'NO'
Stop Job Manager?
¹
YES - stop the execution of the Job Manager after this step.
¹
NO - continue the execution of the Job Manager.
Figure 81. Description of each column in a job list
Note: Every parameter in a job list must be in upper case, separated from other parameters by one blank
space.
Here is an example of a job list for the Preparation Step:
ARIS75JD Z X 4 O M YES NO
In the example, ARIS75JD is a Z type member, which was not executed yet. The maximum return code
allowed for ARIS75JD is 4. ARIS75JD is Optional step in Preparation for Installation, but mandatory step
in Preparation for Migration. The ARIS75JD requires parameters from ARISIVAR and the execution of the
Job Manager will not stop after this step.
As ARIS75JD is submitted to your VSE system, the Job Manager will compare the maximum return code
from the execution to MAXRC. If the job completes with a return code greater than MAXRC, the Job
Manager stops.
6.5.2.1
How to Run All Jobs Again:
If you have multiple databases and want to execute Preparation, Installation, or Migration Step again this
section will explain how to do it. You can choose one of the following:
1. Punch a Job List corresponding to the step you want to execute:
¹
ARISITBP - Job List for Preparation Step
¹
ARISITBI - Job List for Installation Step
84
DB2 for VSE Program Directory
¹
ARISITBM - Job List for Migration Step
Change the "Return Code" fields (See Figure 81 on page 84) for all jobs with "X" and re-catalog the
Job list to the installation library.
WARNING: When changing the records in the file, note that the fields must be separated by only one blank.
2. See Figure 83 on page 86.
6.5.3
Starting the Job Manager
IMPORTANT: Modify ARISIVAR Z-type member with the appropriate parameters. If you subsequently change ANY ARISIVAR global variables you MUST restart the Job
Manager.
After successful modification of ARISIVAR control table, punch and submit job control member
ARISIMGJ.Z from the distribution library, which will start execution of Job Manager.
* $$ JOB JNM=ARISIMGJ,CLASS=x
(1)
* $$ LST CLASS=V,DEST=(,userid)
*modify accordingly
// JOB ARISIMGJ JCL TO START MANAGER EXEC
// LIBDEF *,SEARCH=(PRD2.DB2750) *modify accordingly
// EXEC REXX=ARISIMGR
/*
/&
* $$ EOJ
Figure 82. Starting the Job Manager
(1)
For CLASS specify any available partition to run the Job Manager.
Note: ARISSTDL Z-type member must run in background partition, thus for the Prepara-
tion Step do not submit the Job Manager to run in background partition. See Figure 83 on
page 86:
Note: ARISIMGJ Job will always complete with the return code of 0. You must check the return code of the executed job and rely on the messages from the Job manager
to make sure that the execution was successful.
See "How the Job Results are Evaluated".
6.5.3.1
User Interface:
Appendix A. How to Use the Job Manager
85
F4 0004 *************************************************************
F4 0004
PREPARE FOR INSTALLATION/MIGRATION PROCESS
F4 0004 *************************************************************
F4 0004 ENTER INSTALLATION LIBRARY NAME (PRD2.DB2750
default) Q Exit
(1)
F4-0004
4
F4 0004 YOU HAVE SELECTED PRD2.DB2750
F4 0004 PRESS ENTER TO CONTINUE OR ENTER ANOTHER LIBRARY NAME
F4 0004
Q Exit
4
F4 0004 ENTER PARTITION NUMBER: (default 4)
Q Exit
(2)
F4-0004
0
F4 0004 YOU HAVE SELECTED
0
F4 0004 PRESS ENTER TO CONTINUE OR ENTER ANOTHER PARTITION NUMBER
F4-0004
4
F4 0004 PLEASE SELECT ONE OF THE FOLLOWING :
F4 0004 FOR PREPARATION
ENTER (P)
F4 0004 FOR INSTALLATION...
ENTER (I)
F4 0004 FOR MIGRATION
ENTER (M)
F4 0004
Q Exit
4 p
F4 0004 IF PREPARATION FOR:
Q Exit
F4 0004 INSTALLATION... PLEASE ENTER (I)
F4 0004 MIGRATION
PLEASE ENTER (M)
F4-0004
4 i
F4 0004 DO YOU WANT TO EXECUTE ALL JOBS? {Y|N-default}
Q Exit
(3)
F4-0004
4 n
F4 0004 IF YOU WANT TO START FROM A SPECIFIC JOB ENTER 1
(4)
F4 0004 IF YOU WANT TO EXECUTE ONLY ONE STEP
ENTER 2 (Default)
(5)
F4 0004
Q Exit
4 2
F4 0004 ENTER THE JOB NAME YOU WANT TO EXECUTE (ex. ARIS75JD):
F4 0004
Q Exit
4 aris75jd
F1 0001 1Q47I F4 ARIS75JD 00021 FROM (JCL) , TIME=12:45:32
BG 0000 * ** JOB JNM=ARIS75JD,CLASS=0,DISP=D
BG 0000 * ** LST CLASS=V,DISP=D,DEST=(,XXXXXXX)
BG 0000 // JOB ARIS75JD DEFINE DB2750 PROGRAMS AND TRANSACTIONS
Figure 83. Sample user answers when running the Job Manager
Notes for Figure 83:
(1)
The installation library name, which is specified here, is included in library search path for all jobs
as the parameter - LIBNAME.
// JOB name
// LIBDEF PROC,SEARCH=(%%LIBNAME%%)
(2)
For Preparation Step - answer 0 (BG partition). Note: the BG partition must be available.
For Installation/ Migration Steps - specify any available partition that has enough size to start
the DB2 startup database
86
DB2 for VSE Program Directory
(3)
Enter 'YES' if you want to run all jobs within the current step (Preparation/ Installation/
Migration).
Note: the Job Manager will skip all jobs which were run successfully. The first job it will submit
will be a job which failed in previous execution or which was never run before.
The default answer is 'NO'.
(4)
Enter '1' if you want the Job Manager to start from a particular job and continue execution of all
jobs which follow the specified one.
Note: this choice is useful if you have to execute some jobs twice, even if the execution of the
jobs was successful.
(5)
The default answer is '2' - to execute only one job.
Note: At any time Enter Q to quit and terminate the Job.
6.5.4
Execution of Jobs Submitted by the Job Manager
On the console during the execution of job you should see the following:
F4 0001 1Q47I F4 name_of_submited_job 00025 FROM
(ARISIMGR) , TIME=11:39:33
F4 0004 // JOB name_of_job comment from submitted job
DATE 09/12/2001, CLOCK 11/39/33
* more comments from submitted_job (if available)
F4 0004 EOJ name_of_job MAX.RETURN CODE=0000
DATE 09/12/2001, CLOCK 11/39/36, DURATION 00/00/03
F4 0004 EOJ NO NAME
DATE 09/12/2001, CLOCK 11/39/37
F4 0001 1Q34I F4 WAITING FOR WORK
F1 0001 1Q34I LST WAITING FOR WORK ON 00E
F4-0004 ***********************************************
F4-0004 * JOB: name_of_job EXECUTED SUCCESSFULLY
(1)
F4-0004 ***********************************************
F4-0004 JOB MANAGER COMPLETED SUCCESSFULLY
(2)
F4-0004 EOJ JCL
MAX.RETURN CODE=0000
BG-0000
Figure 84. Console output from the Job Manager
(1)
This message will always appear if submitted job executed successfully.
The possible error messages are:
¹
'ERROR! RETURN CODE FROM LAST STEP WAS xxx'
¹
'JOB WAS CANCELED'
¹
'READ CONSOLE FOR DETAILS.'
(2)
If error occurs you must investigate, correct the error and restart the Job Manager.
Appendix A. How to Use the Job Manager
87
6.5.5
How the Job Results are Evaluated
What do you look for:
¹
Messages from the Job manager (ARISIMGJ). If it was terminated, read console and check your reader to
make sure you understand what went wrong, correct the error, and restart Job Manager.
¹
Messages from submitted jobs.
- Some jobs have error checking inside the JCL. In such situations Job Manager will wait for an user
response to continue or to stop the installation process.
- Other jobs that terminate abnormally will produce readable output on the console and send the console
output file to your reader. Please read the file to determine what went wrong.
- Some jobs will not terminate until there is a console response from the user. If no response was received
after 30 seconds, Job Manager will output a warning message on the console and wait for your response.
¹
If the return code allowed for a job was greater than zero, it is your responsibility to check whenever this code
was expected or if occurred because of some kind of error. This is very important for Z-type member
ARIS75DD. Please read the console output for this job and make sure no errors are found.
IMPORTANT: Always verify if the execution of the last job was successful. If the Job Manager stops its execution, before proceeding to another step, make sure that no
errors occured and that you executed all mandatory jobs for the step.
6.5.6
What Should You Keep in Mind
As soon as you start the Job Manager for Installation or Migration Steps, it will update and recatalog three
members: ARIS75DB, ARIS75SL and ARIS380D
Note: If you need to make any changes to ARIS75DB, ARIS75SL or ARIS380D after starting the Job
Manager for Installation or Migration Steps, you must do it manually.
ARIS75DB
Contains the labels for the VSAM files used for the Starter Database. This member will be
updated using parameters you specified for ARIS75CD Z-type member. The parameters needed
are:
¹
DBCAT
¹
DIRFILE
¹
LOGFILE
¹
EXTFILE
ARIS75SL
This member will be updated using following parameters:
¹
Default Installation Library, which you specify when starting the Job Manager (default is
PRD2.DB2750)
¹
CLIB - see Figure 59 on page 56
ARIS380D
This member will install a language. See 3.6.1, “Install Language and ISQL Help Text” on
page 42. If you need to install more than one language you need to modify this procedure manu-
ally.
88
DB2 for VSE Program Directory
6.6
The Disclaimer
The Job Manager is supplied as an installation aid for DB2 Server for VSE, and is not intended to be used as a
general purpose monitoring tool. Any use of the Job Manager, other than Preparation, Installation, and Migration for
DB2 Server for VSE is not supported.
Appendix A. How to Use the Job Manager
89
7.0
Appendix B. Techniques Used for Installation
The following are techniques used in some of the DB2 Server for VSE installation procedures and members:
¹
Embedding database identification statements
¹
Embedding DB2 Server for VSE library identification statements
¹
Using READ MEMBER statements
¹
Running the DBS utility in single user mode
¹
Suppressing preprocessor output.
7.1
Embedding Database Identification Statements
The IBM-supplied procedure ARIS75DB contains the DLBL statements that identify the components of the starter
database. No program is executed by this procedure. It is executed first in the example job control members to
embed the database DLBL statements needed by DB2 Server for VSE (program ARISQLDS).
You can replace the references to ARIS75DB with actual database DLBL statements, or with references to your
own procedures set up for this purpose.
7.2
Embedding DB2 Server for VSE Library Identification Statements
The IBM-supplied procedure ARIS75SL contains the library identification (LIBDEF) statements for most of the
installation steps for a database. The IBM-supplied procedure ARIS75PL contains the LIBDEF statements for
normal use of DB2 Server for VSE.
The LIBDEF statements in procedures ARIS75SL and ARIS75PL are not unique to a particular database. They are
included whenever a set of DB2 Server for VSE libraries is needed.
You can replace the references to ARIS75SL and ARIS75PL with your own LIBDEF statements, or with references
to your own procedures set up for this purpose.
7.3
Using the READ MEMBER Statement
DB2 Server for VSE can read input from a source member with a statement of the form:
READ MEMBER member-name[.member-type] [(NOCONT]
Note: The square brackets [ ] indicate an optional parameter.
member-name
Specifies a source member in the DB2 Server for VSE library.
90
Copyright IBM Corp. 1981, 2007
member-type
Specifies the source member type. The default is “.A”. For example, either BOOK1 or
BOOK1.A is correct.
NOCONT Specifying NOCONT prevents READ MEMBER from continuing to read from SYSIPT. It
also ensures that the EOF indicator is returned. If NOCONT is specified, subsequent
records are read from SYSIPT after the end of member
A READ MEMBER statement:
¹
Can occur anywhere between byte 1 and byte 71 of a SYSIPT record.
¹
Is accepted only if it occurs immediately after an EXEC statement or another READ MEMBER
statement.
¹
Is accepted after a SCHEMA or RELOAD PACKAGE command if the INFILE specified is
SYSIPT. The NOCONT option is required to properly end the file.
¹
Is accepted after a DATALOAD command if the INFILE specified is (*). An ENDDATA
command is required at the end of the input data records, whenever the end of data is inside
the member or in SYSIPT.
¹
Must not follow other SYSIPT data records. However, SYSIPT data records can follow it if the
NOCONT option is not specified.
¹
Is not intended to be used outside of the DB2 Server for VSE process. Using READ MEMBER
to include members with SQL INCLUDE statements results in errors.
You can place SYSIPT data immediately after an EXEC statement and not READ MEMBER state-
ment.
7.4
Running the DBS Utility in Single User Mode
The job control example shown in Figure 85 starts the application server in single user mode (SYSMODE=S).
When the application server is initialized, it passes control to the application program specified by the PROGNAME
parameter (in this situation, the DBS utility program ARIDBS).
During the DB2 Server for VSE installation process, the DBS utility is run without DB2 Server for VSE logging
(LOGMODE=N). All other DB2 Server for VSE initialization parameters are allowed to default.
// JOB START SINGLE
// LIBDEF PROC,SEARCH=(PRD2.DB2750)
// EXEC PROC=ARIS75DB
*-- STARTER DATABASE IDENTIFICATION
// EXEC PROC=ARIS75PL
*-- DB2 Server LIBRARY DEFINITION
Optional statements for the application program,
such as TLBL and DLBL statements.
// EXEC ARISQLDS,SIZE=AUTO,PARM='SYSMODE=S,LOGMODE=N,PROGNAME=ARIDBS'
SYSIPT input to the DBS utility application program.
/*
/&
Figure 85. Example of Running the DBS Utility in Single User Mode
Appendix B. Techniques Used for Installation
91
Note:
For procedure ARIS75DB, you can substitute your own procedure or job control statements, to
start the application server using your own database.
7.5
Suppressing Preprocessor Output
SYSPCH and SYSLST output from the DB2 Server for VSE Assembler preprocessor is suppressed during the
database install action process. It is not required because only access modules are being built for the database.
Assignment and label information for SYSPCH is not needed when the SYSPCH output is suppressed. The assign-
ment and label information is only required for output to disk file.
Preprocessor parameters NOPRINT (NOPR) and NOPUNCH (NOPU) are used. Refer to the DB2 Server for VSE
Application Programming manual for a complete description of the preprocessor parameters.
Preprocessor diagnostic messages are always written to SYSLST.
92
DB2 for VSE Program Directory
8.0
Appendix C. Procedures Provided by IBM
This appendix lists the procedures provided by IBM for your use. Any procedures not documented in this manual
are included in the DB2 Server for VSE System Administration manual.
Procedure
Purpose
ARISIMGR
Rexx Job Manager
ARISDBSD
Run the DBS Utility in DB2 Server for VSE Single User Mode
ARIS030D
Generate the Starter Database
ARIS040D
Create the DBS Utility Package
ARIS050D
Finish Database Generation
ARIS055D
Load Sample Table and Routines
ARIS059D
Activate the Messages for Language xxxx
ARIS060D
Install ISQL HELP Text into the Database
ARIS061D
Migrate the HELP Text Tables
ARIS062D
Deactivate a Language and/or Delete HELP Text for a Specific Language
ARIS063D
Delete all HELP Text for all Languages
ARIS070D
Update the DB2 Server for VSE System
ARIS075D
Drop, Recreate, and Load the Sample Tables
ARIS080D
Grant SCHEDULE Authority to DBDCCICS
ARIS090D
Link-edit Online Resource Adapter Control with Assembler TCP/IP interface
ARIS095D
Link-edit Online Resource Adapter Control with EZASMI TCP/IP interface
ARIS100D
Link-edit Online Resource Adapter Control with LE/C TCP/IP interface
ARIS110D
Create/Grant ISQL Tables/Authorizations
ARIS120D
Reload the ISQL Package
ARIS130D
Complete the Installation of ISQL
ARIS140D
Link-edit ISQL
ARIS150D
Link-edit ISQL ITRM Terminal Transaction
ARIS160D
Link-edit ISQL ITRM Terminal Extension Program
ARIS170D
Link-edit DB2 Server for VSE Batch Resource Adapter
ARIS175D
Reload the CCSID-related Phases Package
ARIS180D
Link-edit DB2 Server for VSE Trace Formatter
ARIS185D
Link-edit DB2 Server for VSE Directory Expander
ARIS190D
Link-edit DB2 Server for VSE DBSS/DSC with LE/C TCP/IP interface
ARIS195D
Link-edit DB2 Server for VSE DBSS/DSC with EZASMI TCP/IP interface
Copyright IBM Corp. 1981, 2007
93
ARIS250D
Add and Delete Dbextents
ARIS75FC
Sample File Control Table Entries for SQLBIND and SQLGLOB
ARIS75DB
Starter Database Identification Statements
ARIS75PL
DB2 Server for VSE Production Library Definition
ARIS75SL
DB2 Server for VSE Optional Service/Production Library Definition
ARIS360D
Load FIPS flagger
ARIS370D
List Primary Keys to be Dropped and Recreated
ARIS380D
User entry for NLS Installation
ARIS385D
Procedure to install NLS and Load Help Text
ARIS390D
Load initial record to SQLGLOB VSAM file
ARIS395D
Load initial record to SQLBIND VSAM file
94
DB2 for VSE Program Directory
9.0
Appendix D. A-Type Source Members
This appendix identifies the members that are distributed as DB2 Server for VSE A-type source members. The
members contain sample input used during installation and migration.
Member
Contents
ARIDSQLB
Bindfile for DBS Utility
ARIDSQLP
Source Code of the DBS Utility Package
ARIFCRDM
FIPS Flagger Package
ARIISQLM
ISQL Package
ARIPREPF
Prep parm file for preparing DBSU at installation
ARIRCAN
User Cancel Exit Support Macro
ARIRMAR
User Cancel Exit Support Macro
ARIRSQRM
CCSID-related Phases Package
ARISADD
Sample Input to Add/Delete Dbextent Function
ARISAMDB
SQL Statements to be Executed by the DBS Utility to Build Sample Tables
ARISAMPI
SQL Statements to be Executed by the DBS Utility to Load the Sample ISQL Routines into the
Database
ARISCAT
Required Input to Database Generation
ARISCMDB
DBS Utility Commands to Drop Sample Tables
ARISCON
SQL CONNECT Command to be Executed by the DBS Utility
ARISCTM
Database Catalog Migration Authorization Updates
ARISCTMP
System Catalog SYSTEM.SYSOPTIONS Updates
ARISDBG
Control Statements to Generate the Starter Database (Input to ARIS030D)
ARISDBU
SQL Statements to be Executed by the DBS Utility to Finish Database Generation (Input to
ARIS050D)
ARISDIRD
Directory of all DBNAMEs and TPNs in the VSE system
ARISDTM
Commands to Update Datetime Defaults
ARISEXP
DBS Utility Input to Create the New EXPLAIN Tables
ARISFPKY
SQL Statements Used by the DBS Utility to List Primary Keys to be Dropped and Recreated
ARISI20
Input to ARIS110D (ISQL Installation)
ARISI21
Input to ARIS130D (ISQL Installation)
ARISIQBD
Bindfile for ISQL
ARISMMDB
Commands that Create Manufacturing Sample Tables
ARISS001
Commands to Add American English Entry on SQLDBA.SYSLANGUAGE table
ARISTFF
Commands to the DBS Utility for Installing the French Help Text (Input to ARIS060D)
Copyright IBM Corp. 1981, 2007
95